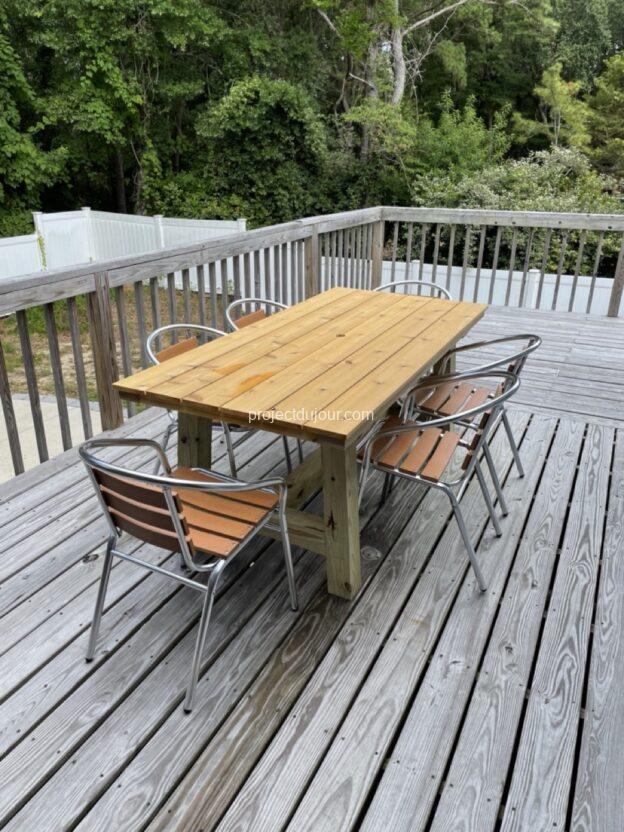
This is a slightly updated version of the a table I already built. This new table is shorter, the frame is made of pressure treated lumber and it’s a bit stronger. For the top, I used cedar boards as I did for the previous table.
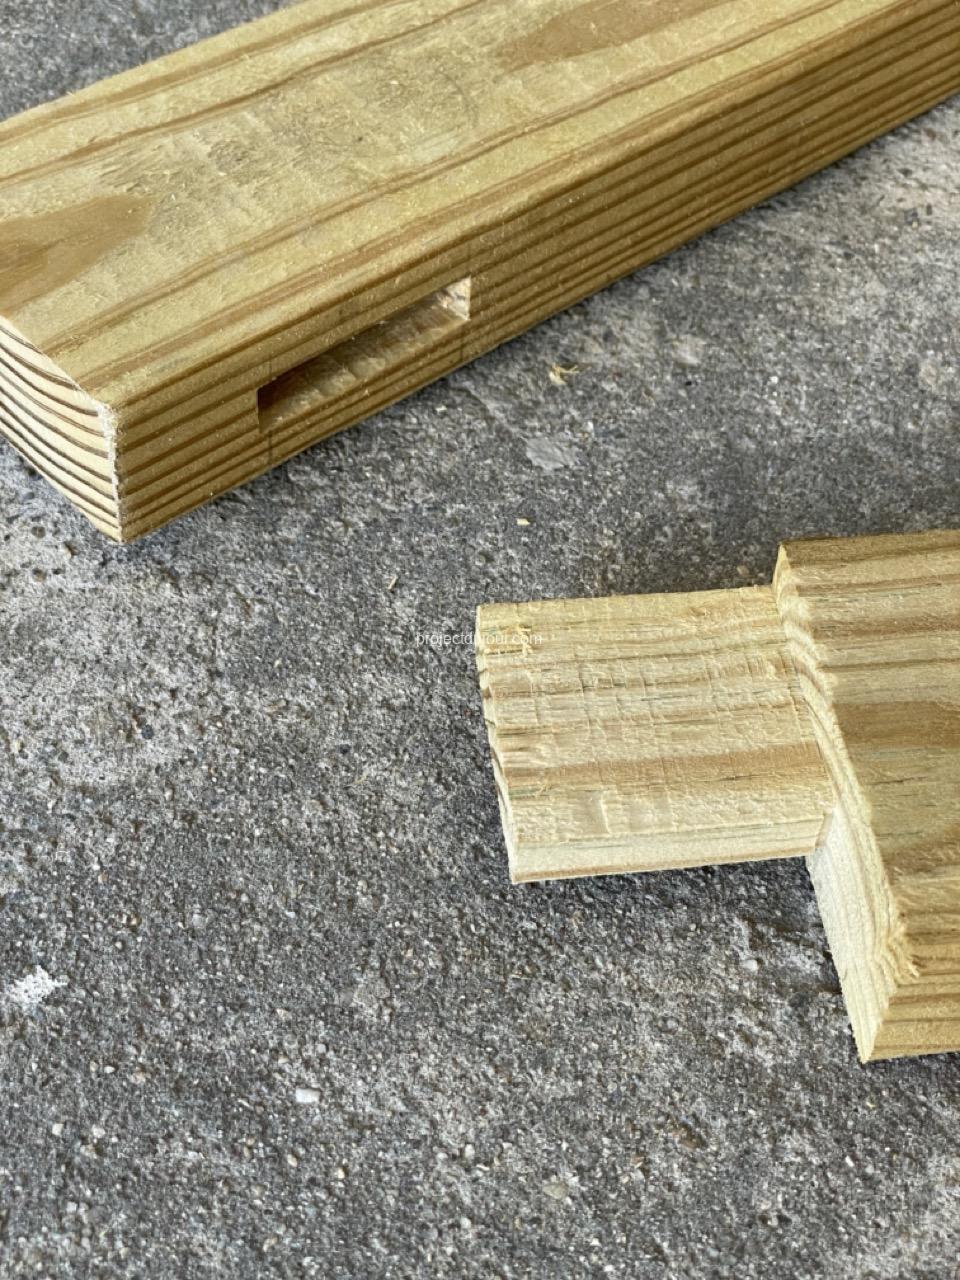
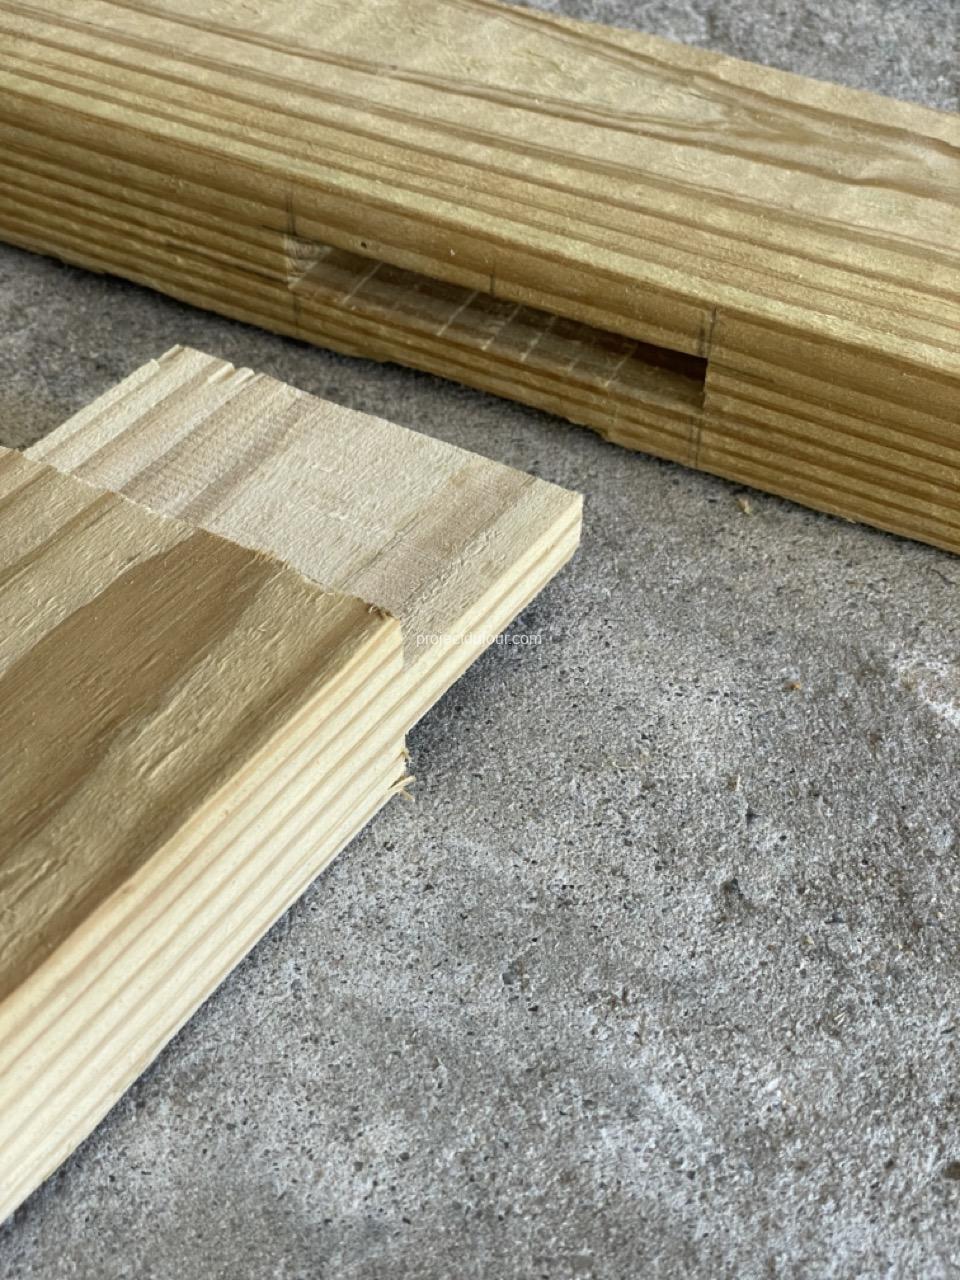
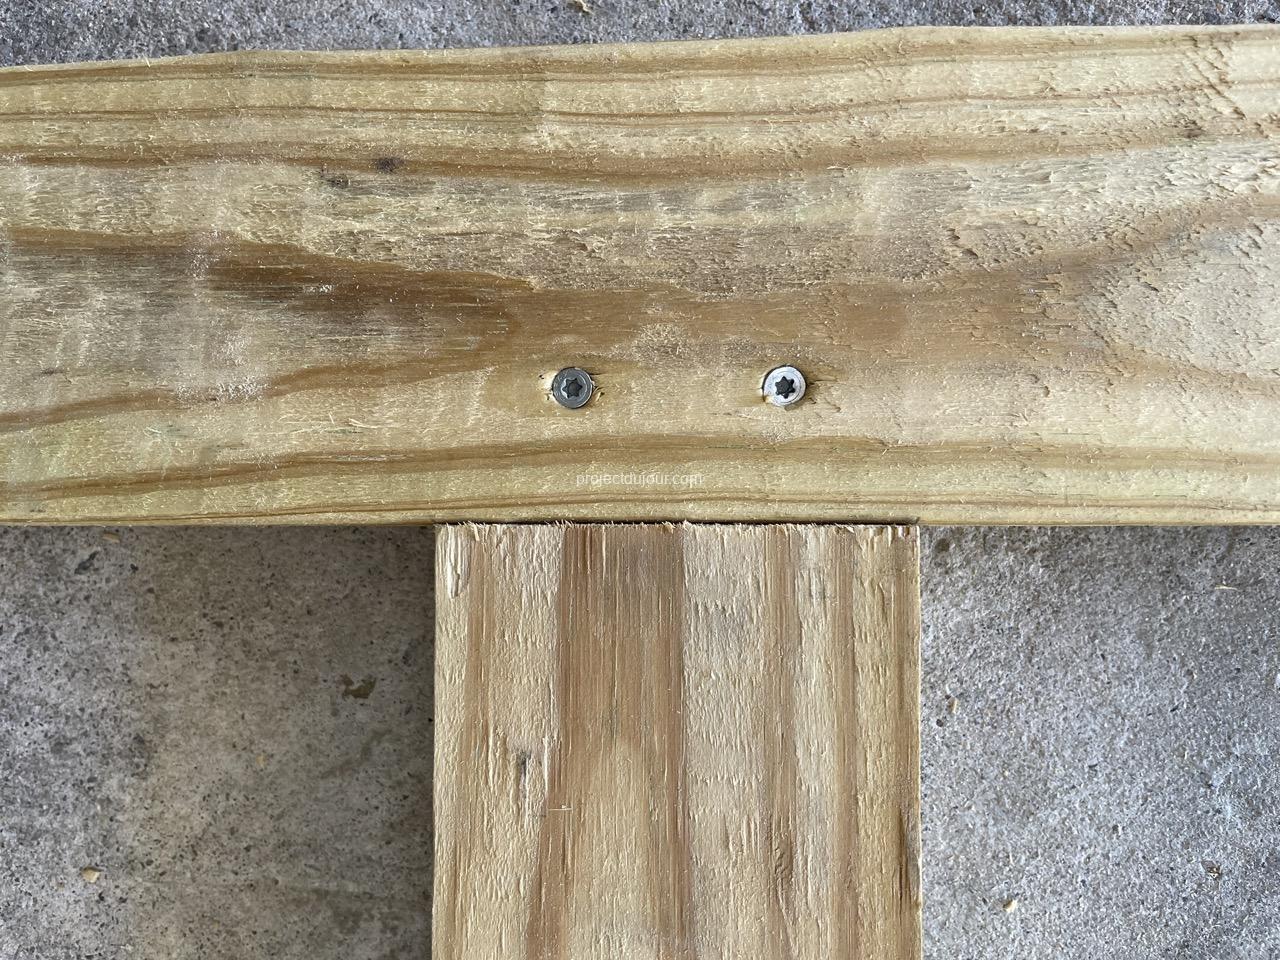
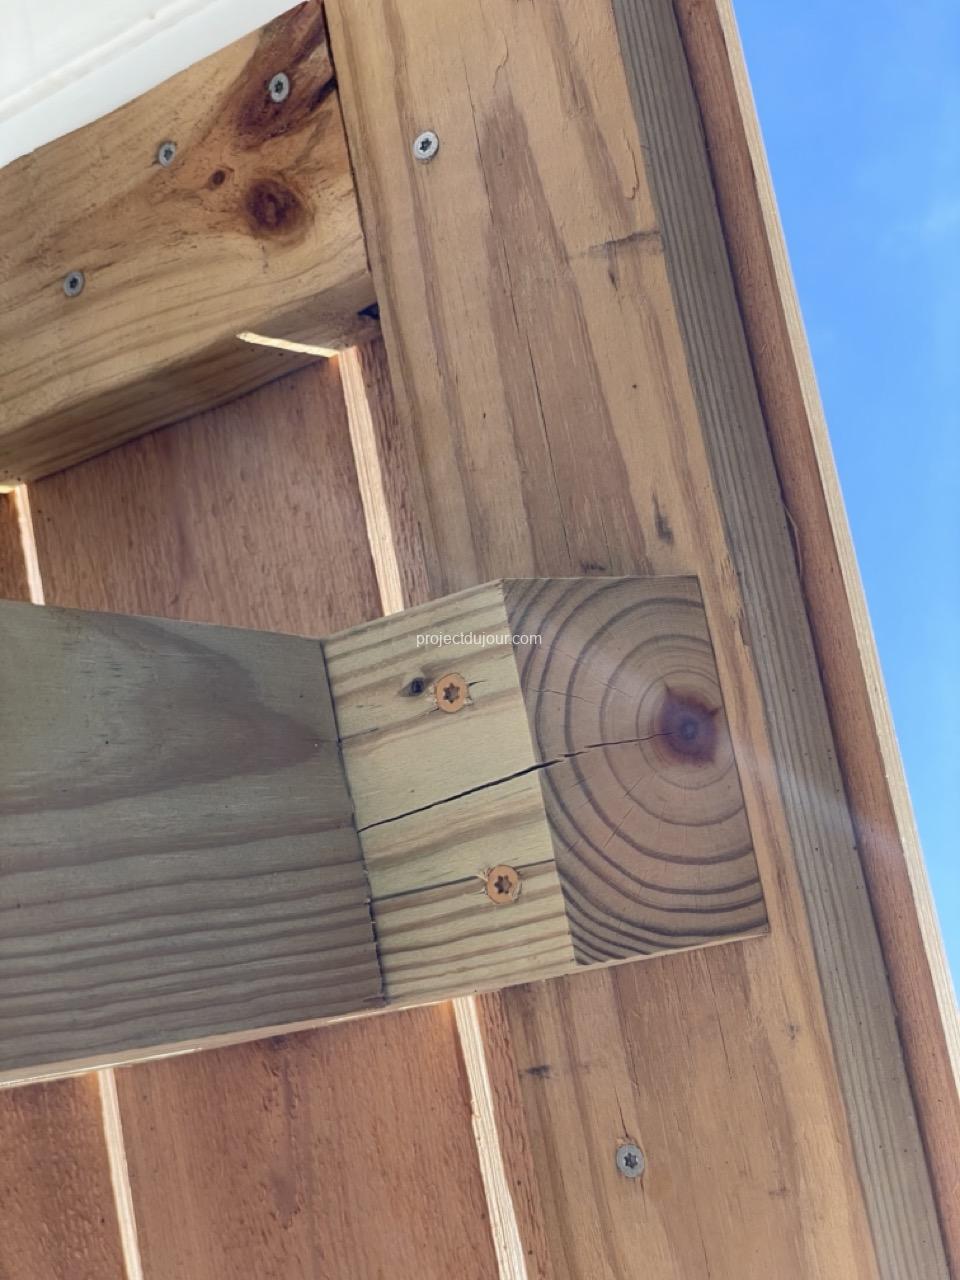
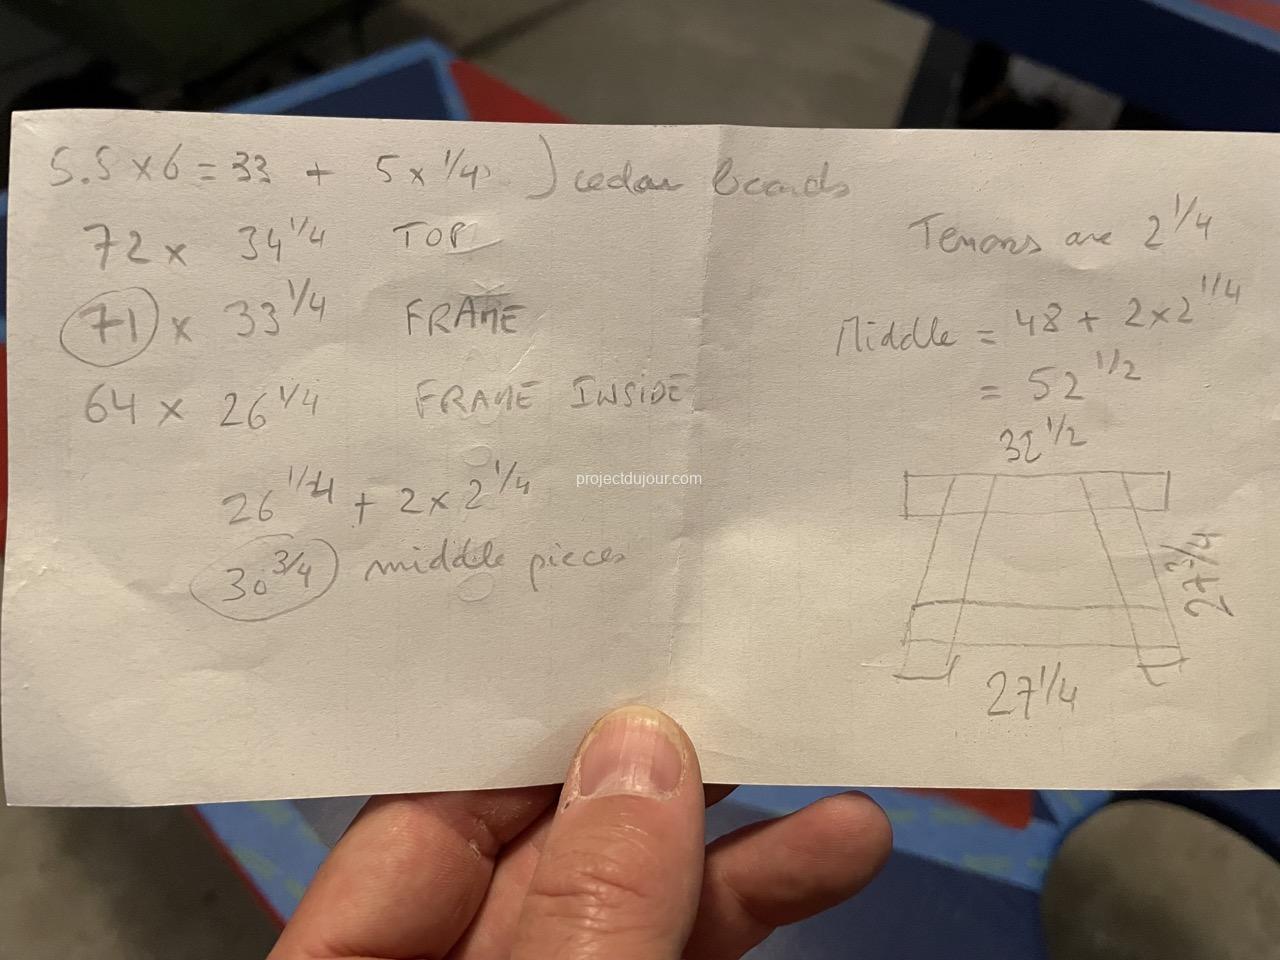
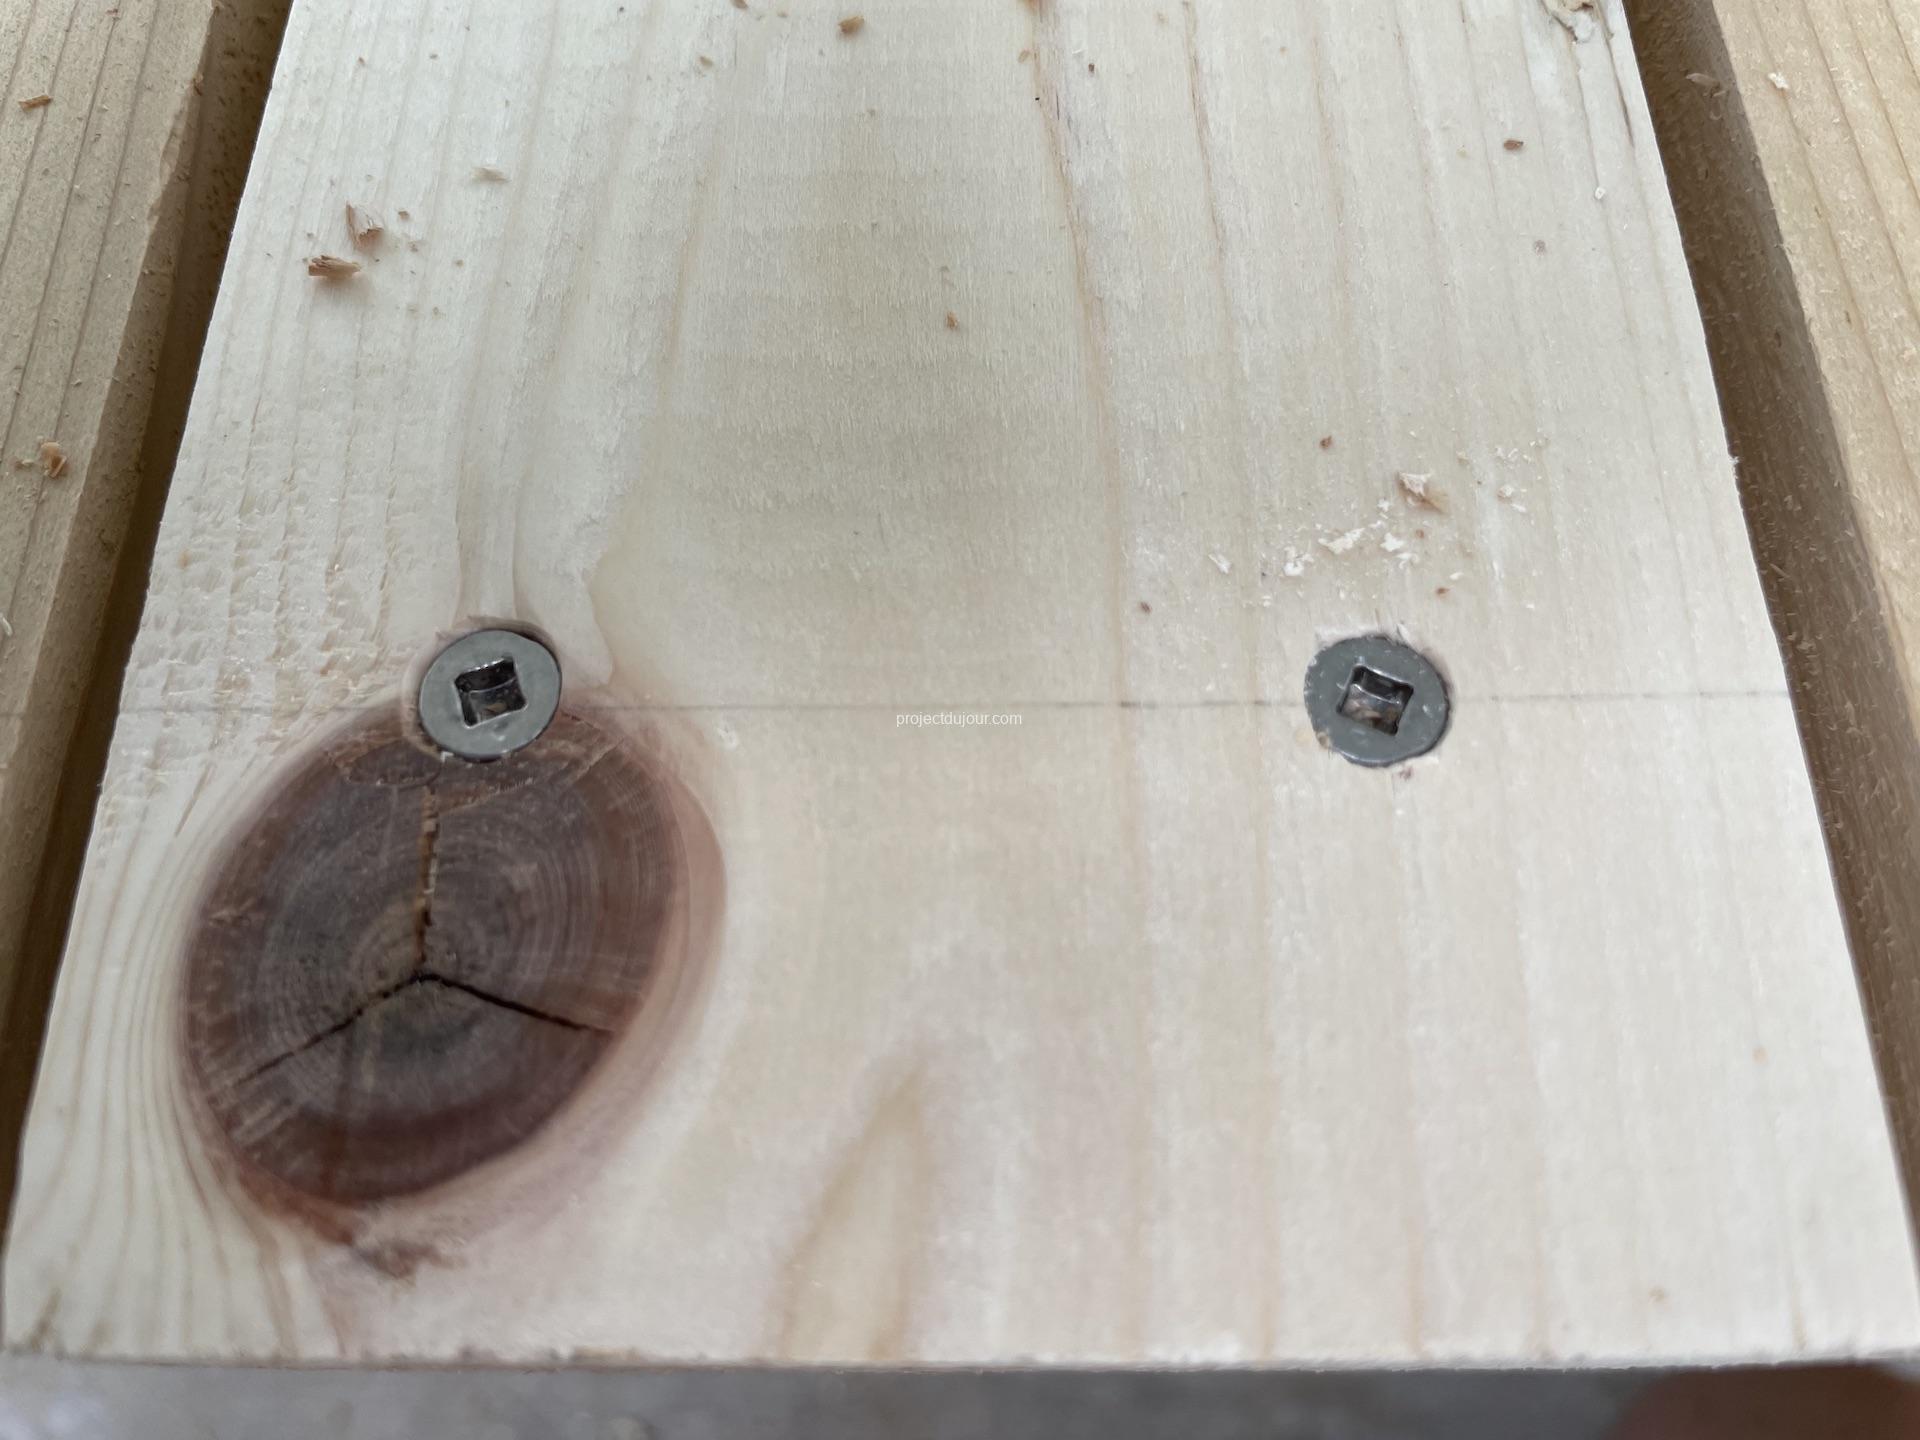
The top frame is built using 2×4 pressure treated lumber with tenons and mortises. The outer dimensions for the top frame are 71″ x 33 3/4″. All the tenons are 2 1/4″ long.
End tenon and mortiseMiddle tenon and mortiseParts readyGlued and assembledStainless screws
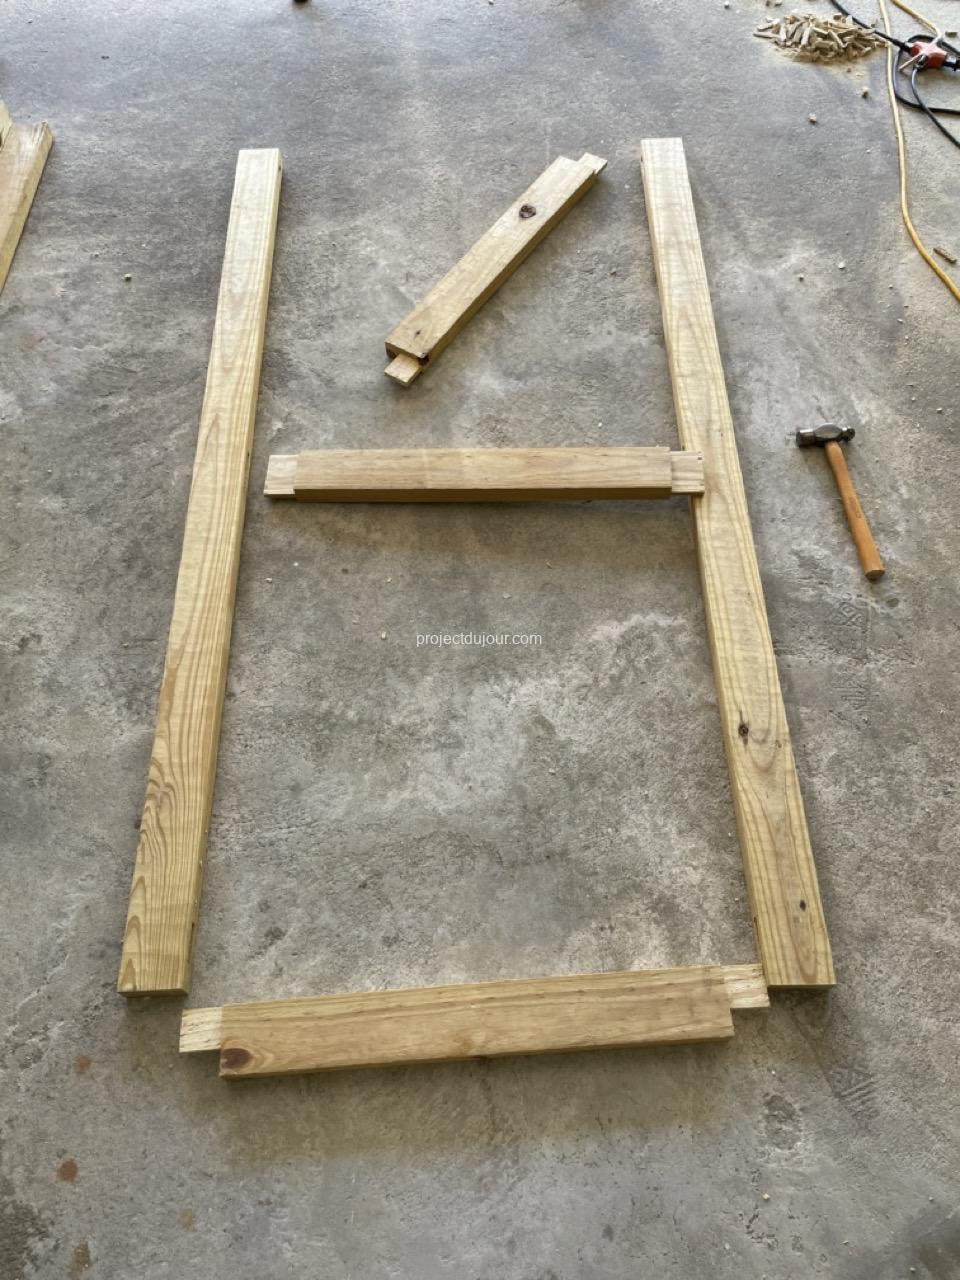
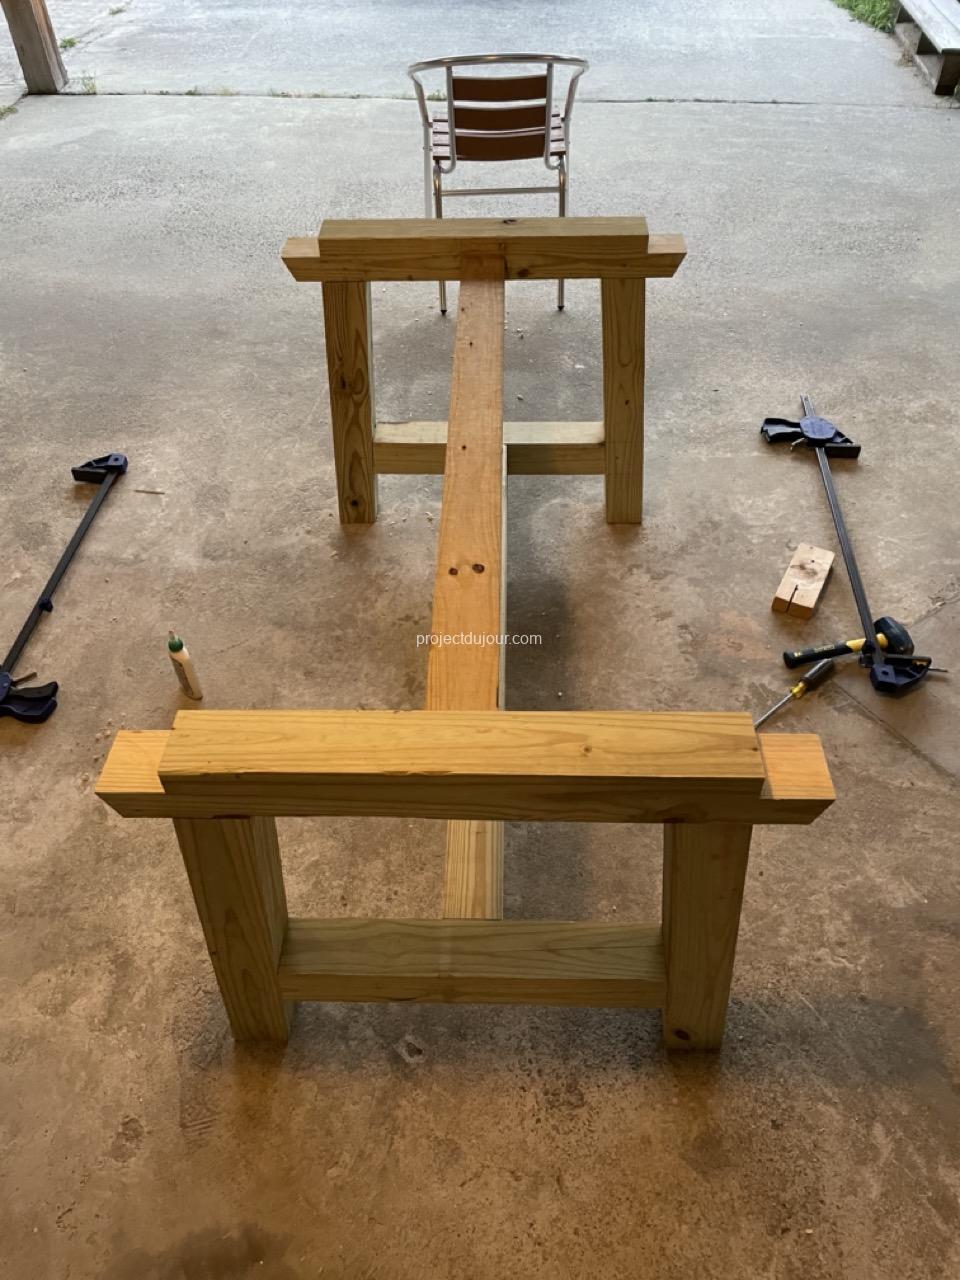
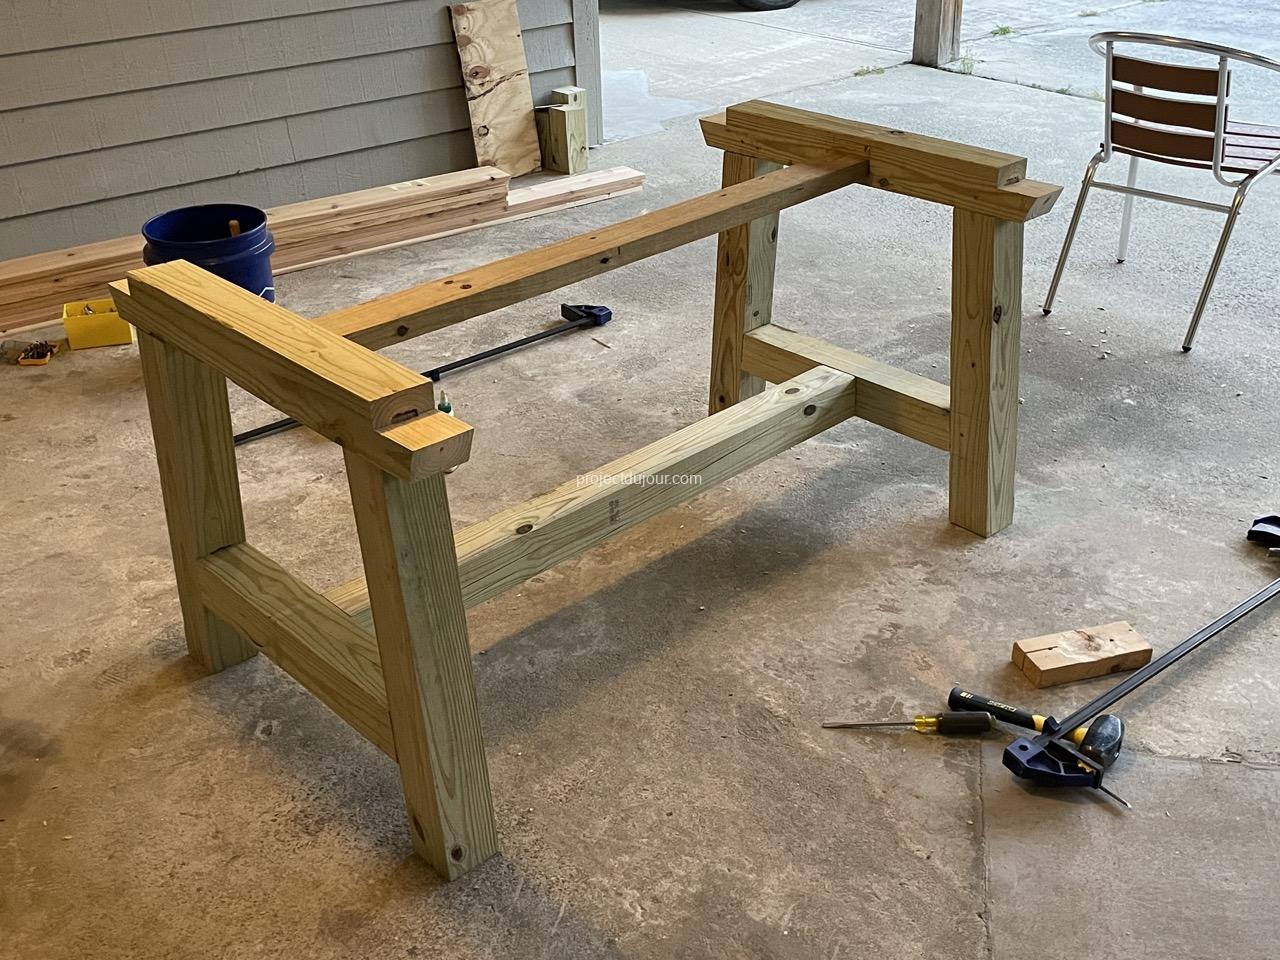
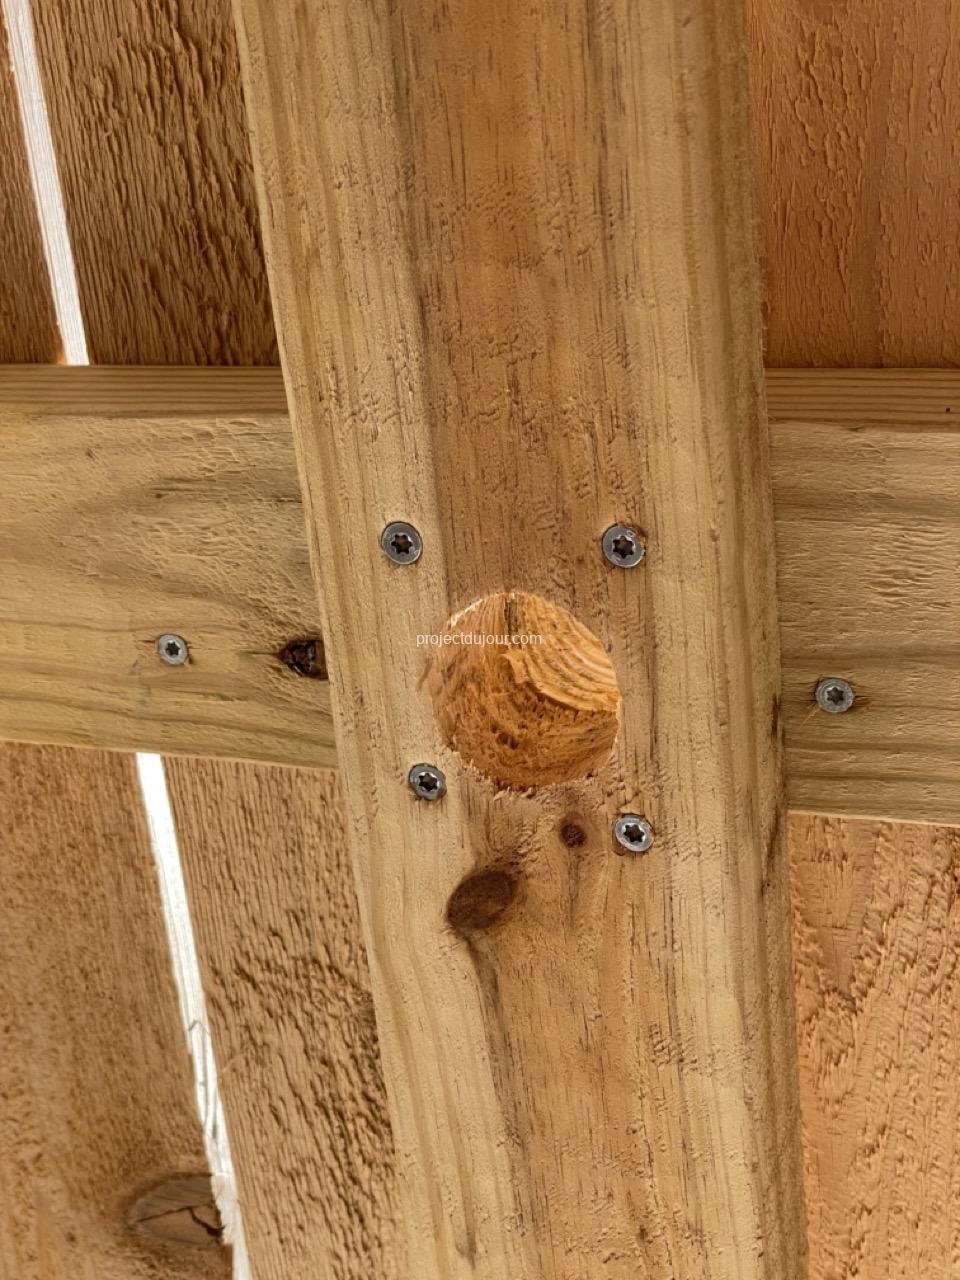
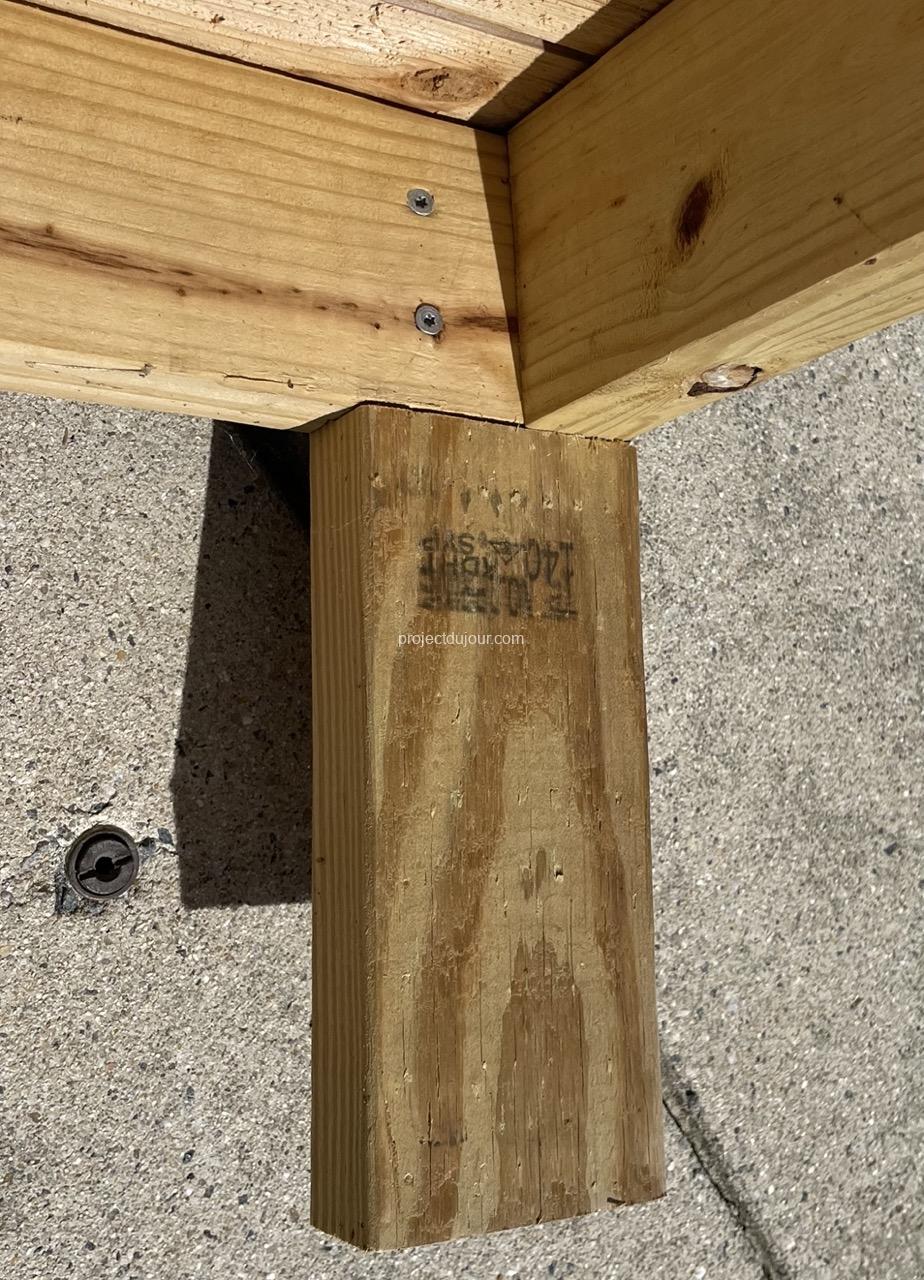
The frame is also built using tenons and mortises but the legs and the bottom H stretcher are made of 4×4 pressure treated lumber. There is an added 2×4 holding the top two end beams. The top frame is dropped on top of the bottom frame and help with two 3 1/2″ screws at each corner. These are screwed from under so I can remove the top. I also added four screws in the middle of the table, where the two 2×4 cross.
FrameFrame with bottom H stretcher Top frame assembled
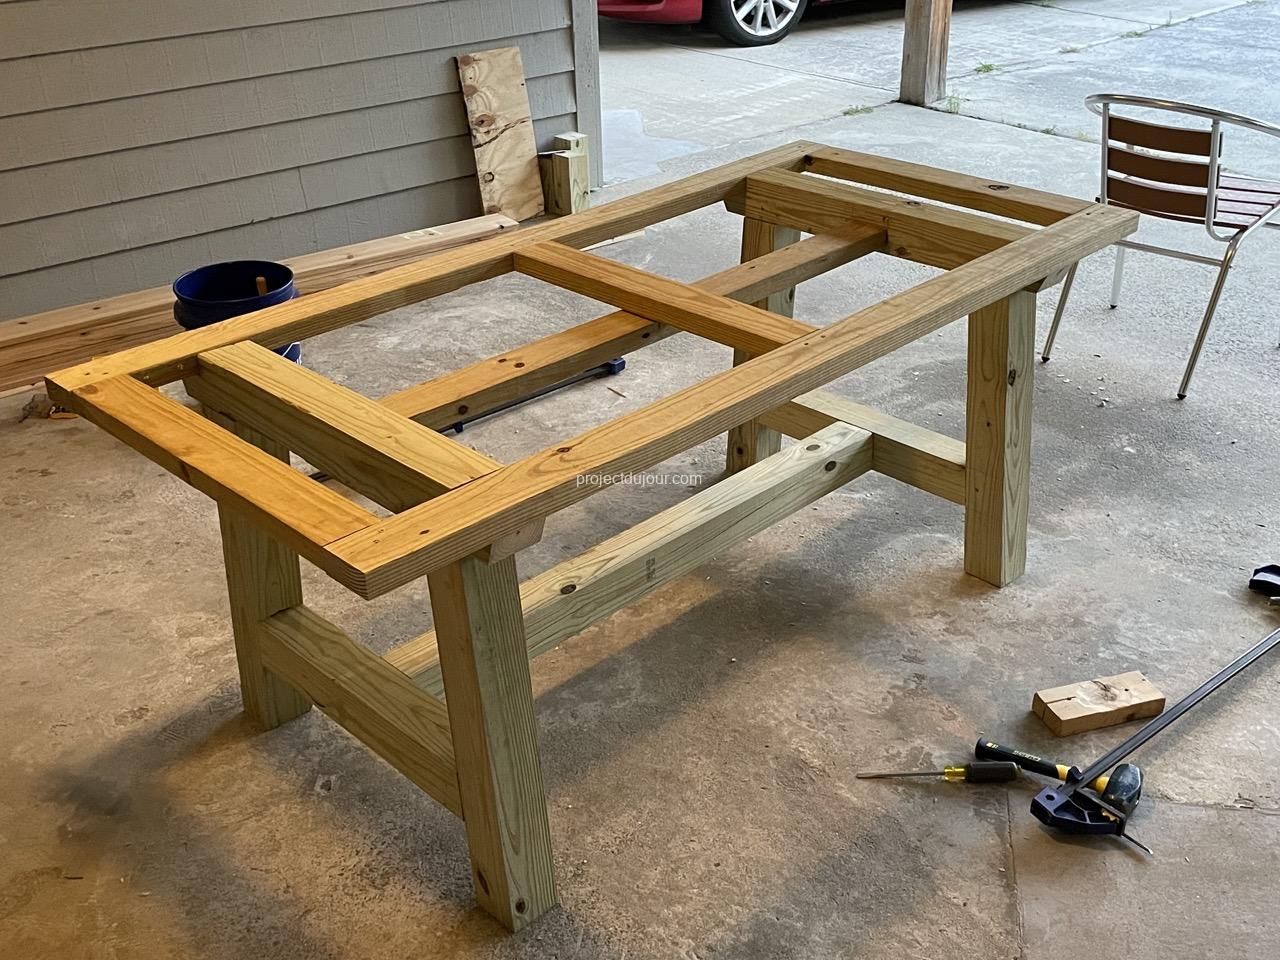
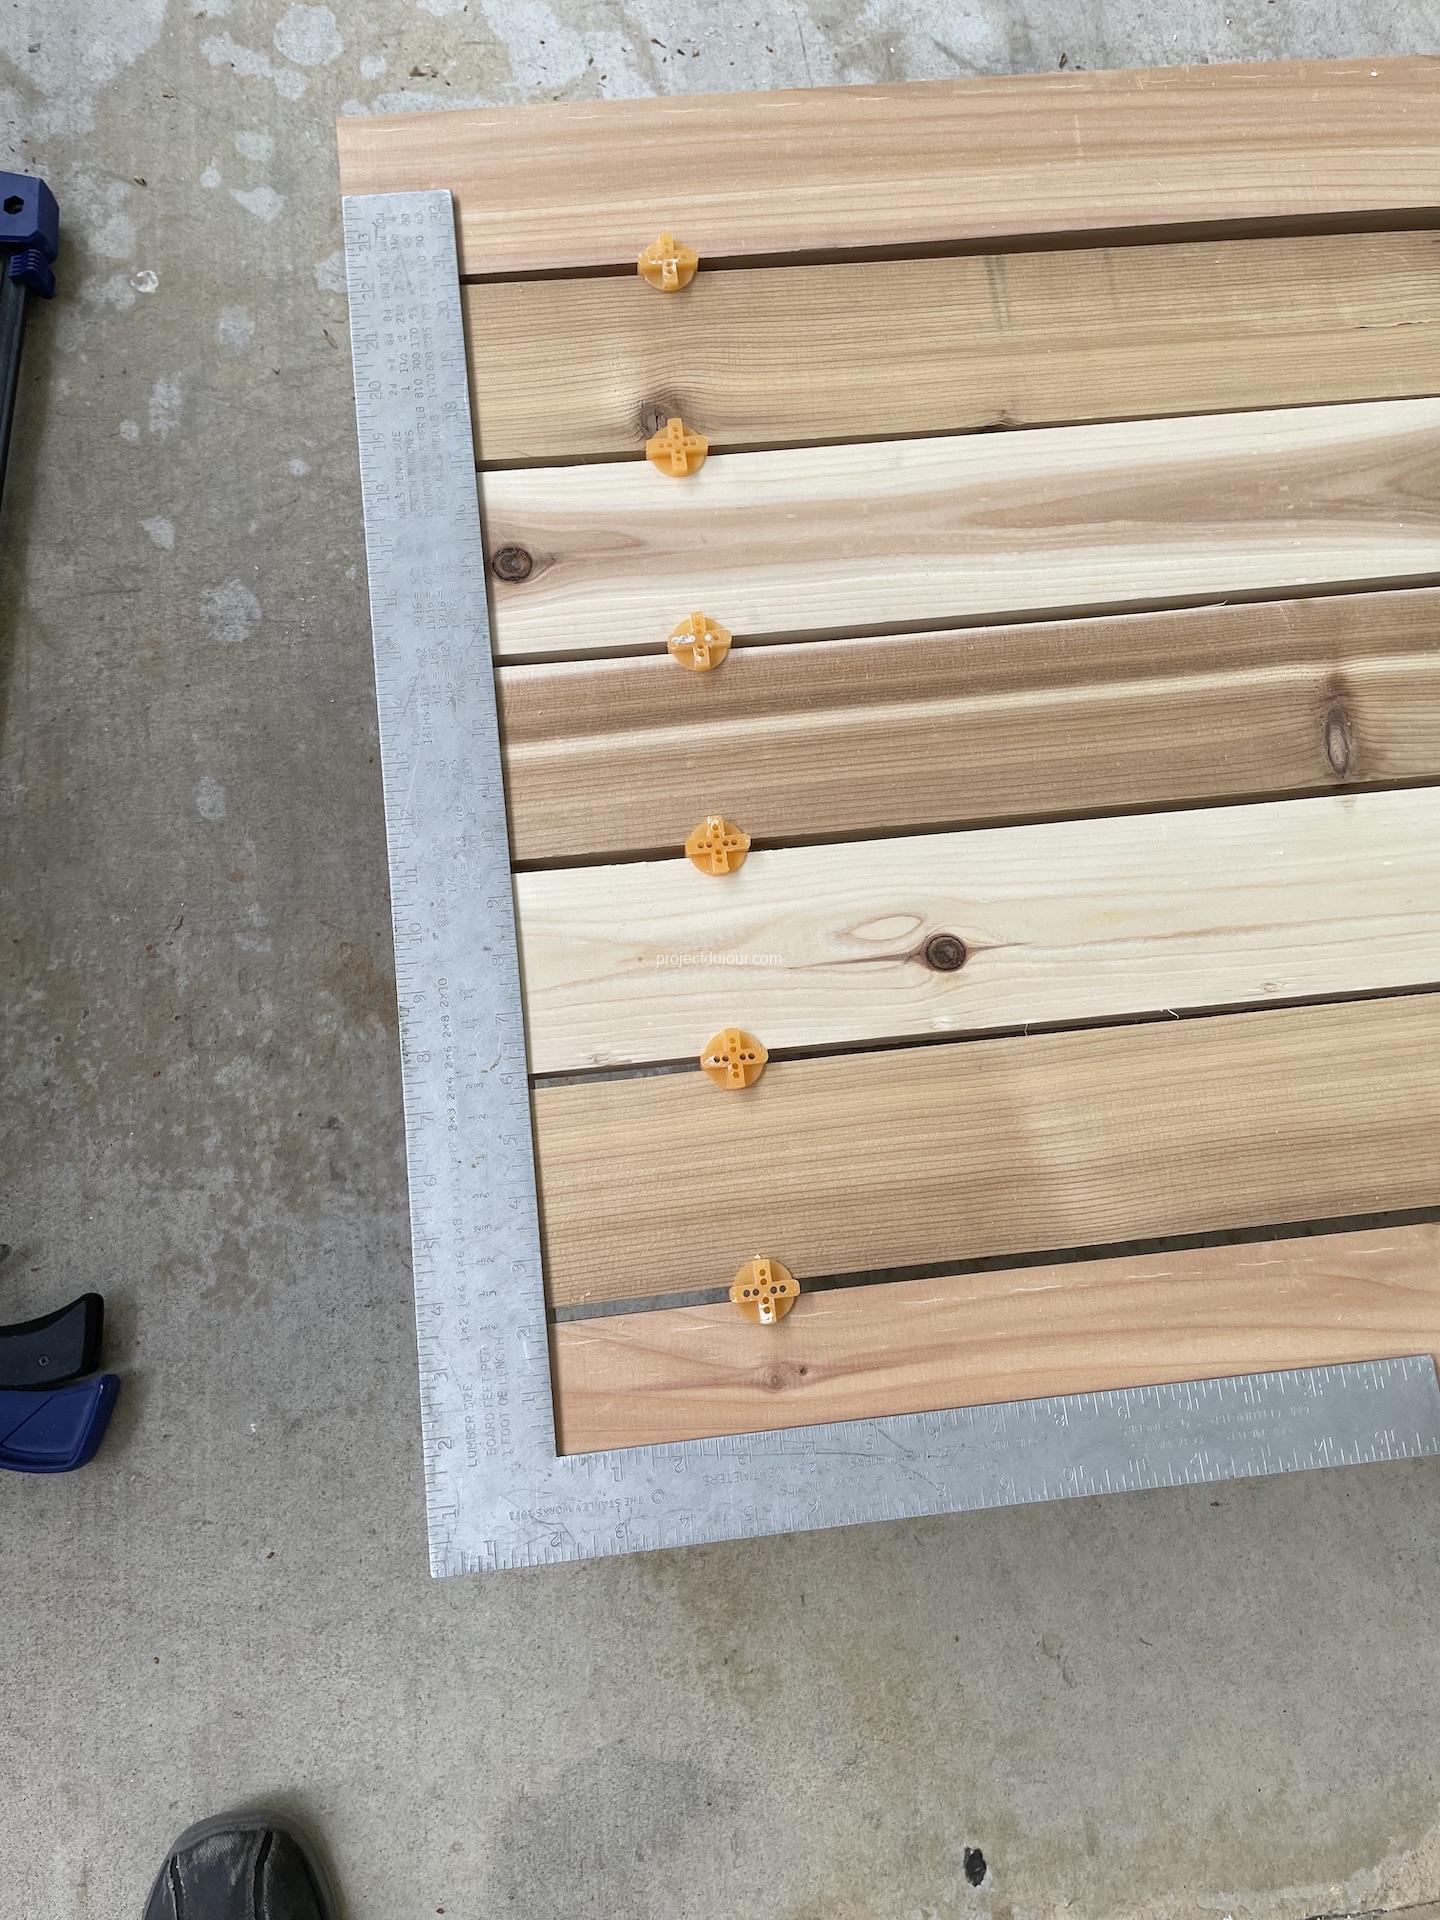
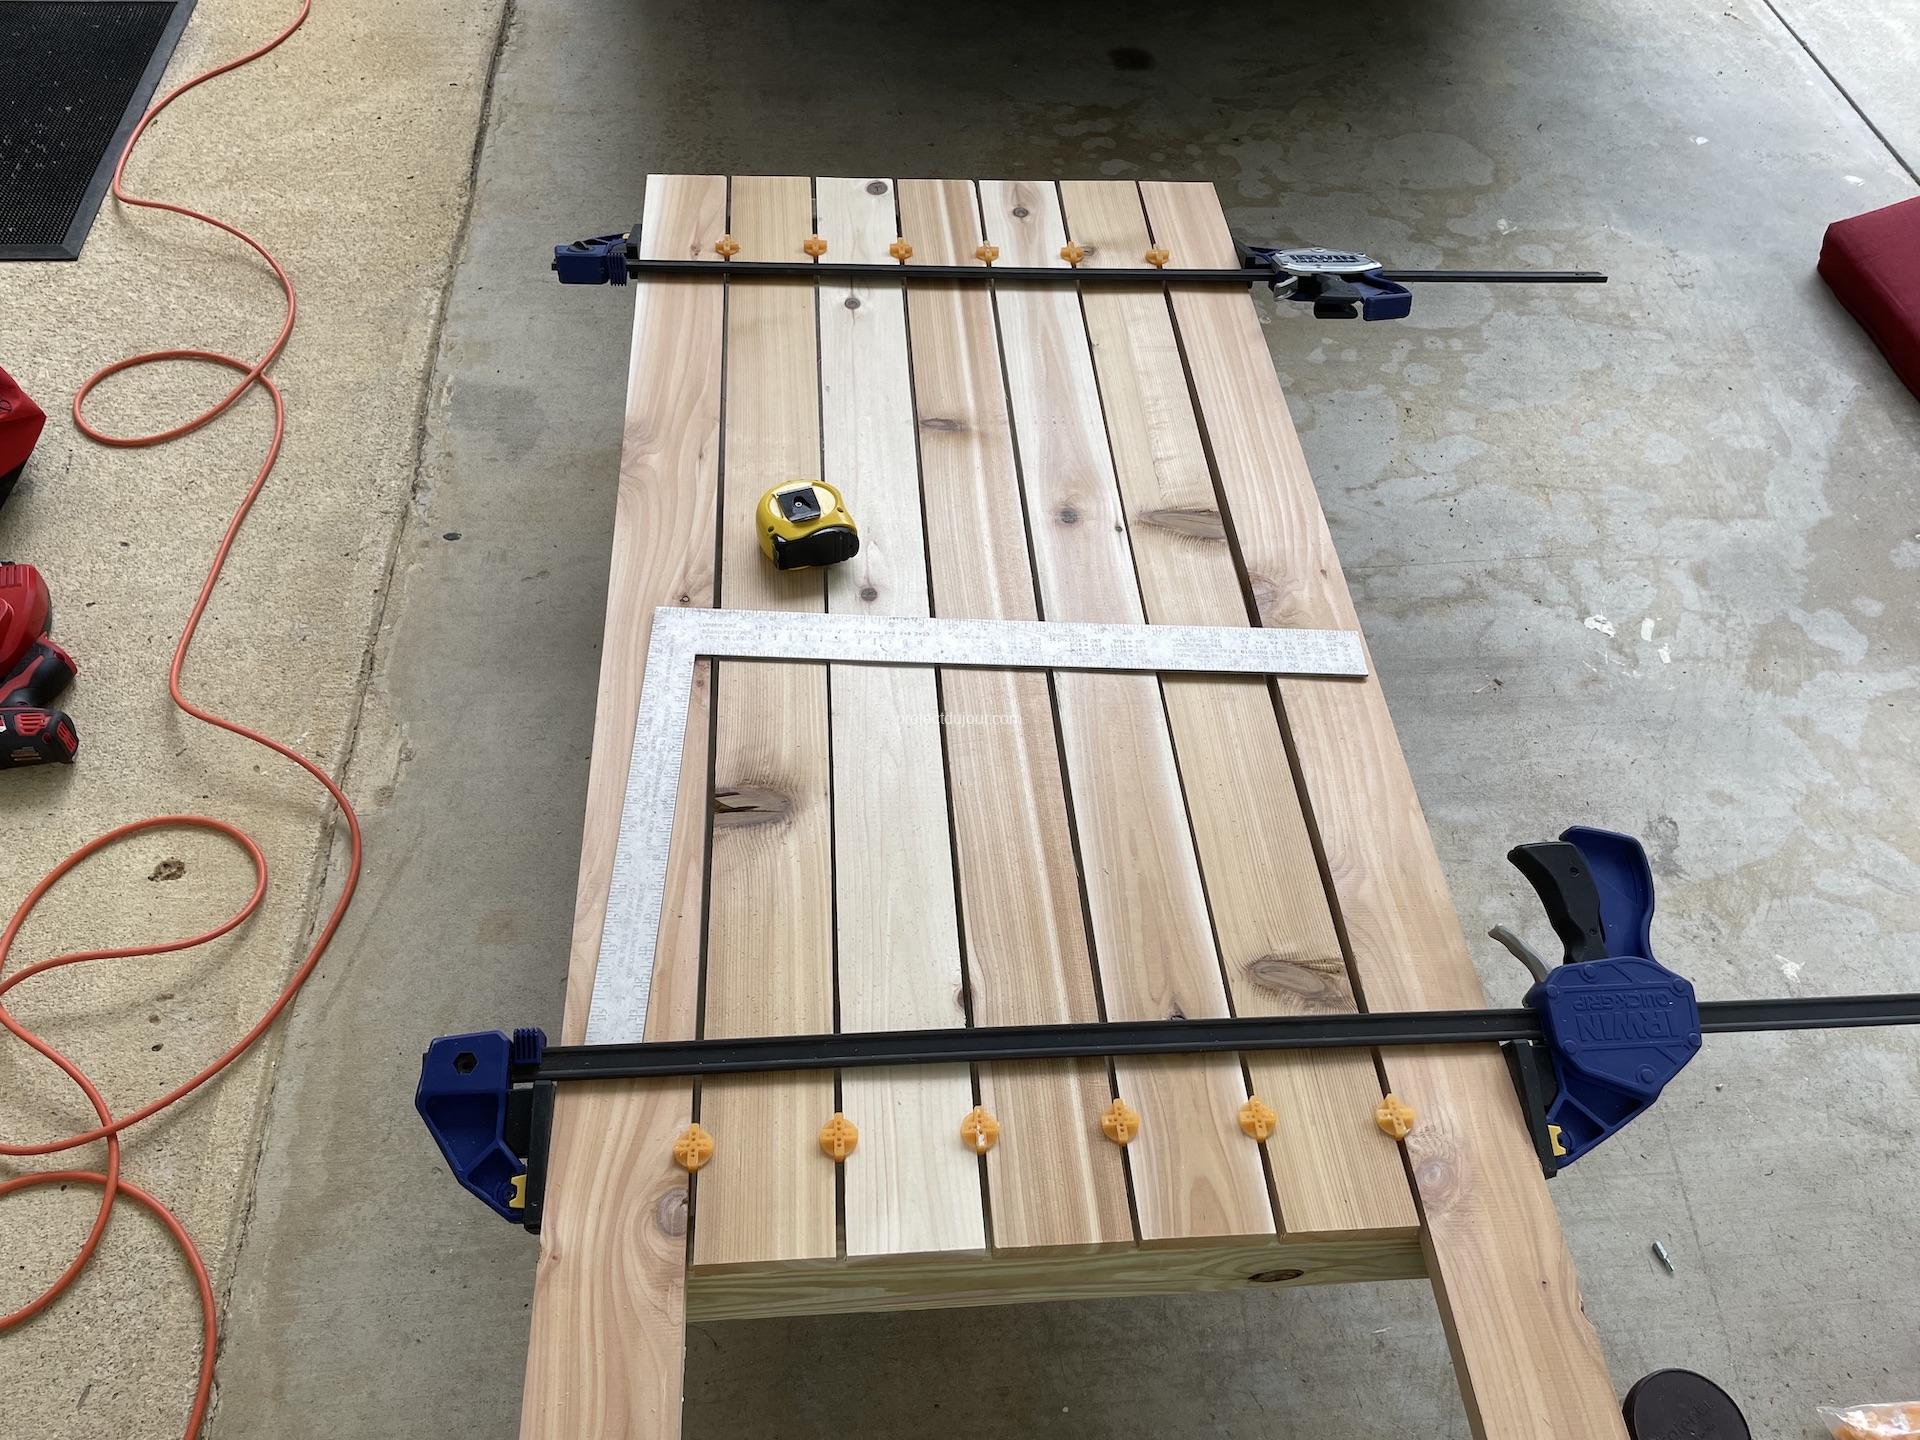
The table top is made of 1×6 cedar boards. The overall size is 72″ x 34 1/4″. I used 3 12 feet long 1×6 cedar boards cut in half for this build. The cedar boards are screwed to the top frame from under so the screws are hidden.
Screws holding the top frame to the legs Center of the table from underHole for the umbrella
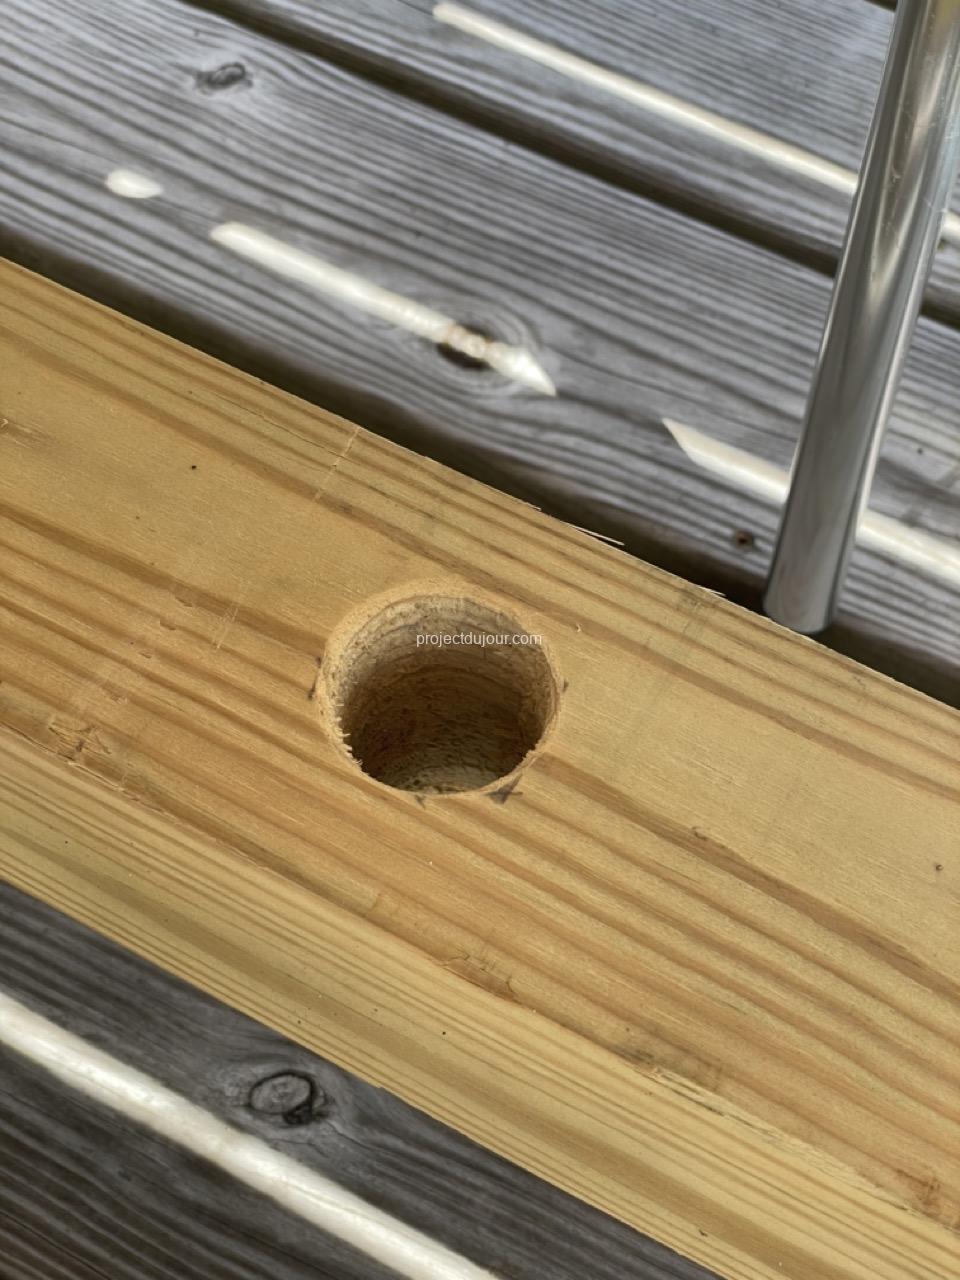
After everything was put together, I drilled a 1 5/8″ hole in the middle of the table top as well as the H stretcher to hold an umbrella.
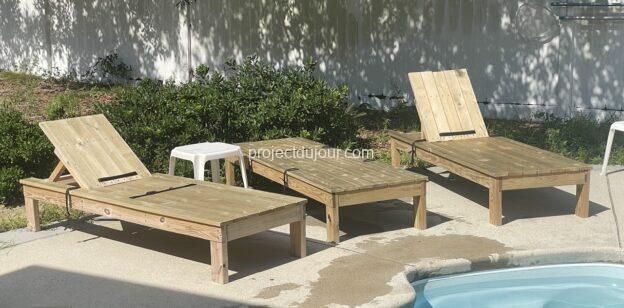
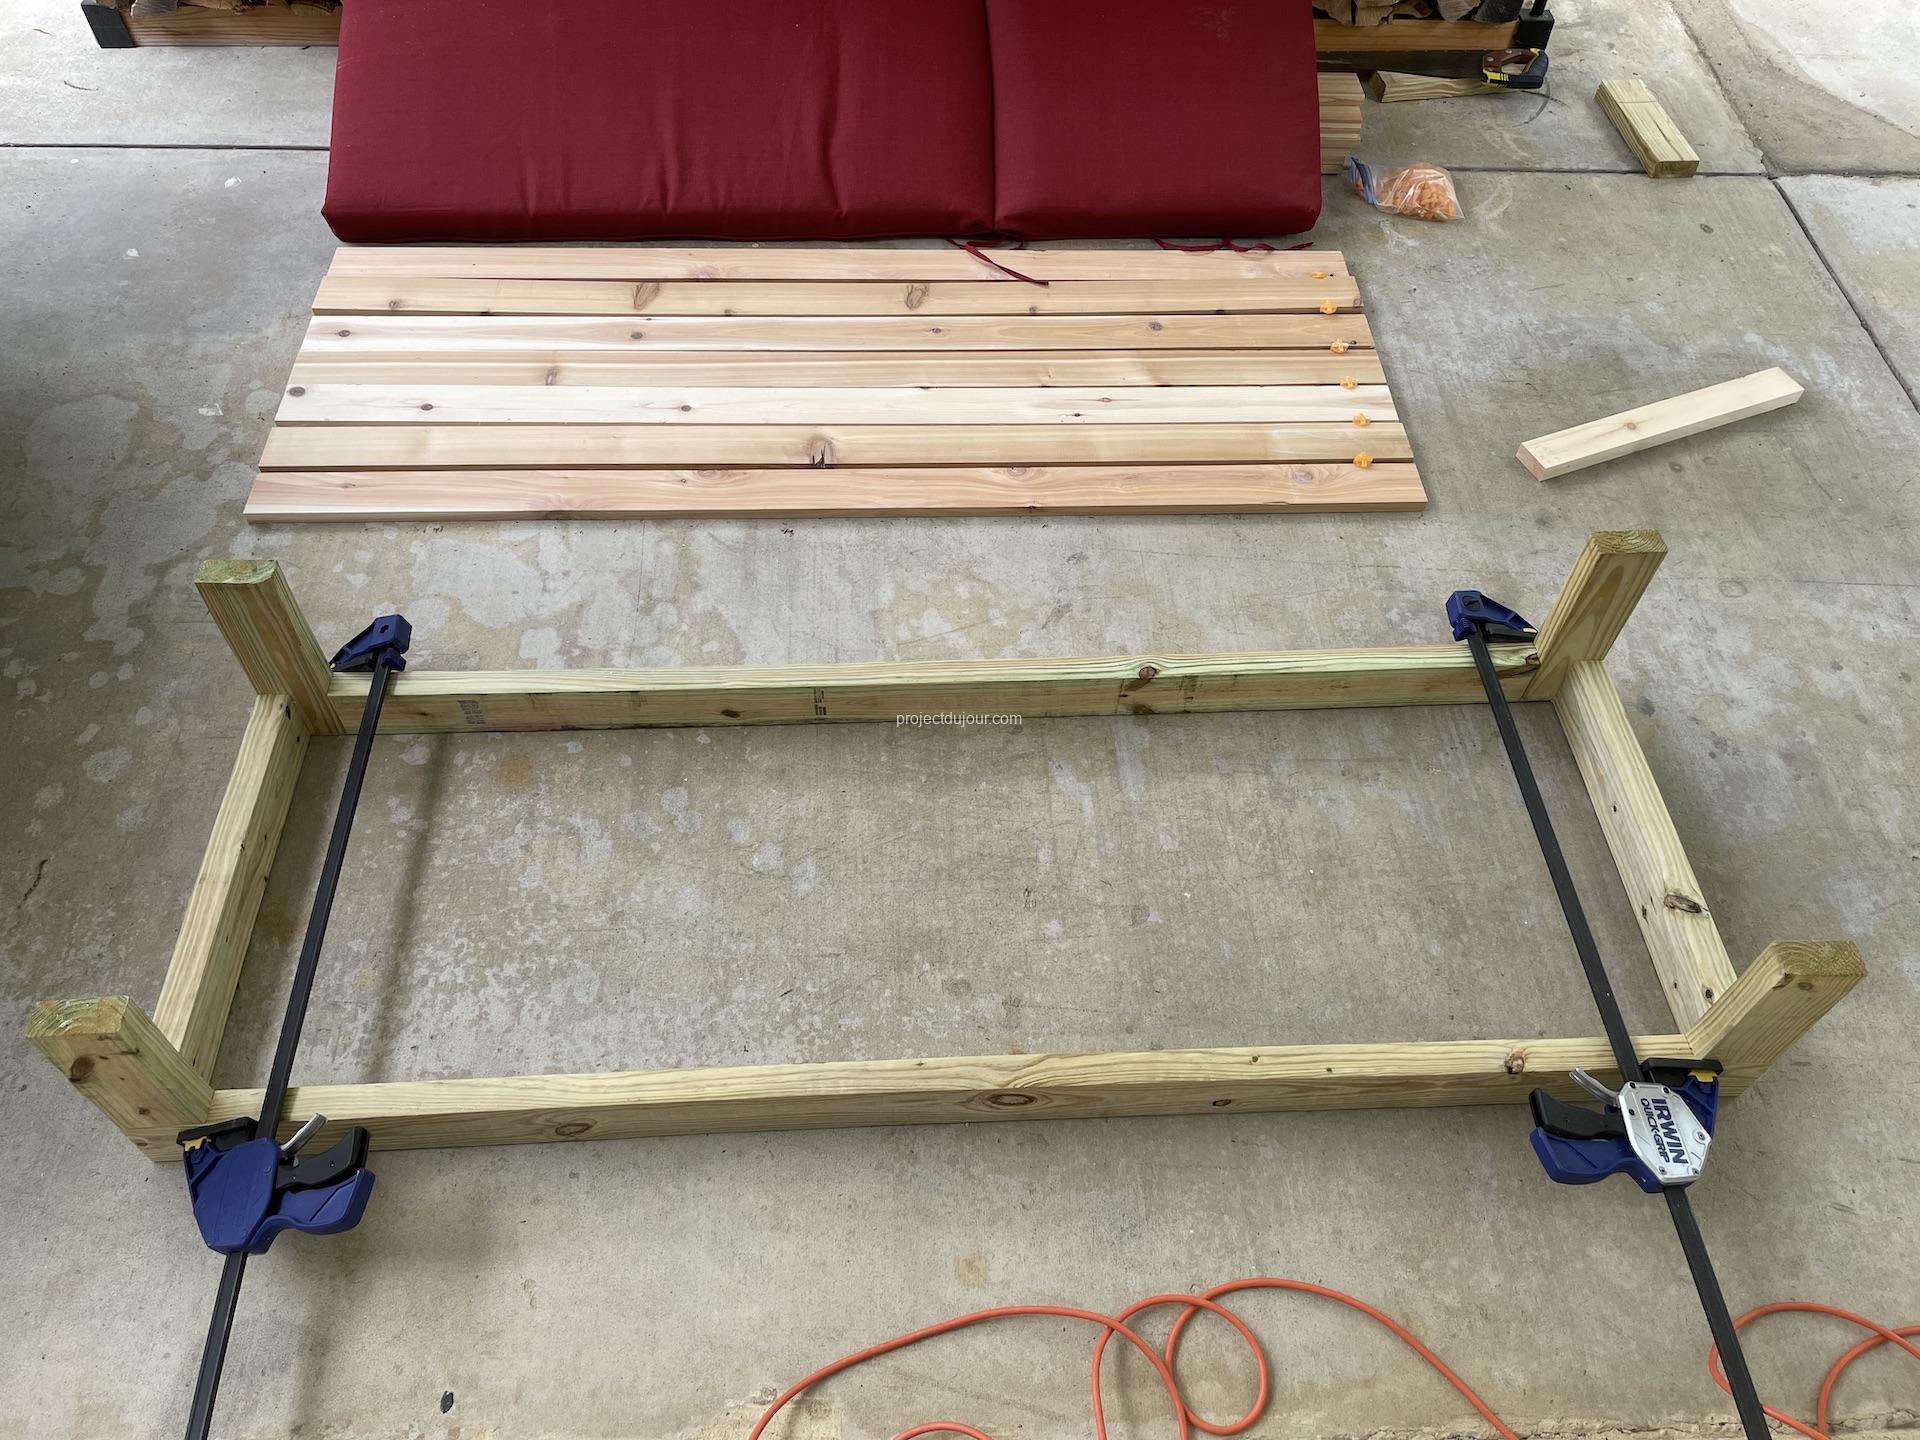
We’ve been looking for pool loungers that wouldn’t break the bank but would still look better than cheap plastic furniture. After some research on Pinterest, we decided to try to build our own. We estimated these would cost about $150, pretty much the same price as the plastic ones. This is based on 2021 prices, when lumber got really expensive and a 2×4, 8 feet long was around $10. The frame is built using pressure treaded lumber and the top is built out of cedar. All the screws are stainless steal and the hinges are galvanized.
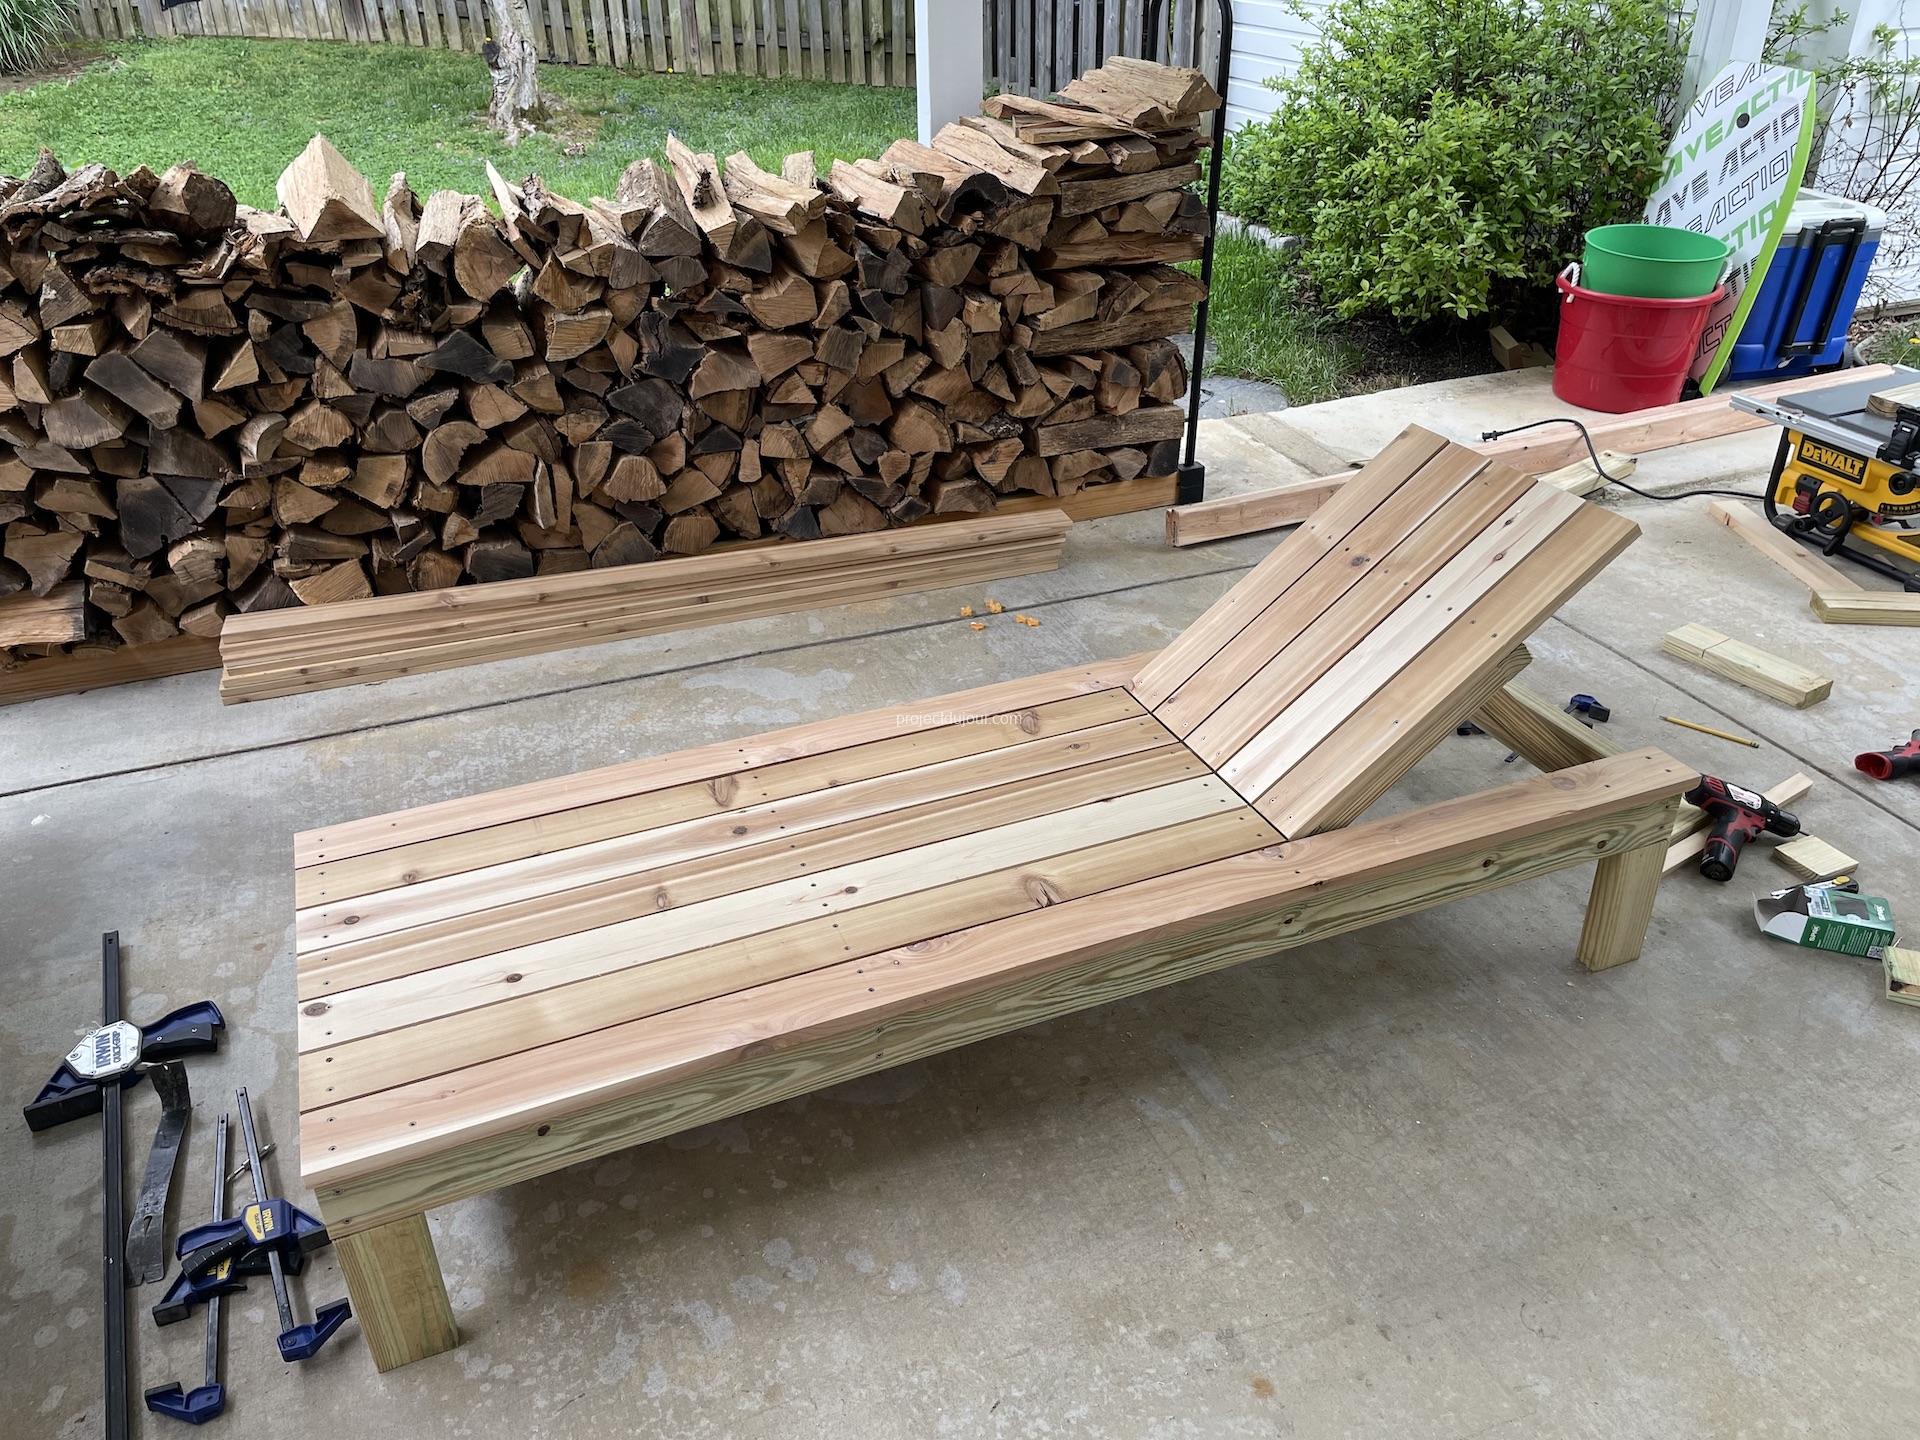
The overall length of the loungers is 6 feet. The flat part is 4 feet long and the raised back is 2 feet long. This is apparently a standard size for pool loungers and you can find cushions for these in many stores (I can’t recall if we got ours at Lowe’s or Home Depot). The top boards are 1×4 cedar, 12 feet long cut in half so we ended up with no waste. Since we built an even number of loungers, we bought 7 cedar boards for each pair of loungers. For the frame, We used 2×4 pressure treated lumber, 8 feet long. The long horizontal part is a bit less than 6 feet long (71 1/2″) to create a small overhang with the cedar boards at both ends. The left over 2×4 is then cut in half for the legs, about a foot each.
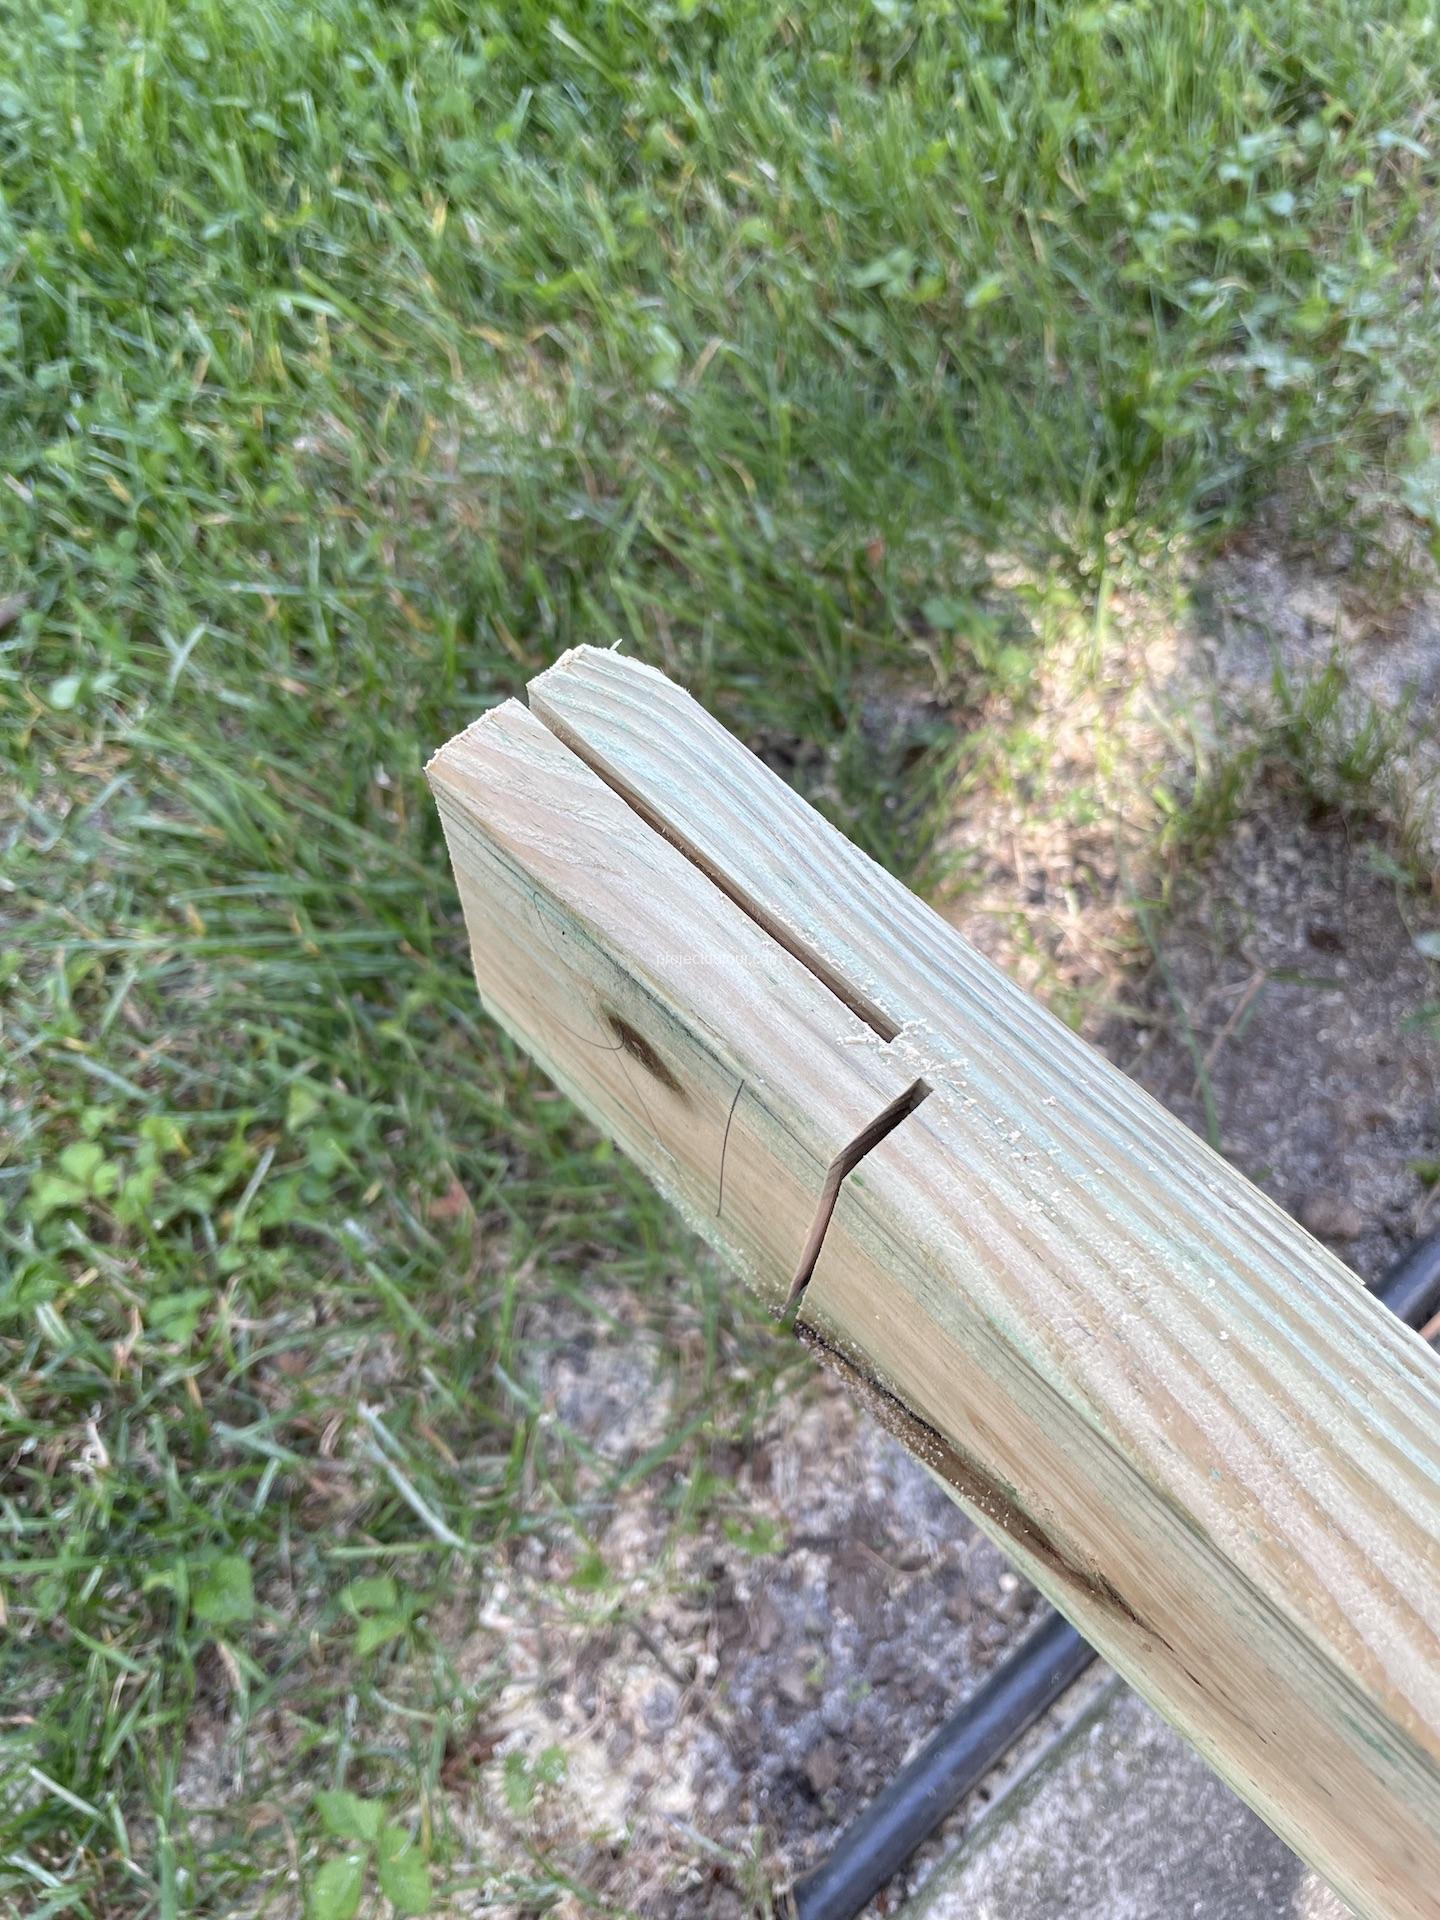
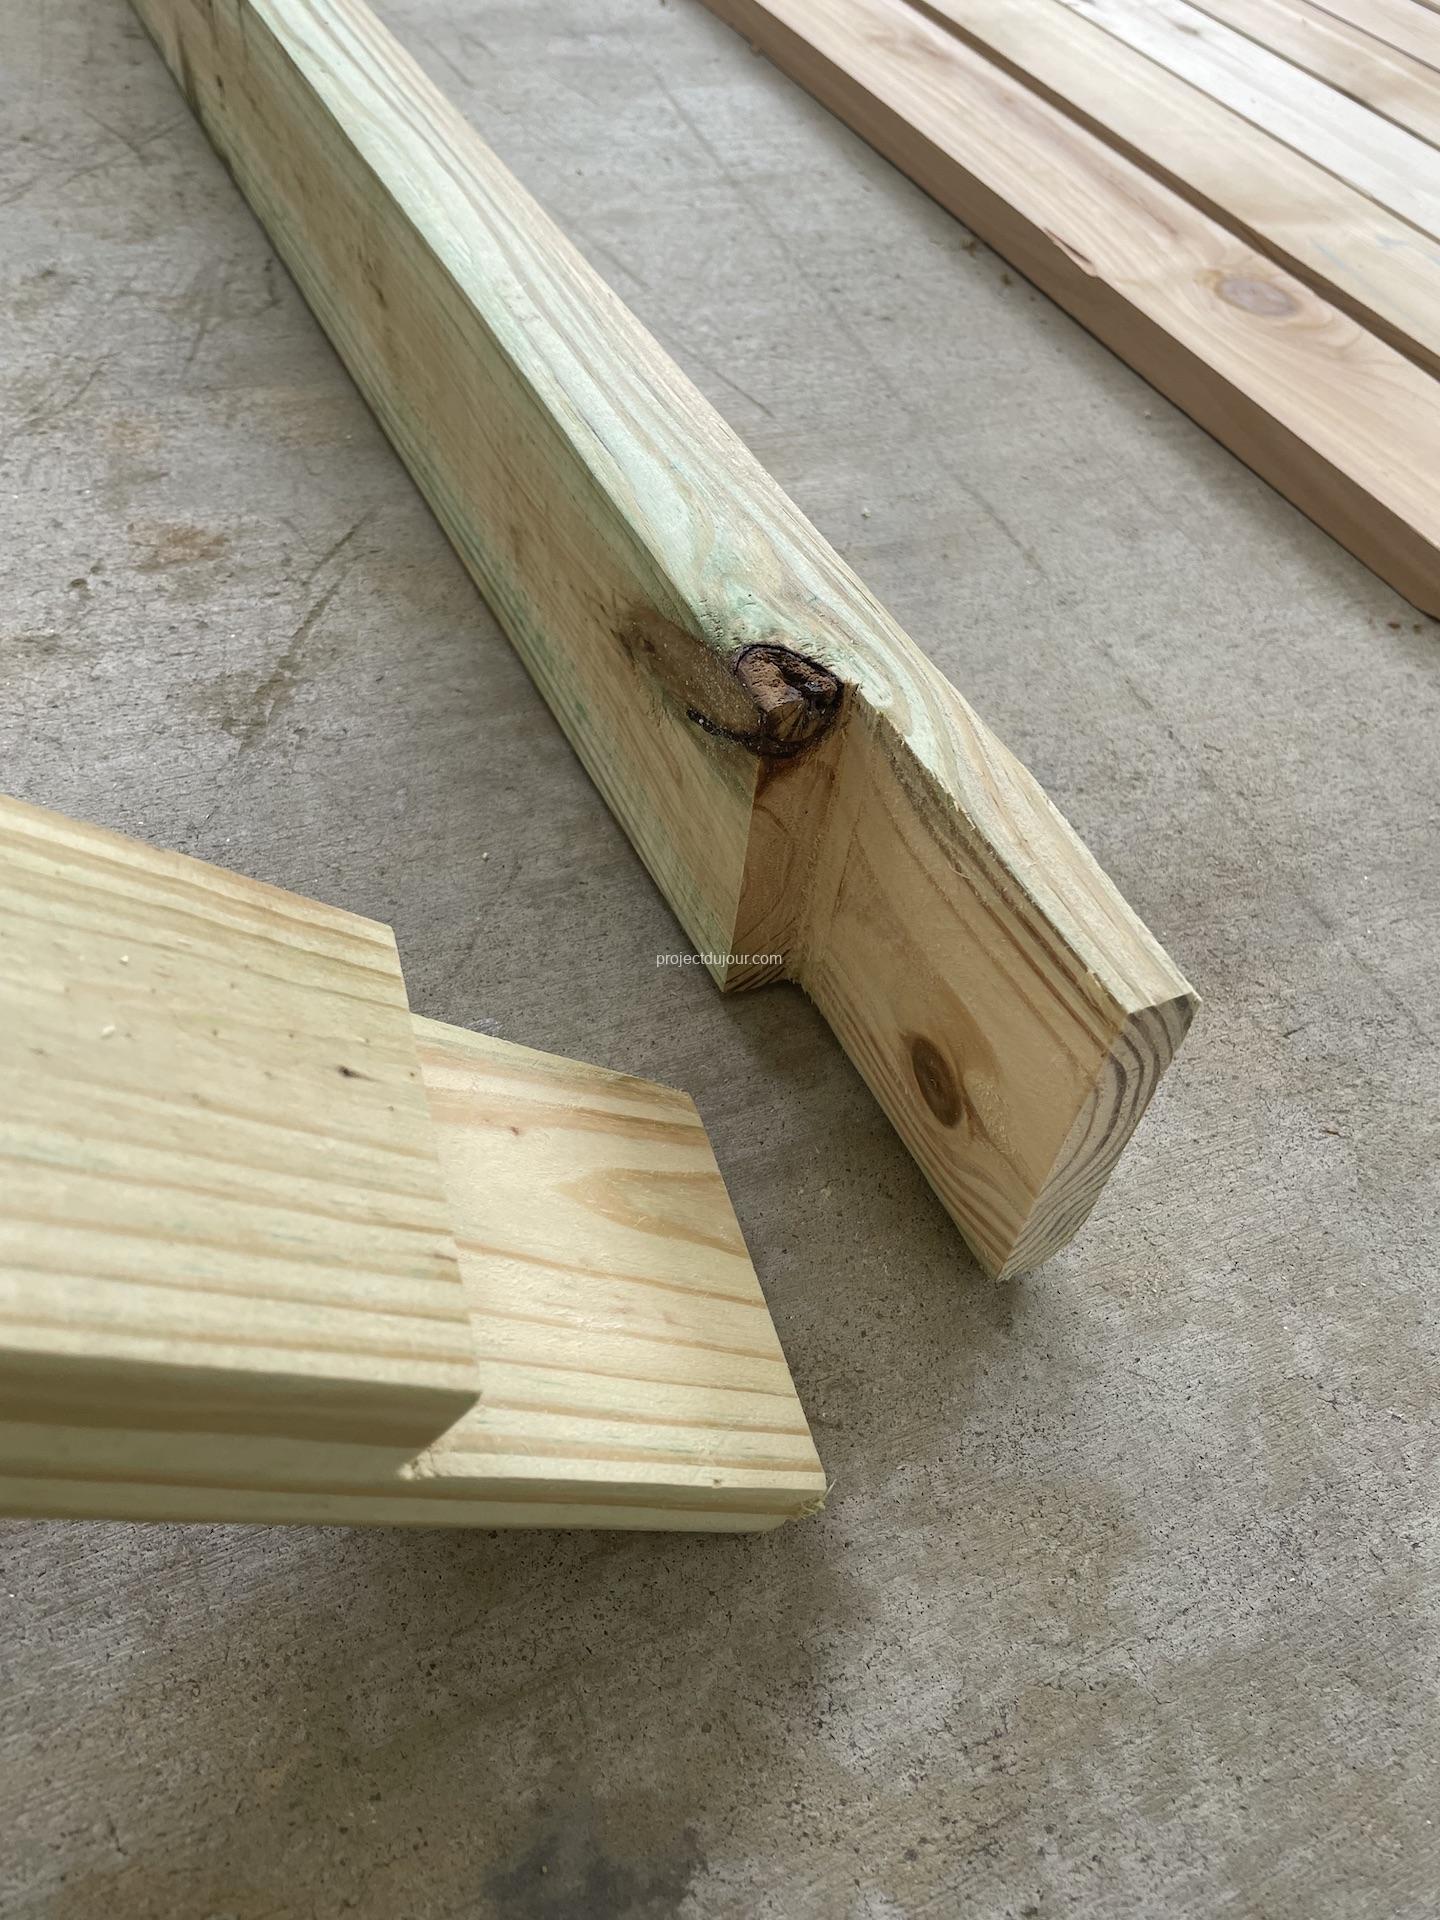
The legs and side parts of the frames are assembled using halving joints and stainless steel screws. I used a table saw to make the initial cuts and finished with a hand saw.
Halving joint cuts using a table sawHalving joint
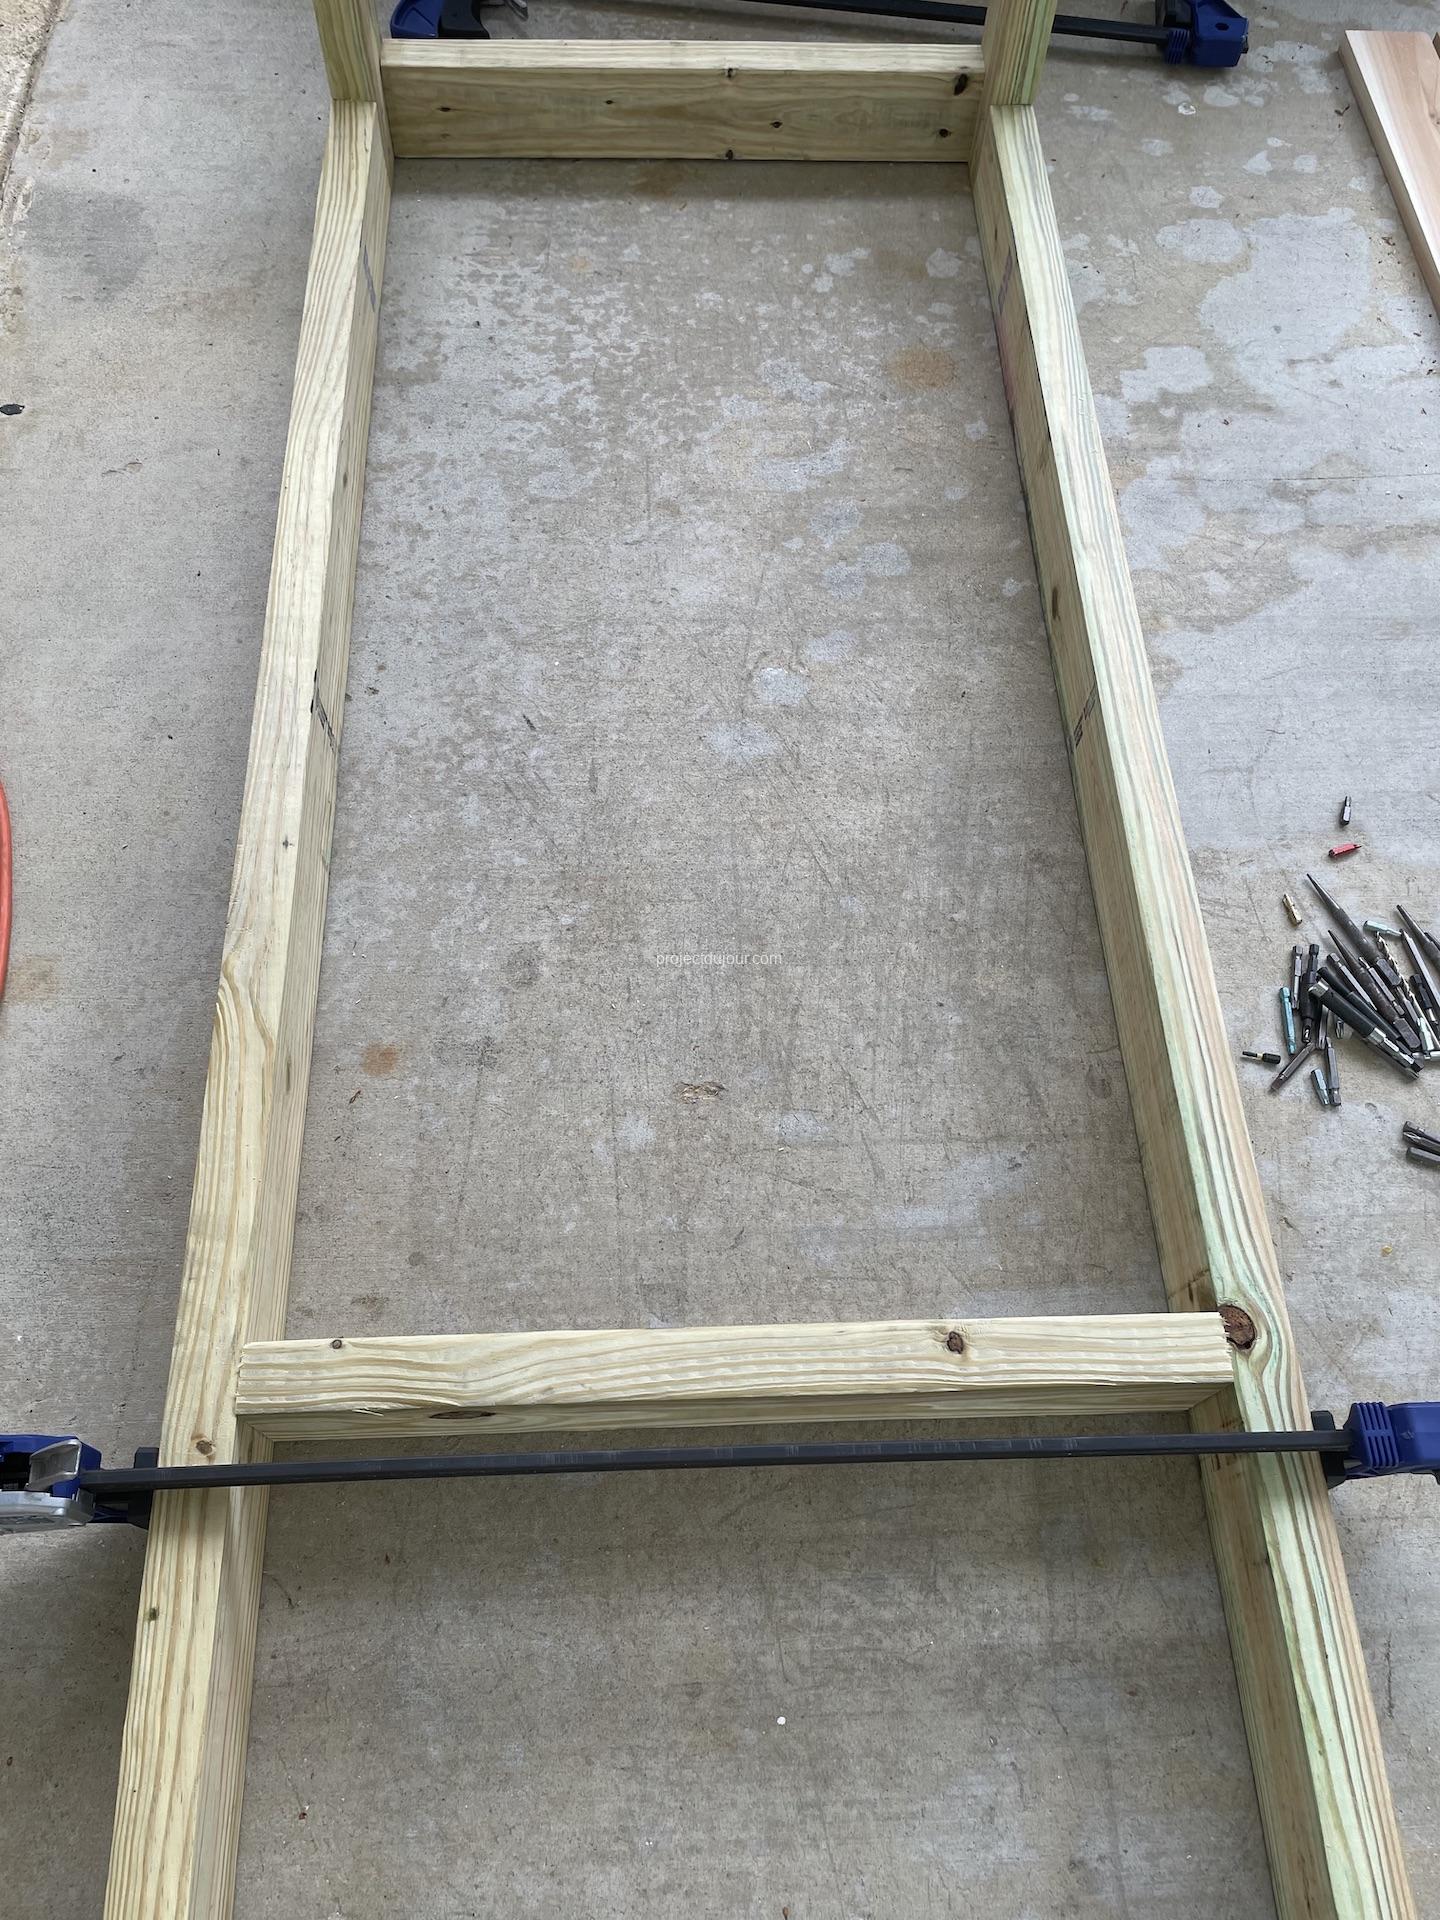
To hold the frame together I added 4 pieces of 2×4 pressure treated between the two sides of the frame. The length of the transversal pieces was determined empirically. I could have used the theoretical width of the cedar boards but I learned over time that these are never exact. So I first laid all the cedar boards I wanted on the ground with tile spacers between them. I then subtracted the width of the frame’s sides as well as a small overhang to match the overhang on the length of the lounger. At the end, of all this, I settled for 21 1/2″ for all the transversal pieces.
Frame alignment before screwsPlacing transversal supportScrews for the frameLong screws outsideShort screws inside
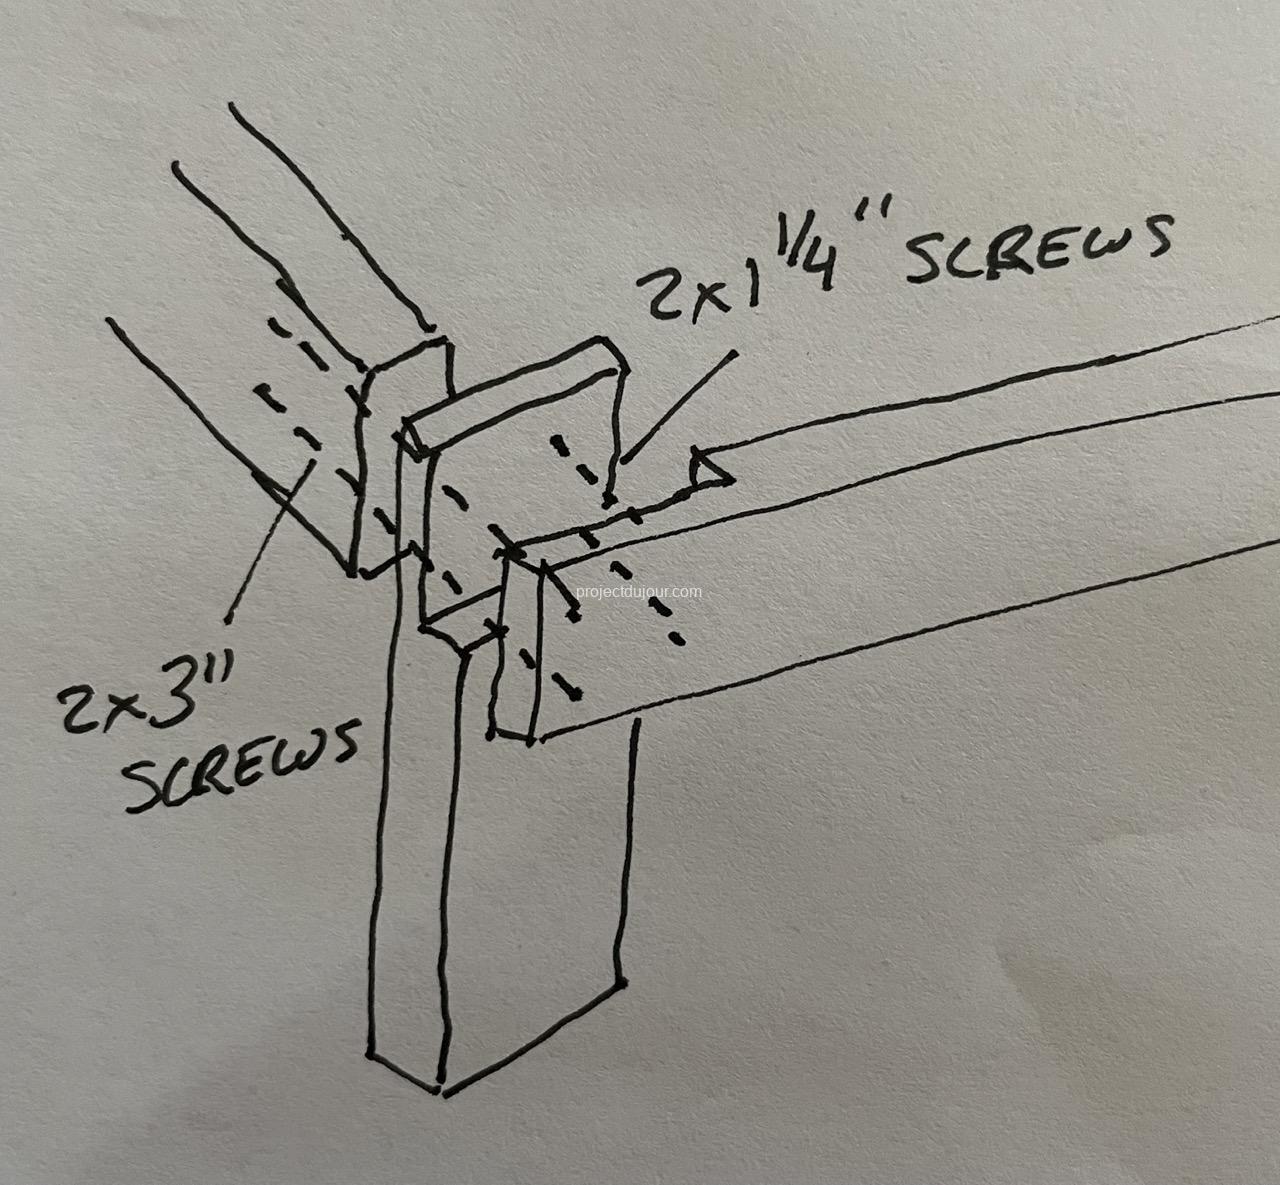
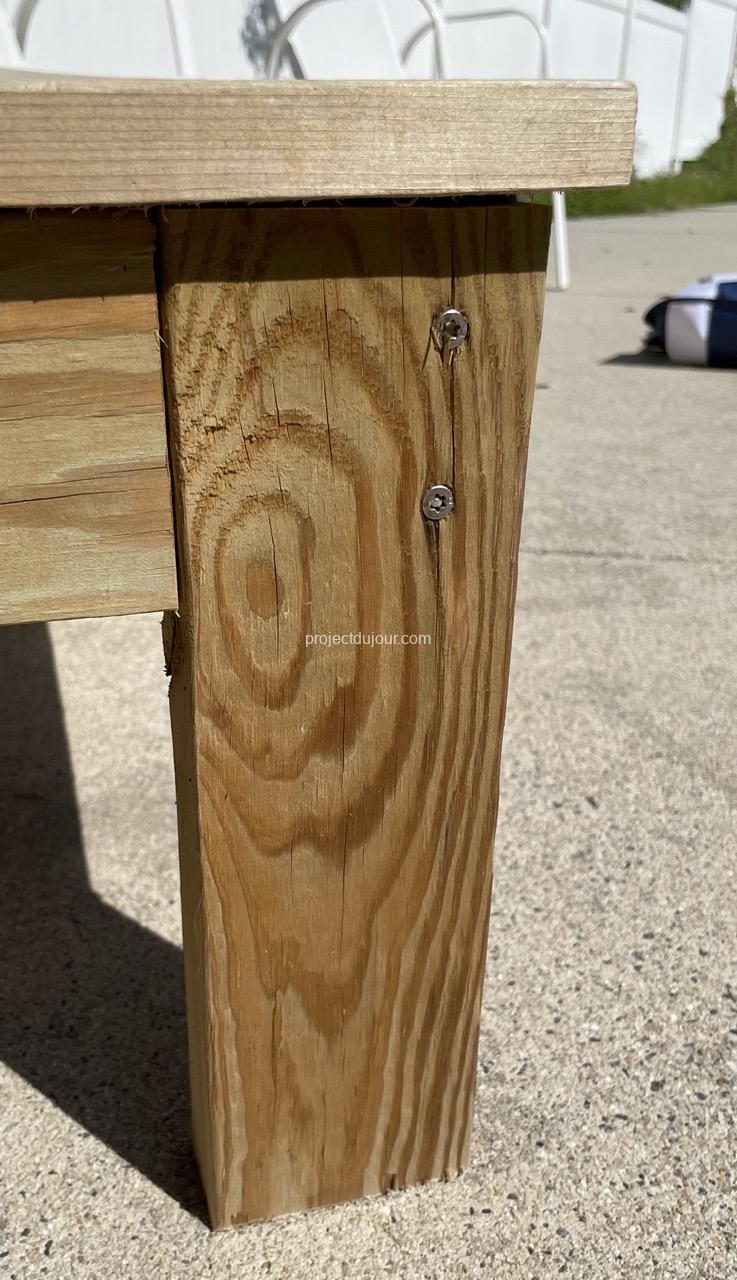
I used two 3″ long stainless screws at each corner, screwed from the outside of the frame. These tie together the leg, side beam and transversal piece. I added two 1 1/4″ long stainless screws on the inside of the halving joints. This way each leg holds with 4 screws.
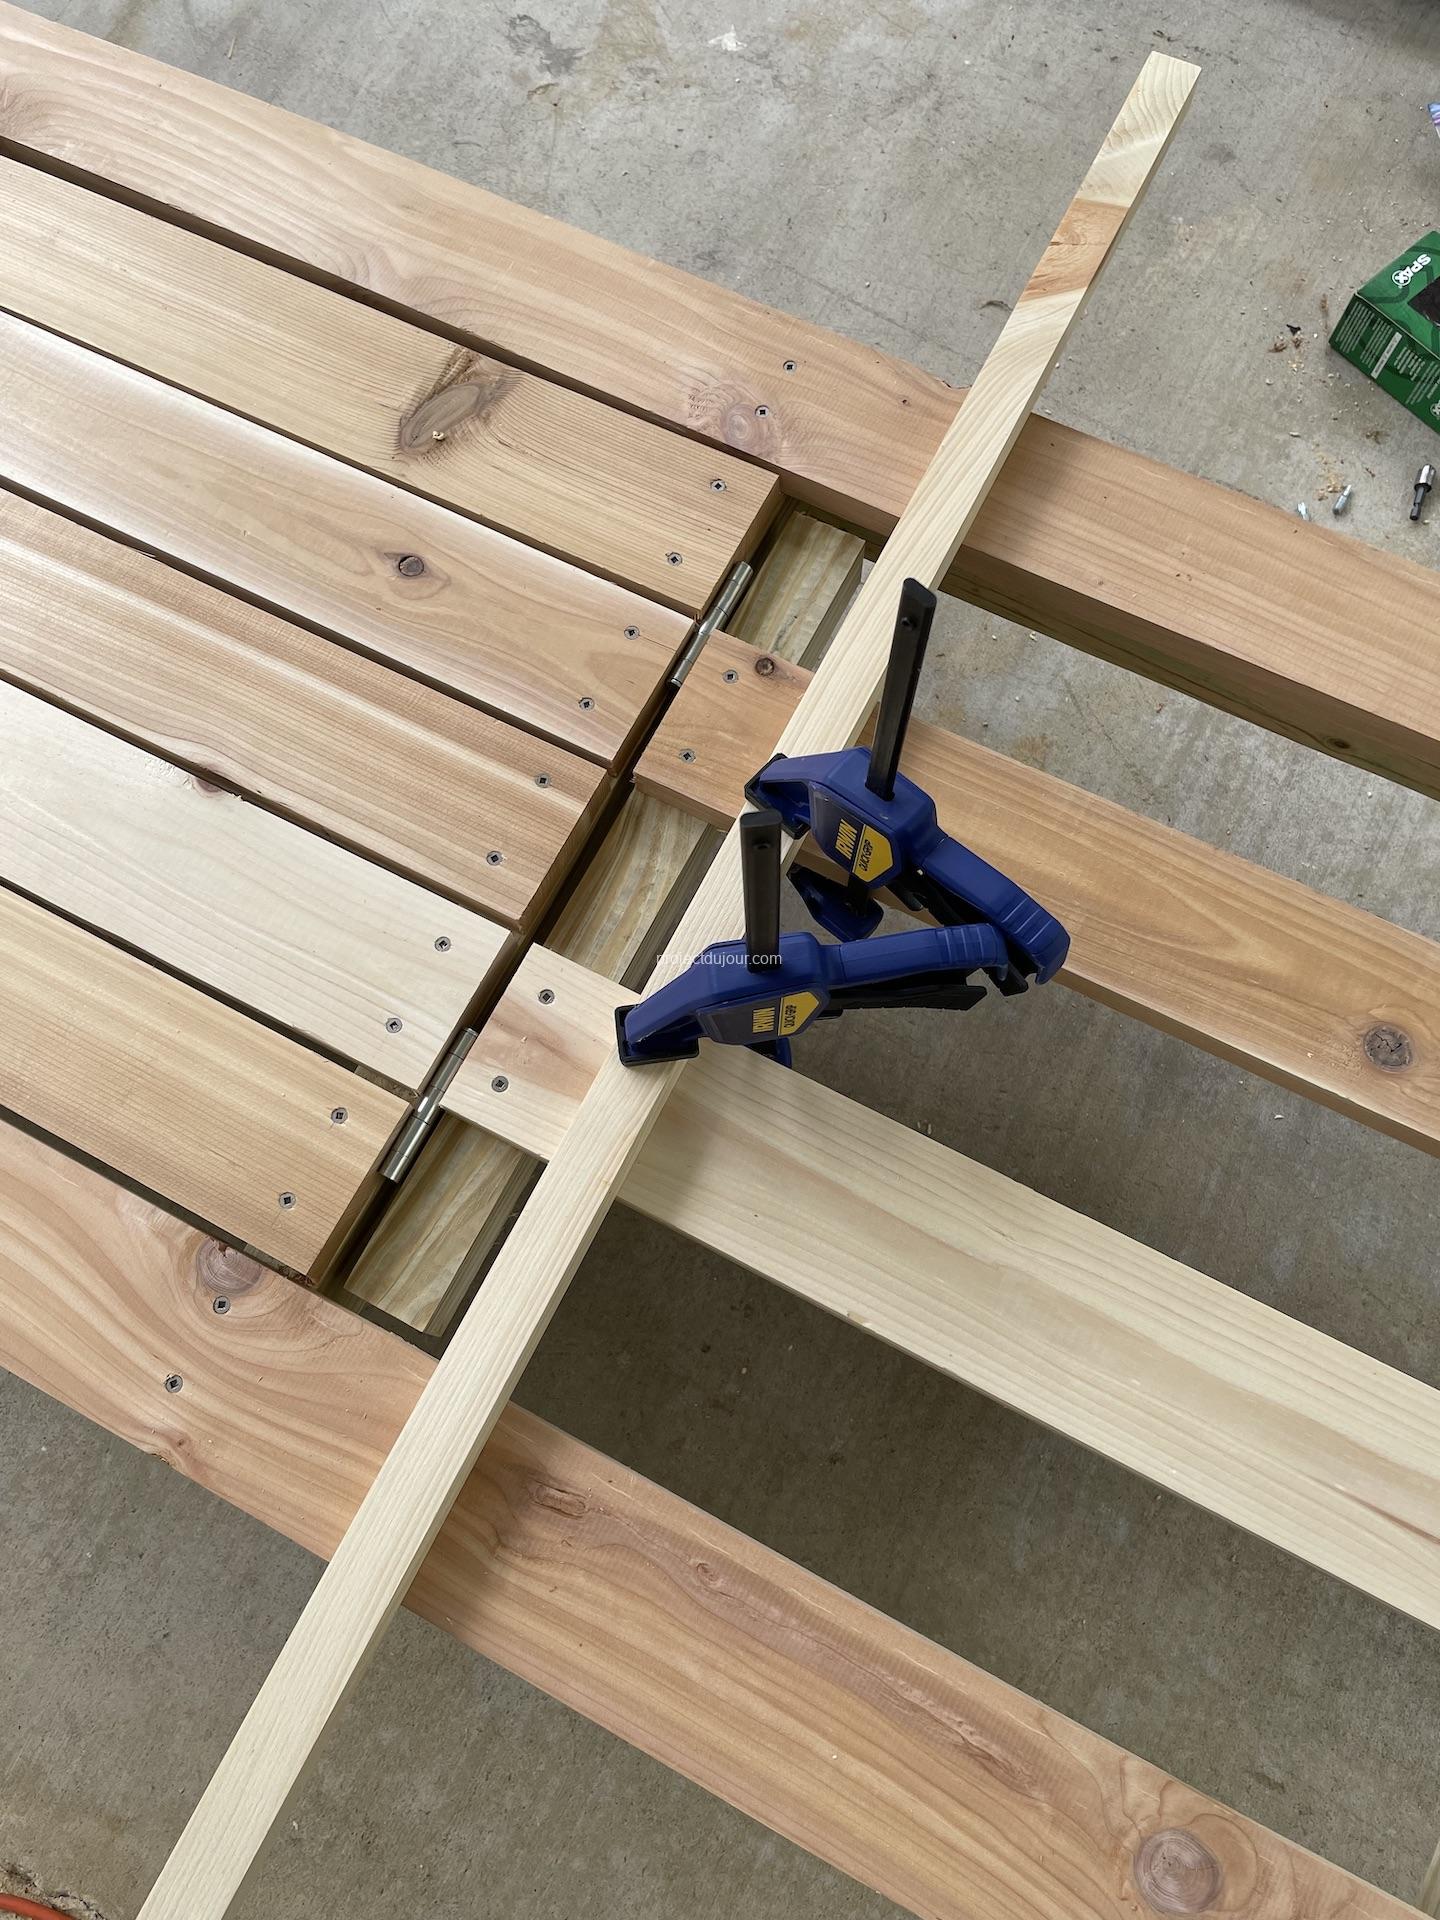
The two extra transversal supports are located approximatively 2 feet from each end (one third of the length). The best way to figure out where to place the support close to the hinges is to first cut the 5 center cedar boards to 4 feet and place them on the frame. You also need to keep a small space for the hinge (see picture of hinge below). I ended up with the opening for the back being 22″ long.
To make sure the spacing between the boards was regular, I used tiling spacers.
Using tile spacer and square for alignmentPositioning over frame
Before screwing any cedar board to the frame, I clamped them together and moved them over the frame until the overhangs where even on all sides.
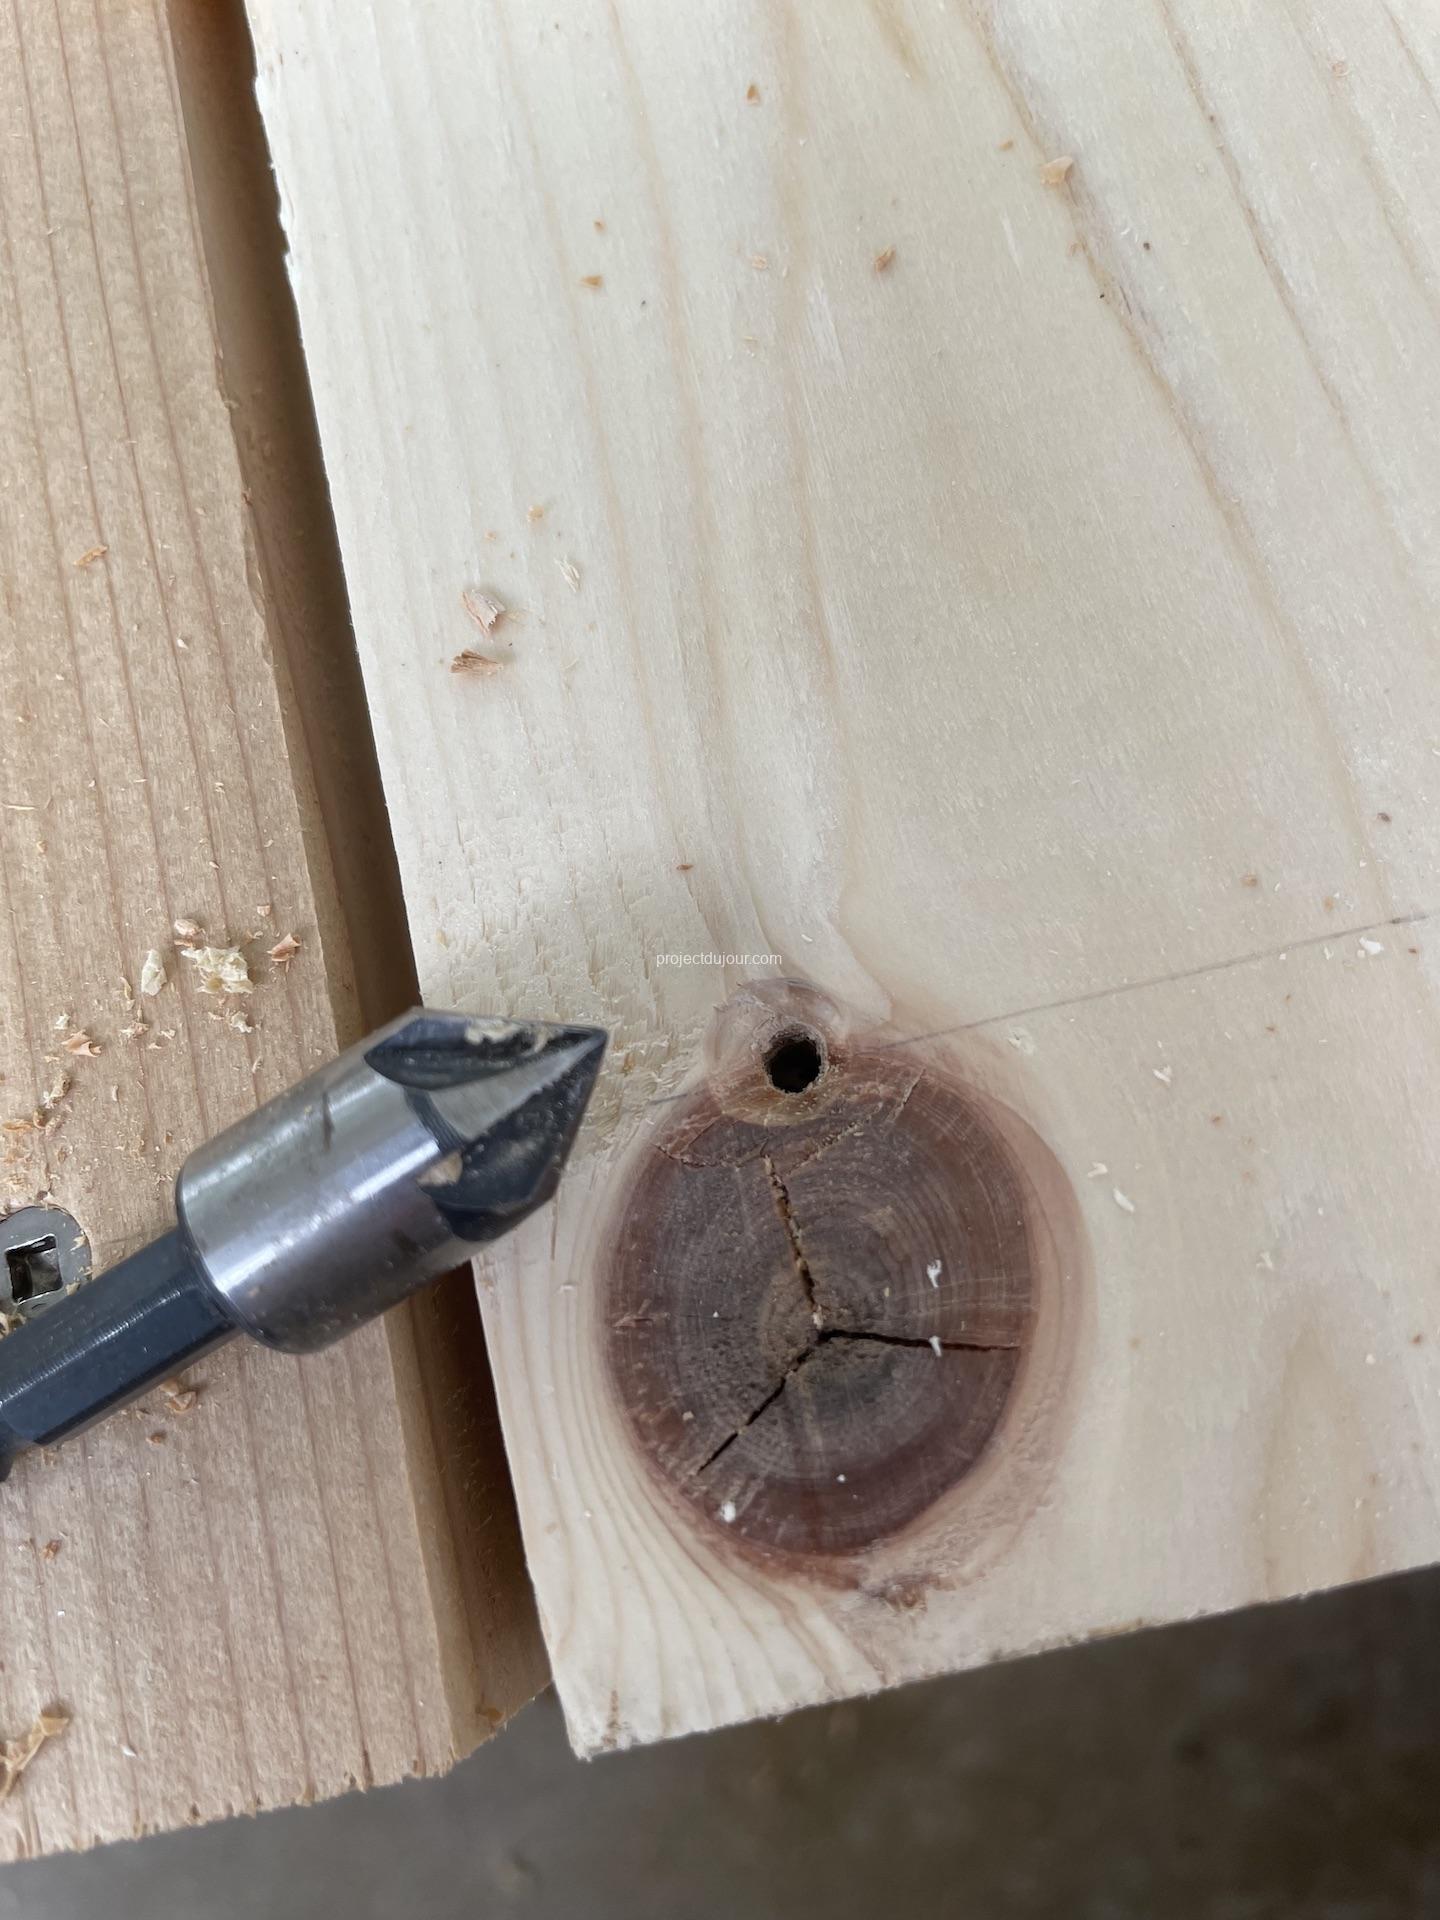
Since cedar has a nasty tendency to split, I decided to counter sink and pre-drill each hole. I don’t have a counter drill bit so I used first a counter bit and then a drill bit. It’s a bit time consuming so I would suggest buying a proper counter drill bit. To attach the cedar boards, I used some “SPAX #7 x 1-5/8in. Flat Head Stainless Steel Screws with Double Lock Thread” (found at Lowe’s or Amazon).
Counter sink and pre-drillFlush stainless screws
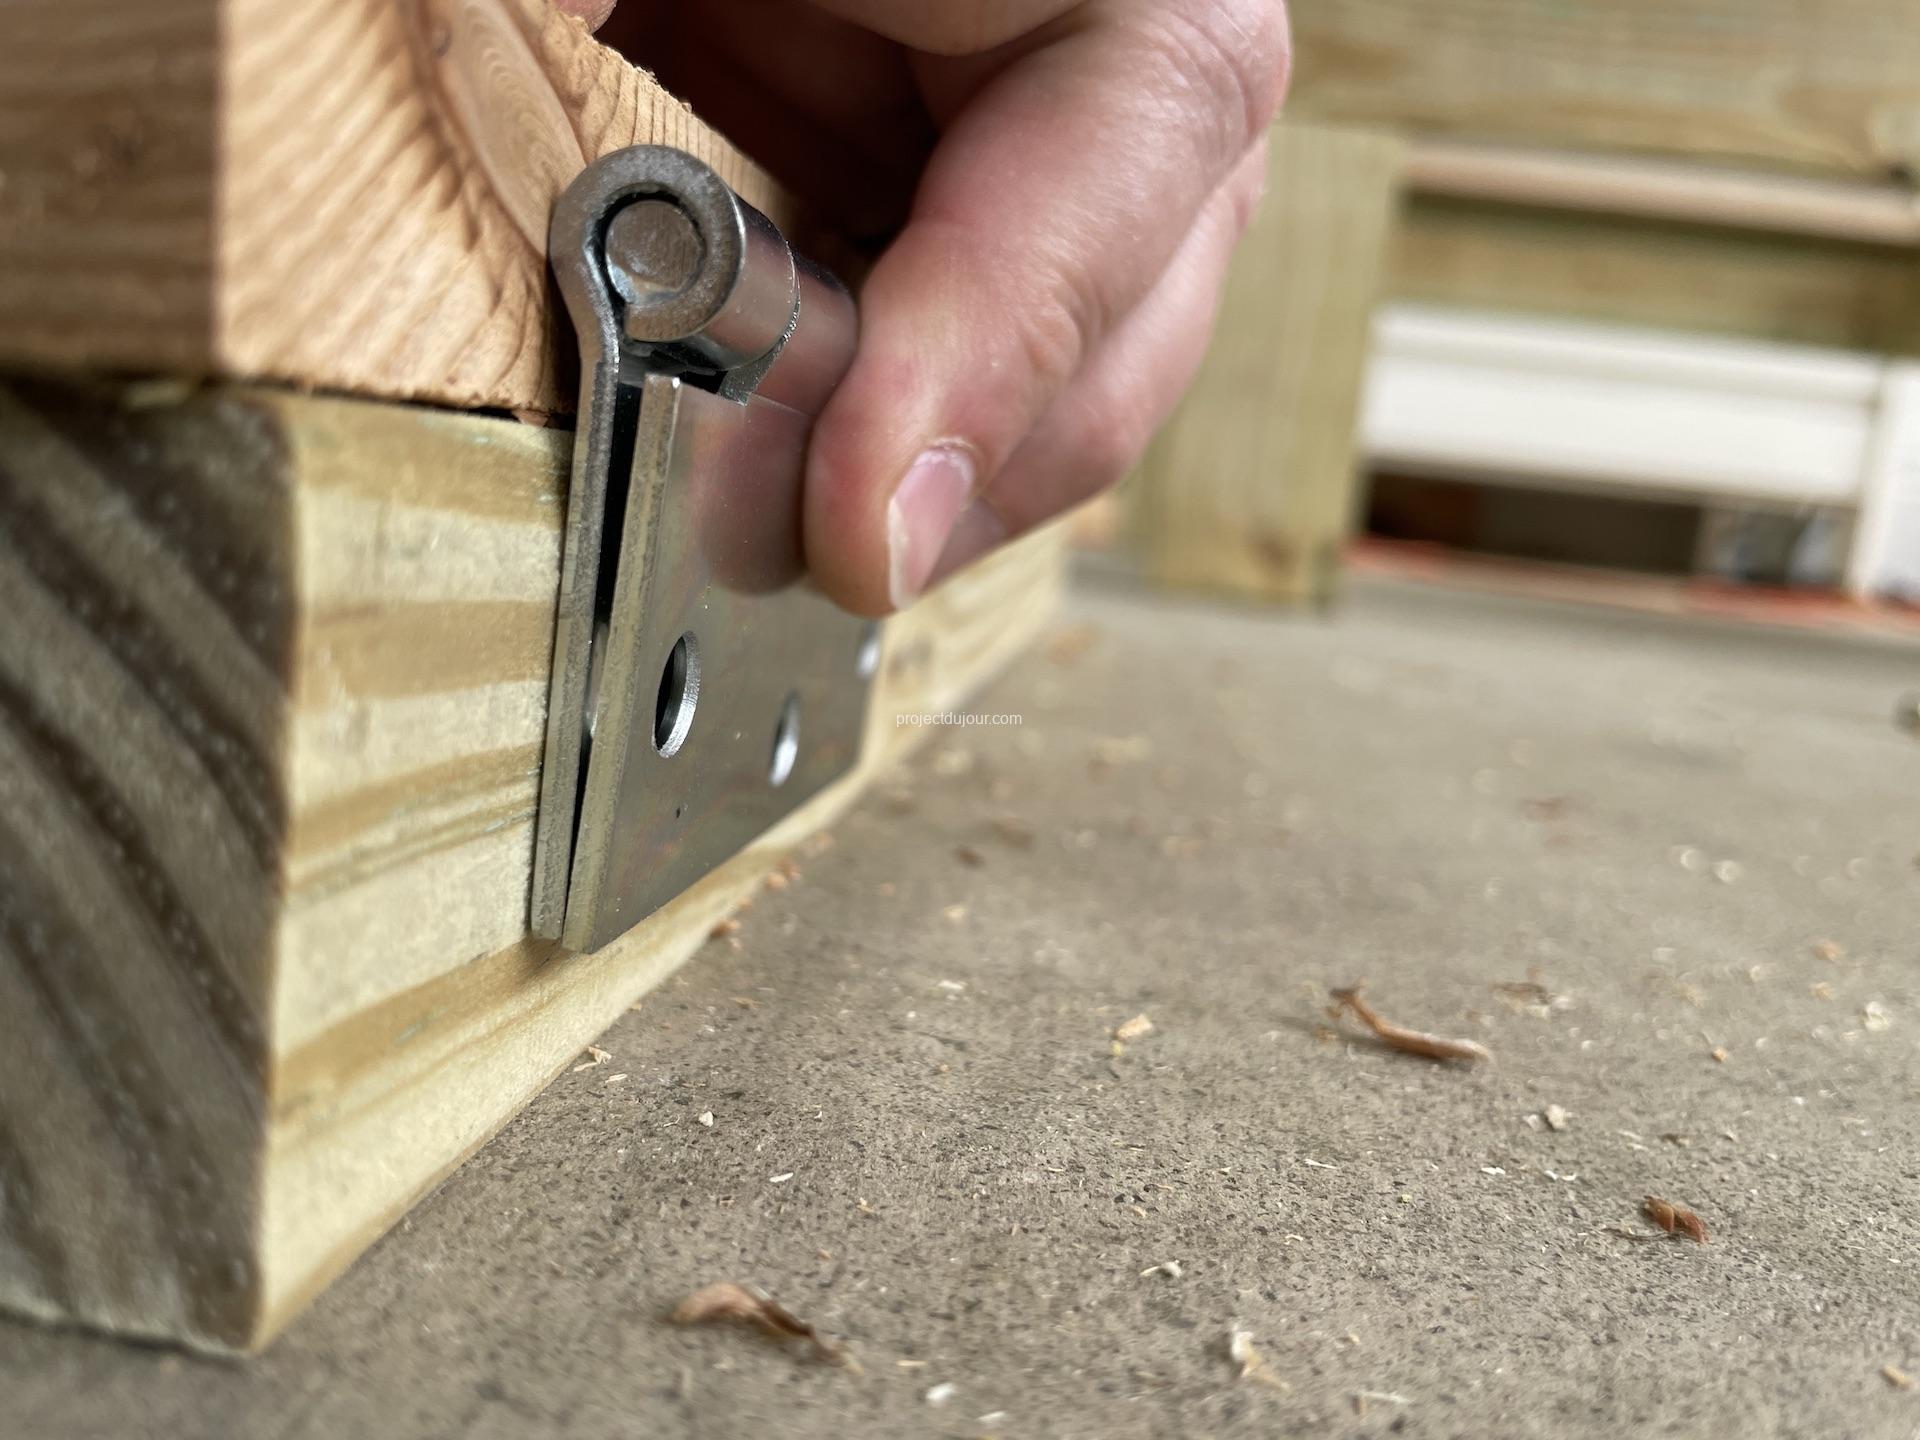
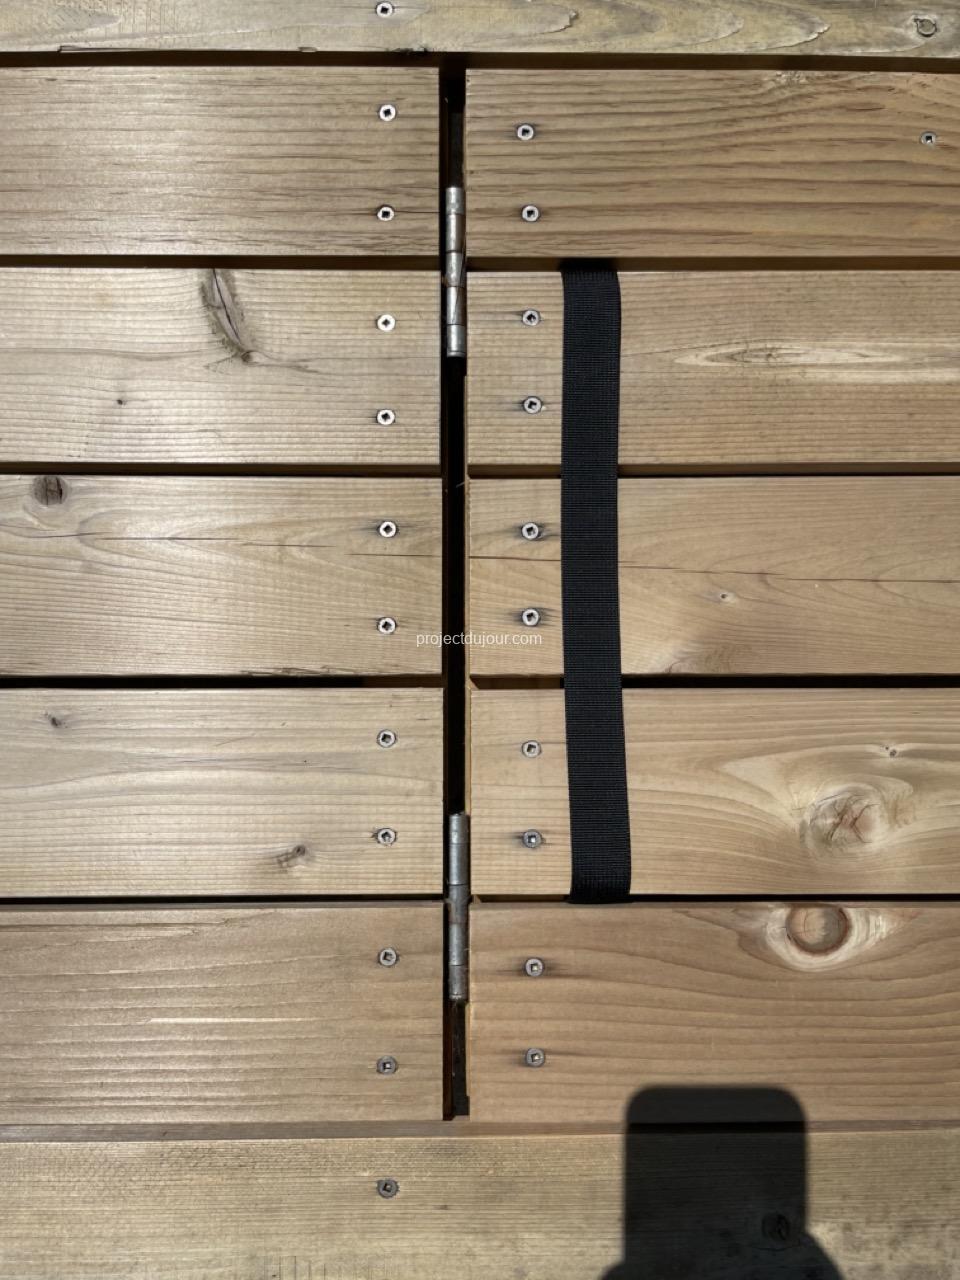
Mounting the hinges for the back was a bit tricky. My method might not be the simplest but it guaranteed that when the back was pushed down, everything was perfectly flat. Also, make sure all the cedar boards that are hitting the hinges are slightly recessed so there is space for the round part of the hinge. This space is also needed to be able to lift the back; without enough spacing between the cedar boards on the flat surface and the back, the back would hit the bottom part.
Small recess for the hinges
The frame for the back is built using left over 2×4 pressure treated lumber ripped in half. The actual size is 1 1/2″ by 1 3/4″. I started by cutting the piece close to the hinges. I used a small piece of scrap wood as a spacer to determine the depth of the hinges. Since I wasn’t sure the hinge placement was final, I used a single screw just to hold each hinge in place. I didn’t pre-drill for that screw but I marked the center with a punch tool.
Hinges placement on the back
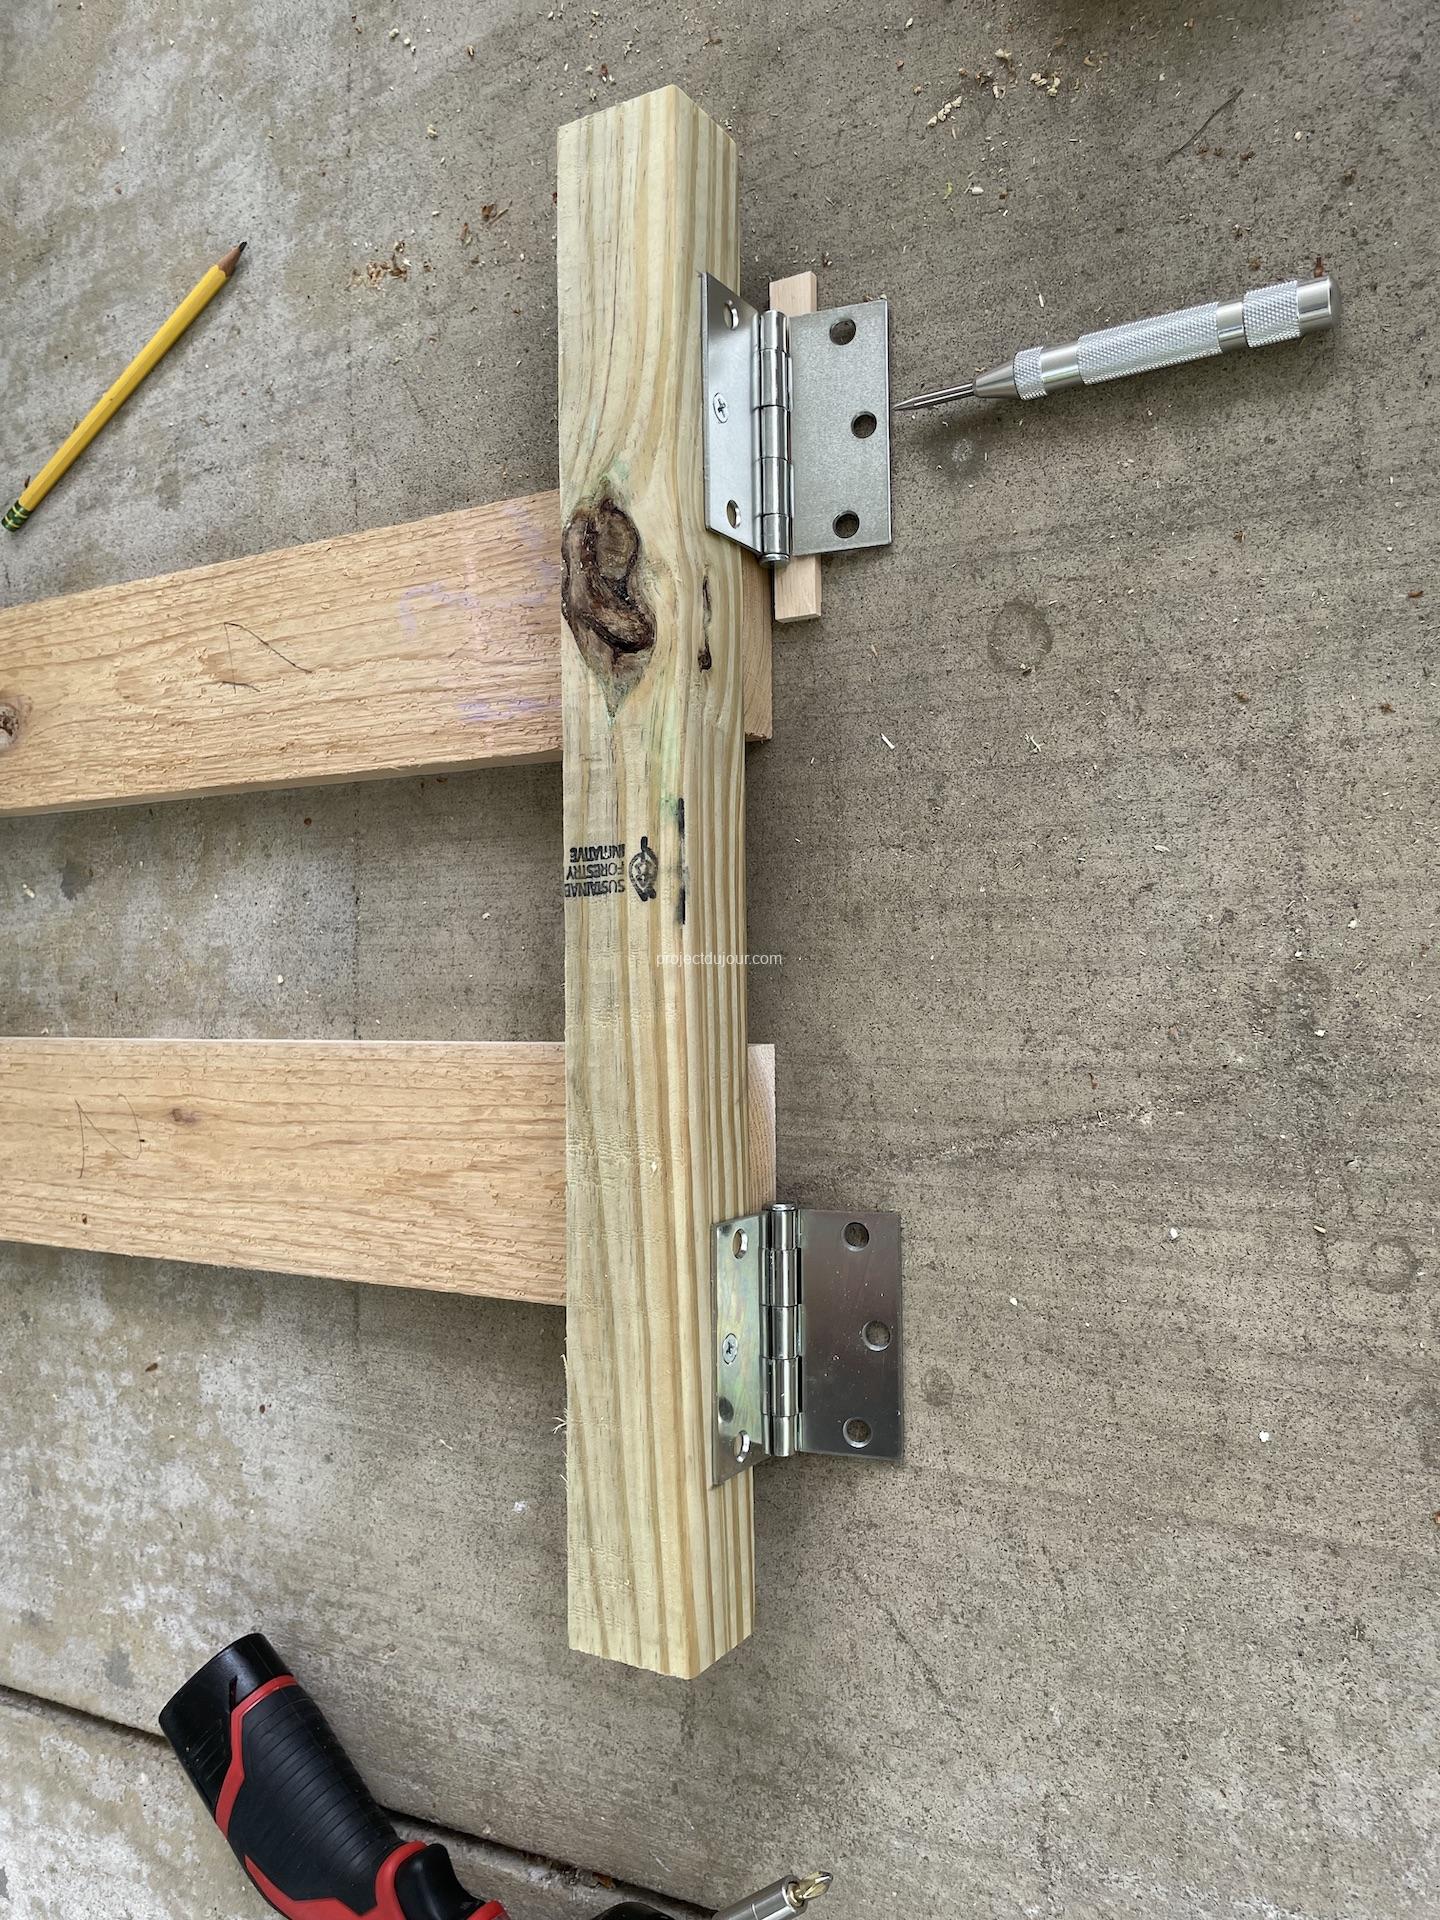
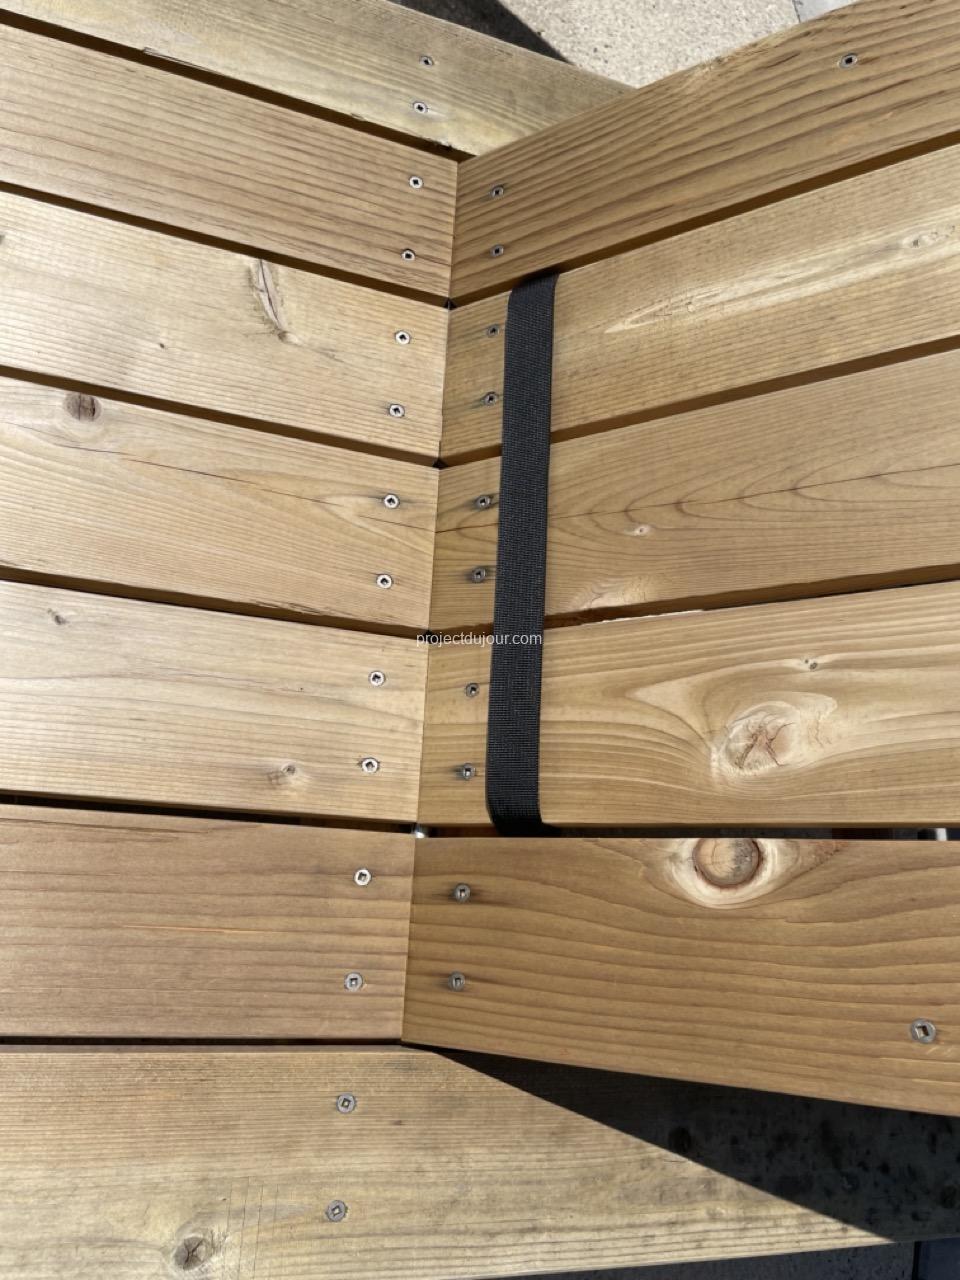
At that point, I attached two of the five boards for the back and used clamps with a piece of scrap wood to hold the back in place. With the back at the correct height, I used a pencil all around the hinges to mark their location on the transversal support of the base frame. I then lifted the back and added all the missing screws.
Marking hinge placement on frameBack loweredBack fully raised
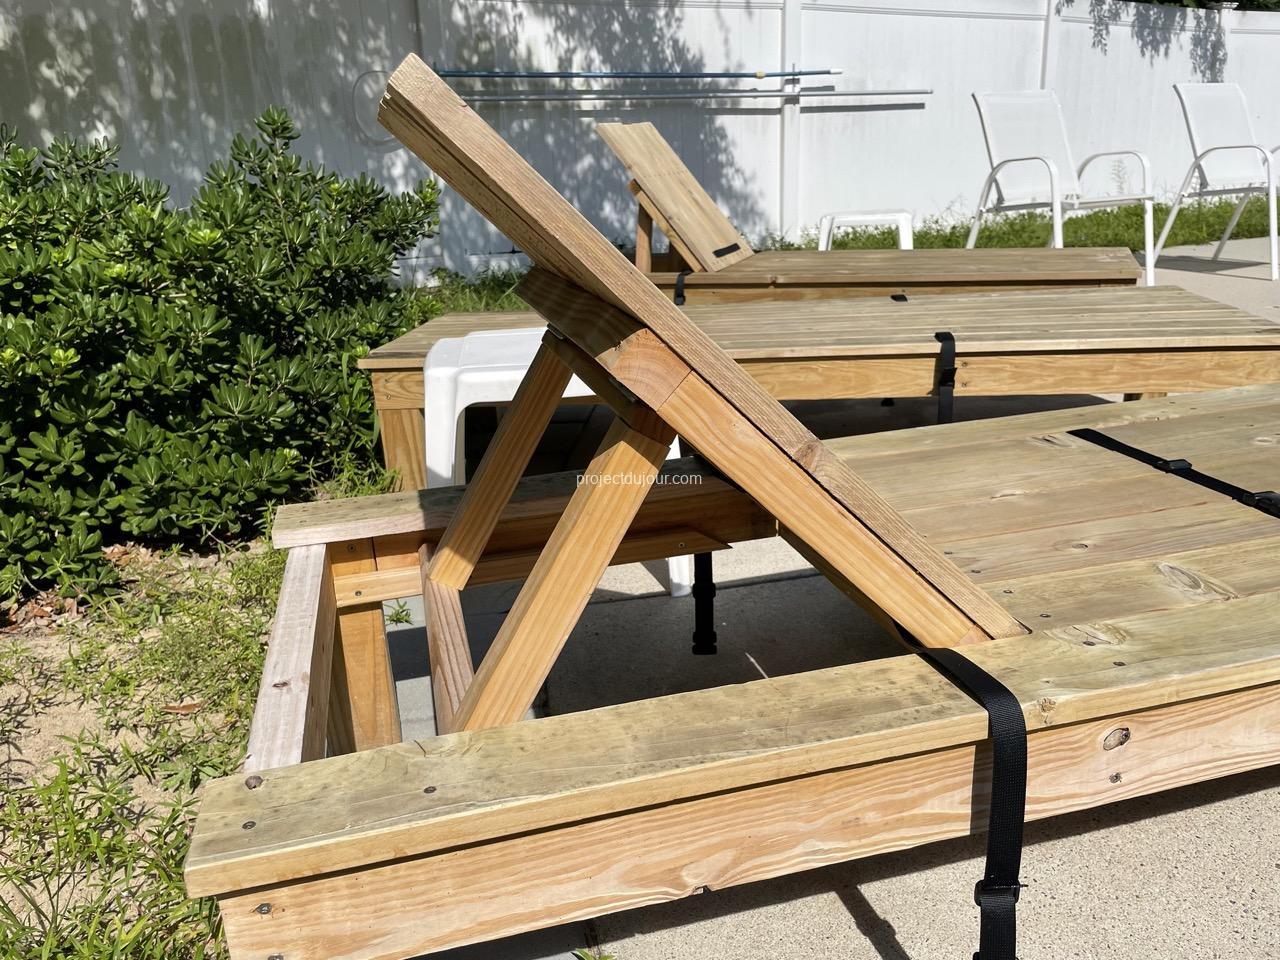
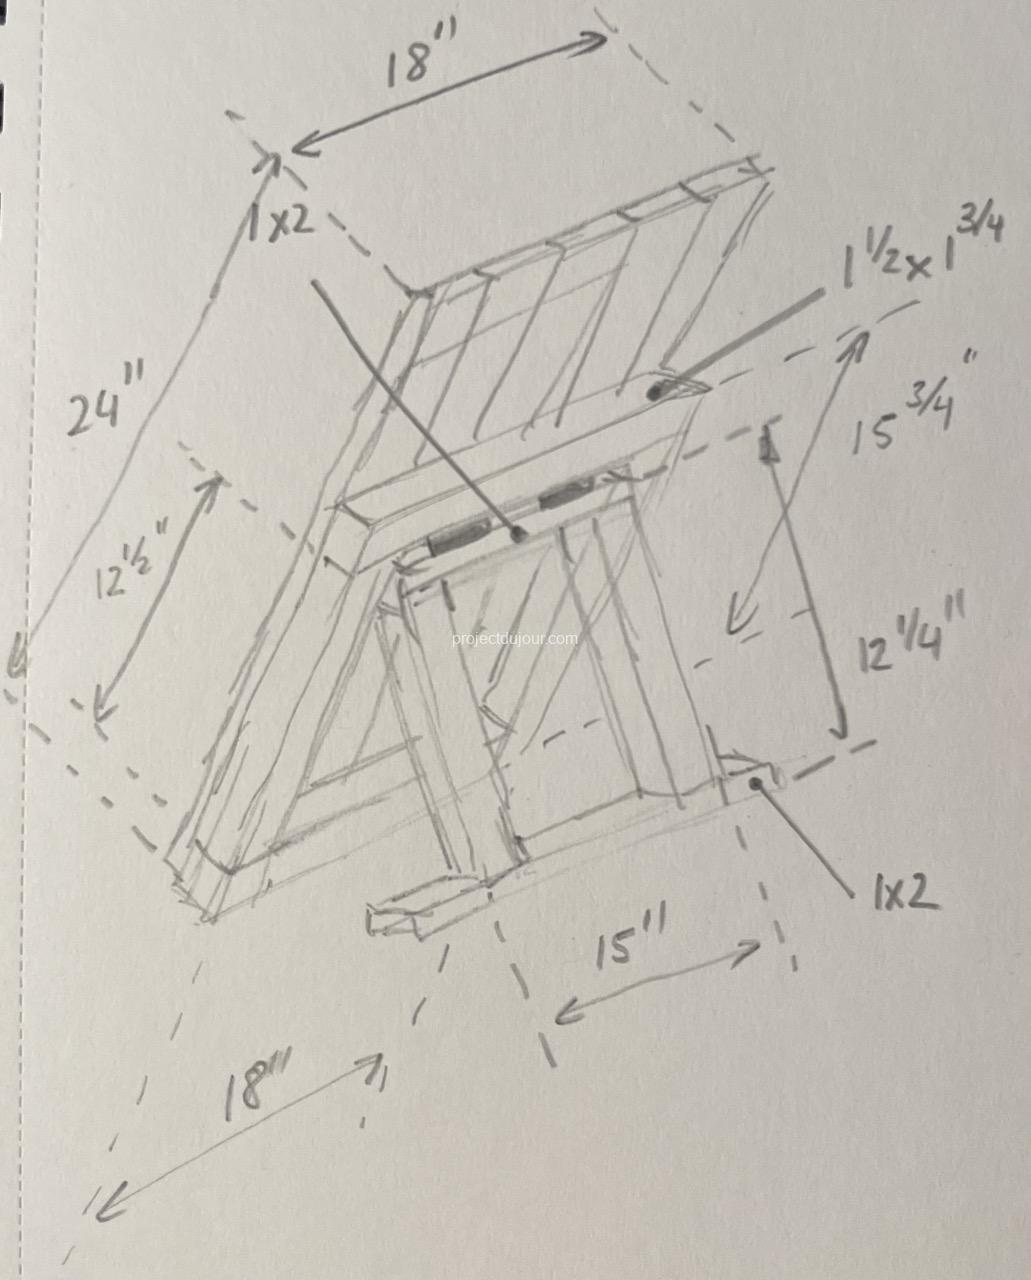
It took me some time to figure where to position the hinges for the the legs holding the back in upright position. I experimented for a while with scraps of wood until I reached a compromised that I liked. The legs are built using 2×4 ripped in half as well as some 1×2 pressure treated lumber. The legs rest on a strip of 1×2 screwed inside the frame. that strip is 19 1/4″ long and is cut at an angle so the leg is lowered when the back is laid flat (see video below).
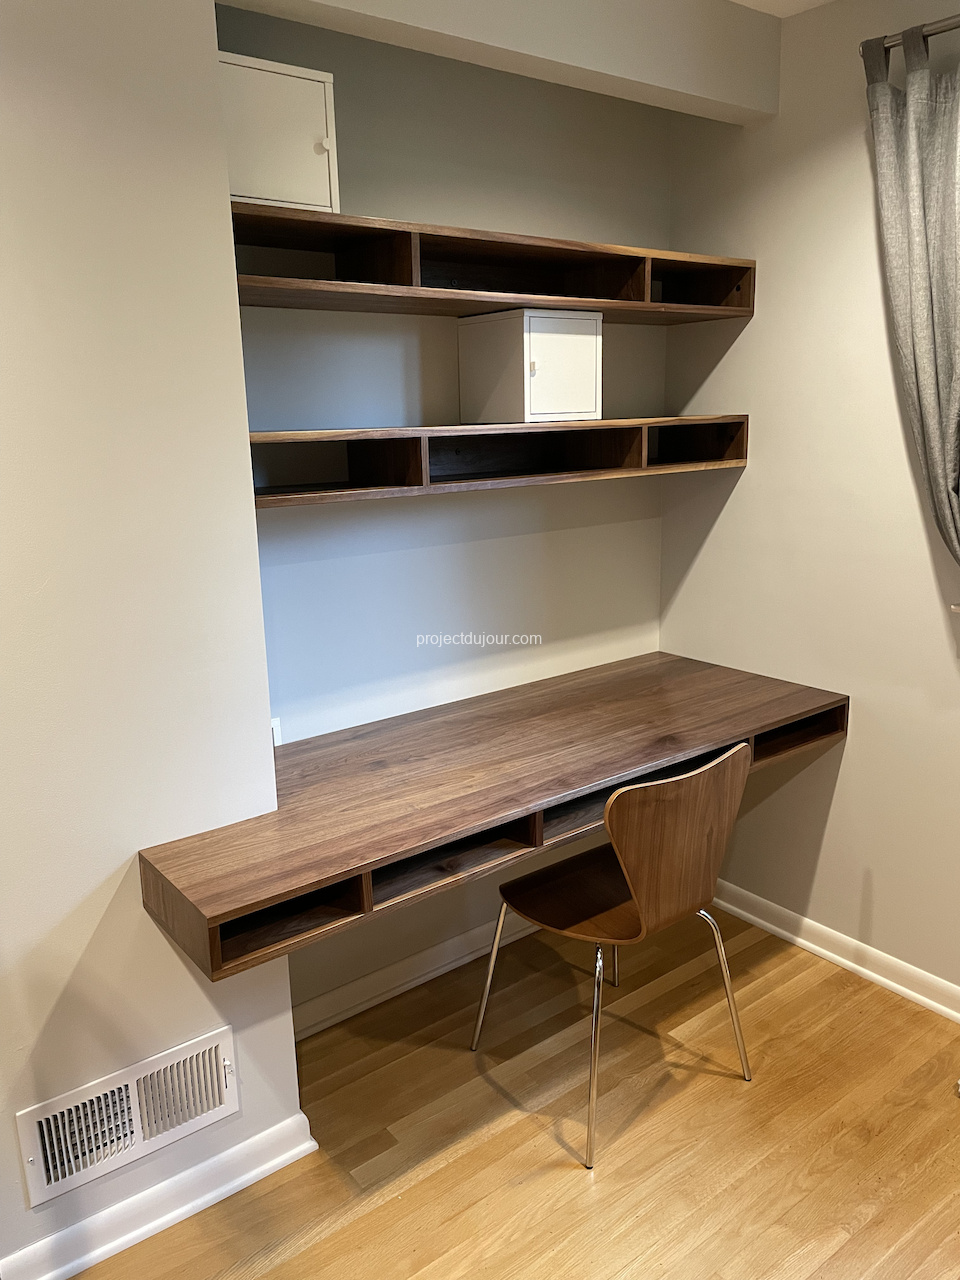
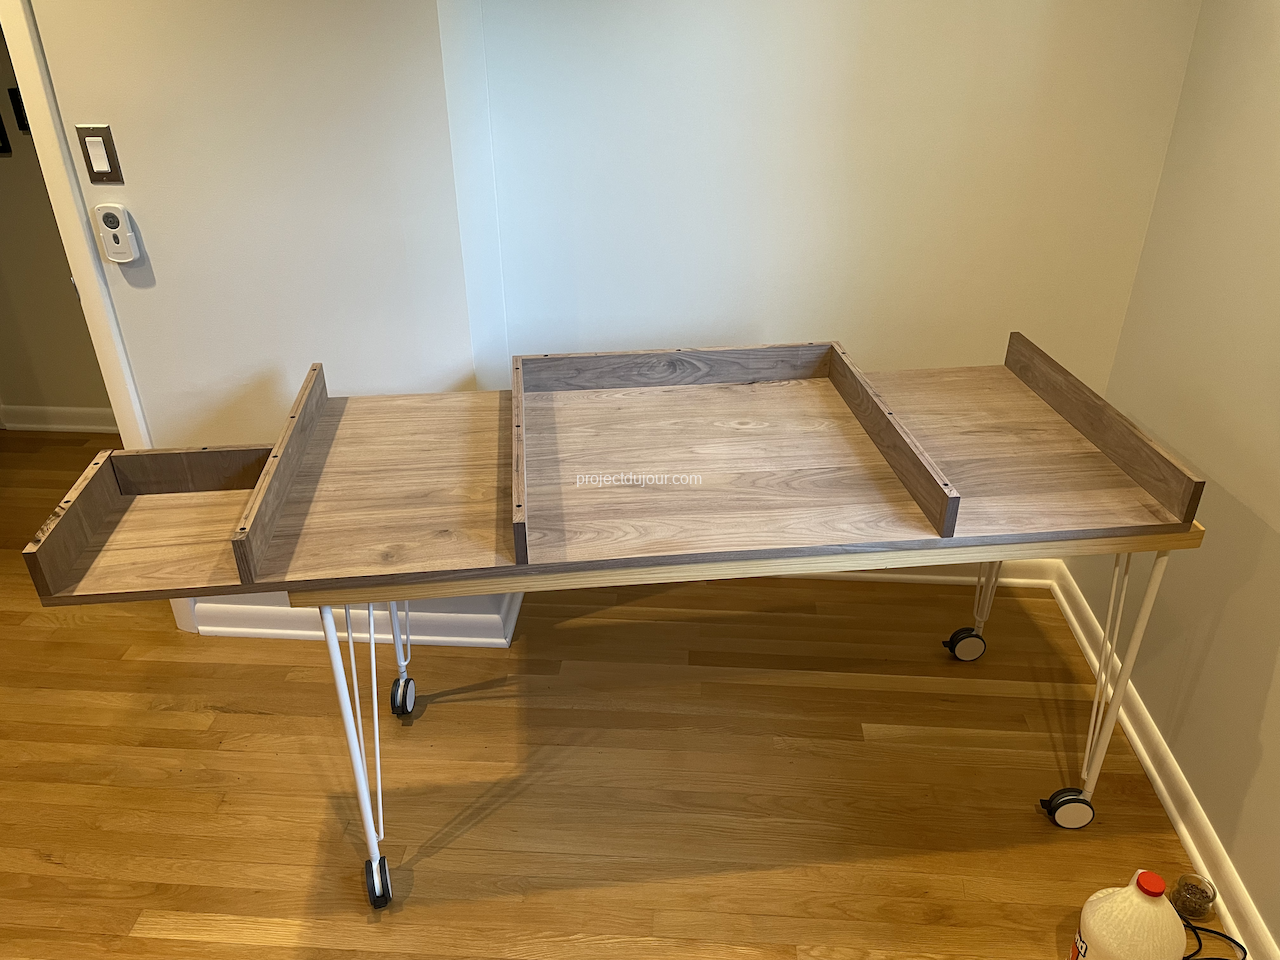
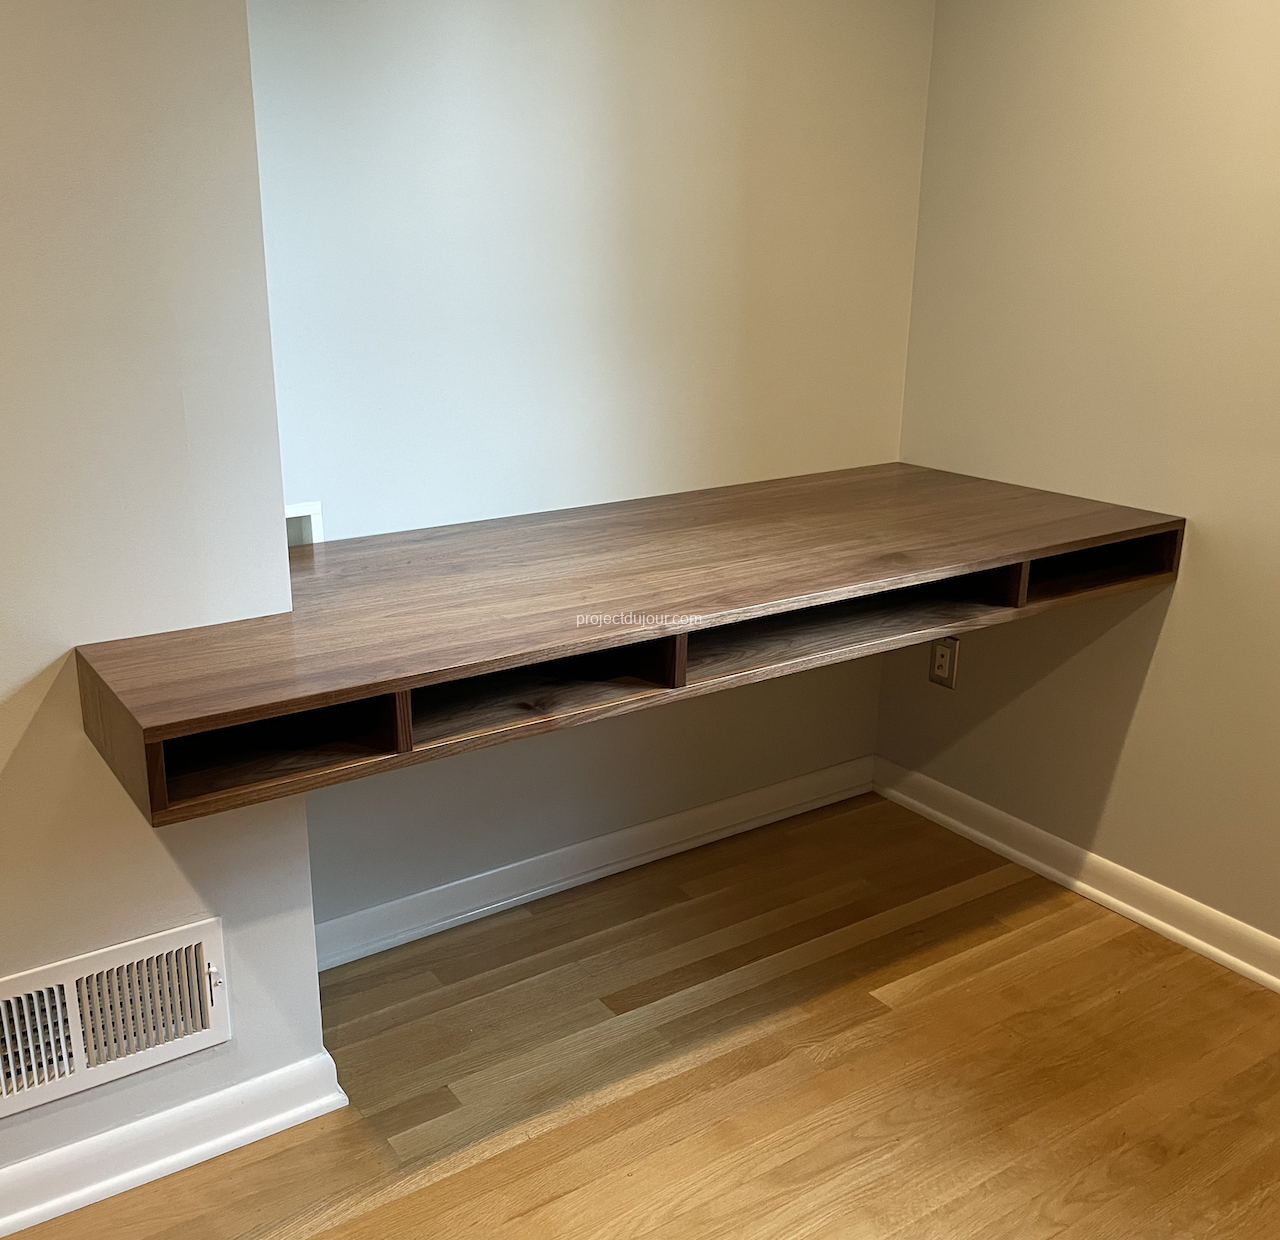
This project du jour is for a small bedroom that used to have a closet encroaching on the main space. I removed the closet years ago and finally decided to build a desk and shelves for the open space. This is a simple built-in desk and a set of shelves made of walnut. The assembly is based on dowels and glue, nothing else.
The slabs of walnut were prepared by a local timber shop, Freestate Timbers. I tried to assemble my own panels in the past but it seems I can never get the boards to be perfectly flat (even using a plate joiner). Buying fully assembled boards makes life a lot easier.
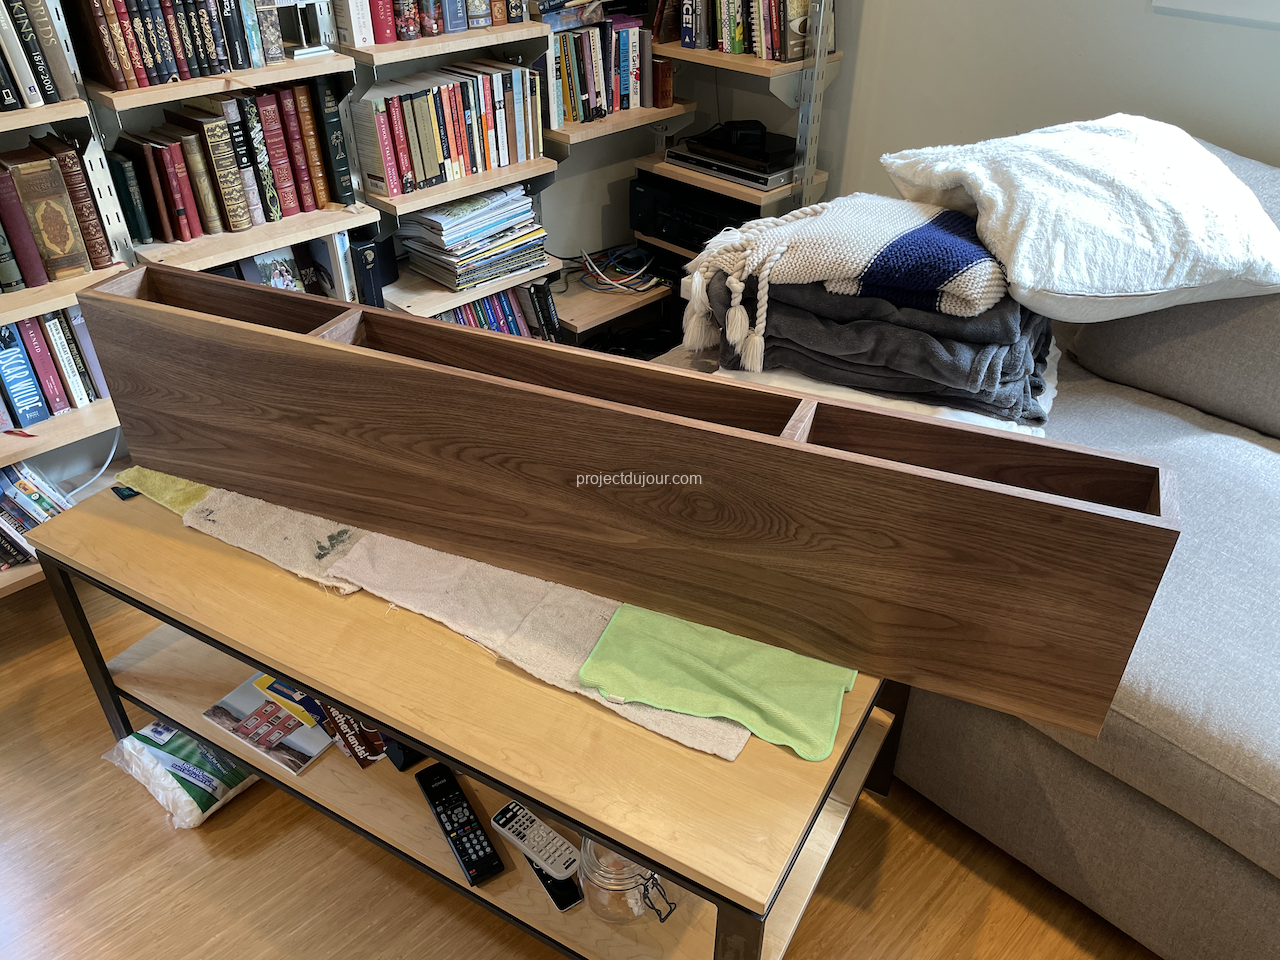
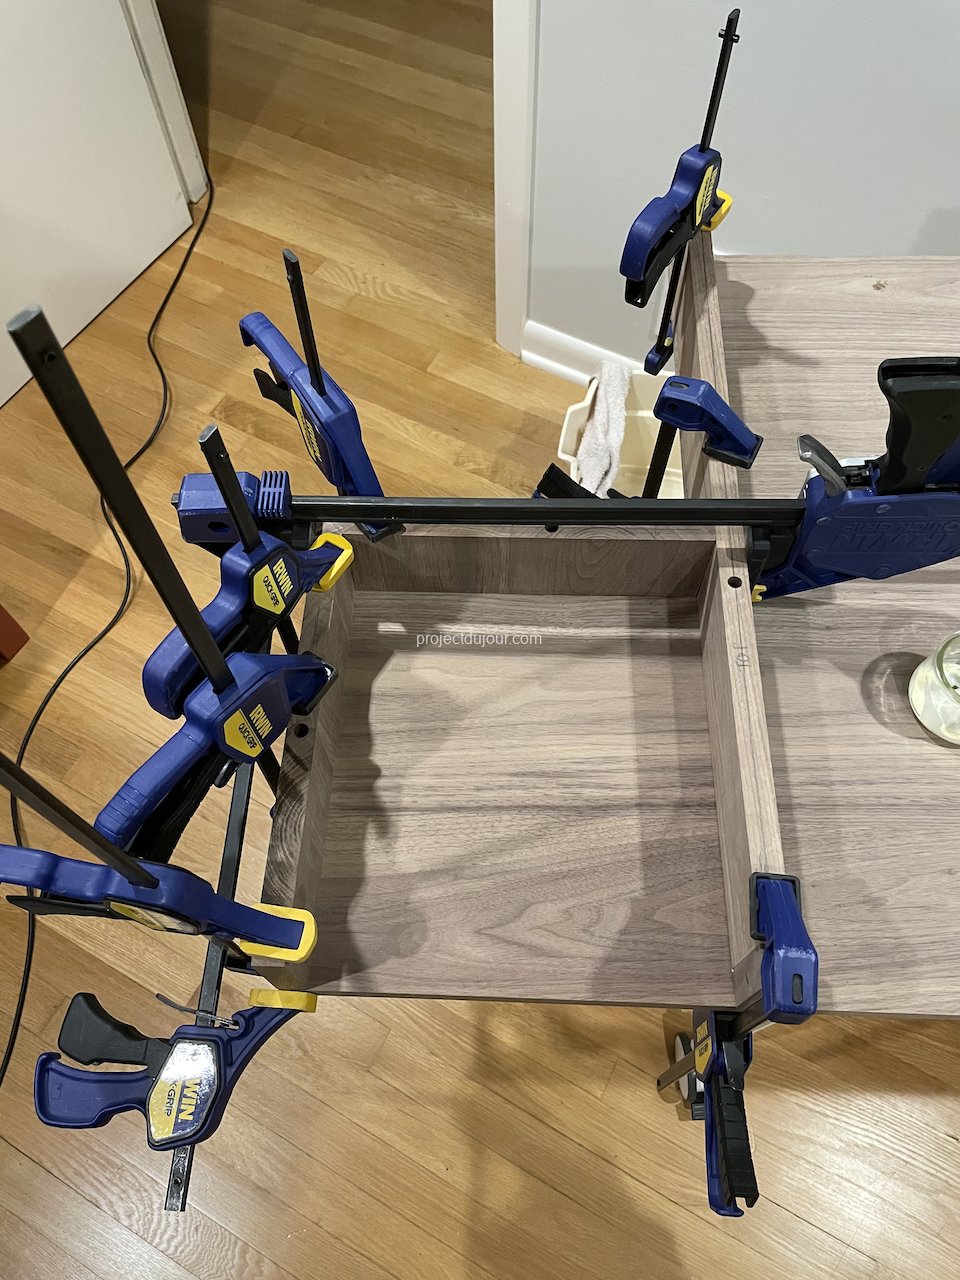
I started with the shelves. For each shelf, I used 2 long horizontal boards, about 13″ wide. Then I have 4 very short vertical dividers and a piece at the back (not for the full length, just the middle). The piece in the back ensures some rigidity and allows me to attach the shelf to the wall behind it.
Shelf parts ready to get glued
Shelf glued and clamped
For the finish, I first wanted to use a natural oil like Danish Oil or even some wax but I feared this would not resist well on the desk. Coffee tends to get spilled on desks in this household… Ultimately, I decided to try Minwax Wipe-On Poly (clear satin). This is the first time I used this product and I was pleasantly surprised. It’s fairly easy to apply, fast and somewhat forgiving (no drips!). It does stink when applied so we needed to make sure we had some good ventilation. The result on walnut is really nice.
Finished shelf
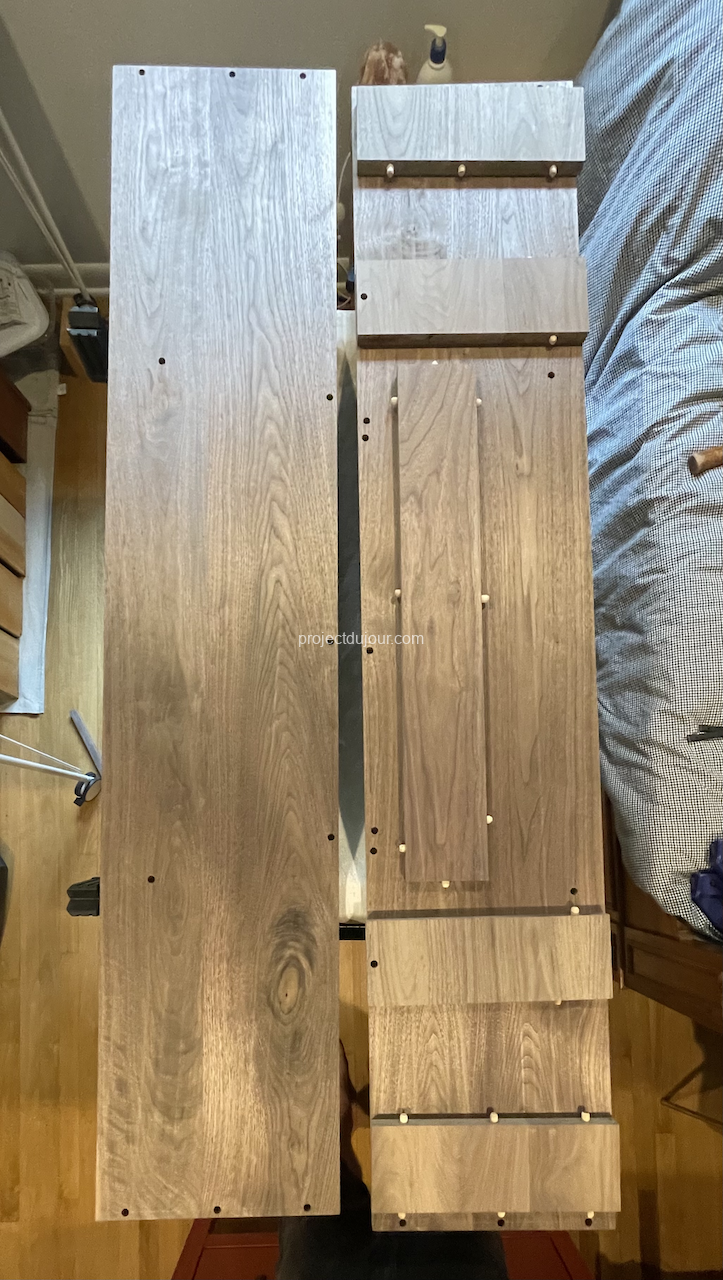
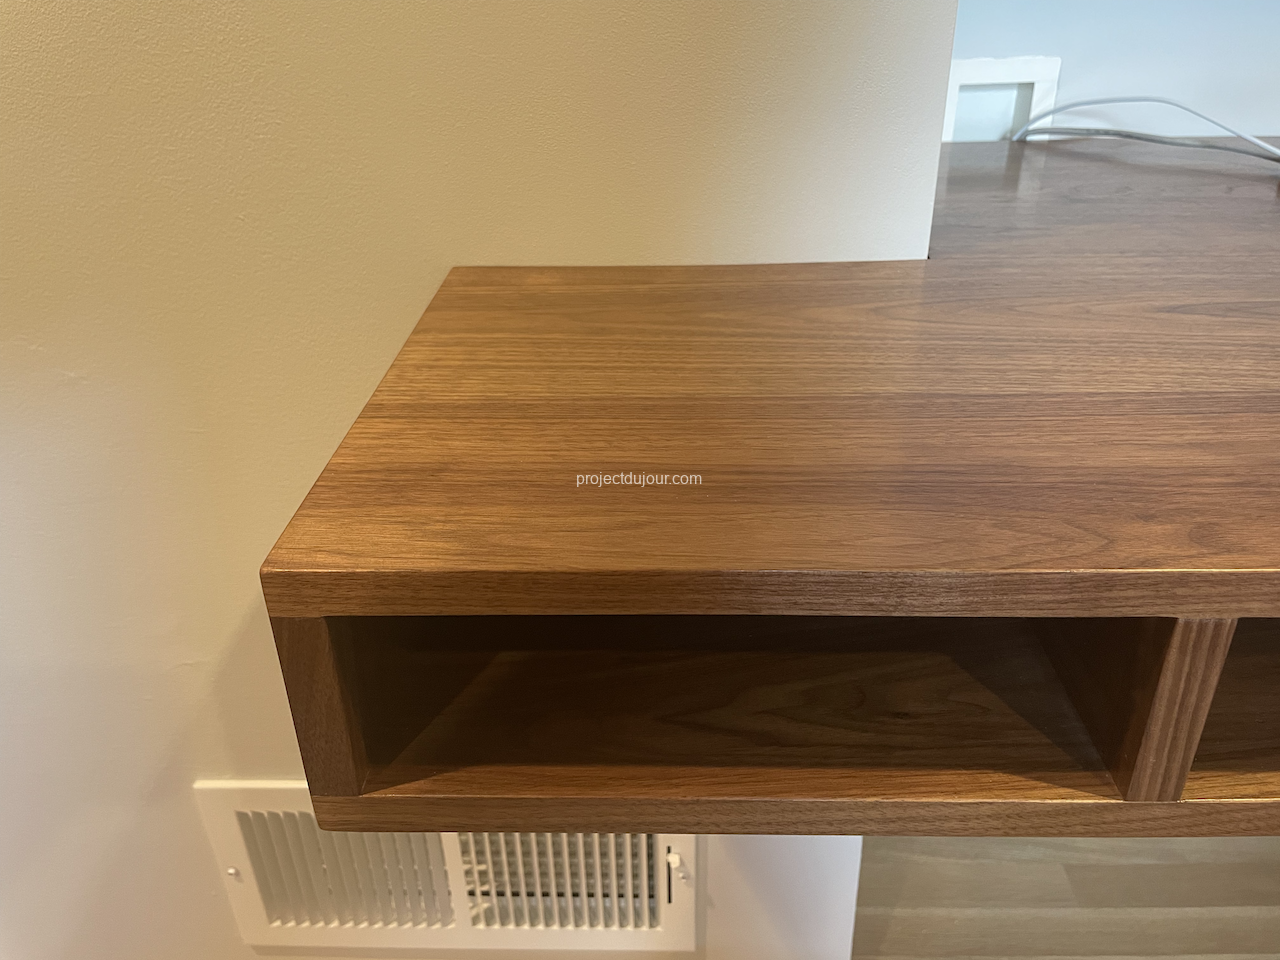
The desk construction is very similar, two big horizontal slabs and 4 vertical dividers for the central part. To give the desk a bit more character I decided to add a small over-hang on the left side.
Desk parts ready to assemble
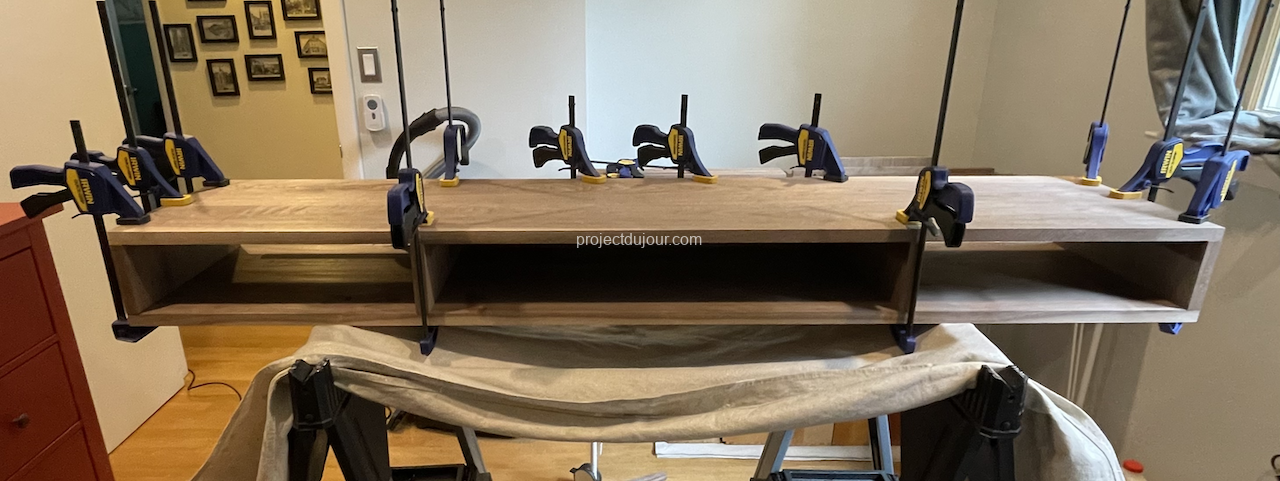
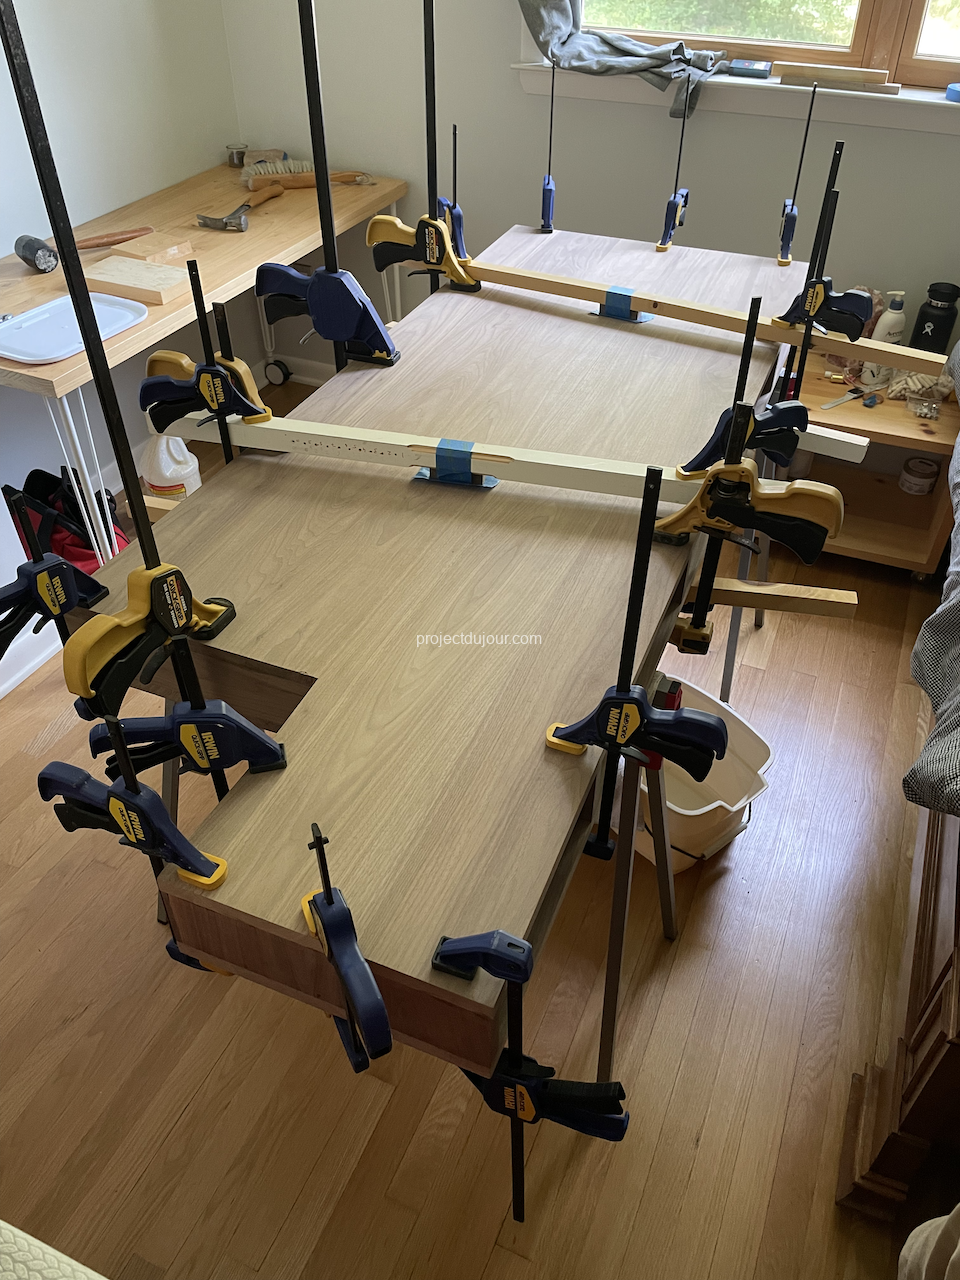
The desk being bigger and a bit more complexed, I assembled and glued it in two steps.
Side of the desk glued and clampedDesk fully glued and clamped
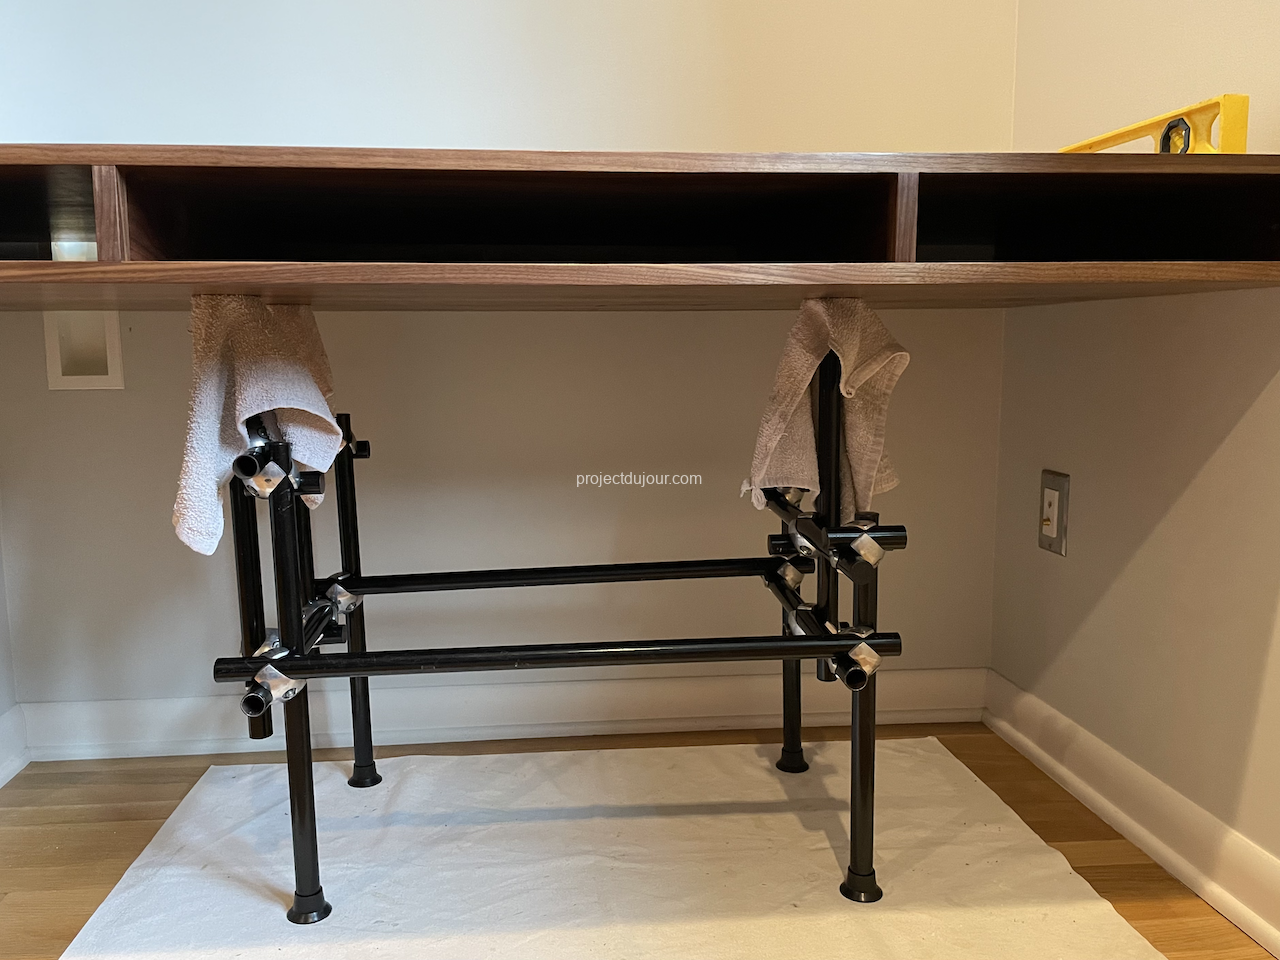
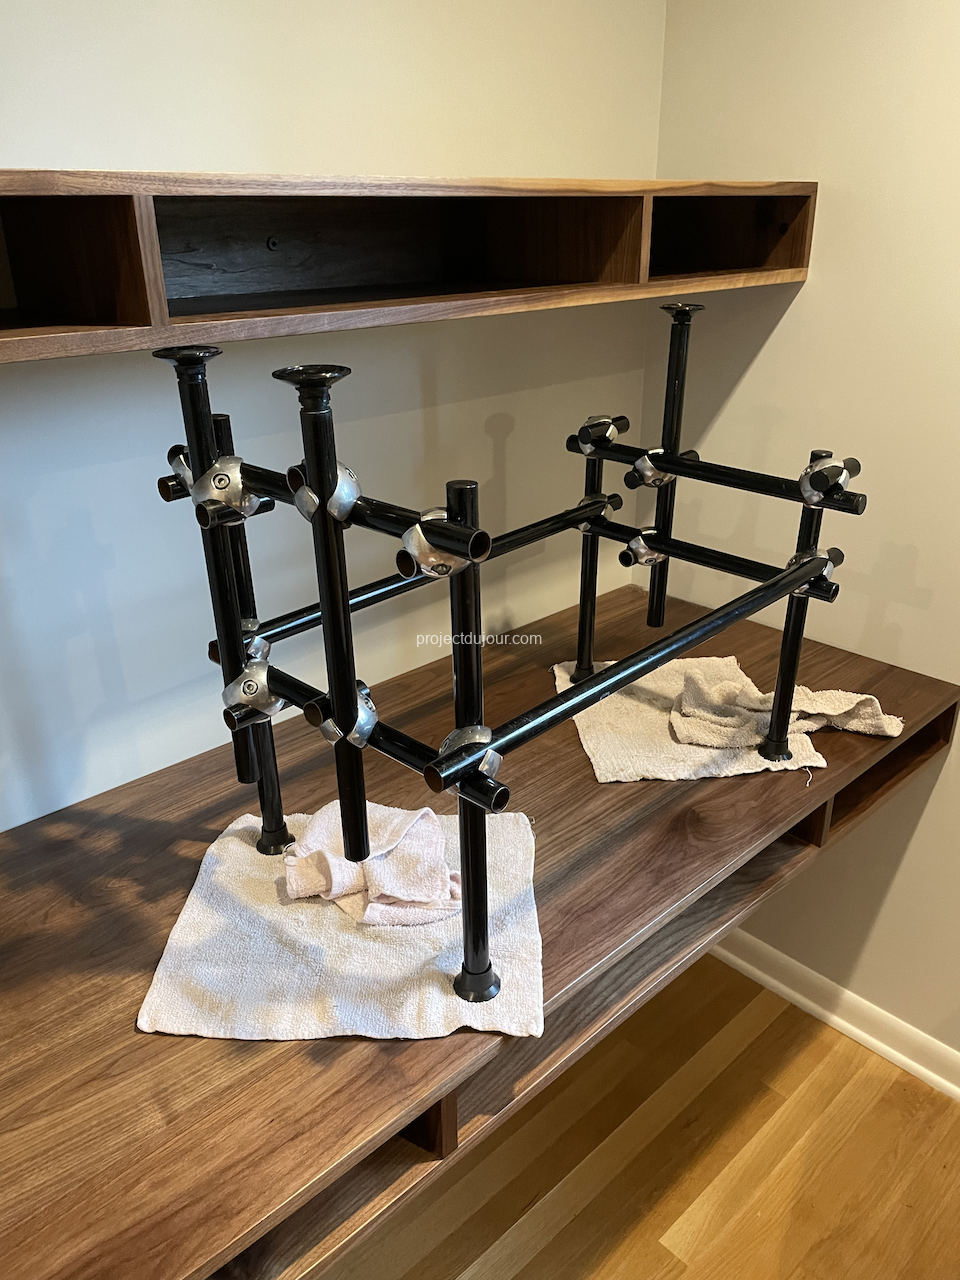
Finally, to mount the desk, I built a temporary frame using metal tubes. I’ve had these since I was 16 and re-used them over the years as shelves, desks, bed frames… They come with adjustable legs so they worked great to support the desk and level it.
Support to install the desk
I was a bit concerned about the strength of the whole desk but with 3″ structural screws on every stud I could find, it seems very sturdy.
Desk installed
I then resized the support frame and placed it on top of the desk to install the first shelf.
Support to install the first shelf
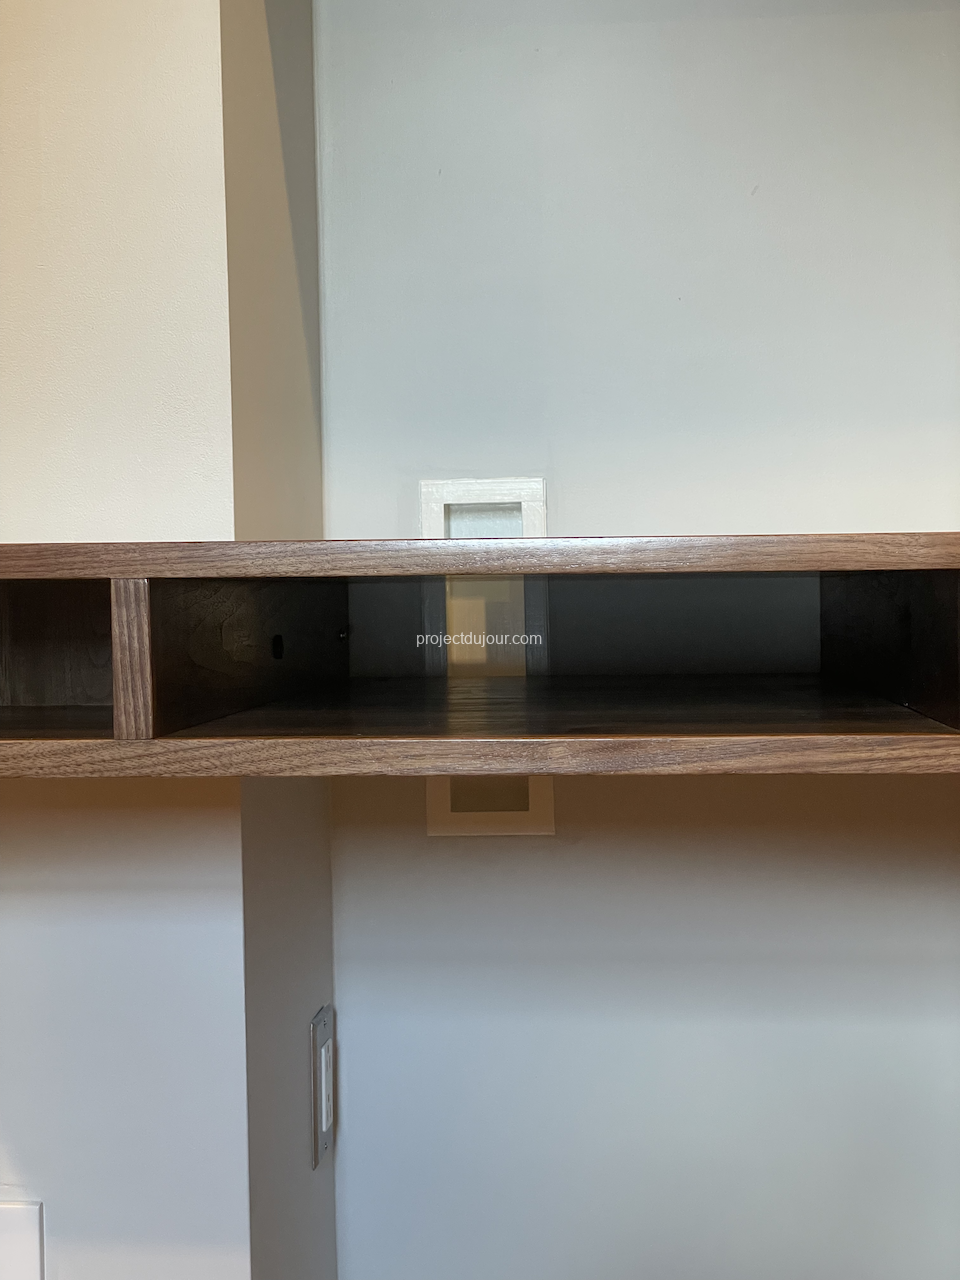
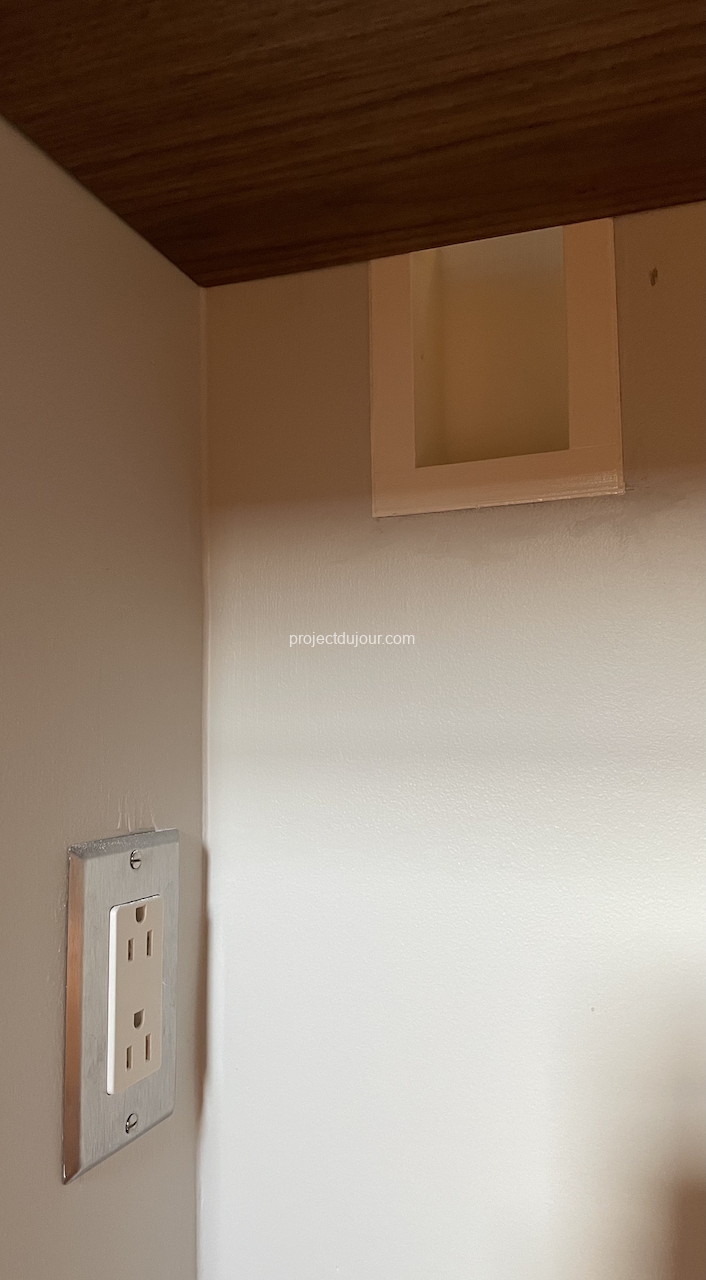
To pass cables from under the desk to the top, I could have drilled a hole in the desk but that seemed like sacrilege. Furthermore, I might add some drawers in the desk and the cables could potentially be in the way. Instead, I decided to cut the drywall and create a small nook that can be used to pass cables behind the desk.
Nook barely visibleNook behind the deskNook seen from under the desk
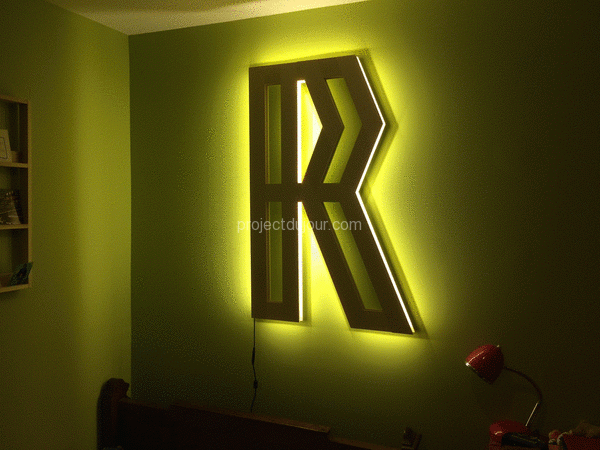
It all started with a LED strip I bought for a different project (amazon, about $12 for the LED strip). The LED strip didn’t really work for what I had in mind but my daughter really, really, really wanted to install the lights in her room. She wanted to put it under her bed but the LED seemed too modern for that old bed frame. So, we had to figure out something to mount the LED strip on…
I spent a fair amount of time trying to figure out what to do with the stair railings. I contemplated replacing them altogether or find a way to improve them. I liked the overall dimensions but the triangular pattern and the shape of the handrail were not my taste.
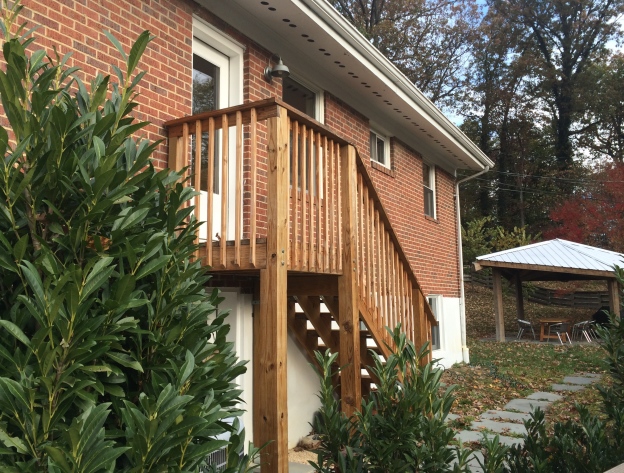
There used to be a deck wrapped around the house. It was really old and not up to code anymore so I decided to knock it down. Breaking it into pieces was trivial, getting rid of the old lumber was more troublesome and expensive, I had to rent a dumpster. At that point, I had a door on the second floor that lead to nowhere. It stayed like that for a couple of years until I finally got some time to build the stairs.
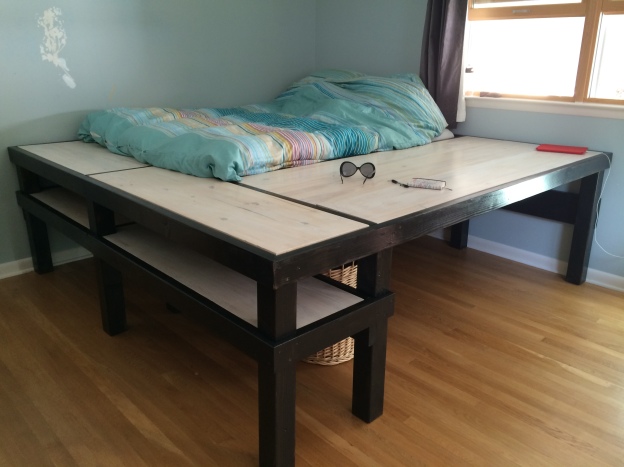
My 12 year old daughter wanted a raised bed that would also be a platform she could walk on. She saw something like that on a TV show and naturally assumed I could build it. I quickly realized that what she wanted would probably require a 500 square foot bedroom. So I decided to lump together a bed, a desk and some shelves to create a large flat surface that would resemble a platform. It’s a bed, it’s a desk, a besk, a ded, a badass bedesk.
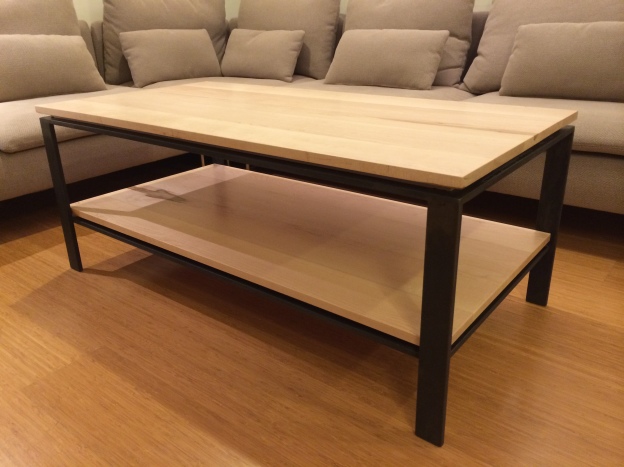
I was looking for a sturdy coffee table with simple, modern lines. Something with solid wood and a steel frame. I used to have a coffee table with a shelf underneath. That was extremely convenient to store all the stuff that would otherwise lay on the table itself so I wanted a table with a shelf. I went to the usual places, IKEA, CB2, Crate and Barrel, Room and Board, Pier 1, Ethan Allen and a few other local stores but sure enough I couldn’t find the right coffee table (at a reasonable price too). Since nobody ever built what I needed, I had an excuse to do what I wanted to do anyway, build my own coffee table.
This project started with some left over timber from past projects. I had some rough cut posts and beams, bolts, nuts and galvanized steel panels left from the patio cover and some dimensional timber from the stairs. It was supposed to be a quick project but I made the terrible “mistake” to go to a local non profit that salvages building materials, The Loading Dock. I was looking for some old window sashes but I ended up with 3 beautiful Anderson wood windows with PVC clad. At $20 a piece, it was a deal. I took the windows home and it dawned on me that I couldn’t use these beautiful windows on a shack, I had to build something nice.