It all started with a LED strip I bought for a different project (amazon, about $12 for the LED strip). The LED strip didn’t really work for what I had in mind but my daughter really, really, really wanted to install the lights in her room. She wanted to put it under her bed but the LED seemed too modern for that old bed frame. So, we had to figure out something to mount the LED strip on…
I initially thought of building a simple shape, maybe a rectangle, an hexagon or an octagon, with a strip inside and one outside but she really wanted a big R shape (her name starts with “R”). I assumed I couldn’t do anything decent that would look like an “R” mostly because it’s not easy to do clean curved cuts. After a few sketches I found a shape I liked well enough to give it a try.
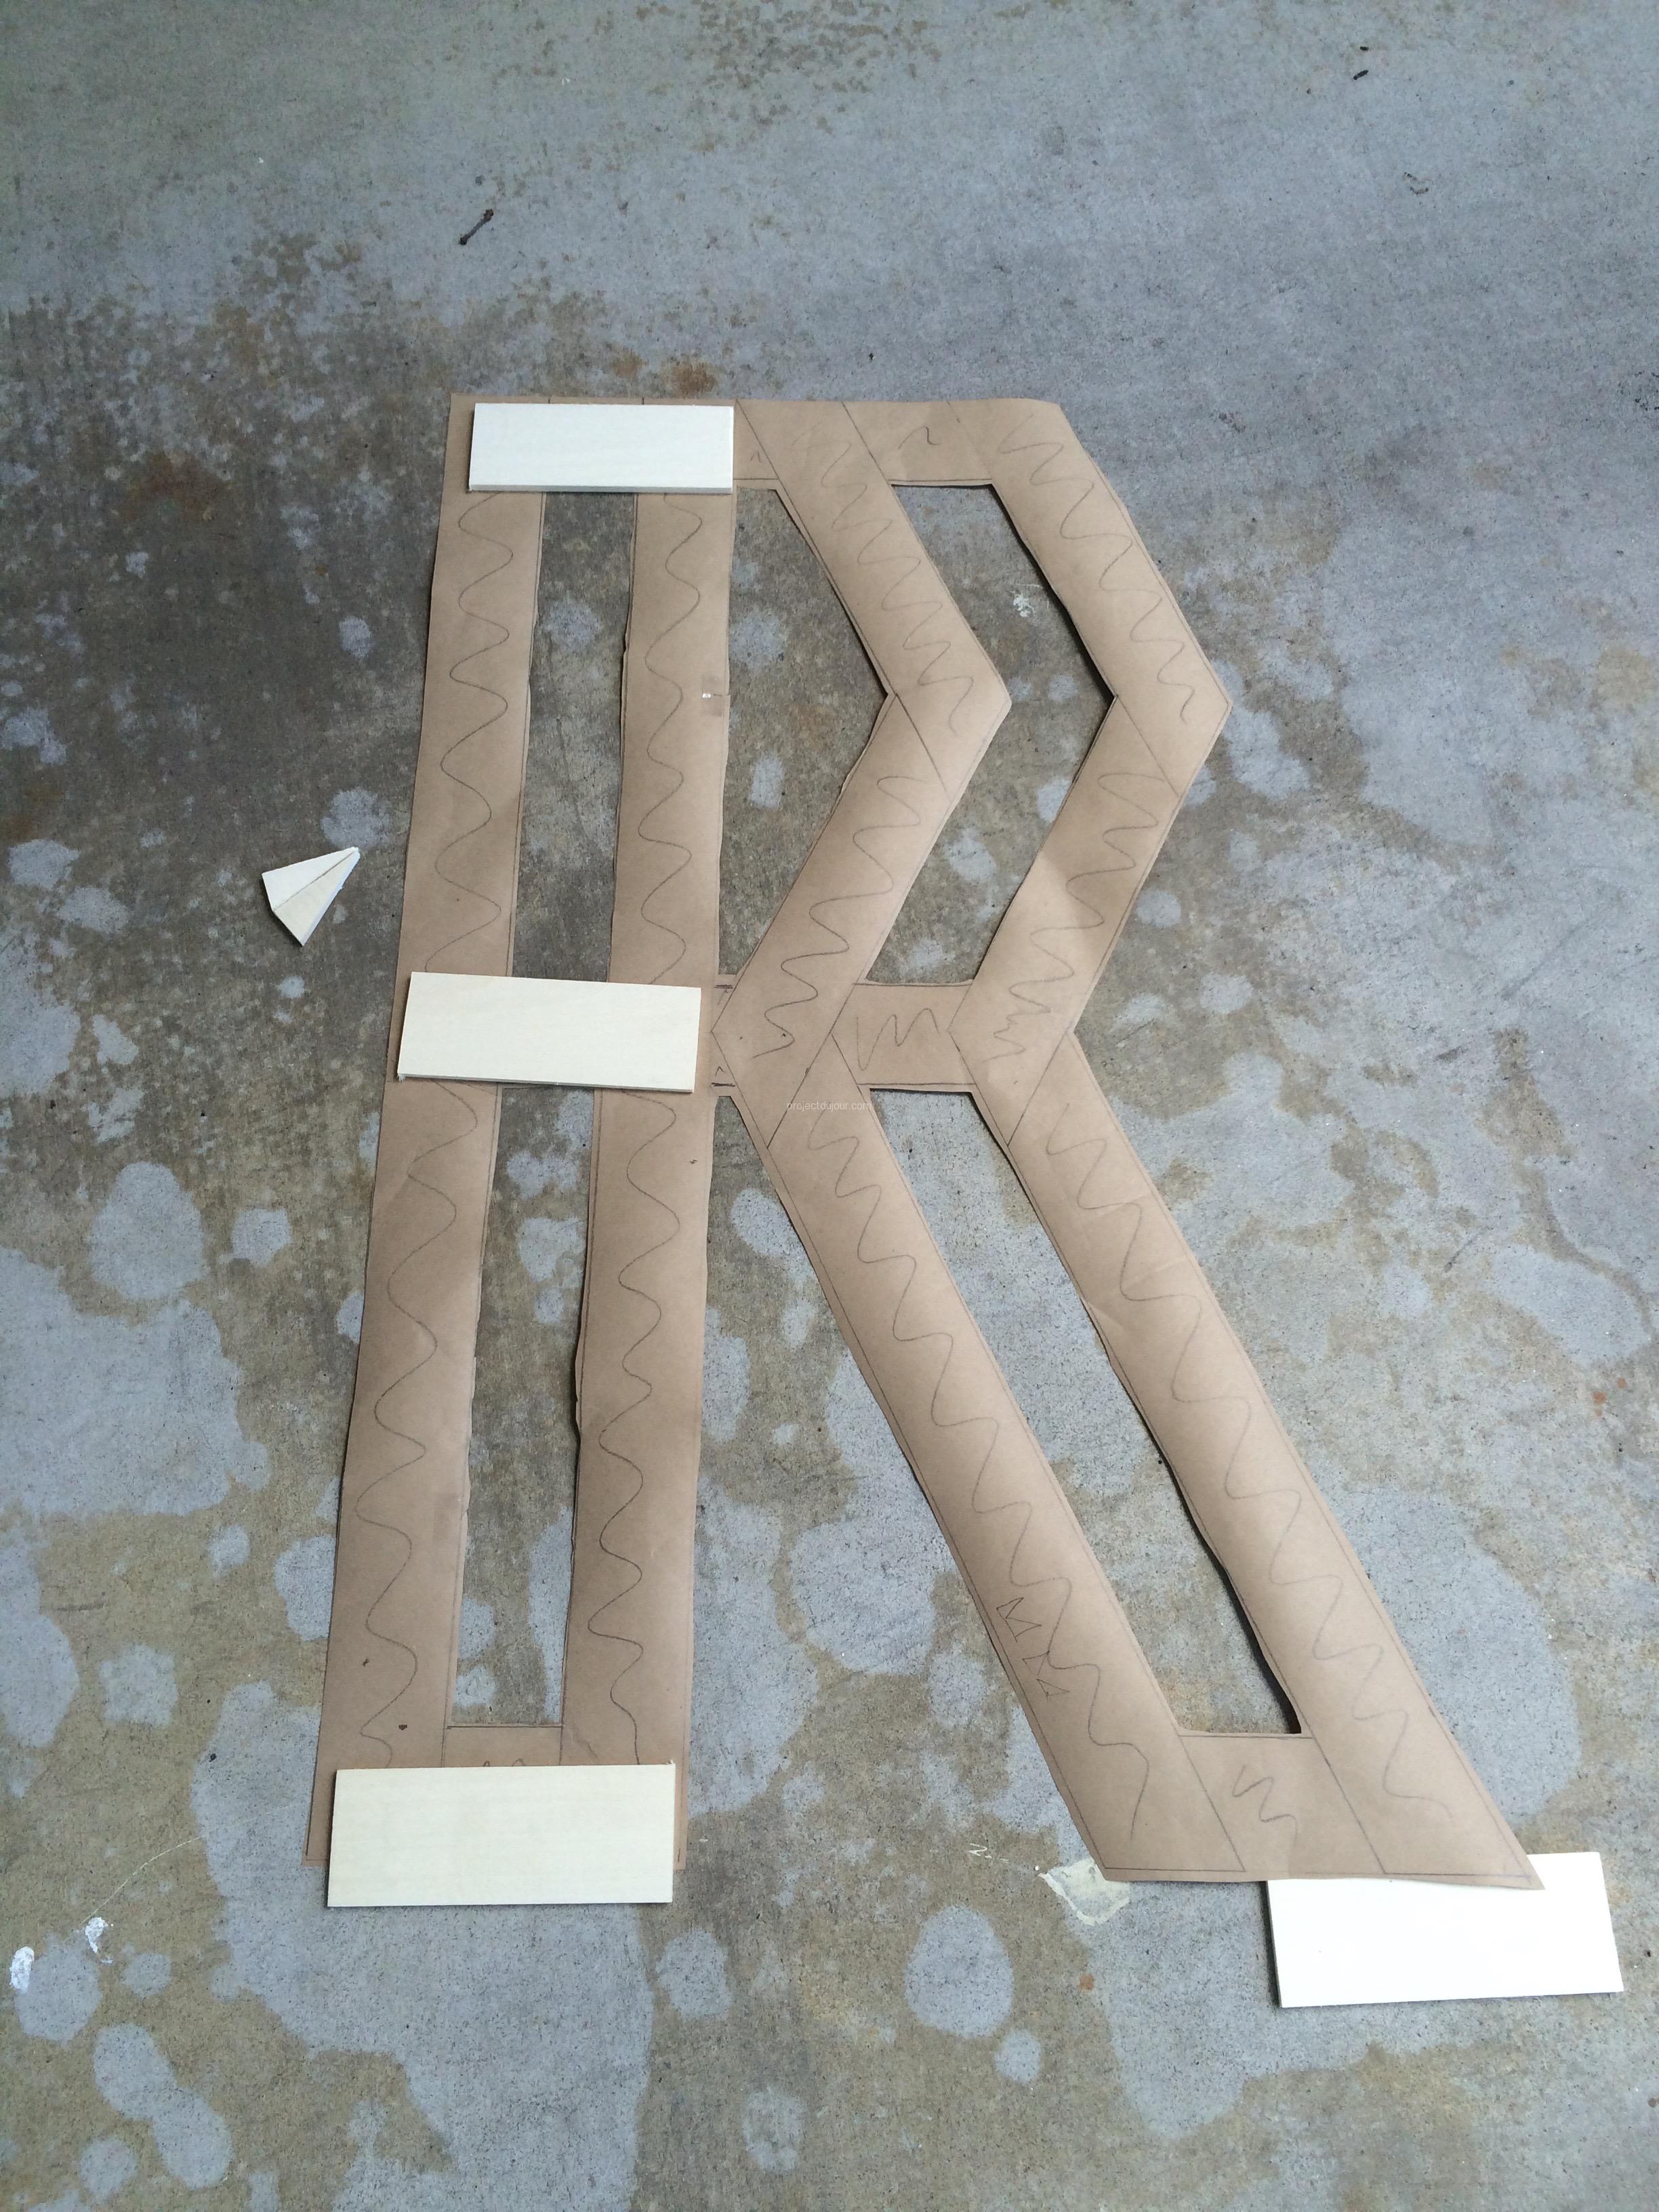
“R” shape design, full size template in paper craft
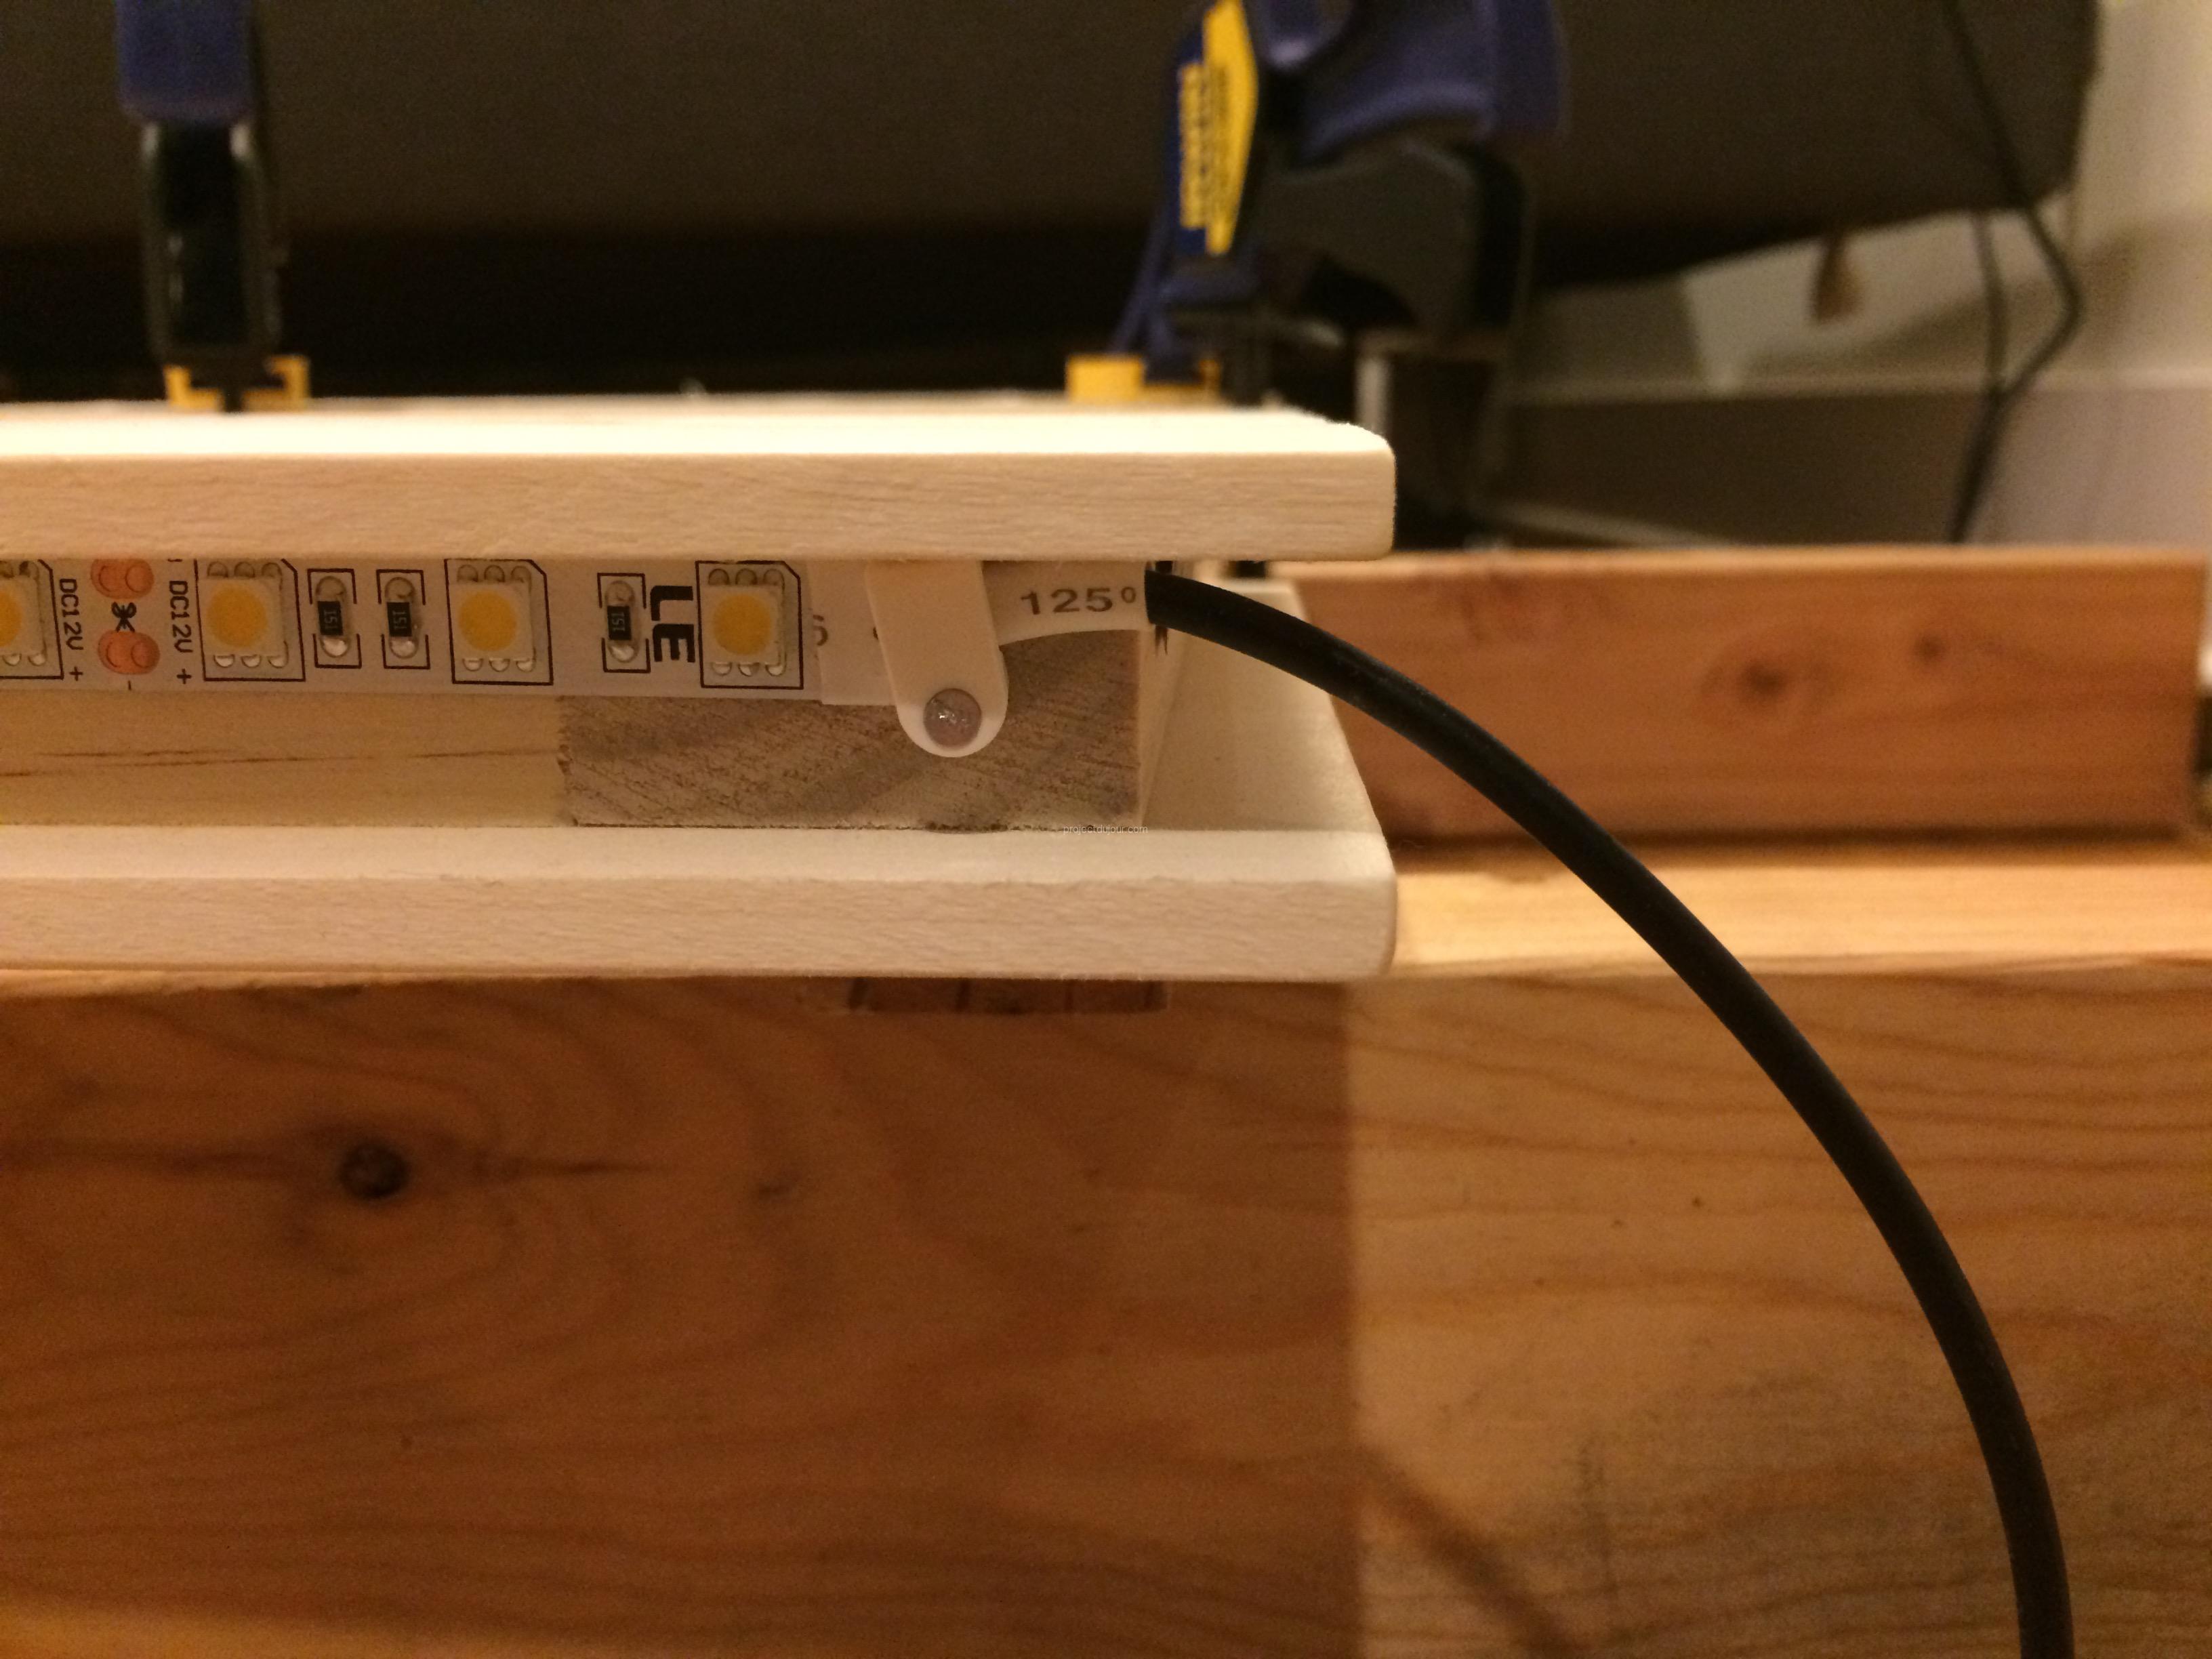
Each bar is “H” shaped, the core is made of 2″ by 1″ solid pine (actually 1 1/2″ by 3/4″). The back and front are made of thin Aspen pine planks, 2 1/2″ wide, 1/4″ thick. The angles on the “R” are all 90, 45 and 22.5 degrees so they were easy to cut with a miter saw. All the pieces hold with wood glue and nothing else. The overall size is such that a 5 meter LED strip can cover the outside and inside.
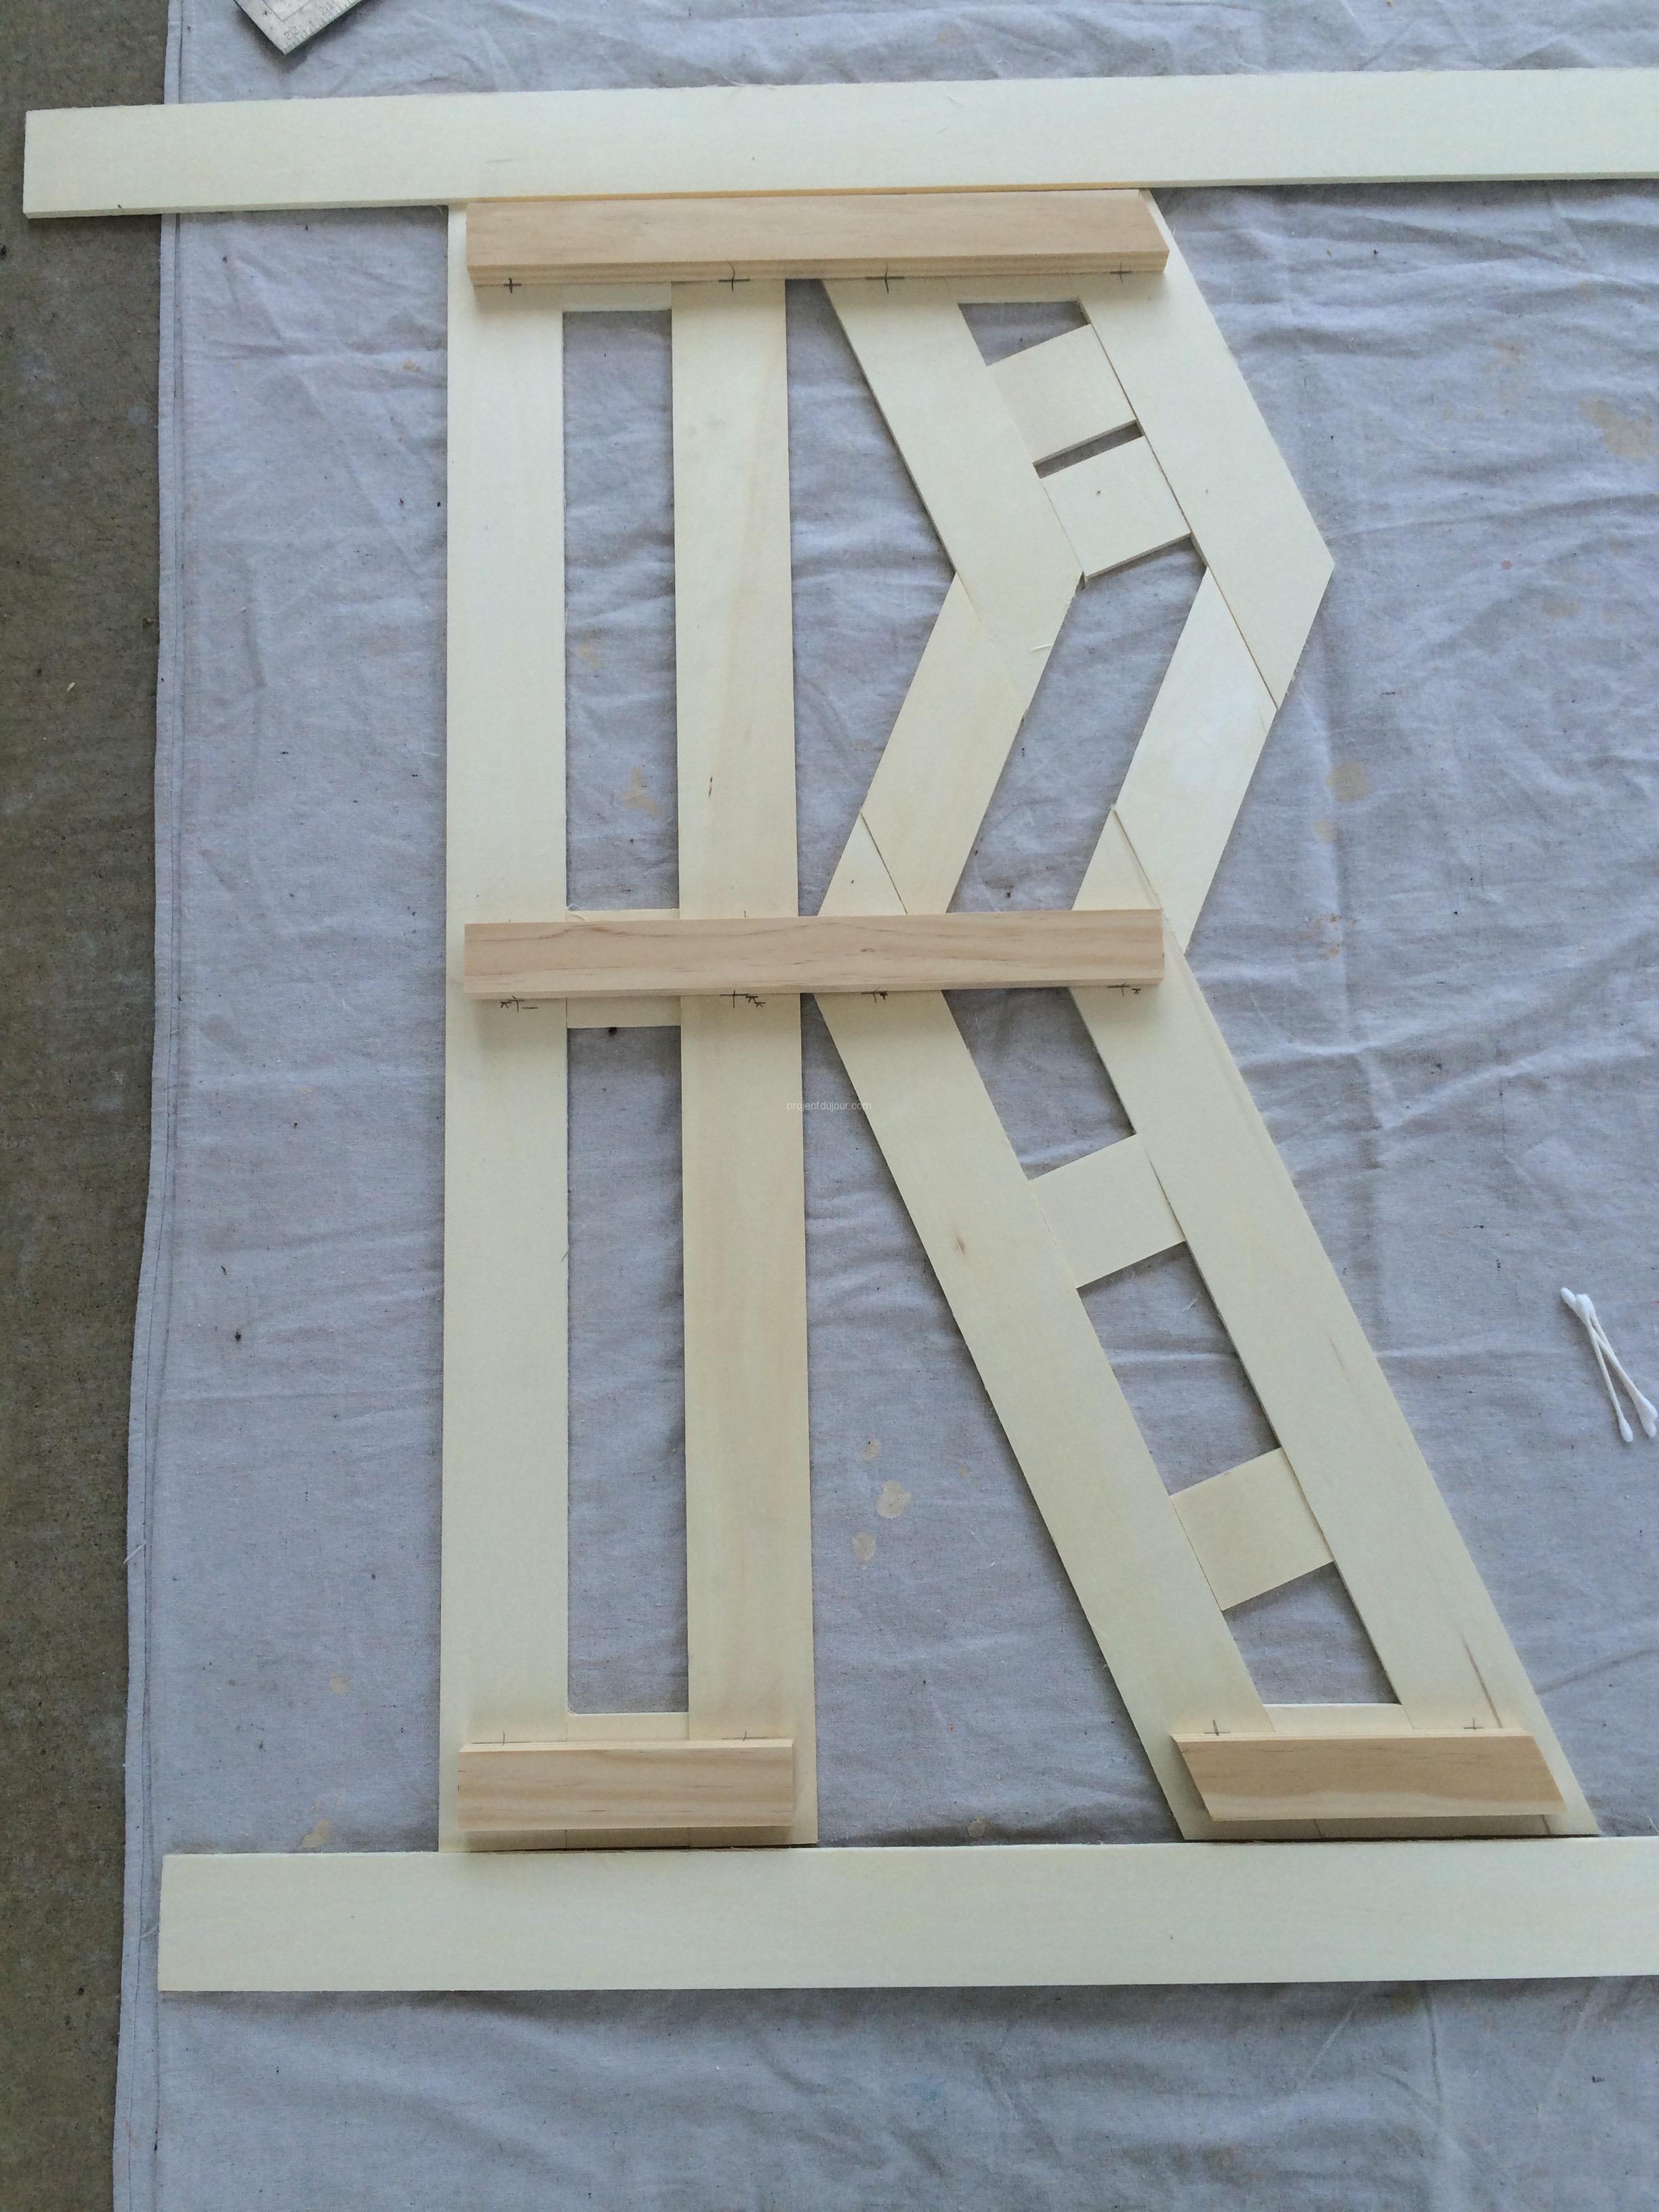
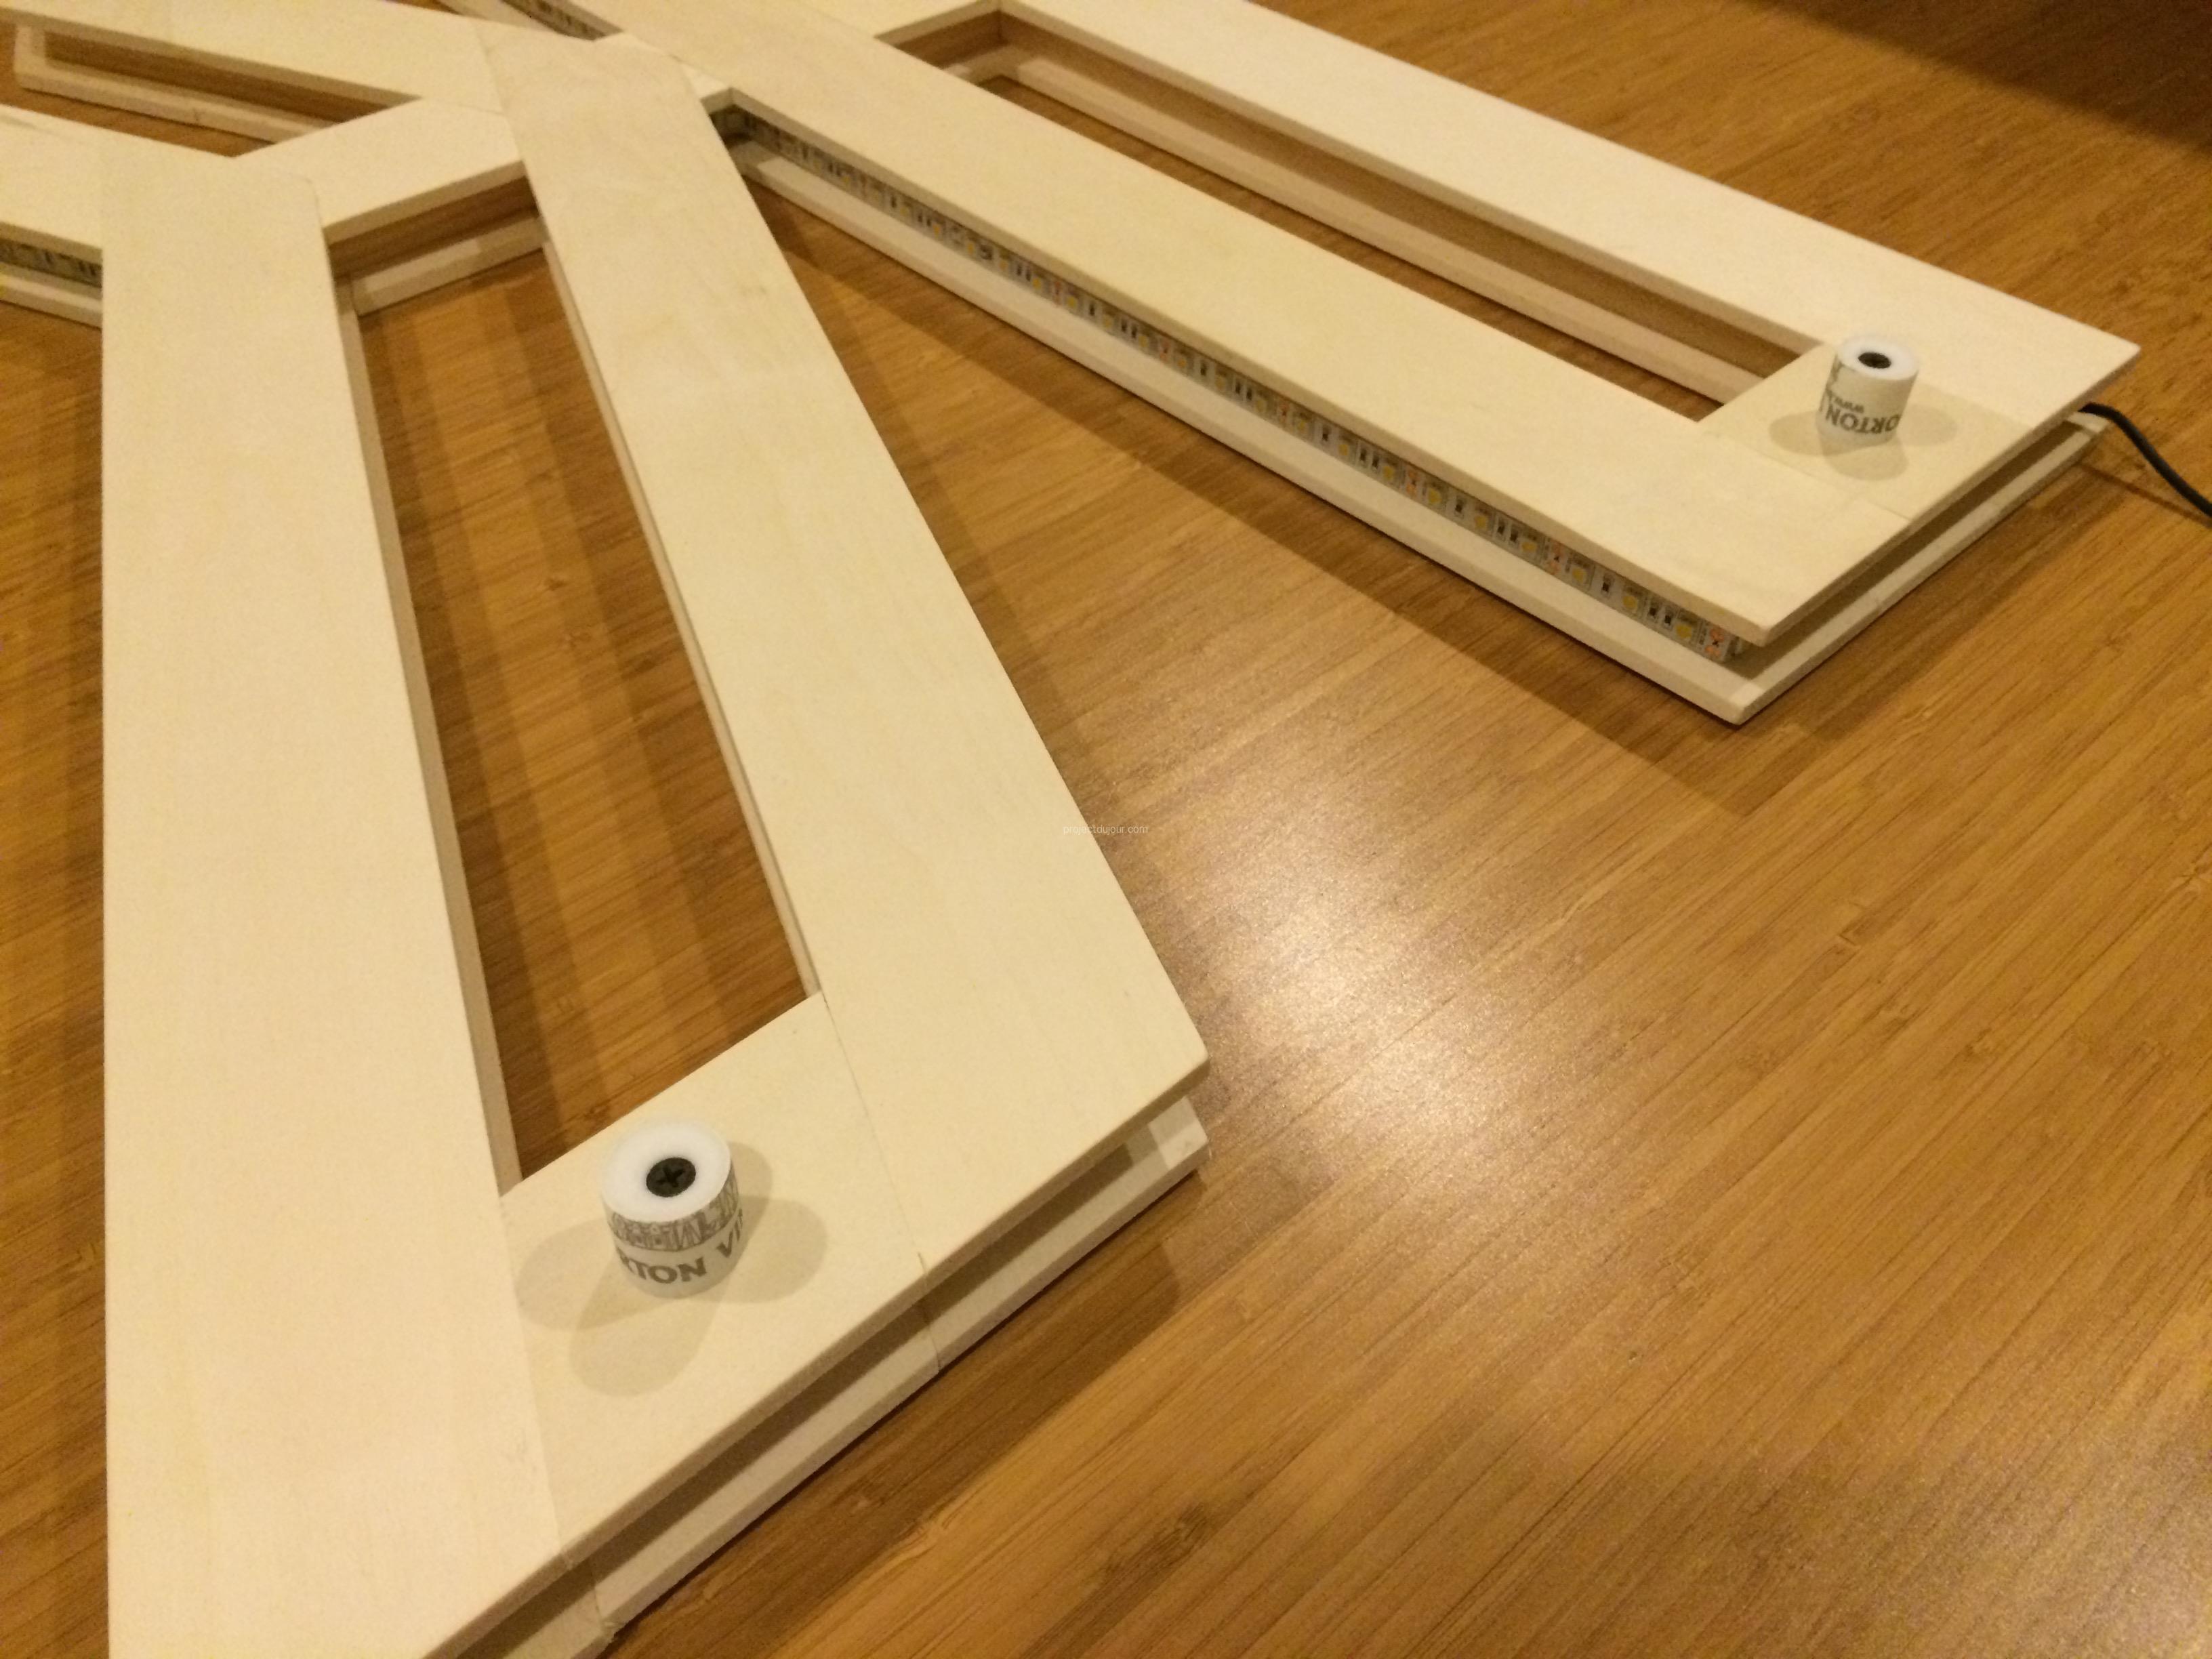
Pieces in place, layers are crisscrossed for strength
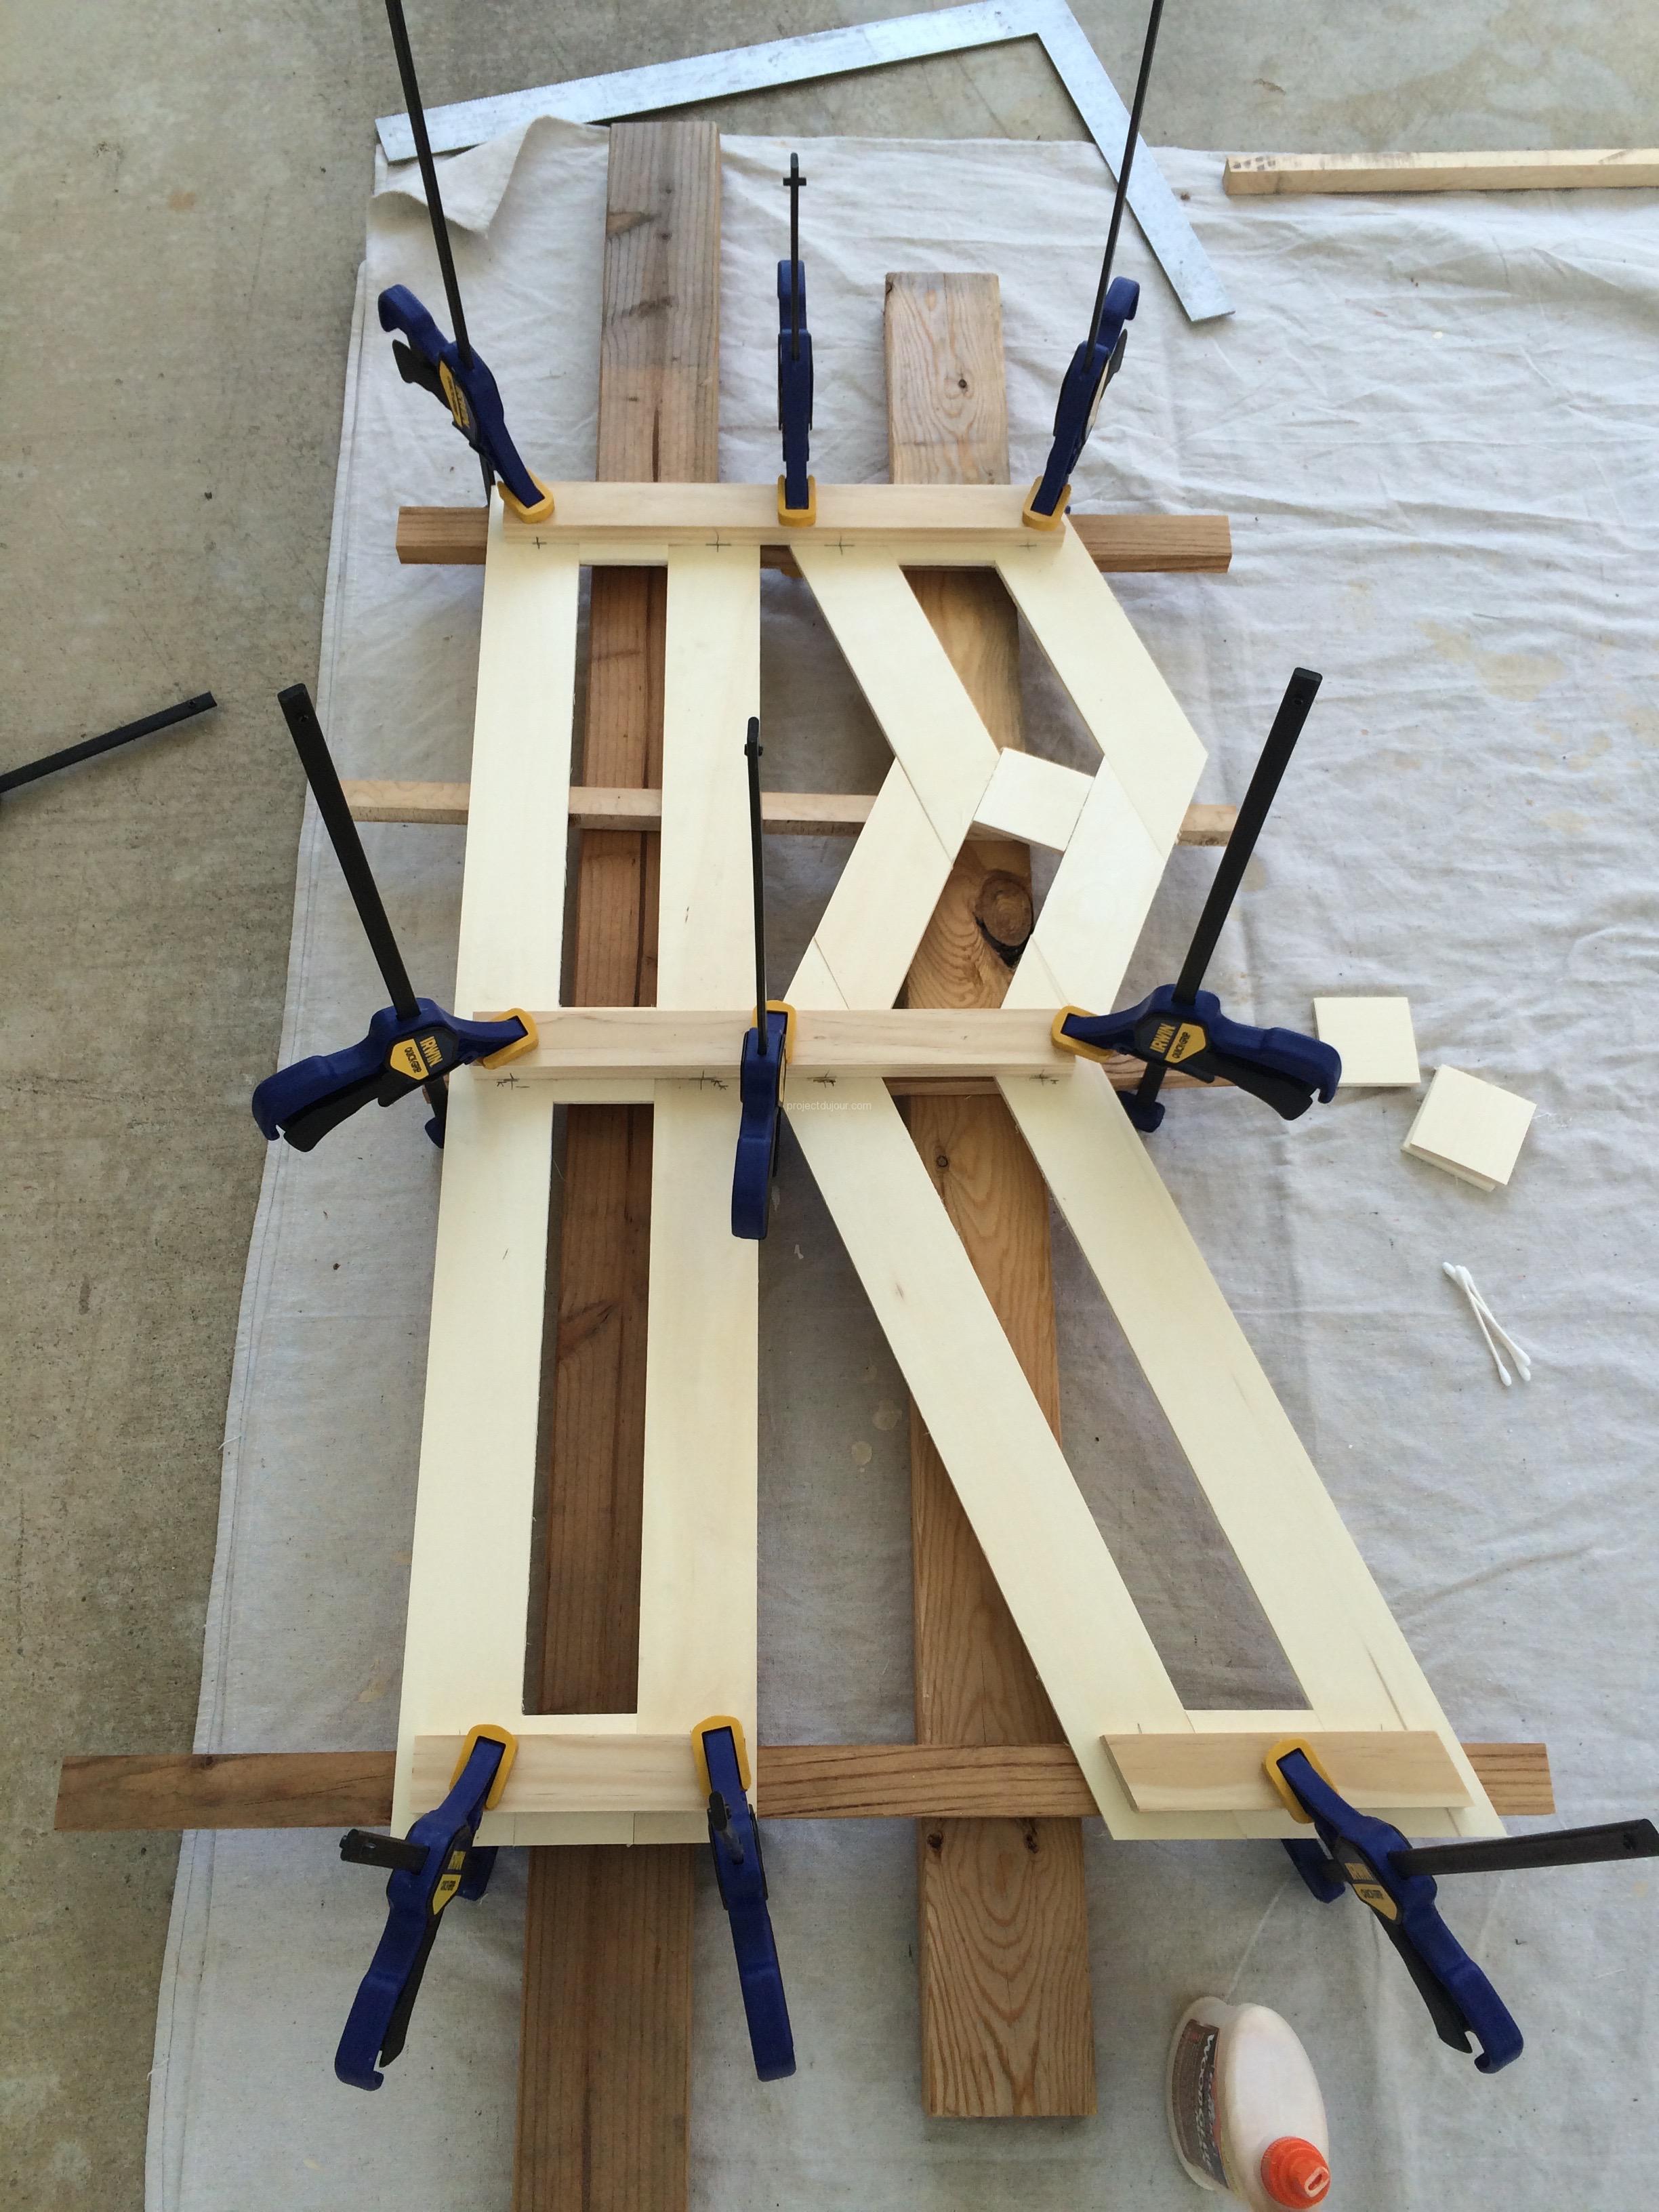
Pieces are held in place with clamps while the glue sets
Once all the back and middle pieces were glued, I cut a little groove in the middle of the “R” so I could run a wire to power the inside of the “R” loop. The LED strip is holding on the inner piece using double sided tape (the strip came mounted on double sided tape). To prevent the cable from pulling the strip away, I nailed a small cable clip at the end.
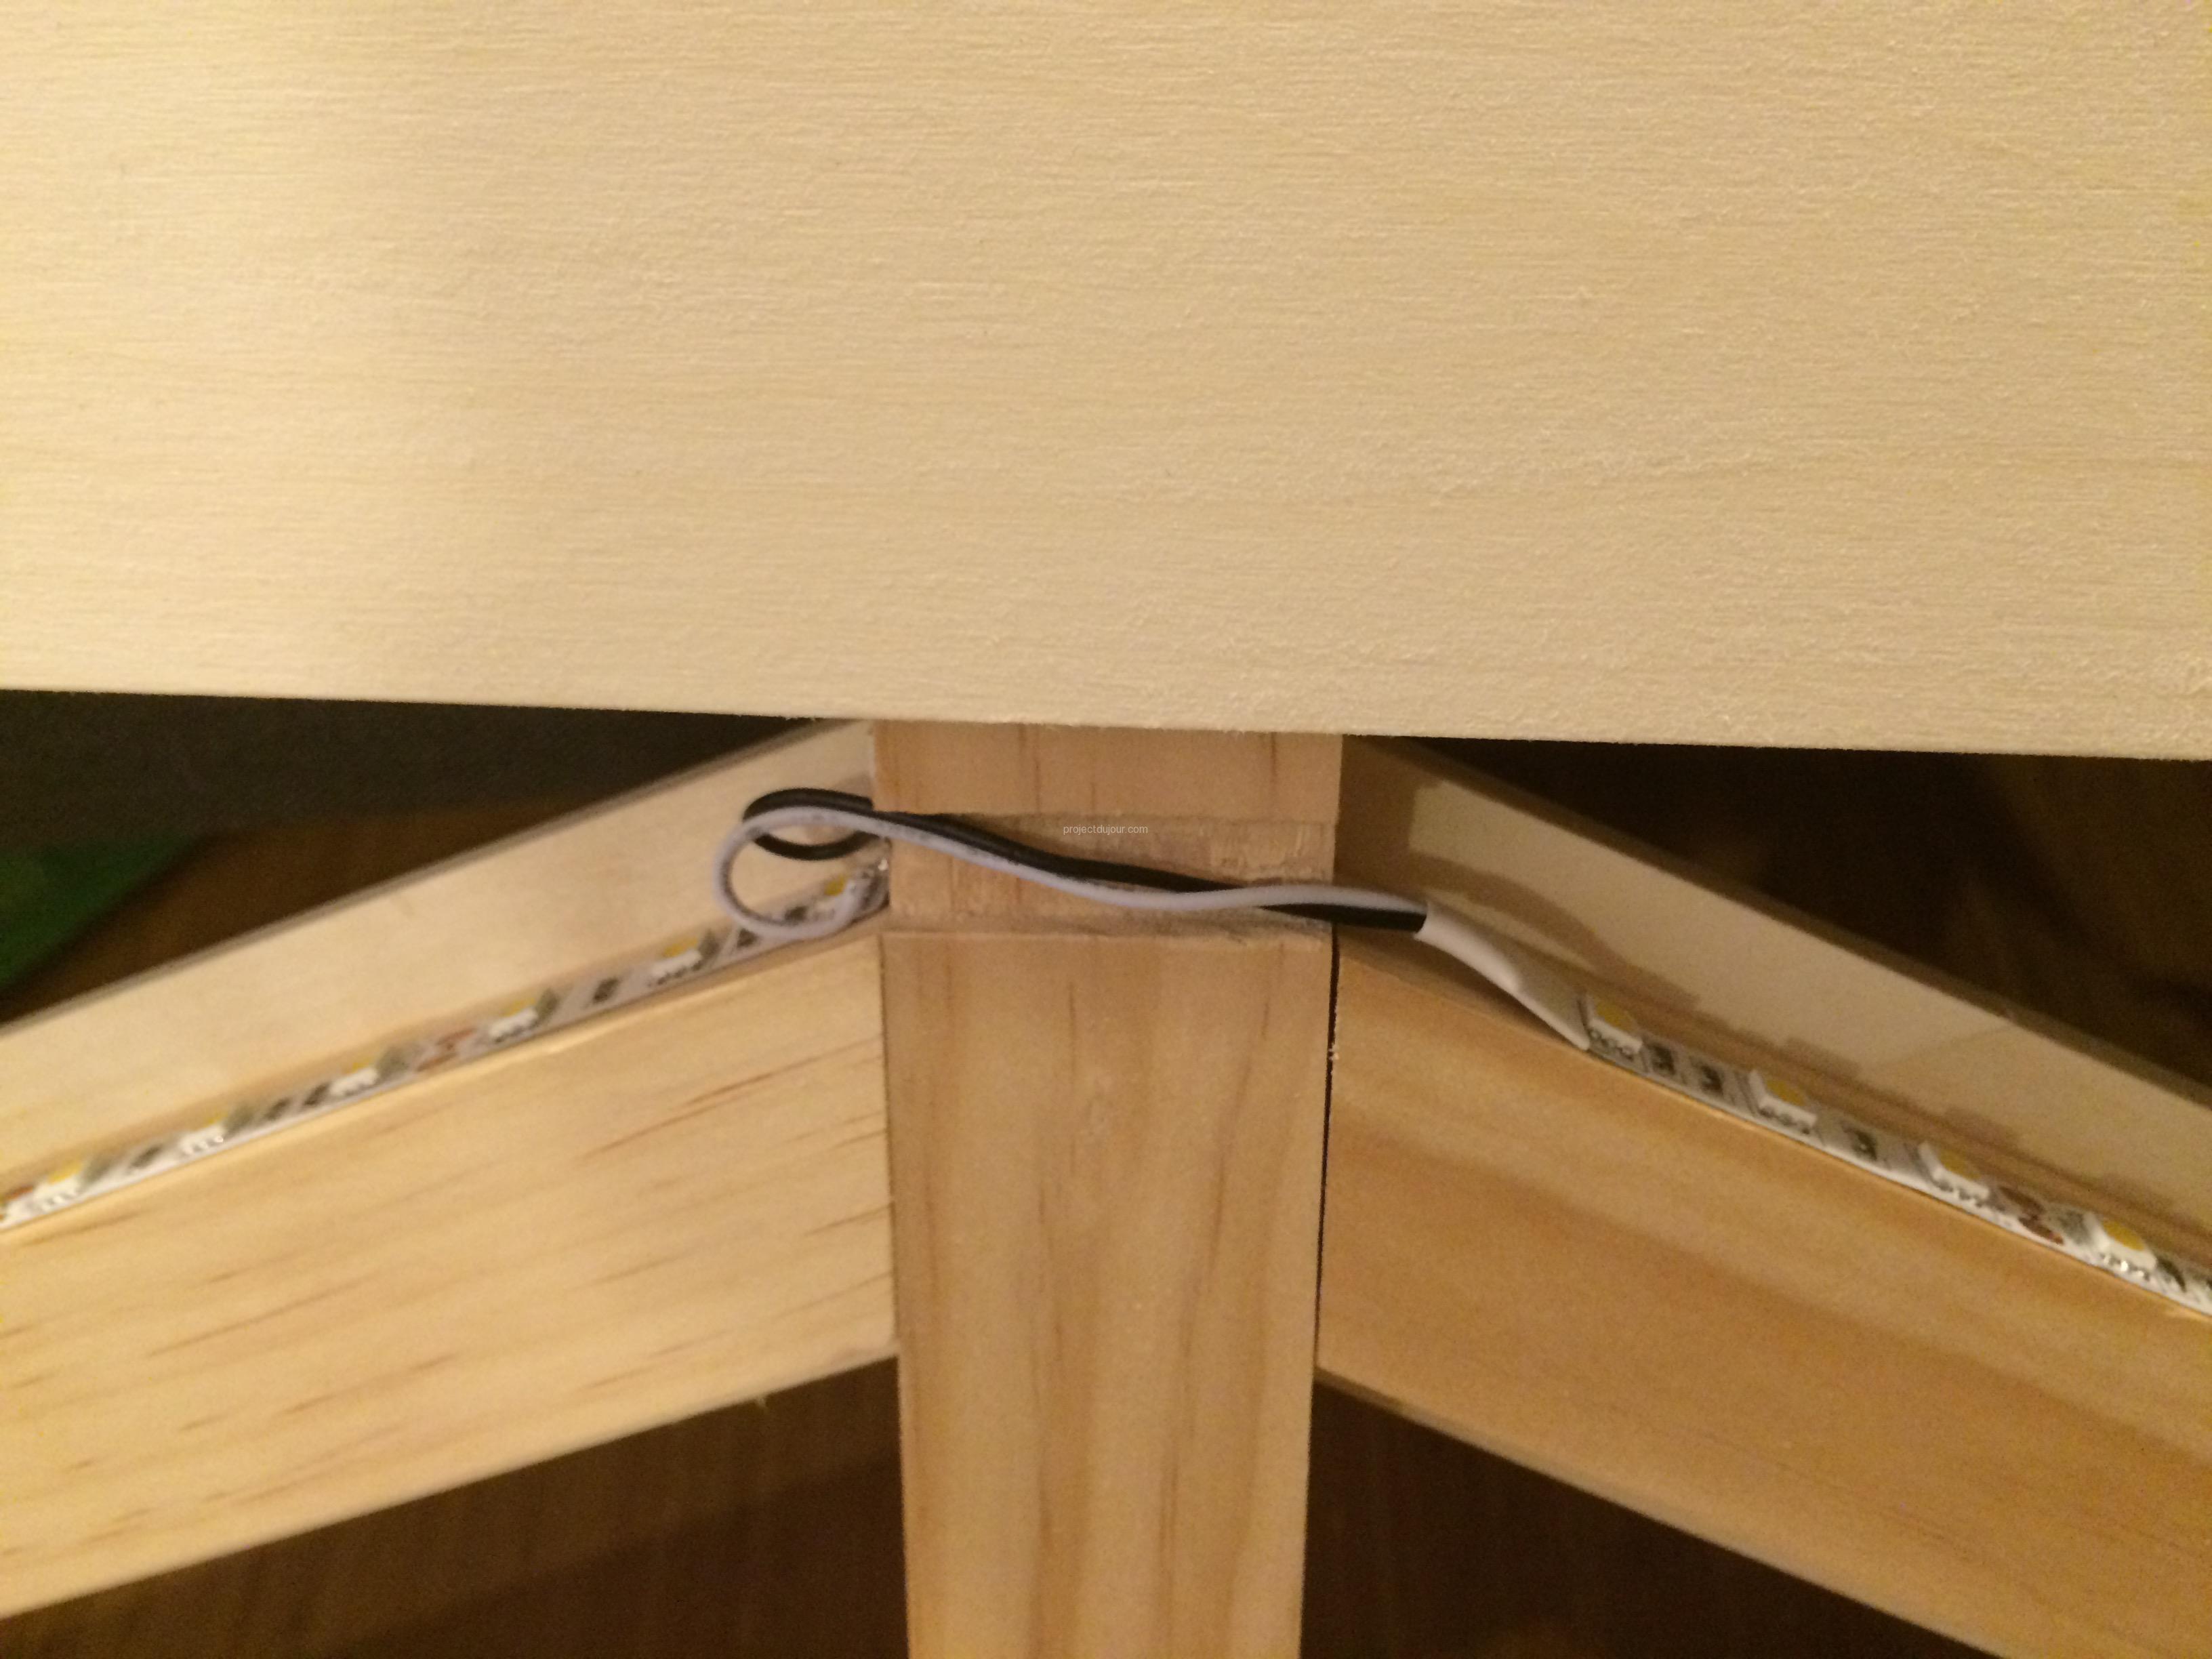
Groove in middle layer to run cable
Cable clip at end of LED strip
While testing the lights, I realized it looked much better if it wasn’t holding directly against the wall. With a bit of space between the back and the wall, the light was able to flow behind the letter and made it look like it was floating. I decided to use a single hook on top and a couple of spacers at the bottom to keep the “R” parallel to the wall.
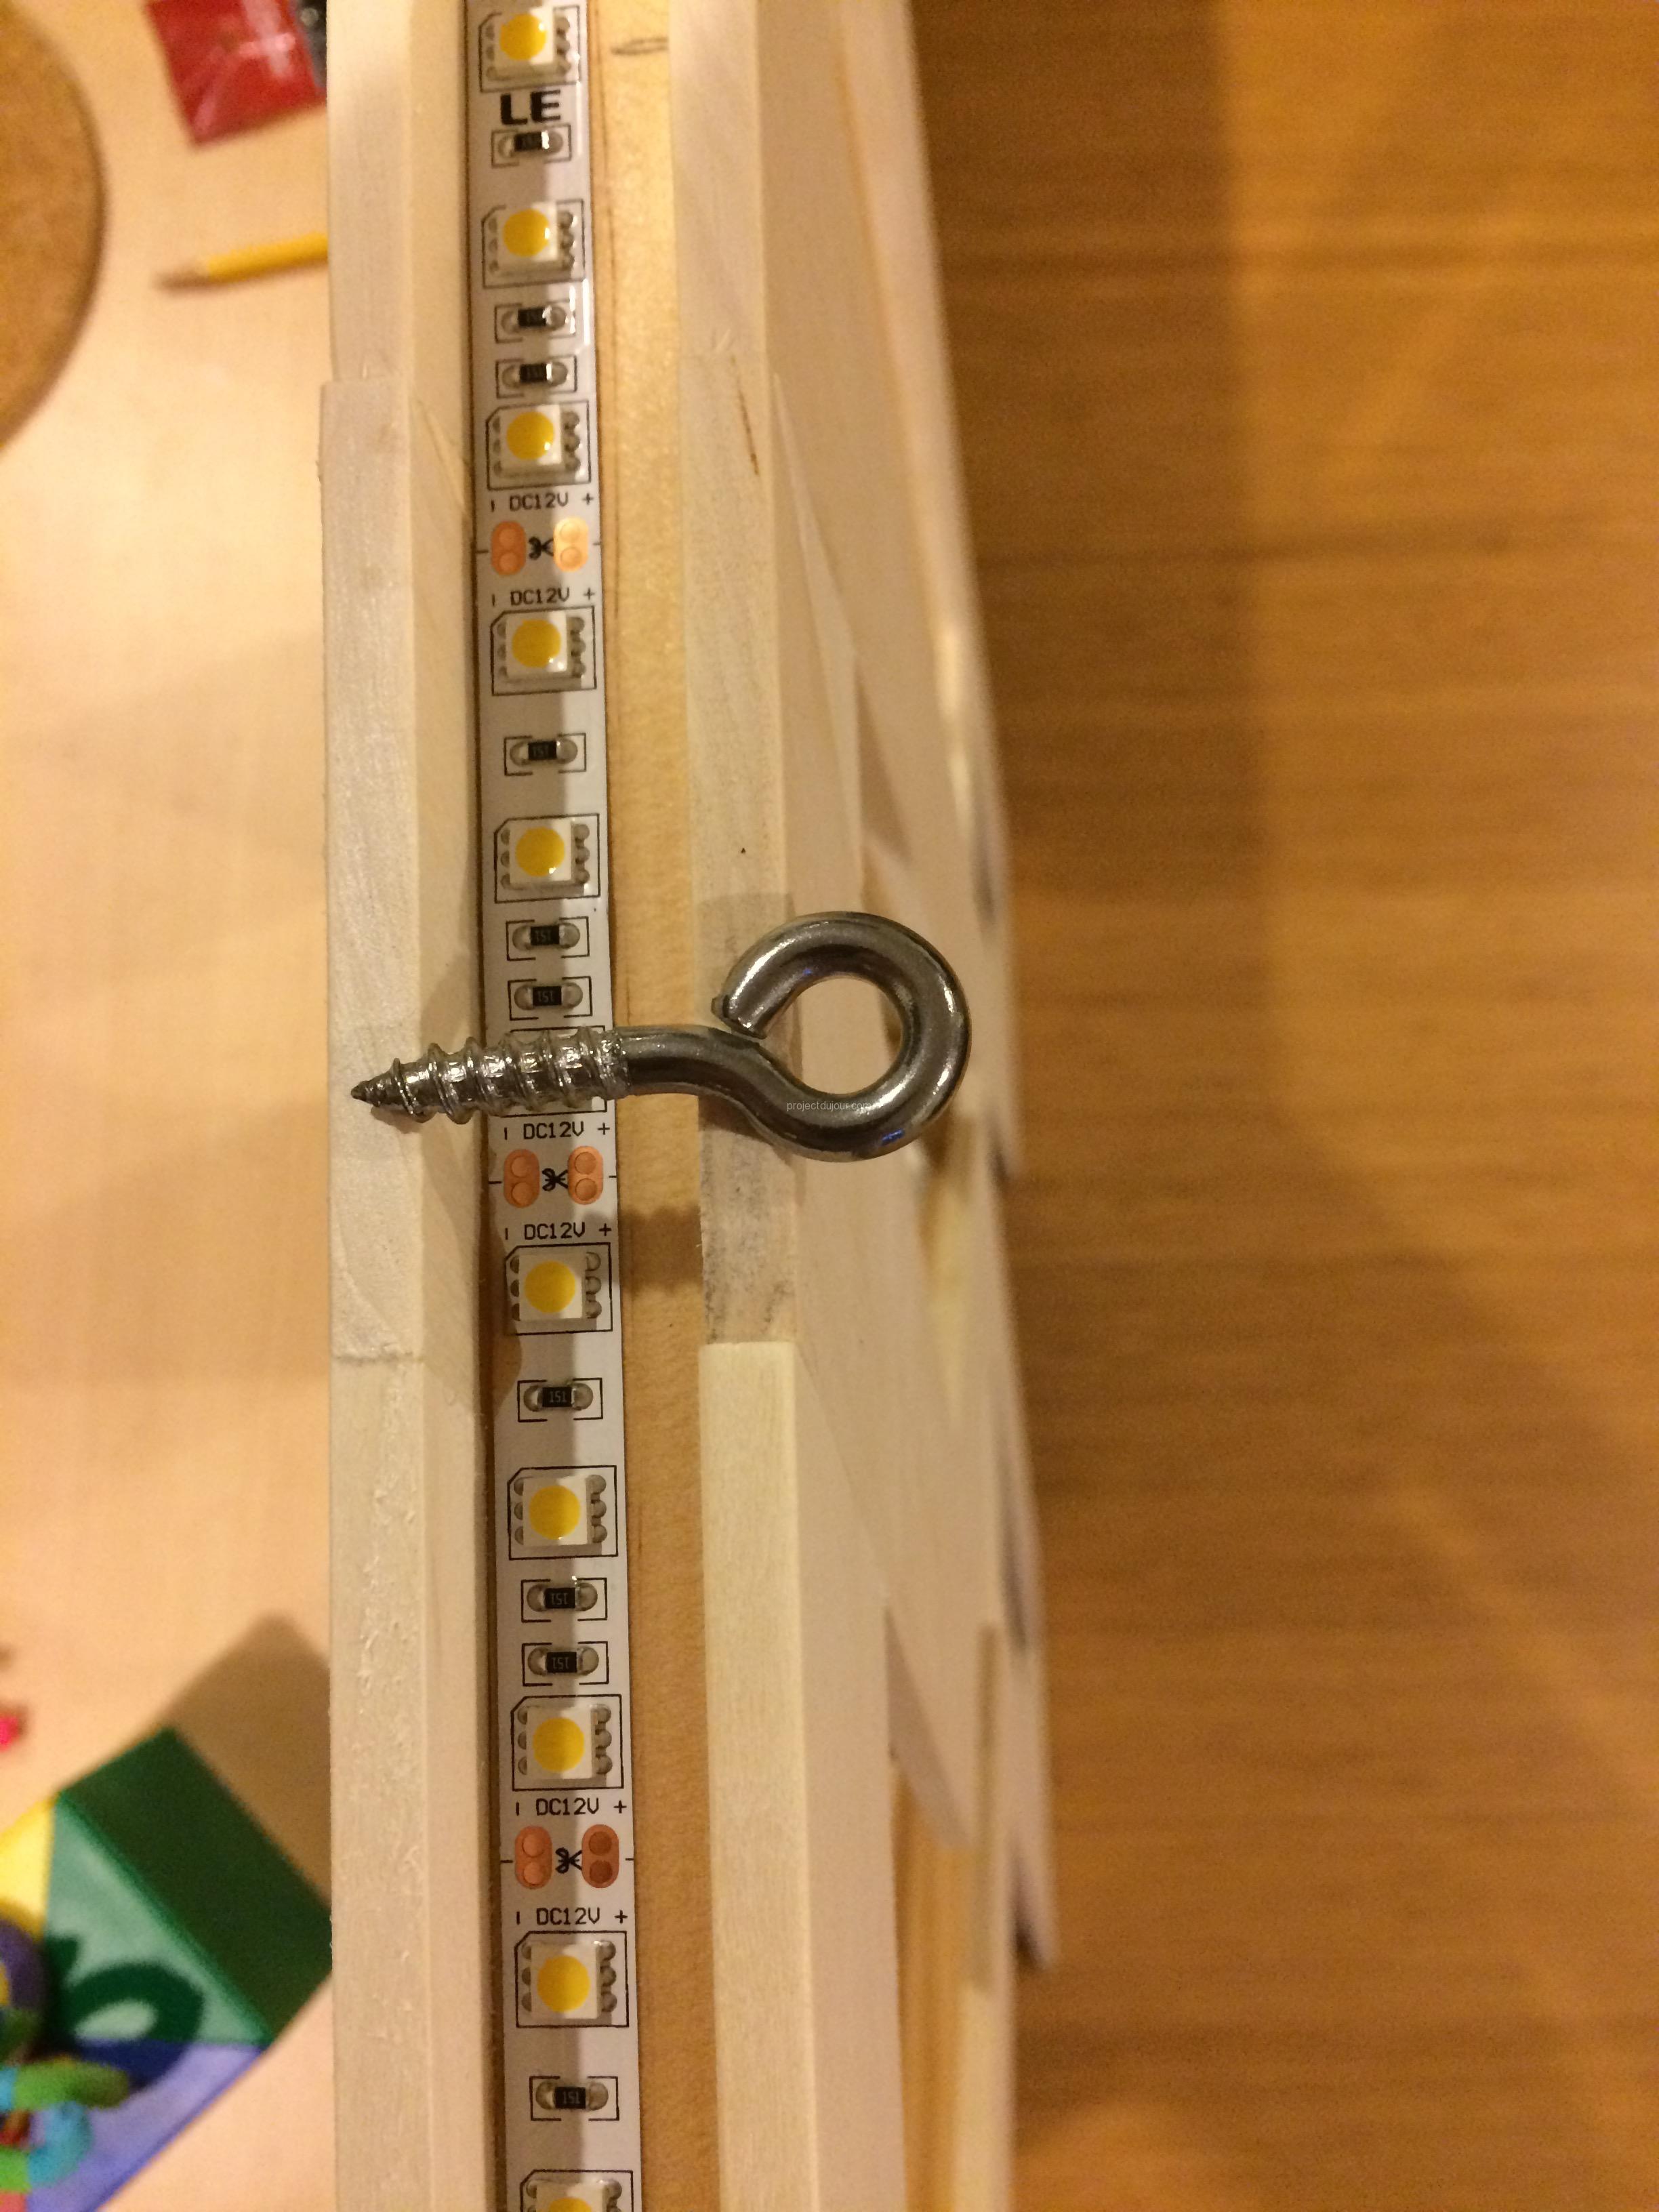
Stainless steel hook on top
Spacers at the bottom, made of a wine bottle cork cut in half
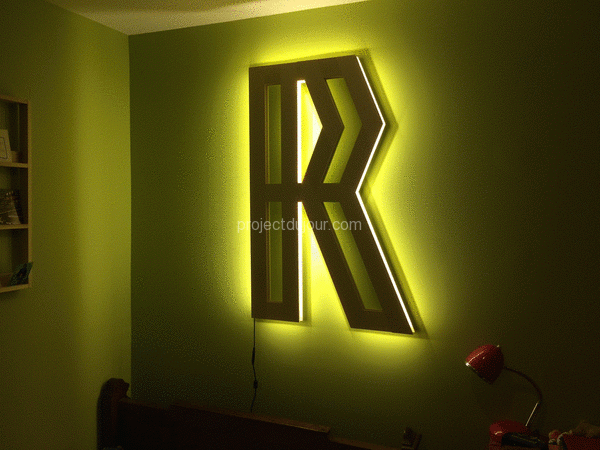
Here is the final result, “R” shaped LED light, off and on.
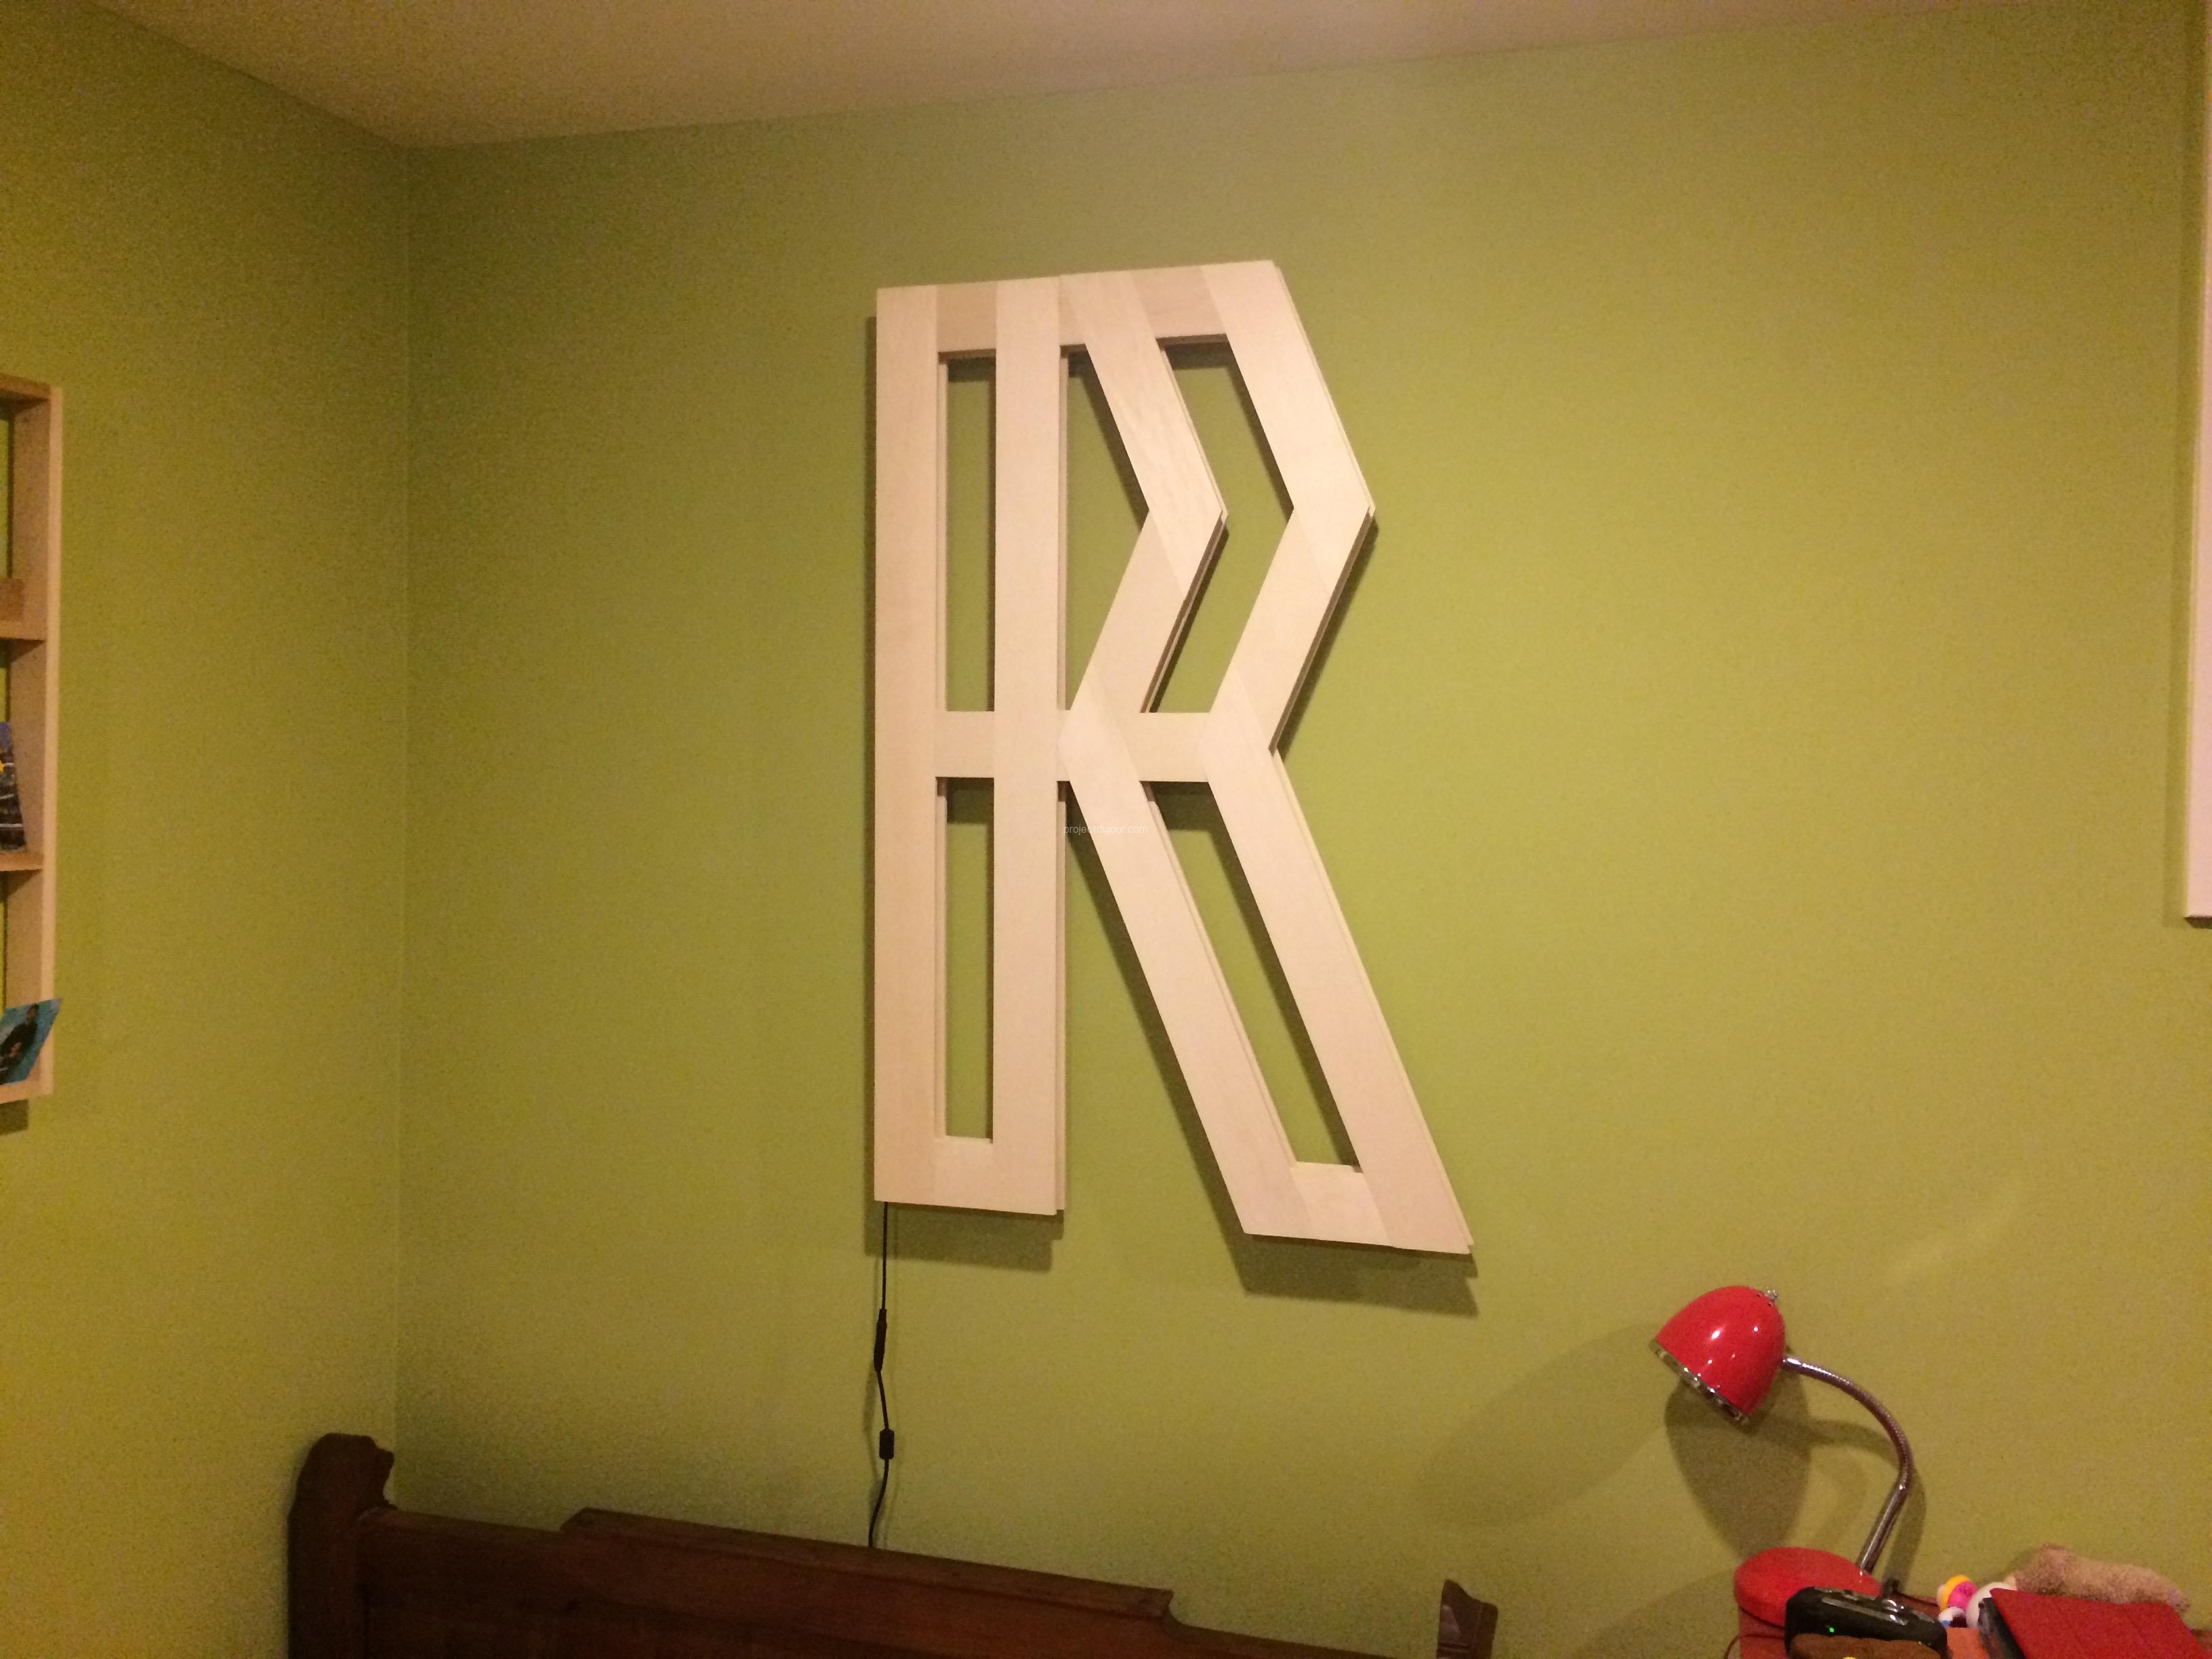
Off
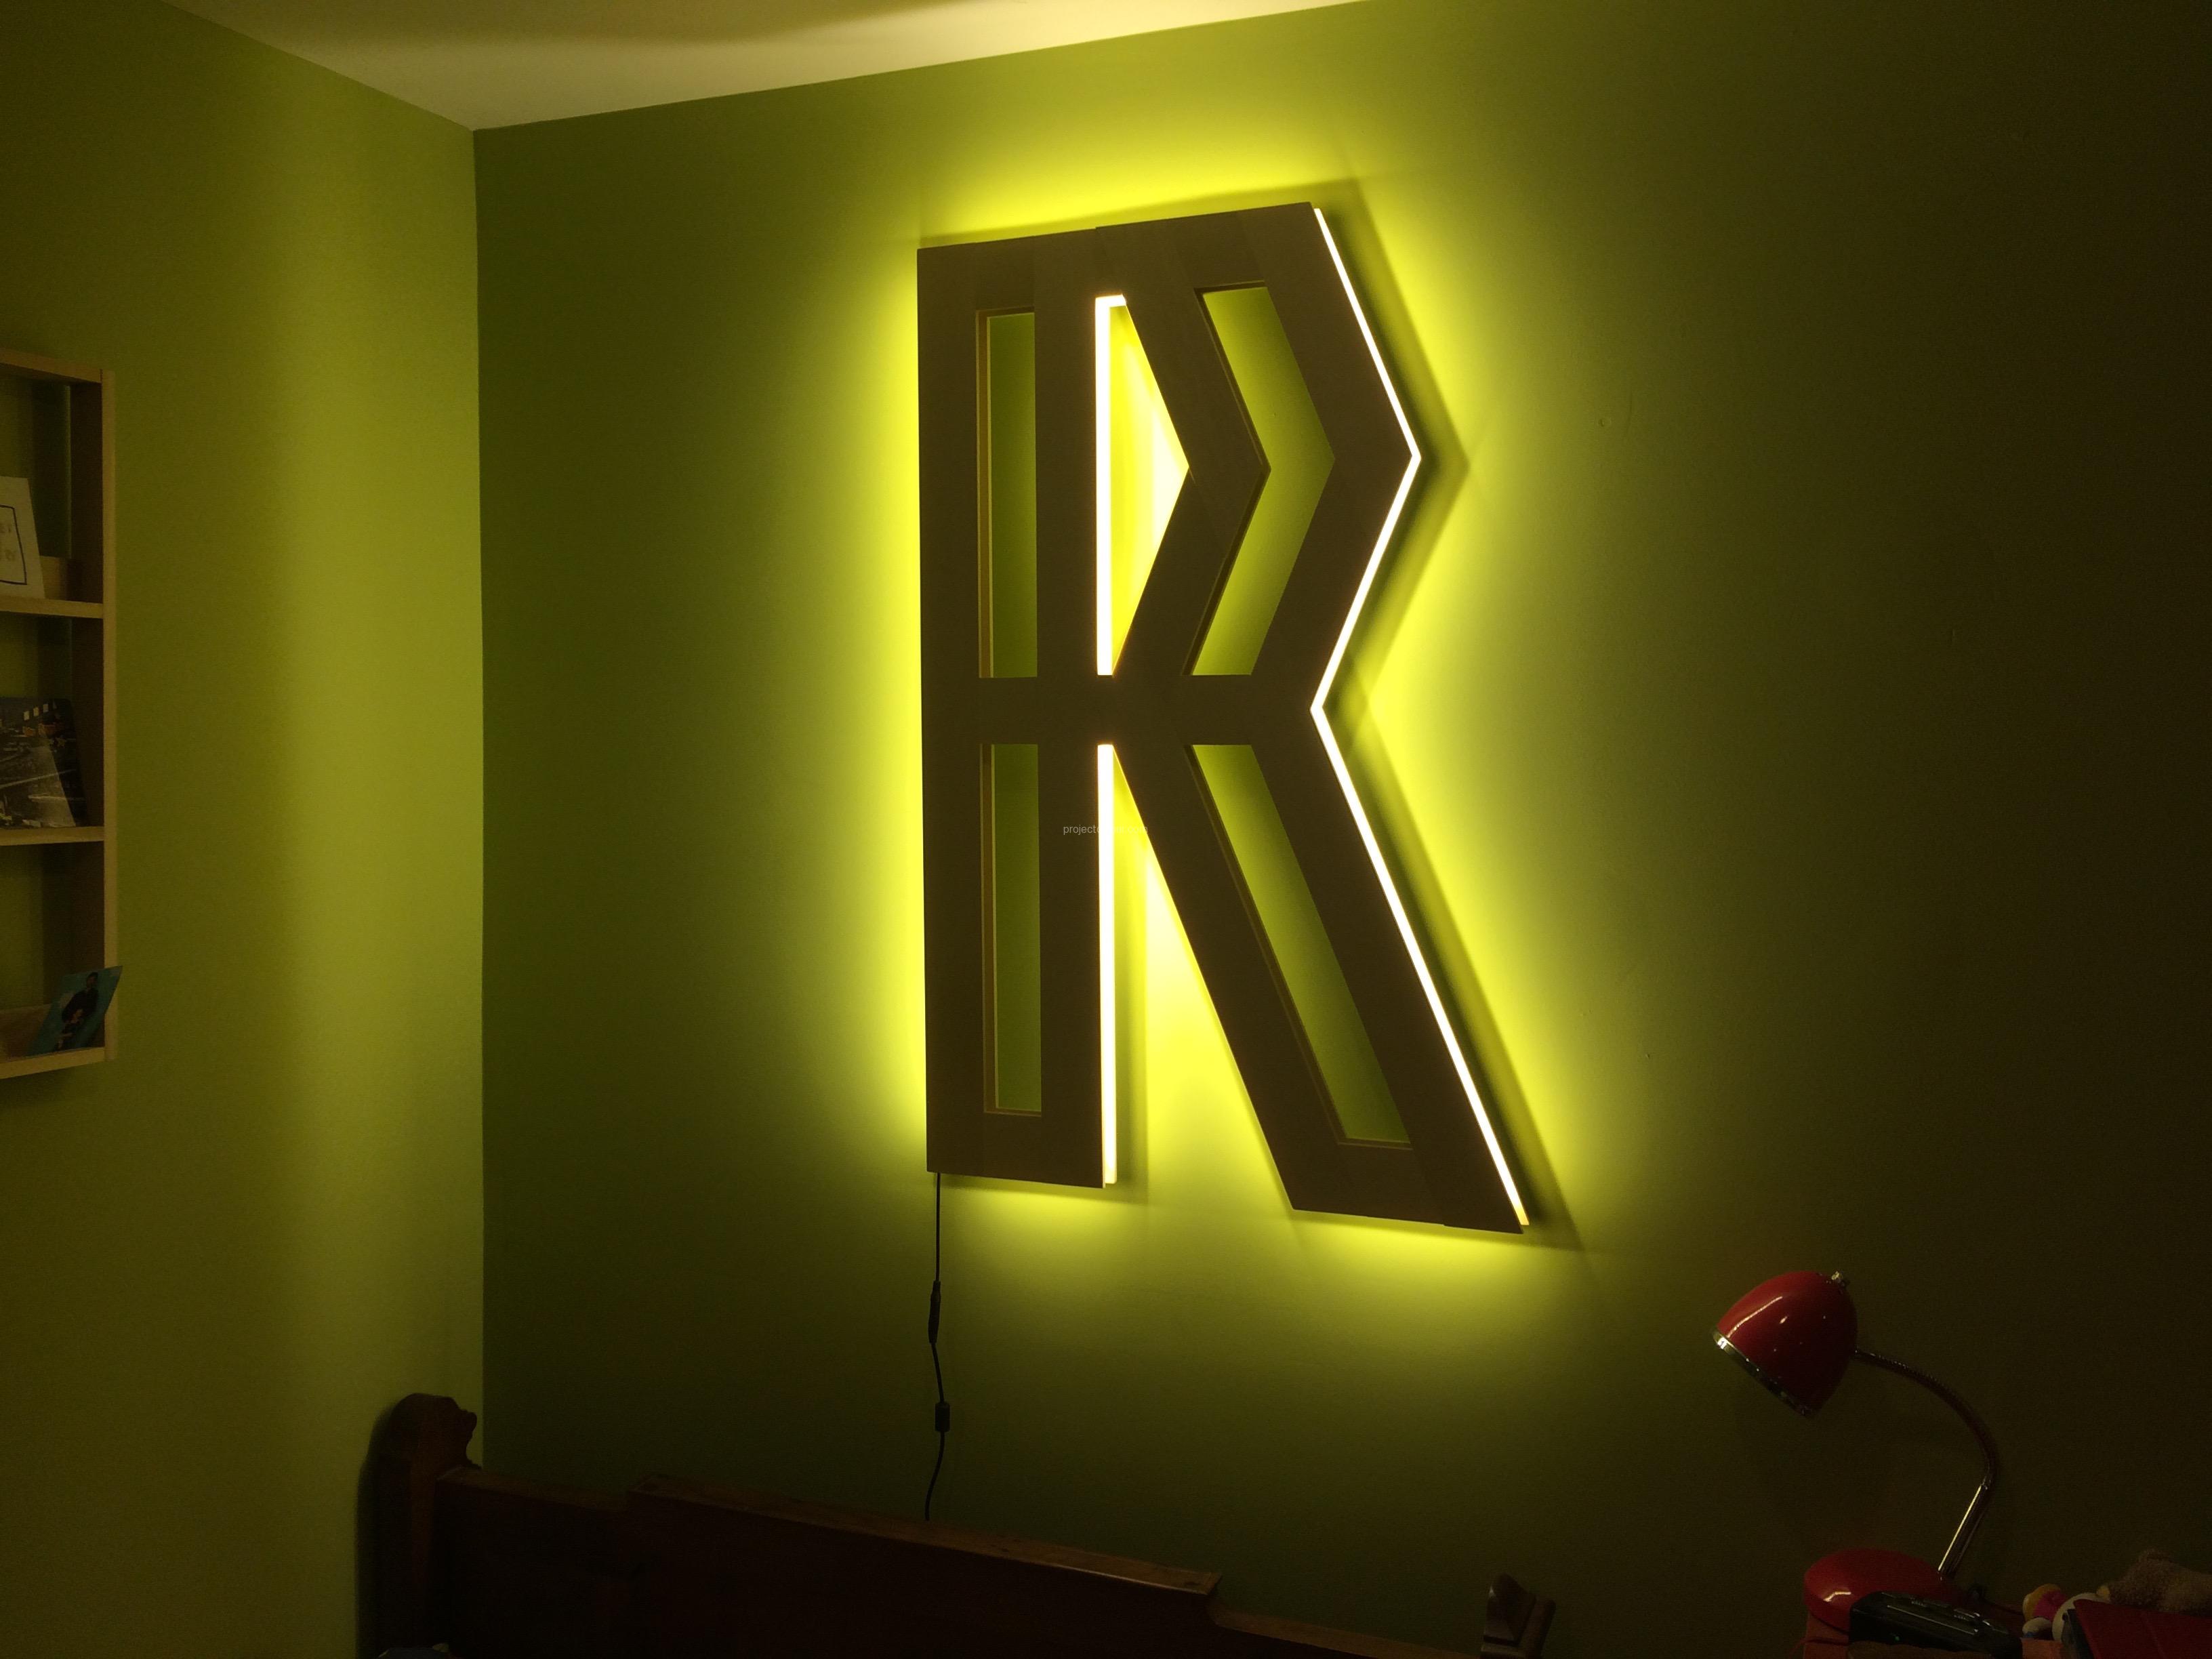
On
