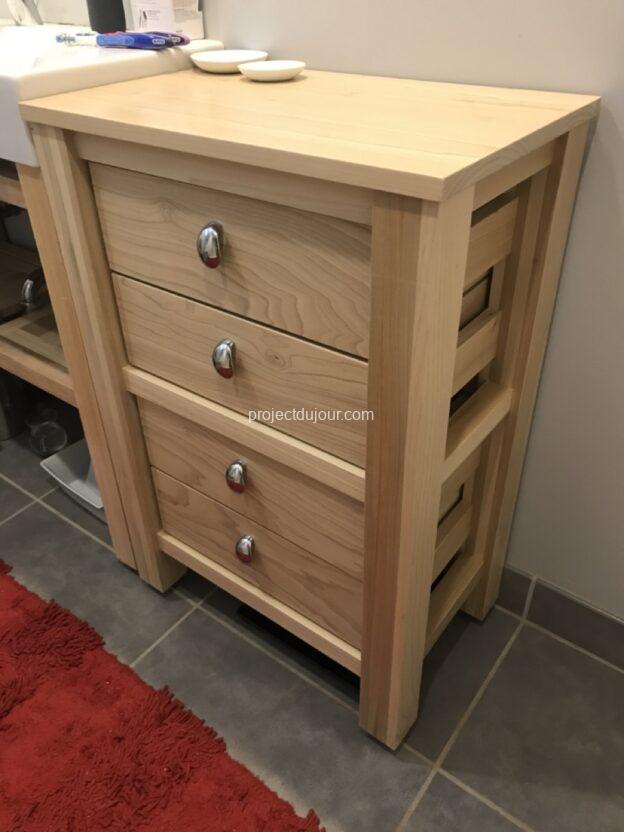
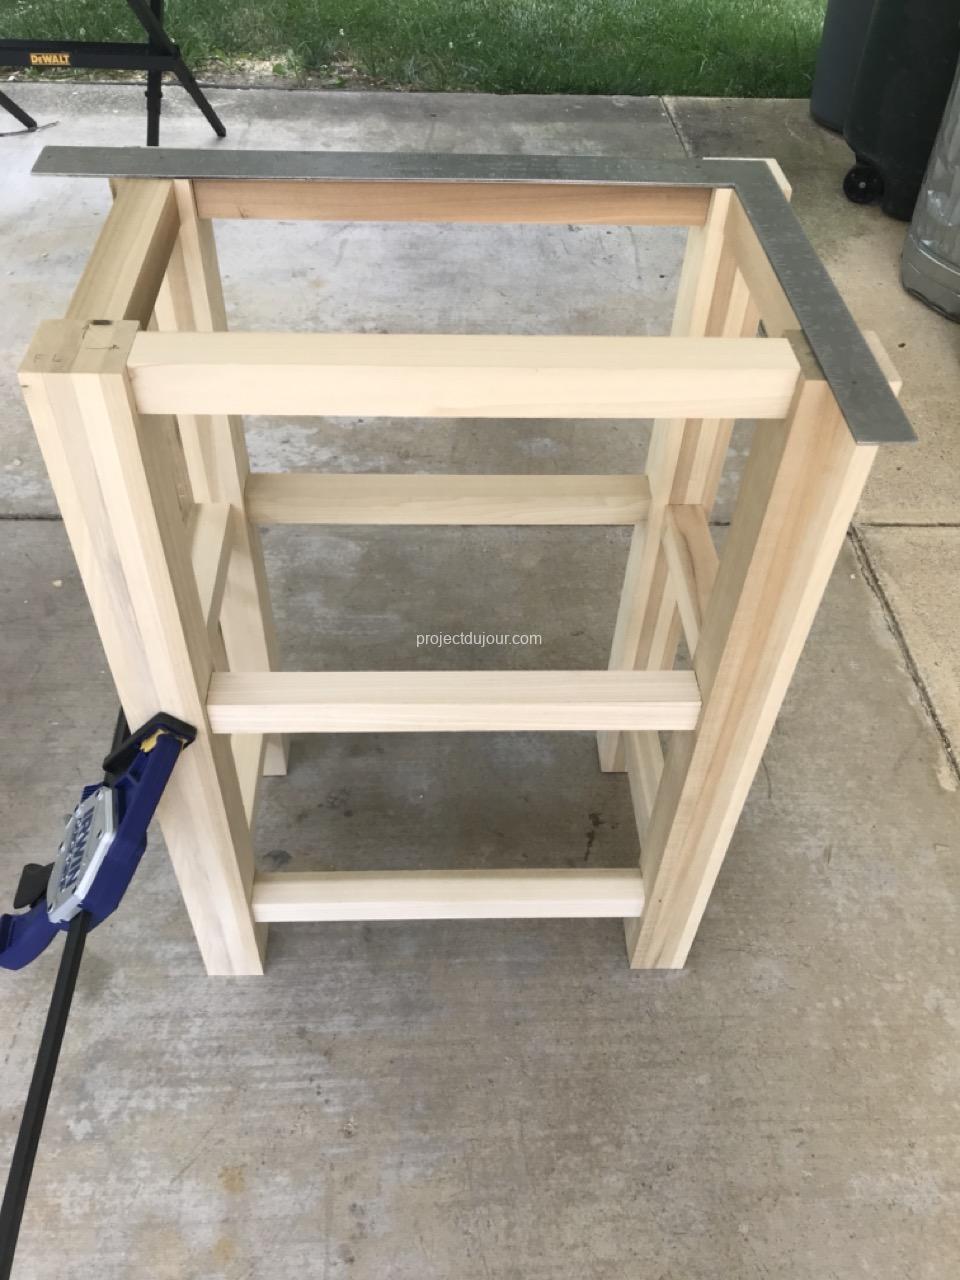
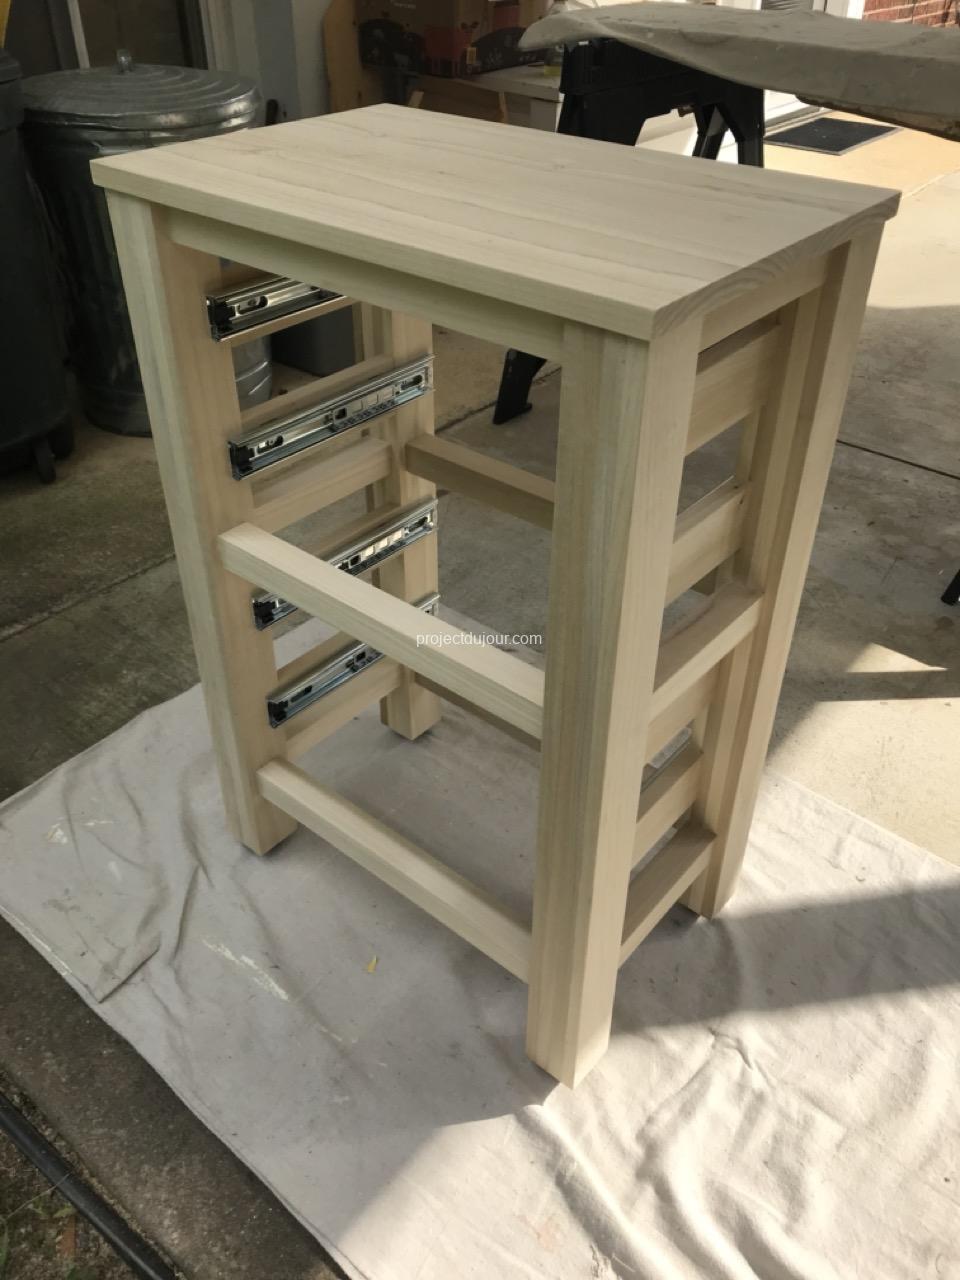
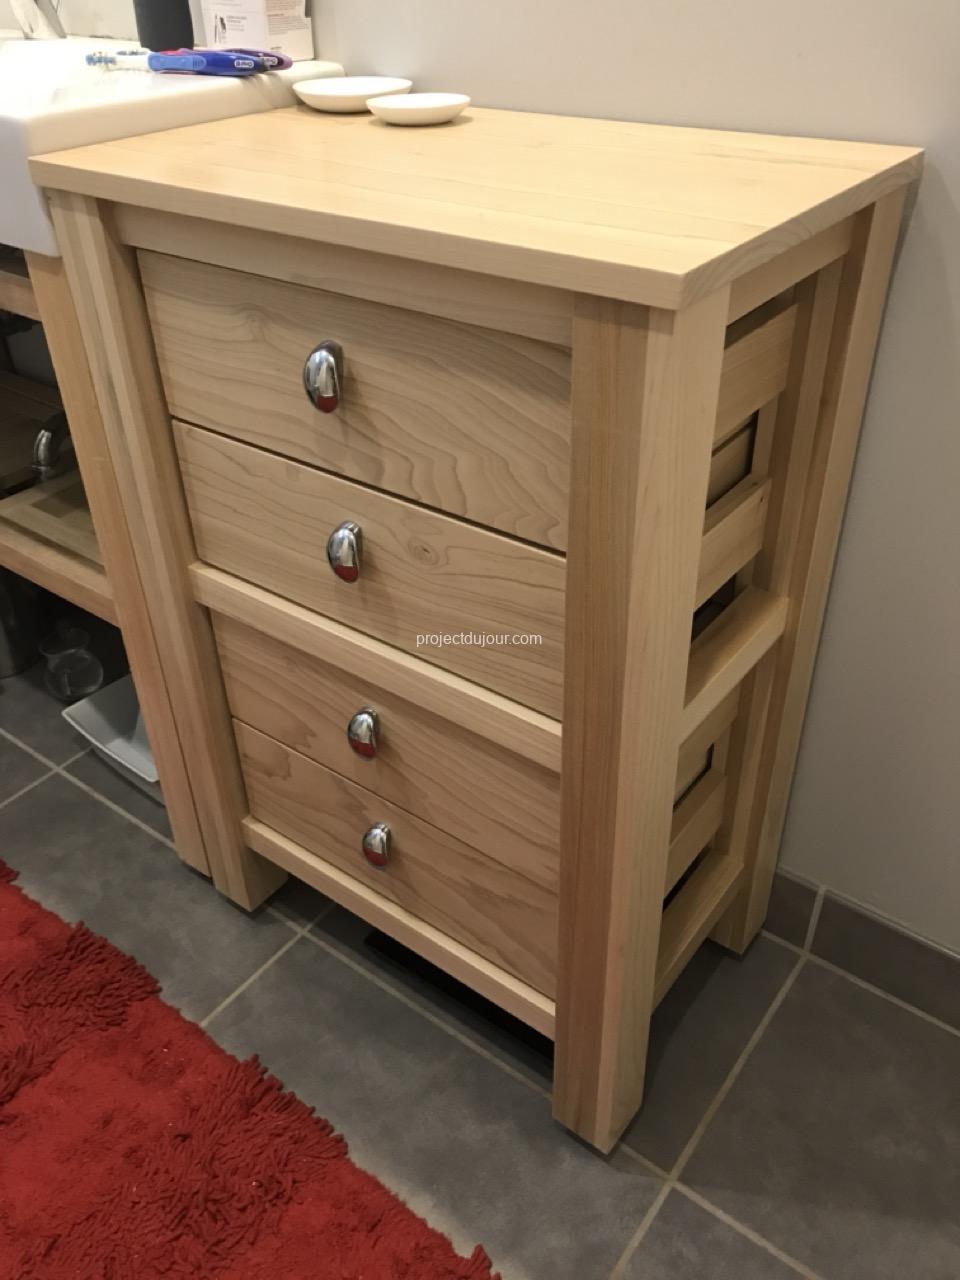
When I remodeled my house a few years ago I had to use a narrow console sink for our rather small downstairs bathroom. Instead of buying the frame from a store, I built something simple out of poplar. The legs where 2 1/4″ by 2 1/4″ posts and the horizontal pieces 1 1/2″ by 1 1/2″. My plan was to add a small cabinet next to it as soon as possible. 12 years later, I finally built it. When COVID hit, I ran to the local Lowe’s and bought a bunch of poplar.
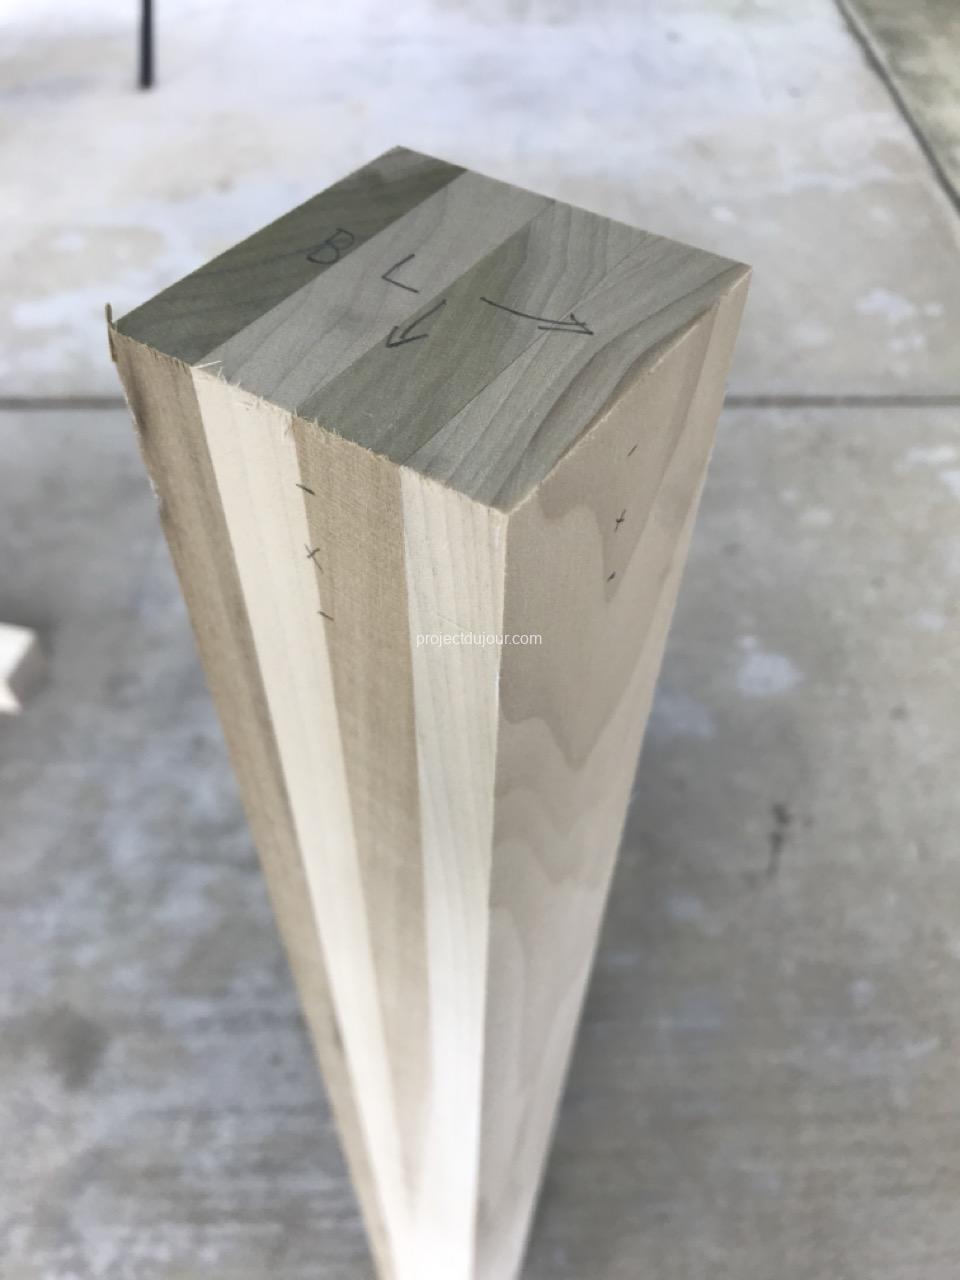
The posts I found were not exactly what I used for the sink. They also happen to not be anywhere close to square which was a pain. Retrospectively I think I should have just bought some 1×3 boards and glued them together.
Single postSorting the post so inside corners are as straight as possible
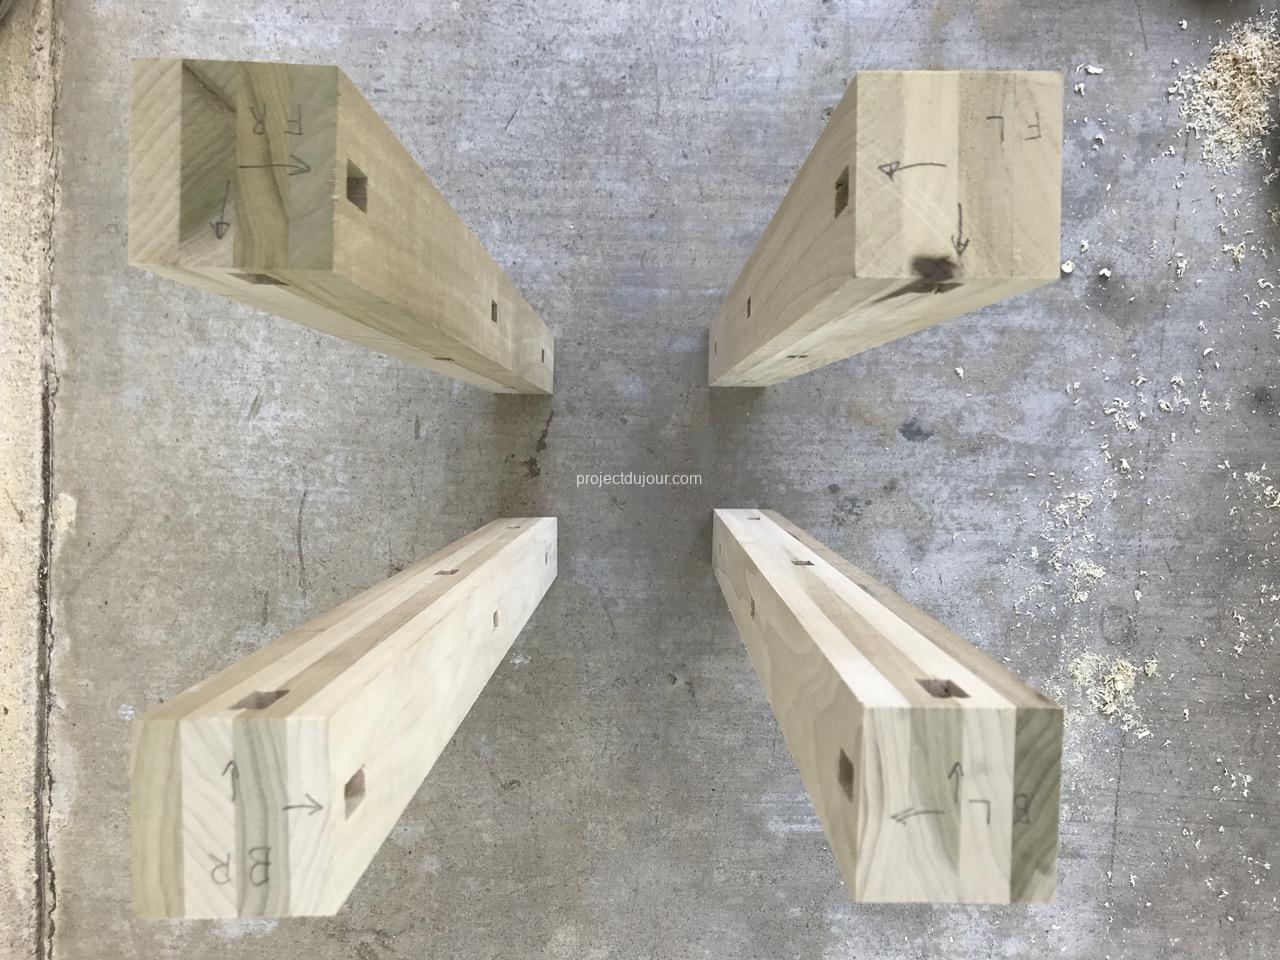
All the horizontal pieces are solid 1 1/2″ by 1 1/2″ poplar. The whole frame is held together using tenons and mortises, all 1/2″ wide.
TestingChecking all angles
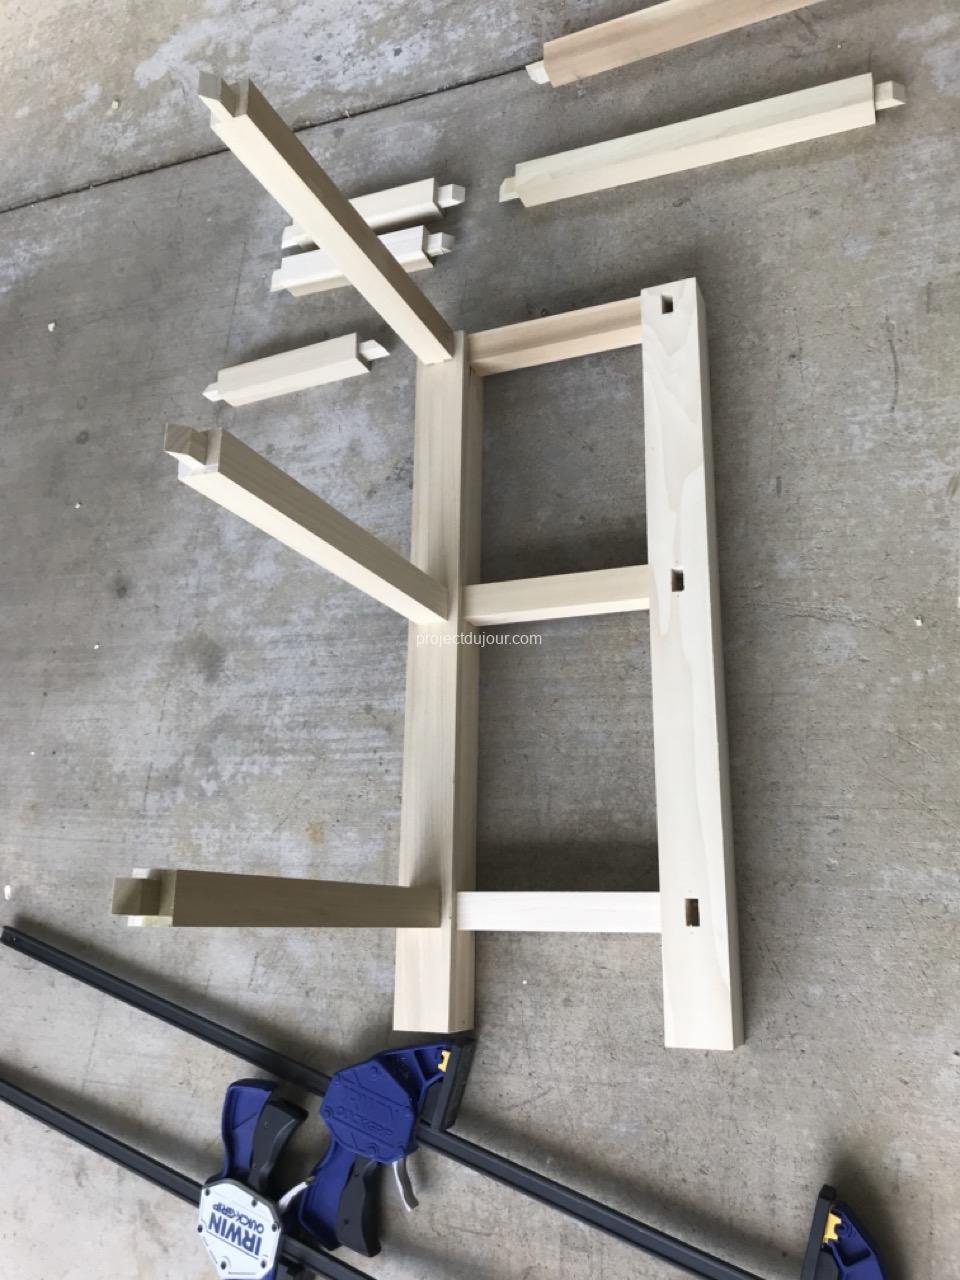
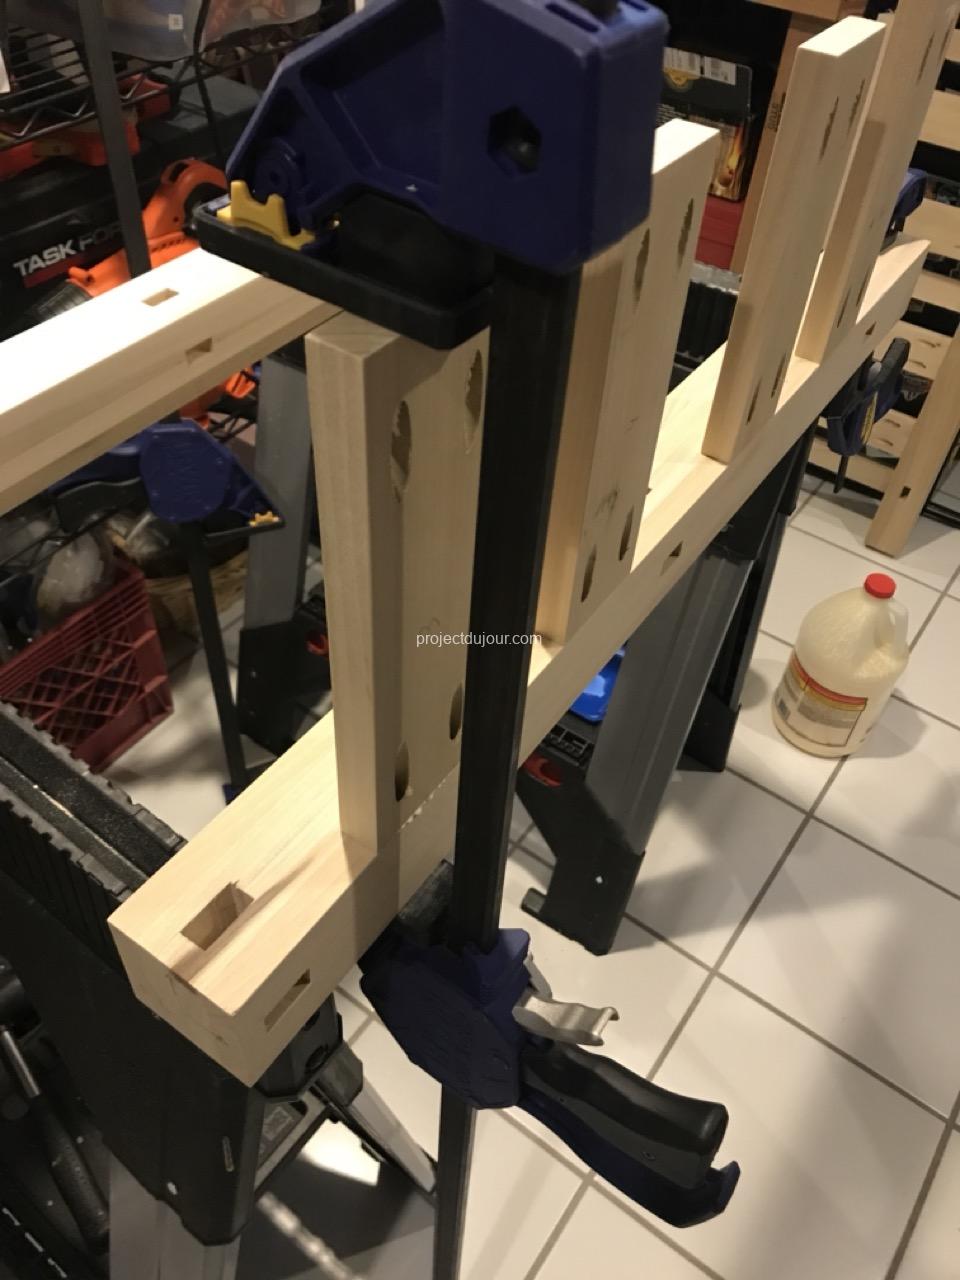
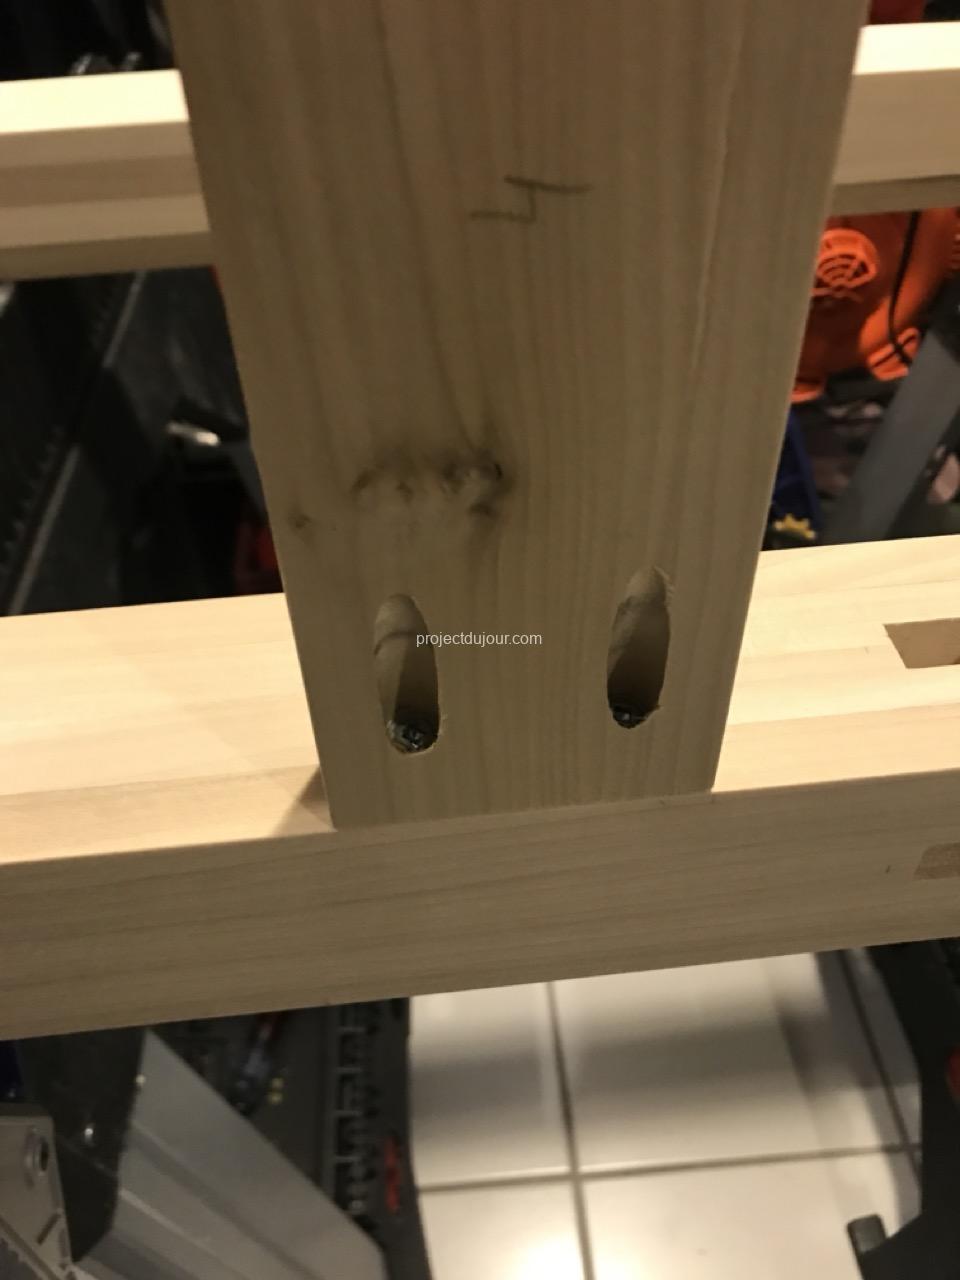
The frame is designed to hold 4 drawers. I initially thought I would attach the sliders on the posts and keep them visible on the sides but this didn’t look great. So, to hide and hold the sliders, I added 4 1×3 boards on each side of the frame. These are attached to the frame using wood glue and pocket screws.
Side boards for the slidersFirst pocket screws
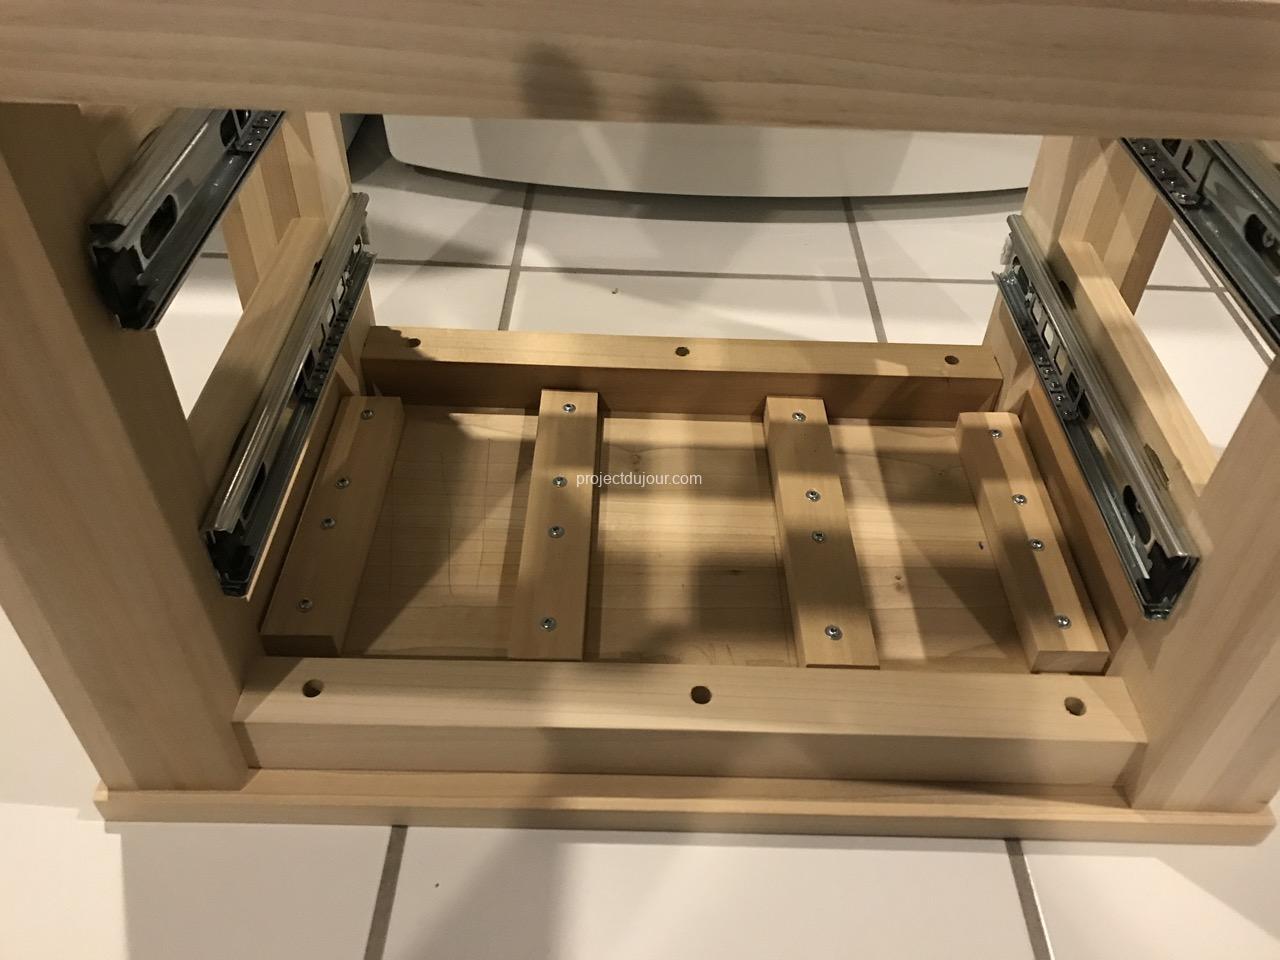
The top is made of 1 by boards glued together on their edges and tied from underneath with 1×4 glued and screwed. I could have used biscuits or dowels but I got lazy on this one. It is then held to the frame using 6 screws.
Top viewed from underFrame finished
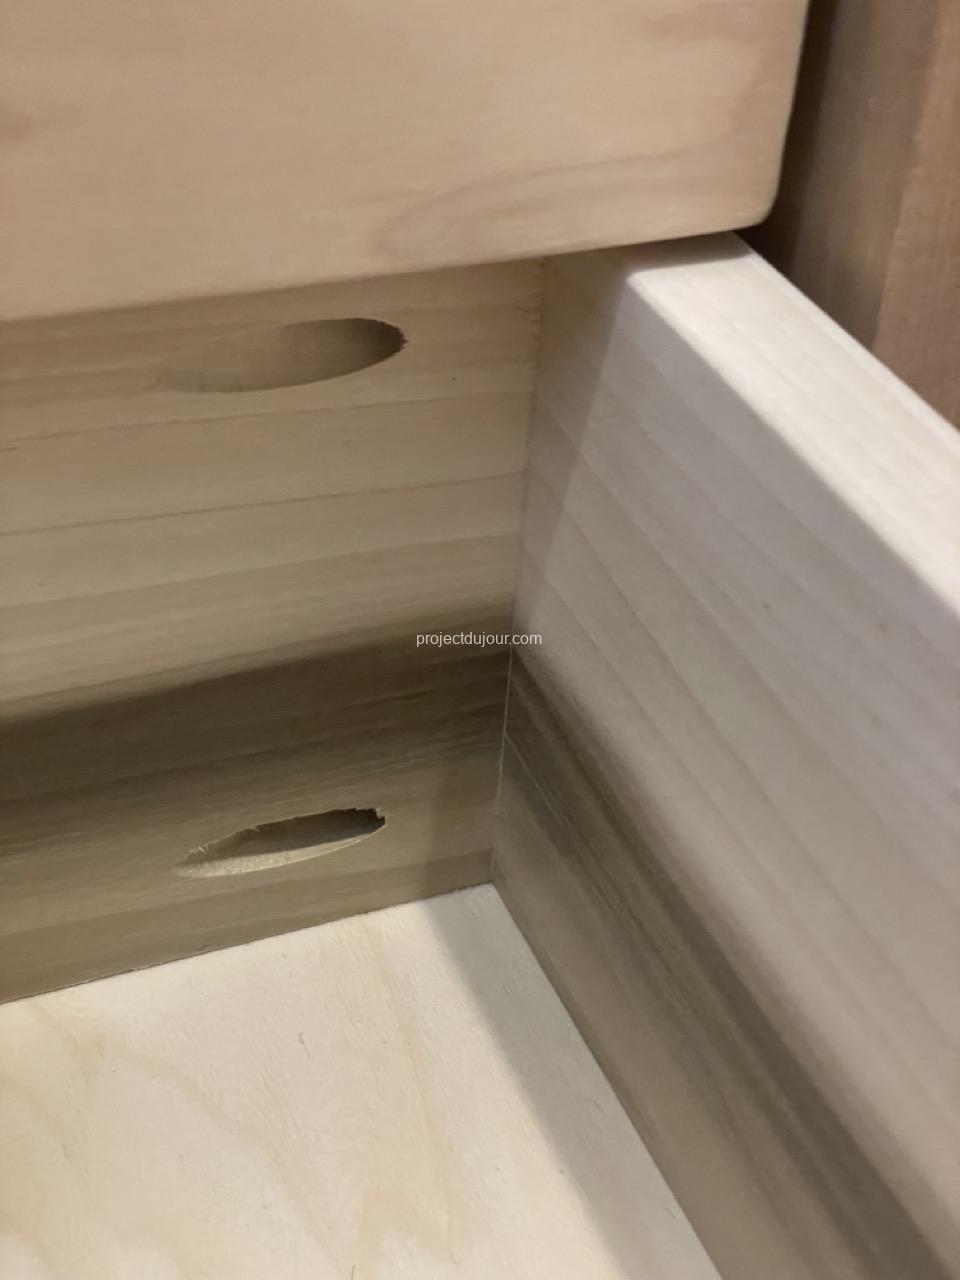
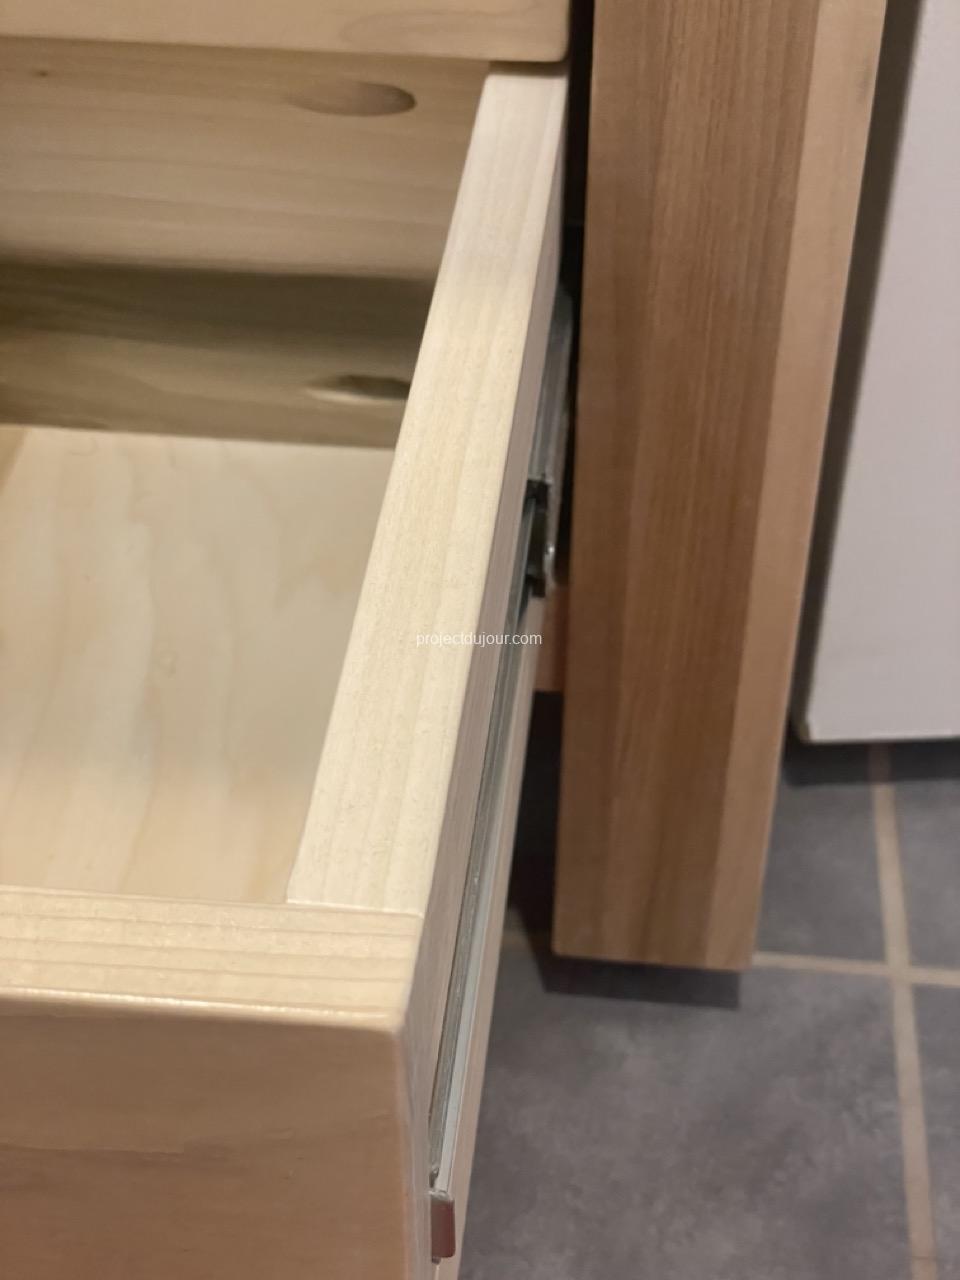
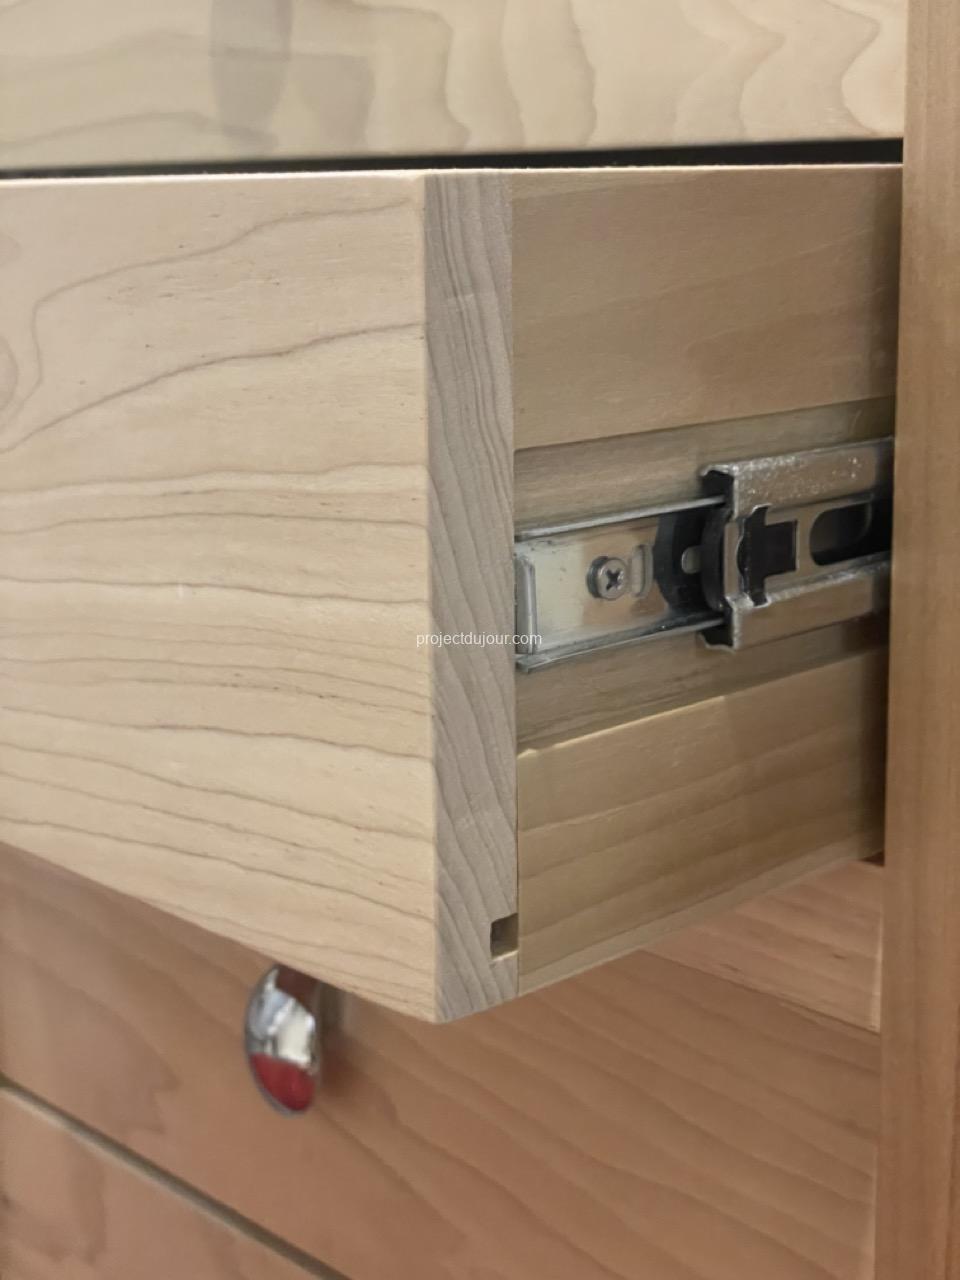
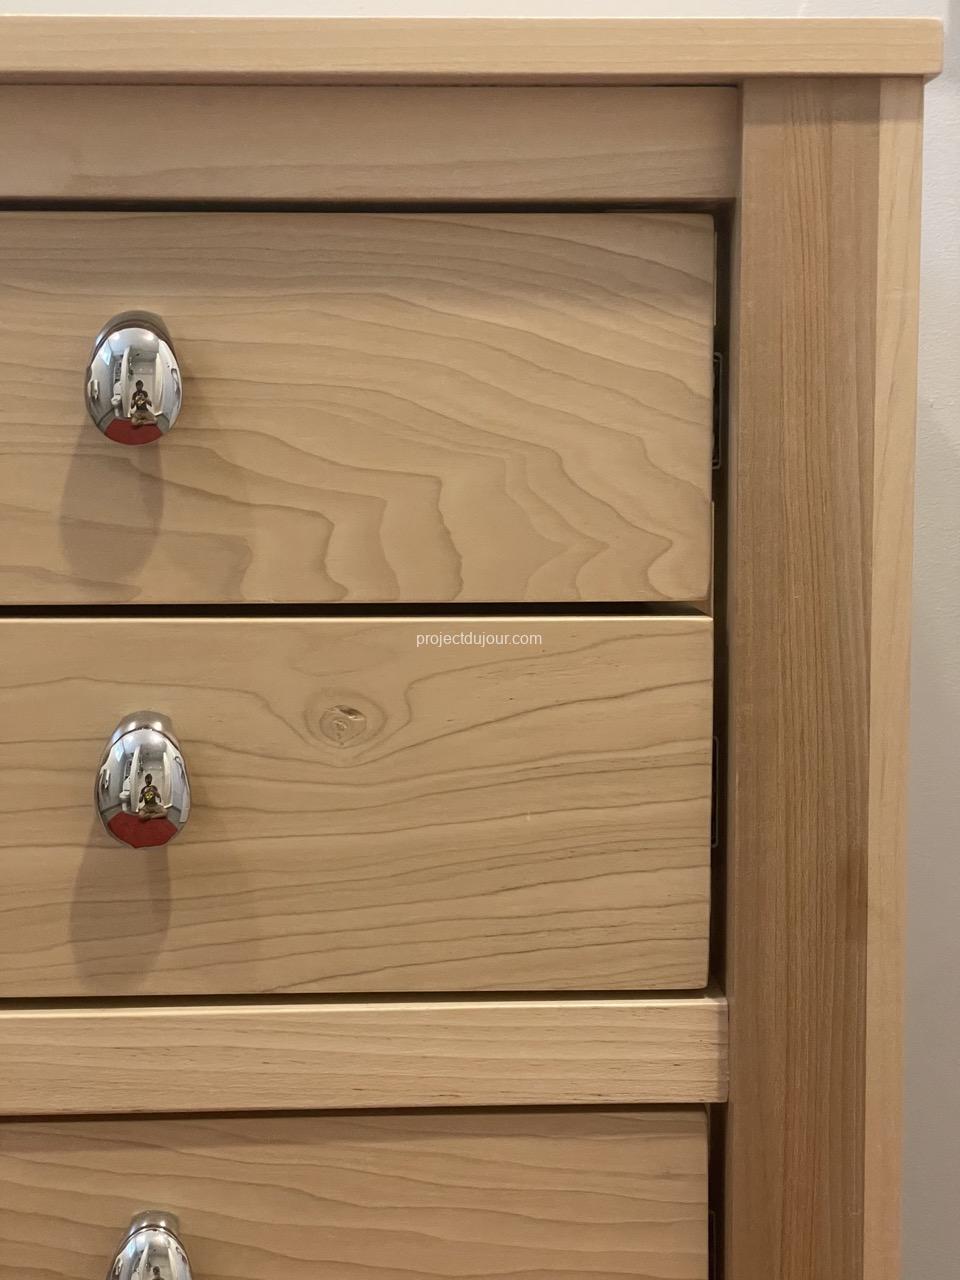
The 4 drawers are made of solid poplar, including the bottom. I used 2 dowels and 2 pocket screws for each corner. I’m new to pocket screws and realized afterwards that I should probably have them screwed from the outside of the drawers instead of from the inside. I cut a groove in the inside of each side to hold the bottom. I also “carved” a groove for the sliders to hide them a bit.
Pocket screwsSlider partially recessedSide view
We then applied 3 coats of clear polyurethane. Finally, for the drawers, we picked some solid handles from Amazon (Viborg), they’re good quality but I’m still a bit ensure about the overall look.
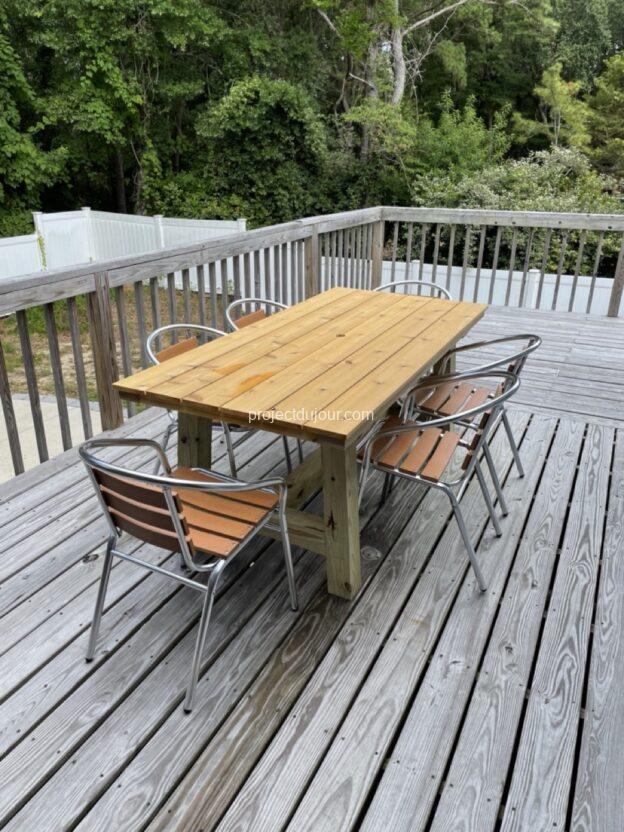
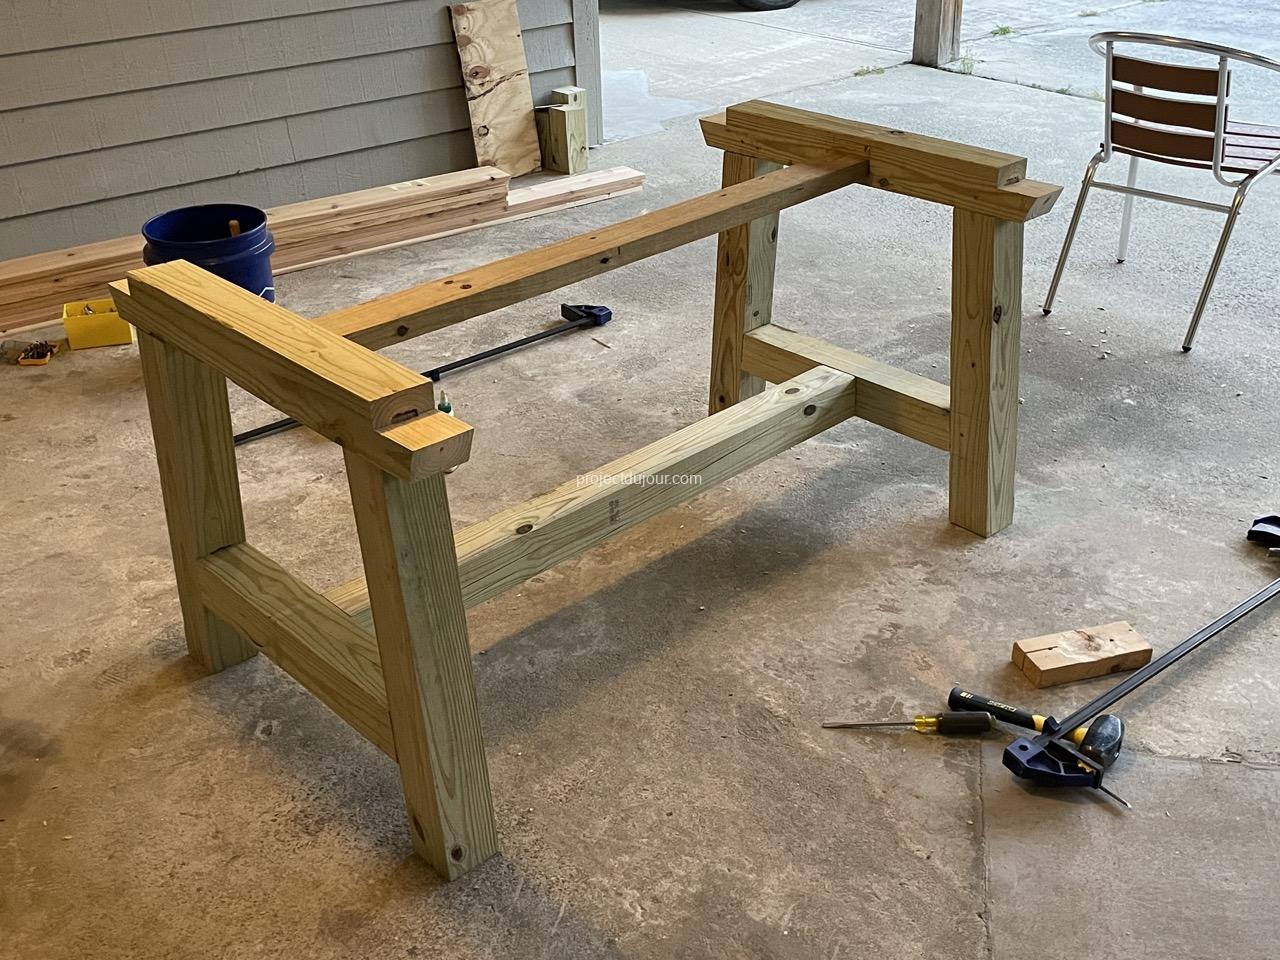
This is a slightly updated version of the a table I already built. This new table is shorter, the frame is made of pressure treated lumber and it’s a bit stronger. For the top, I used cedar boards as I did for the previous table.
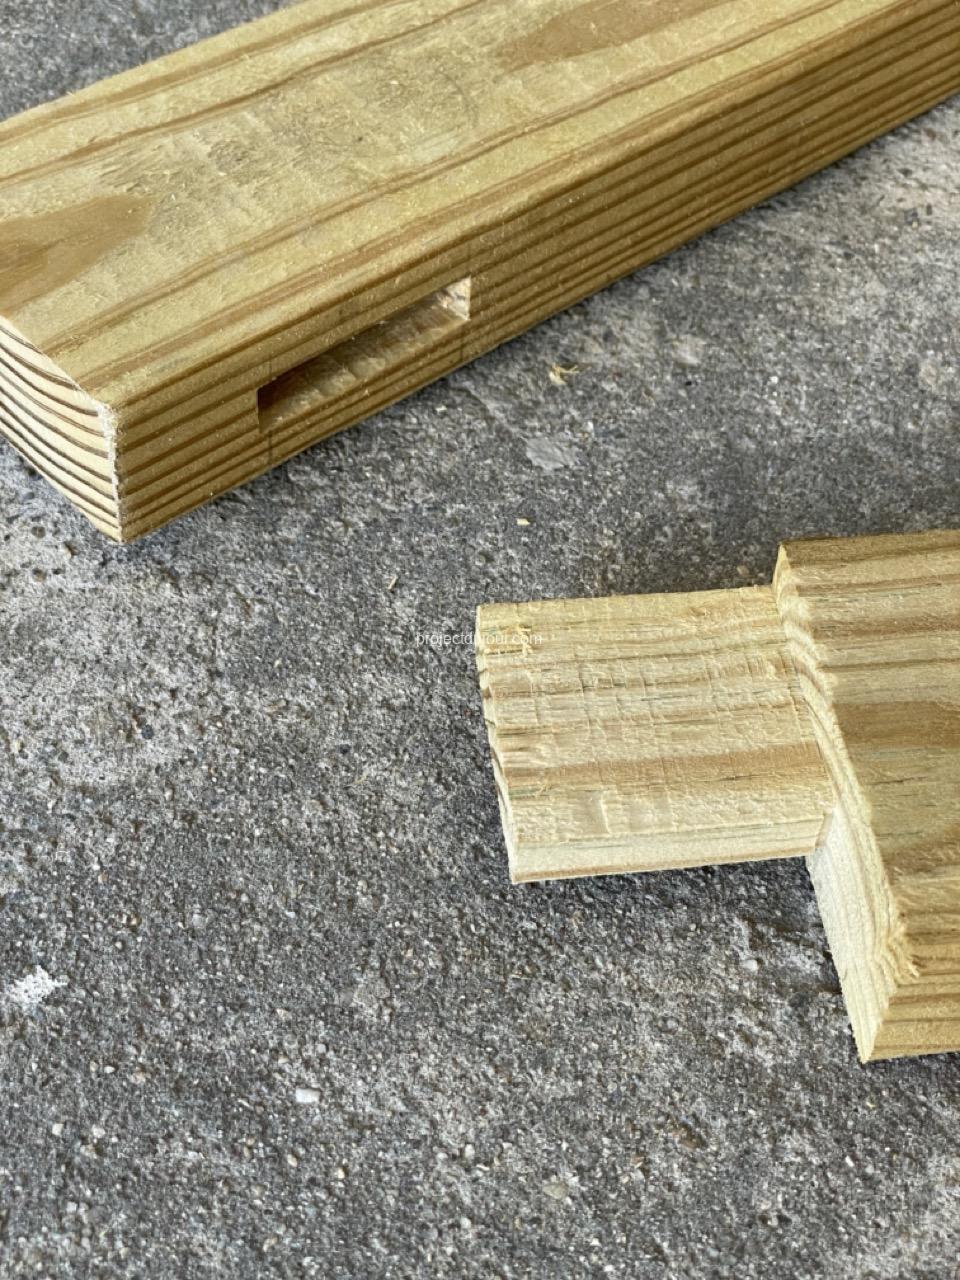
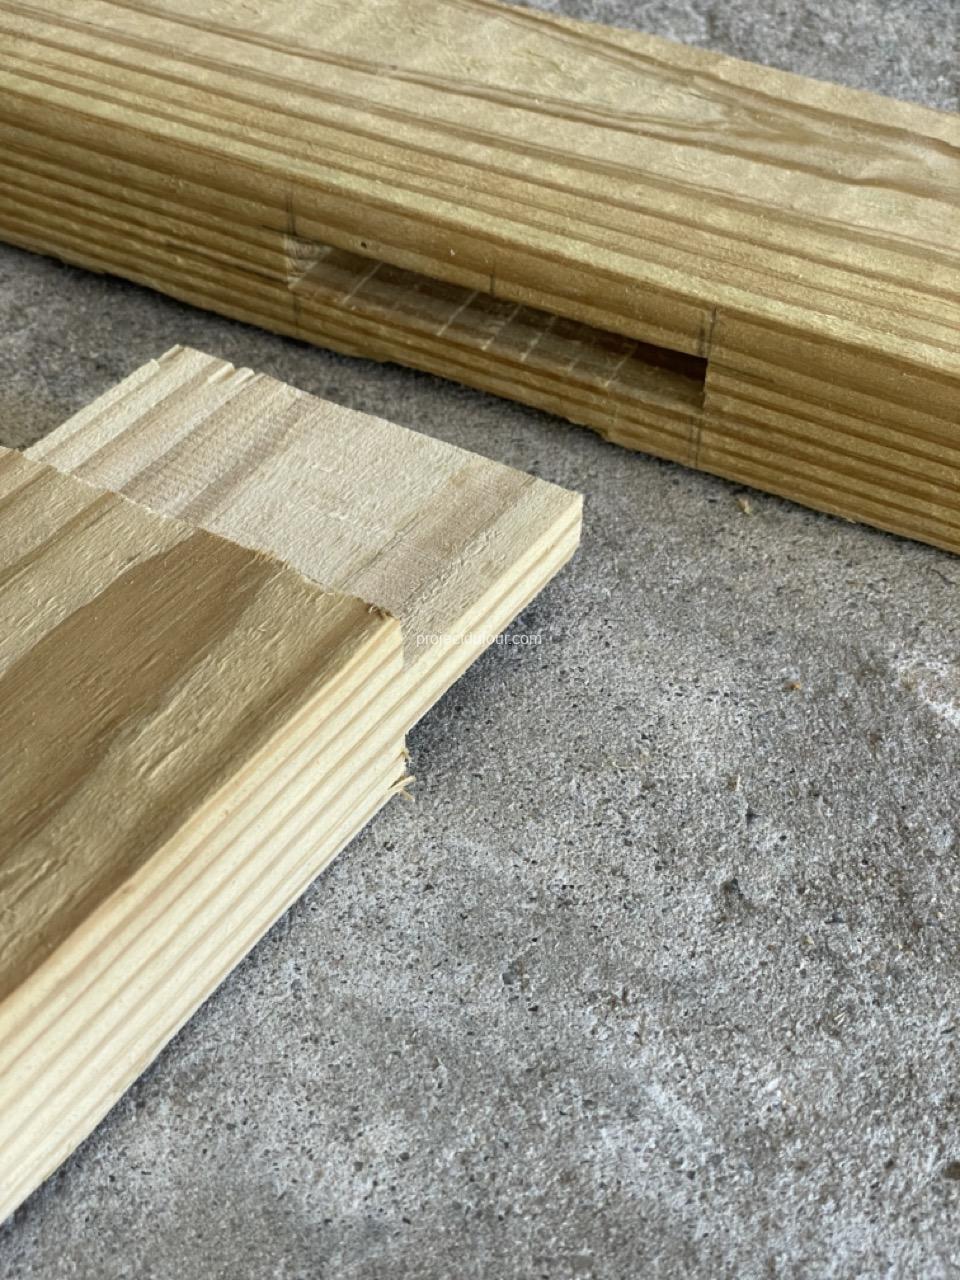
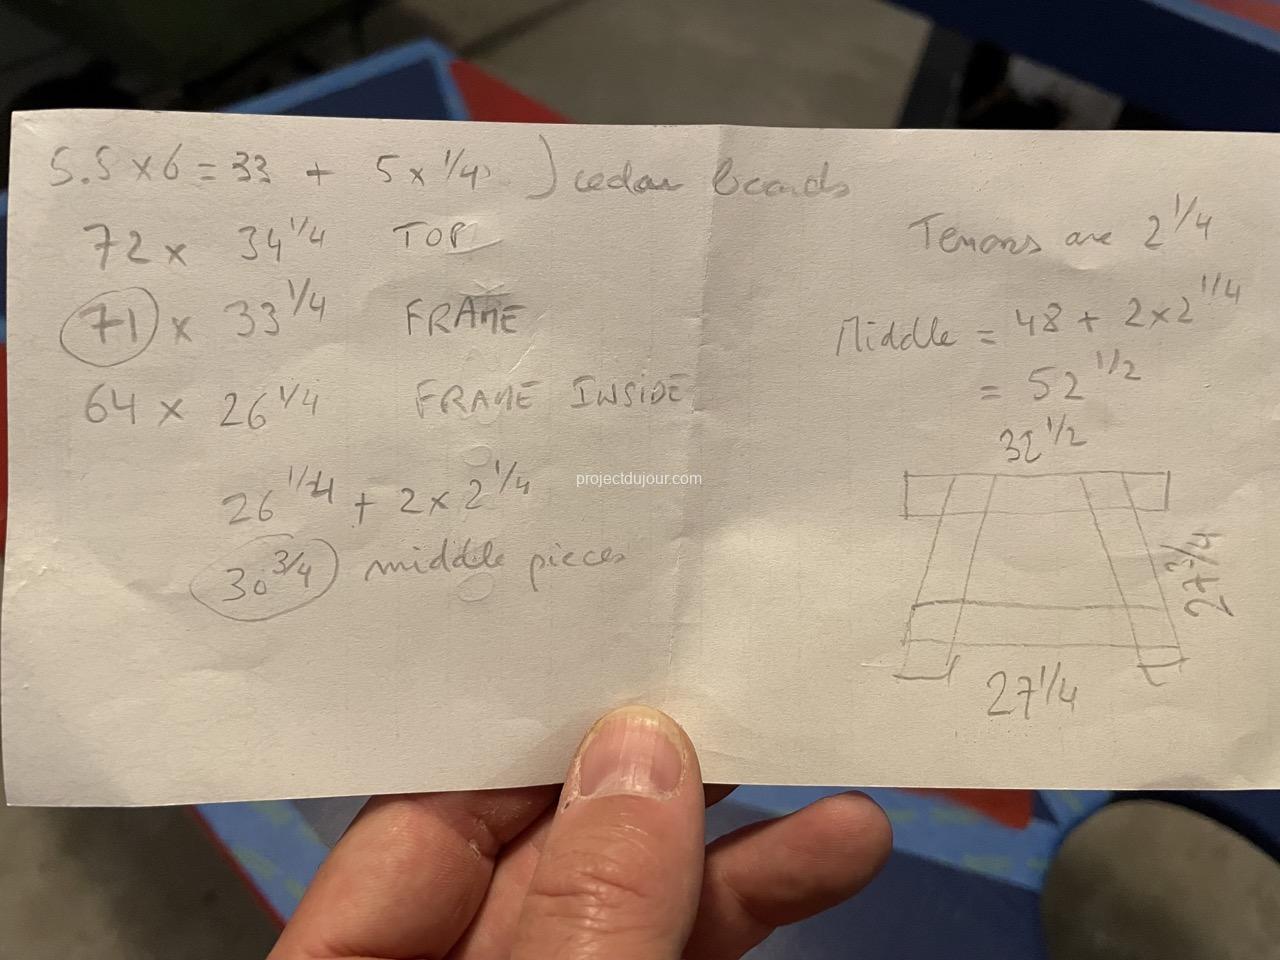
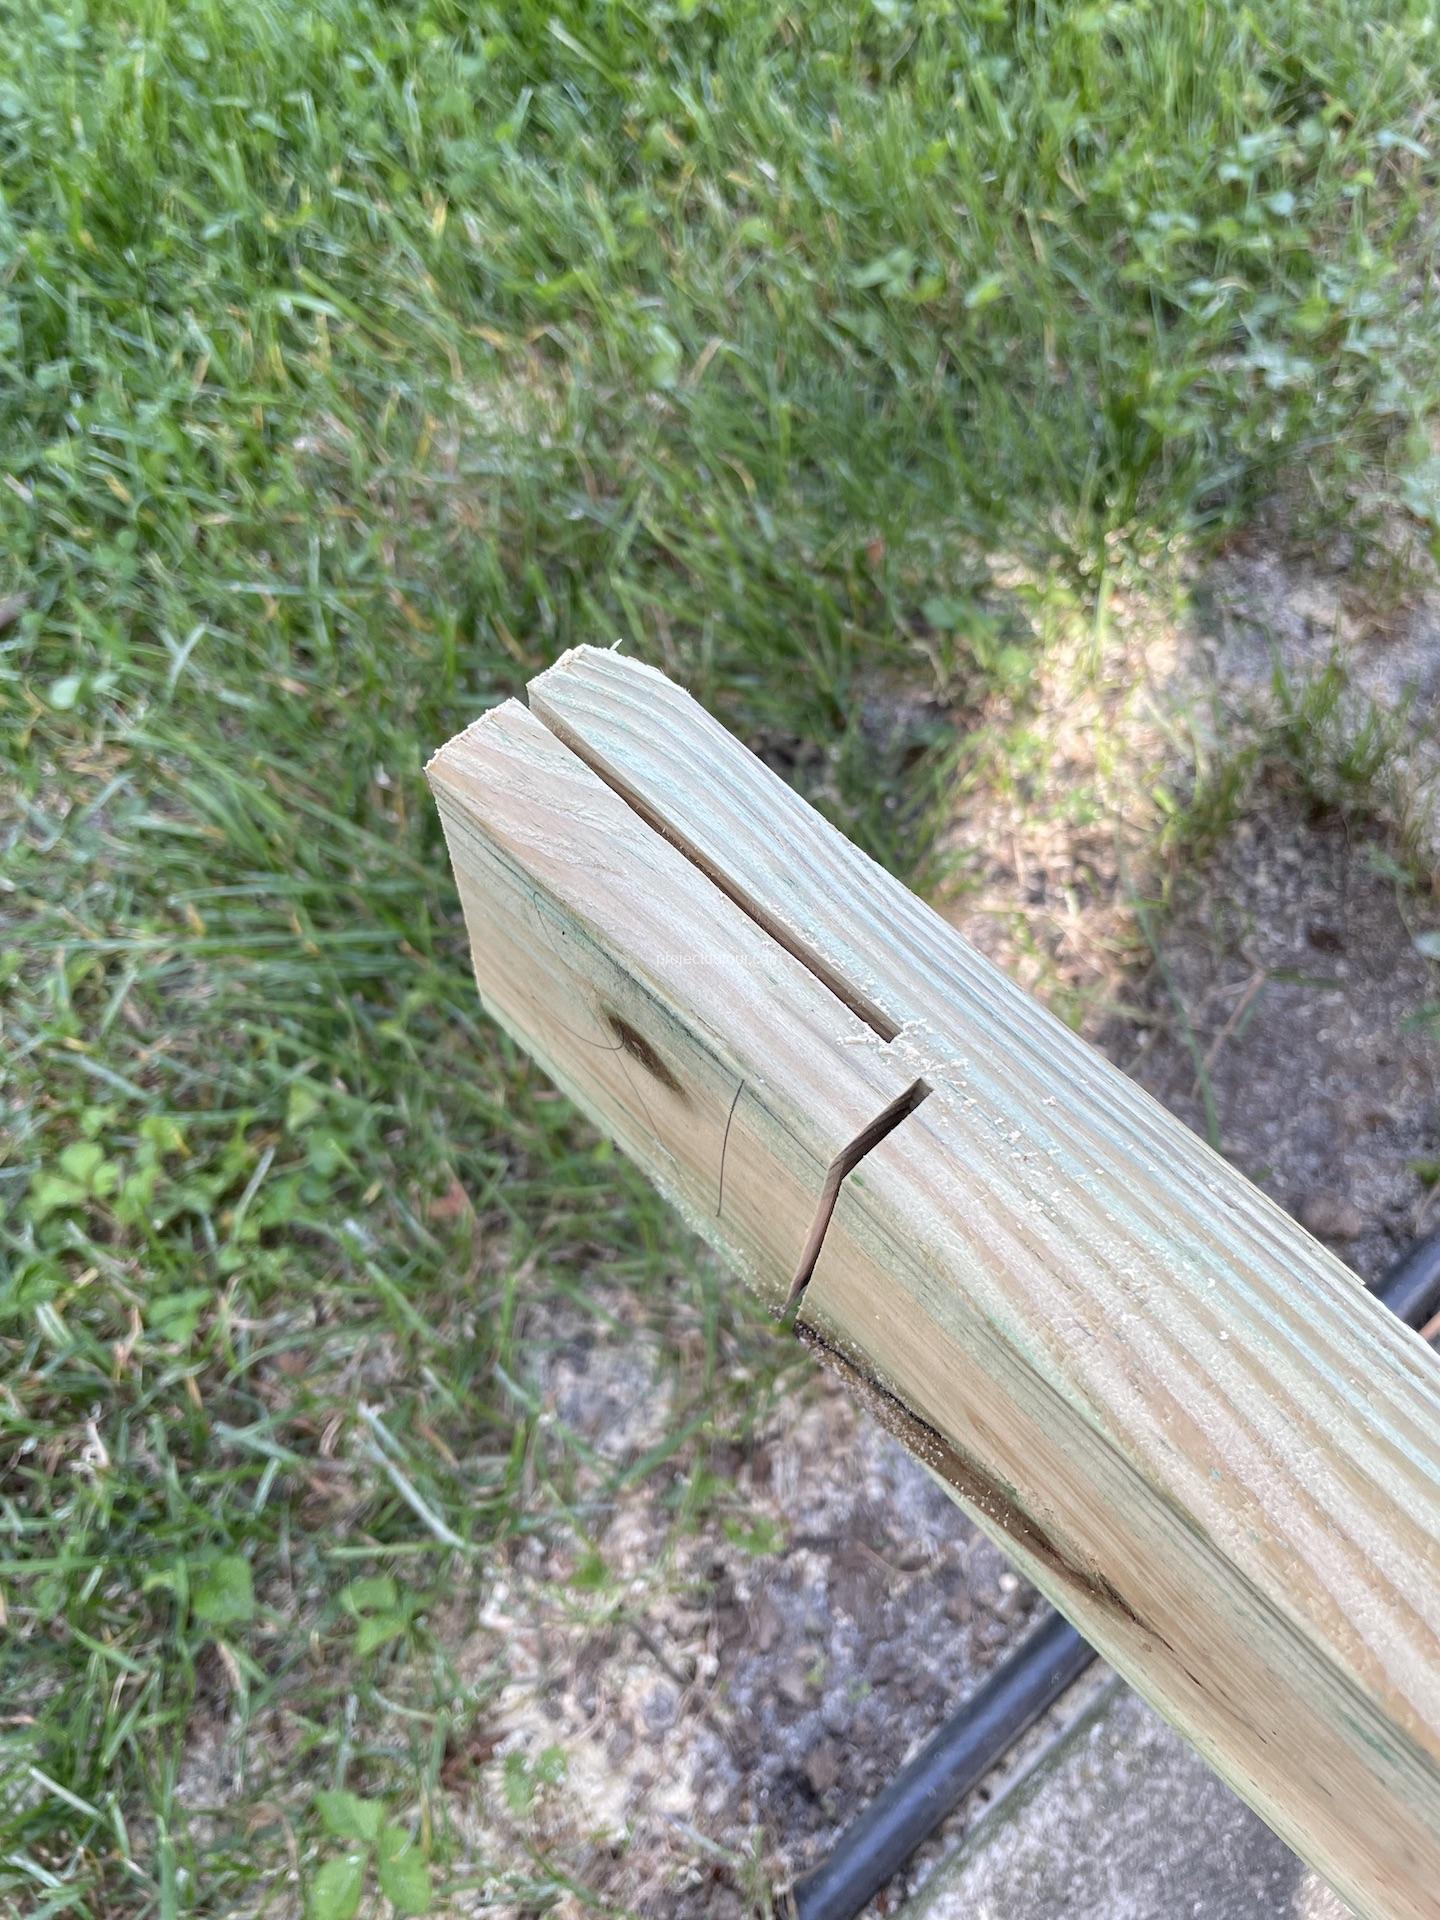
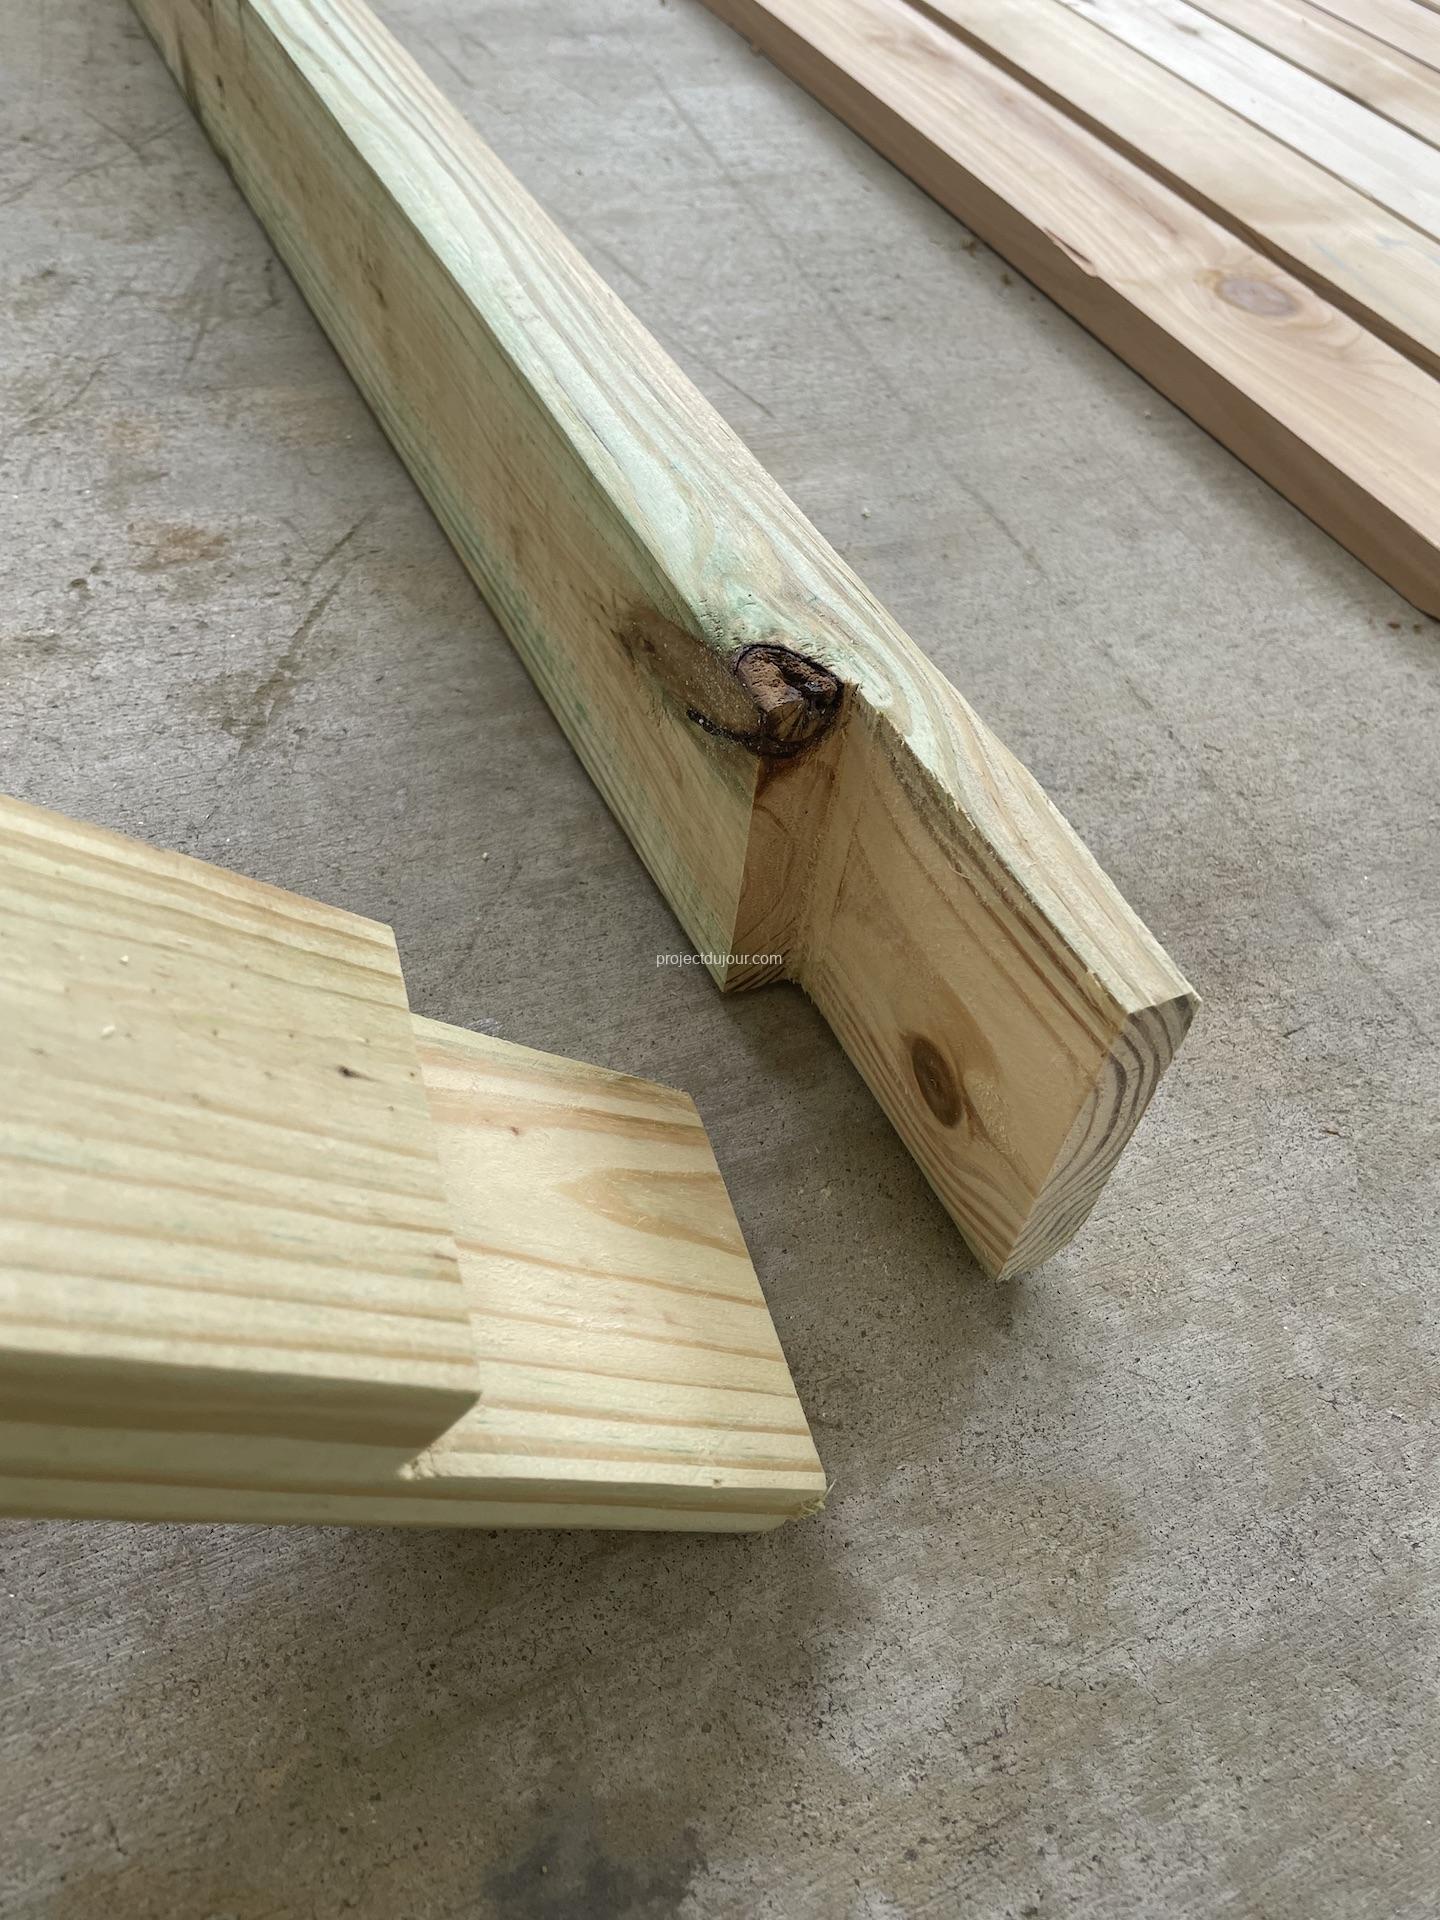
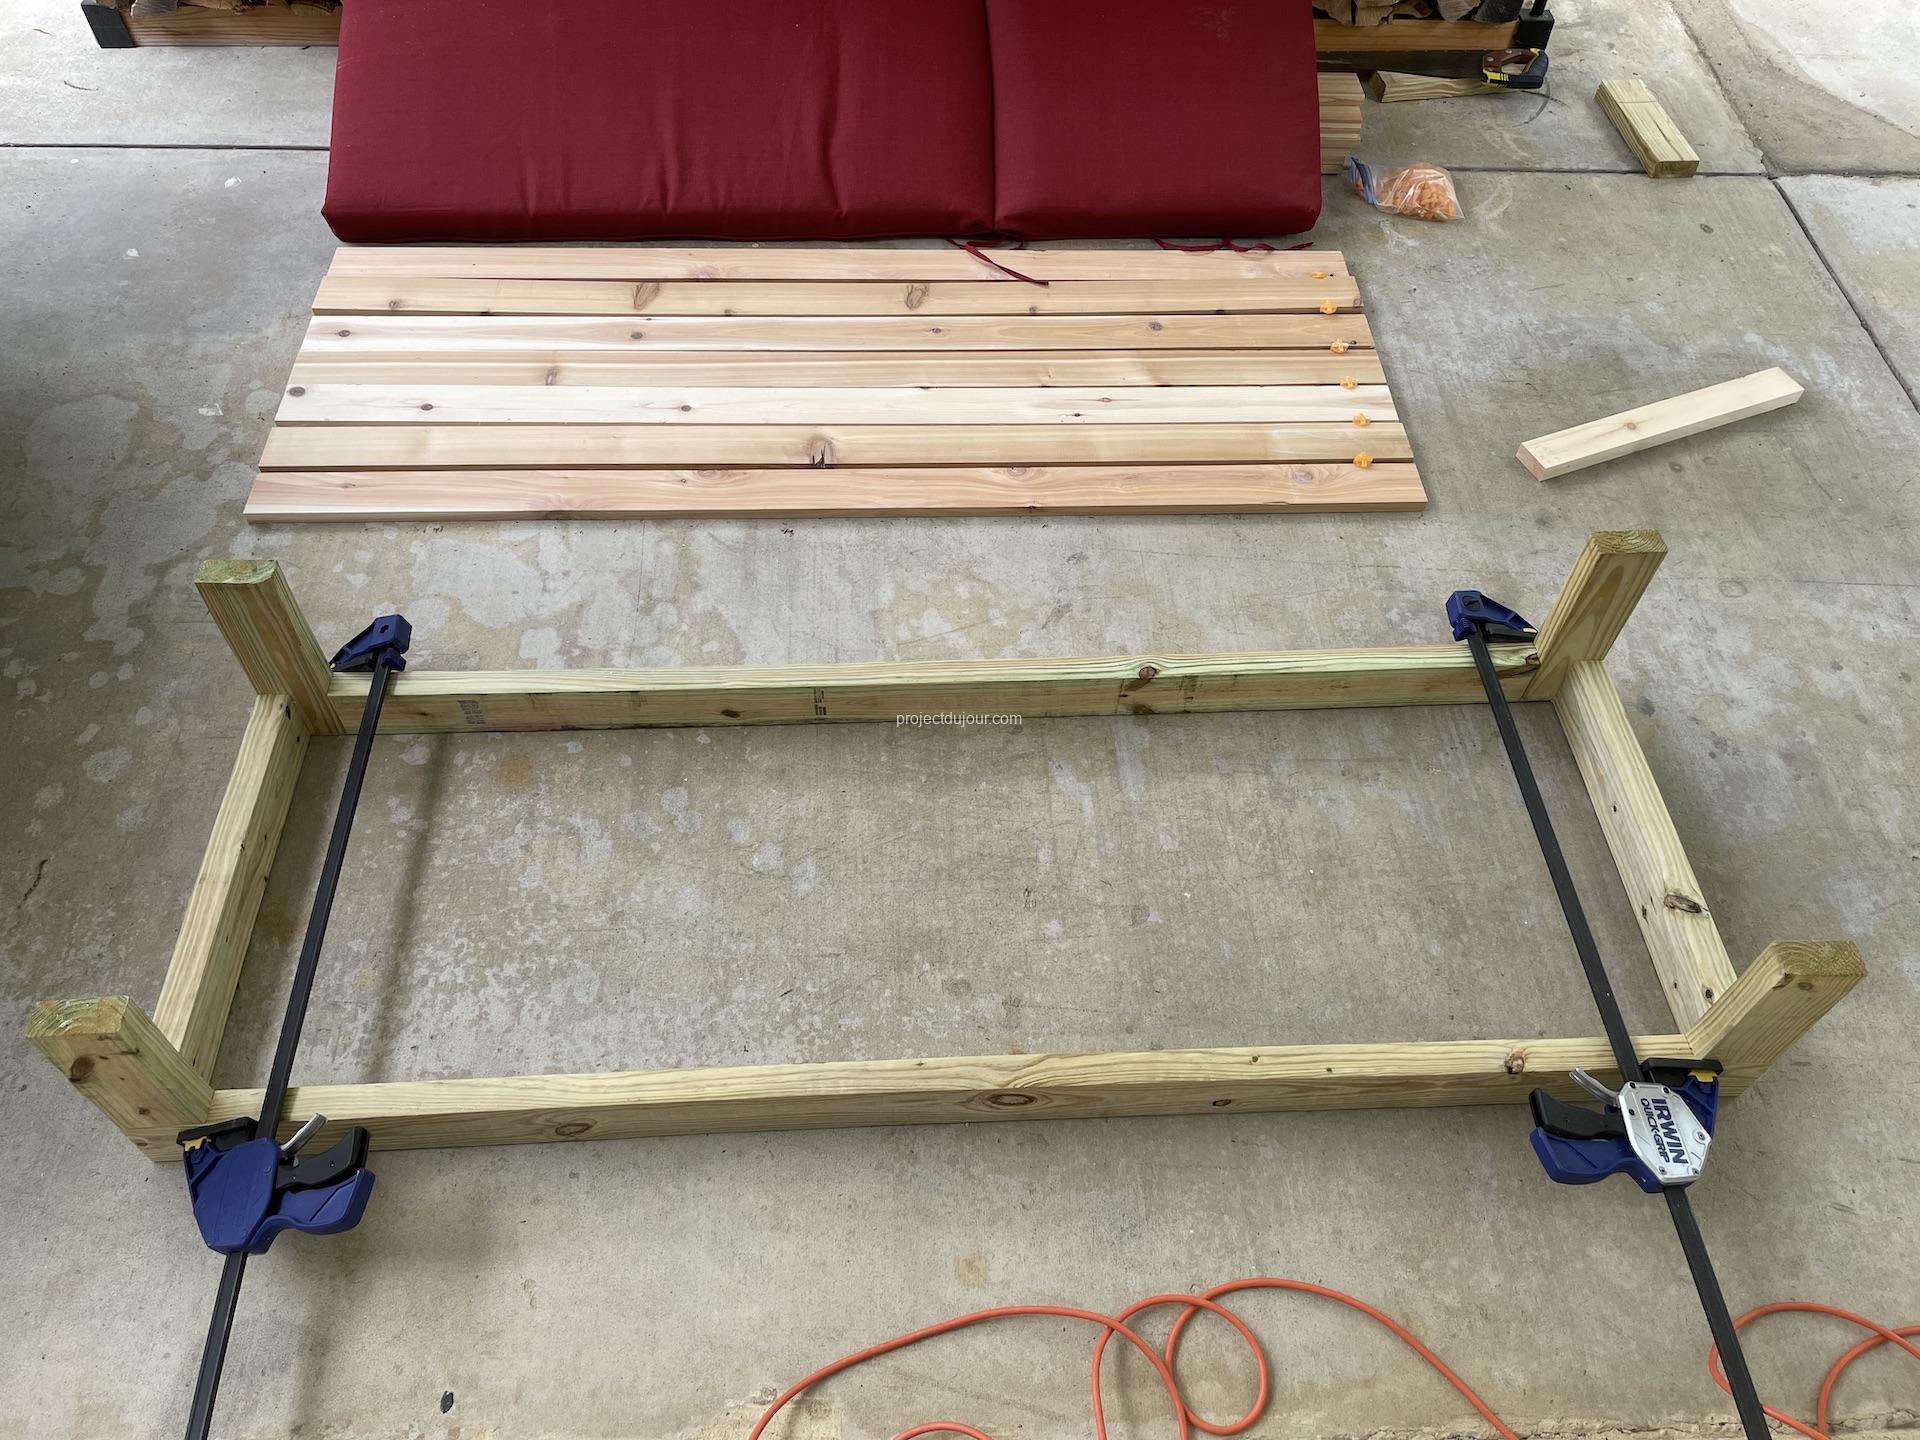
The top frame is built using 2×4 pressure treated lumber with tenons and mortises. The outer dimensions for the top frame are 71″ x 33 3/4″. All the tenons are 2 1/4″ long.
End tenon and mortiseMiddle tenon and mortiseParts readyGlued and assembledStainless screws
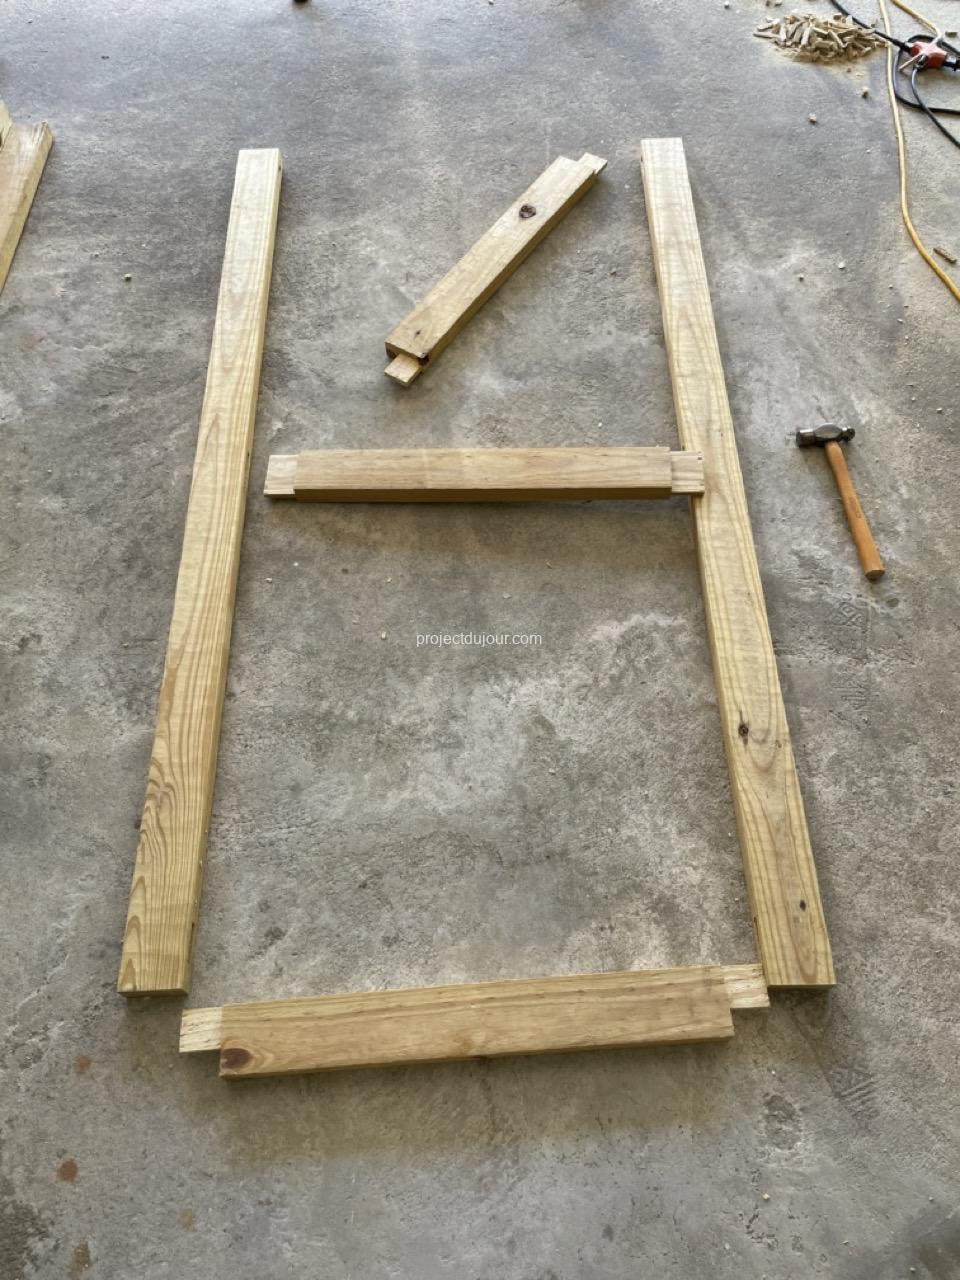
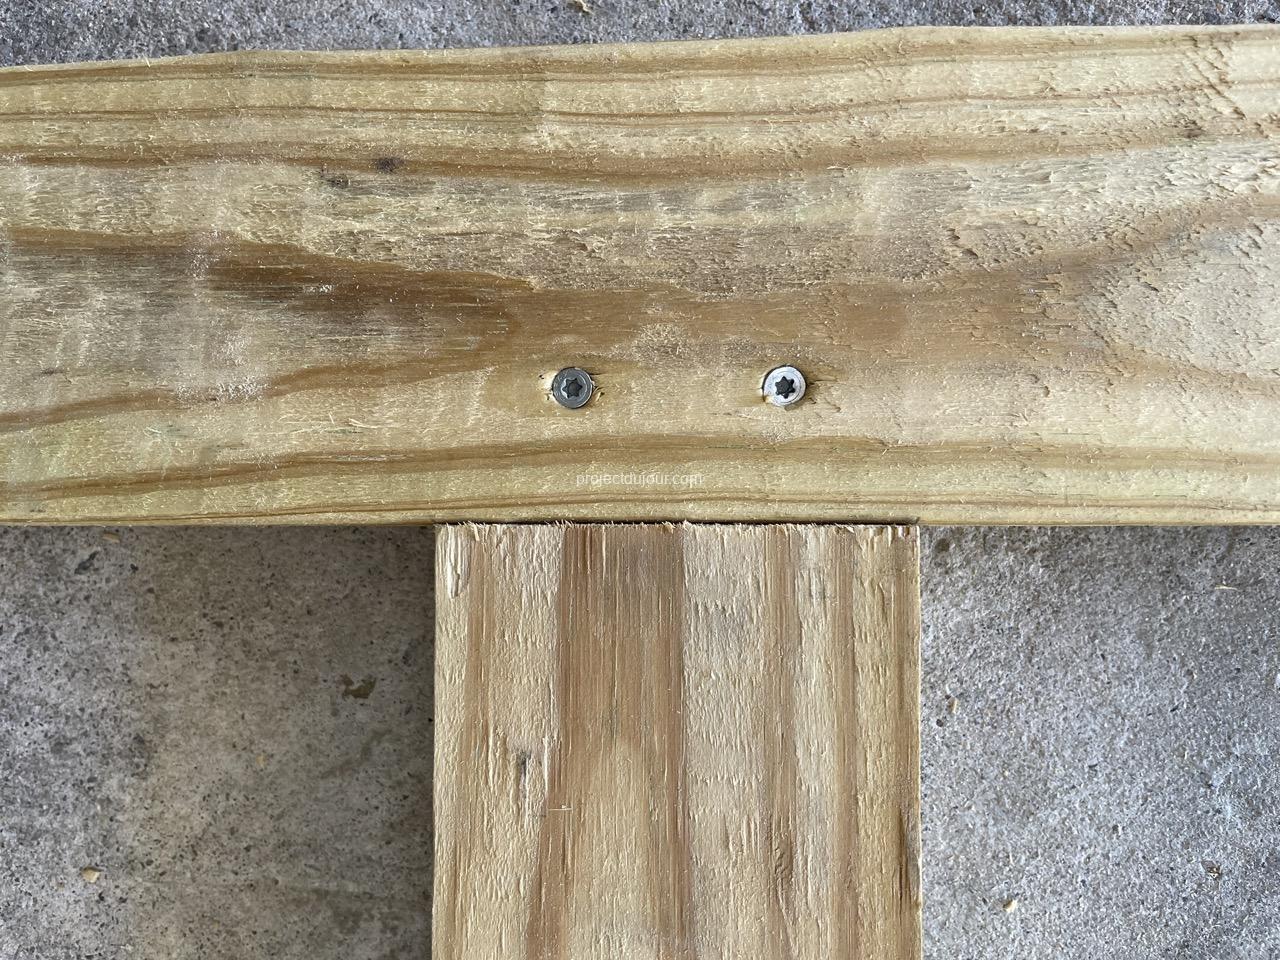
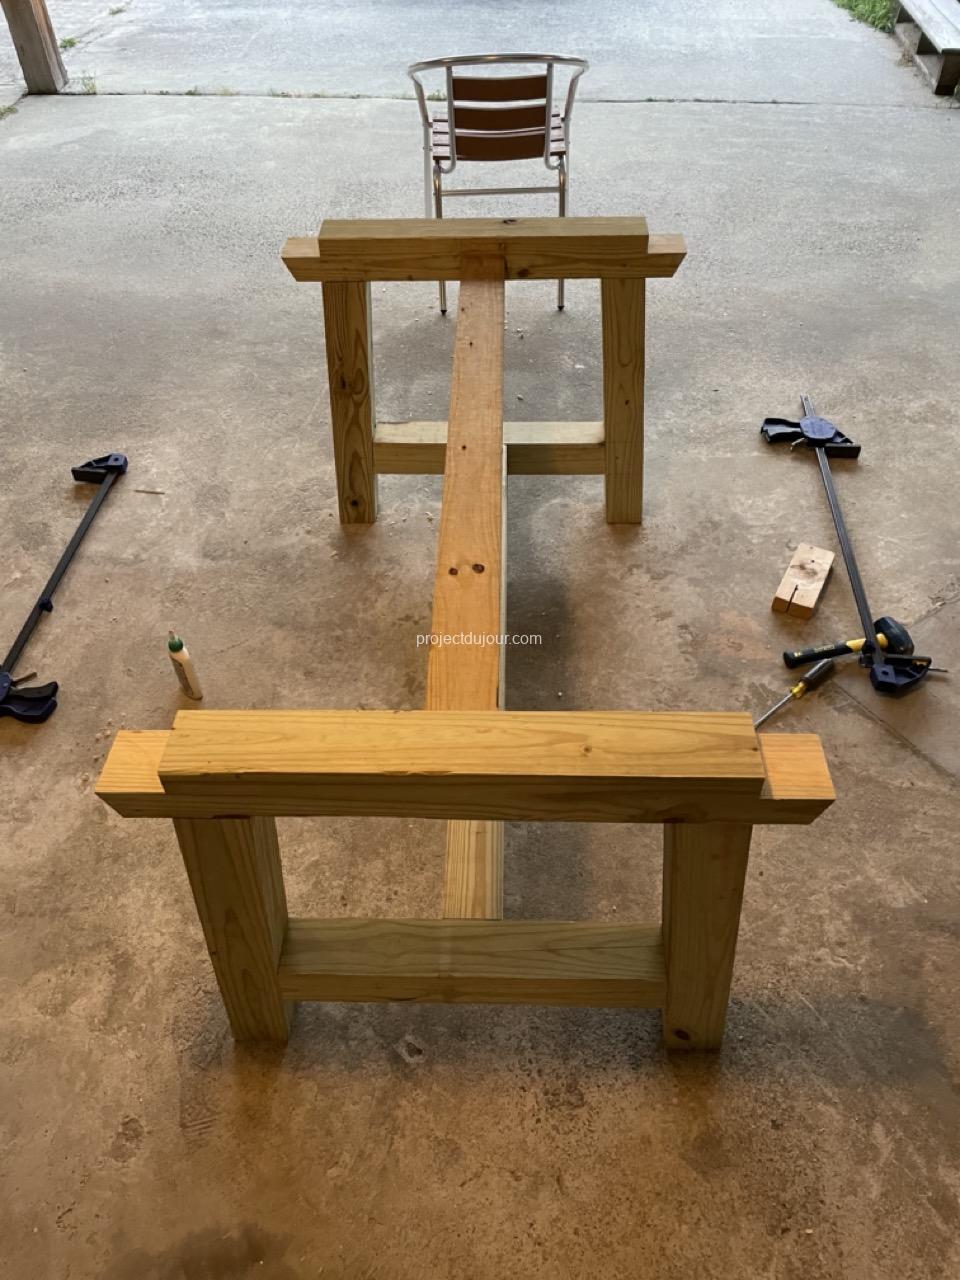
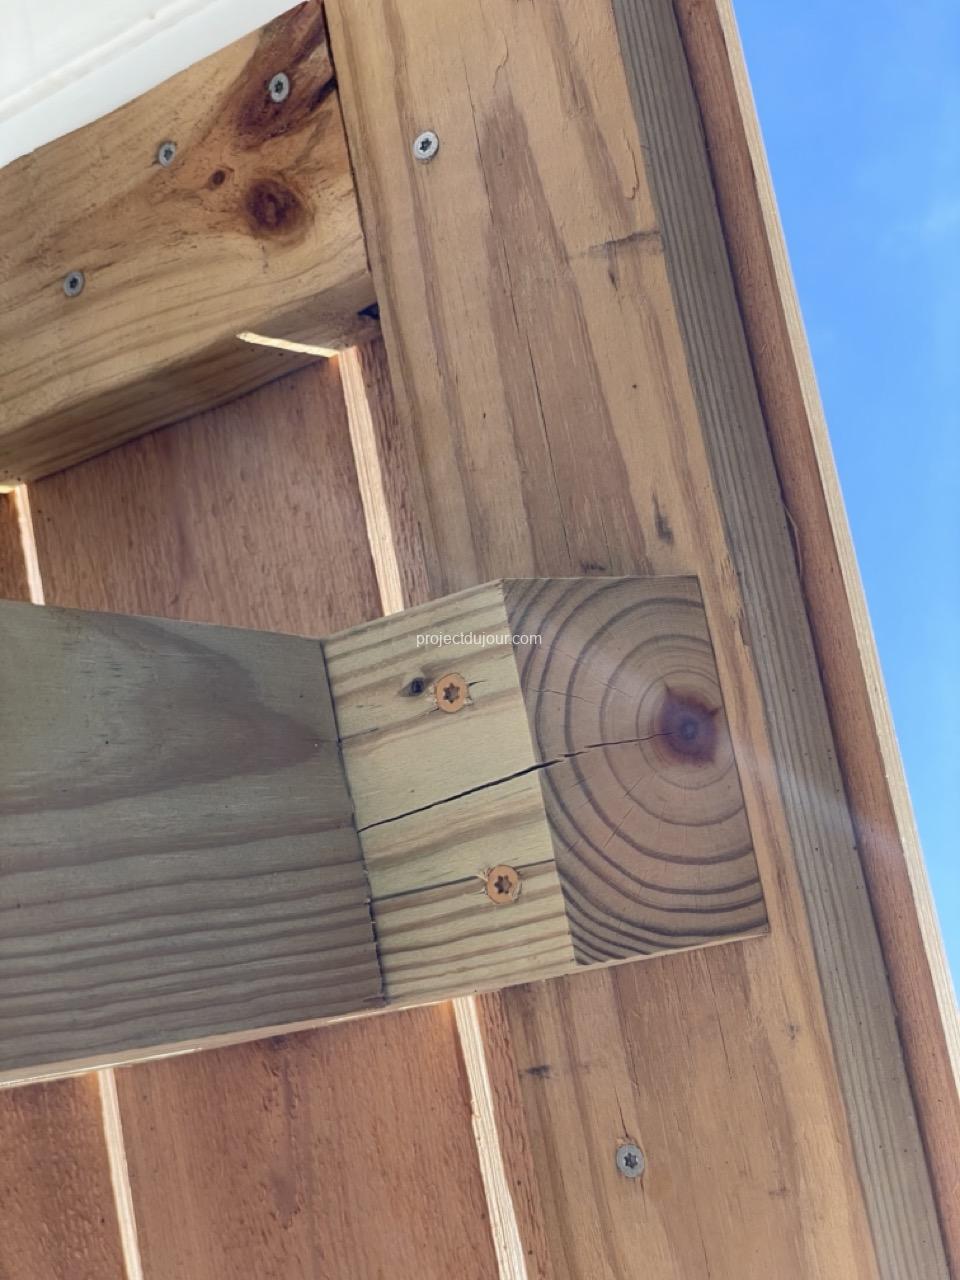
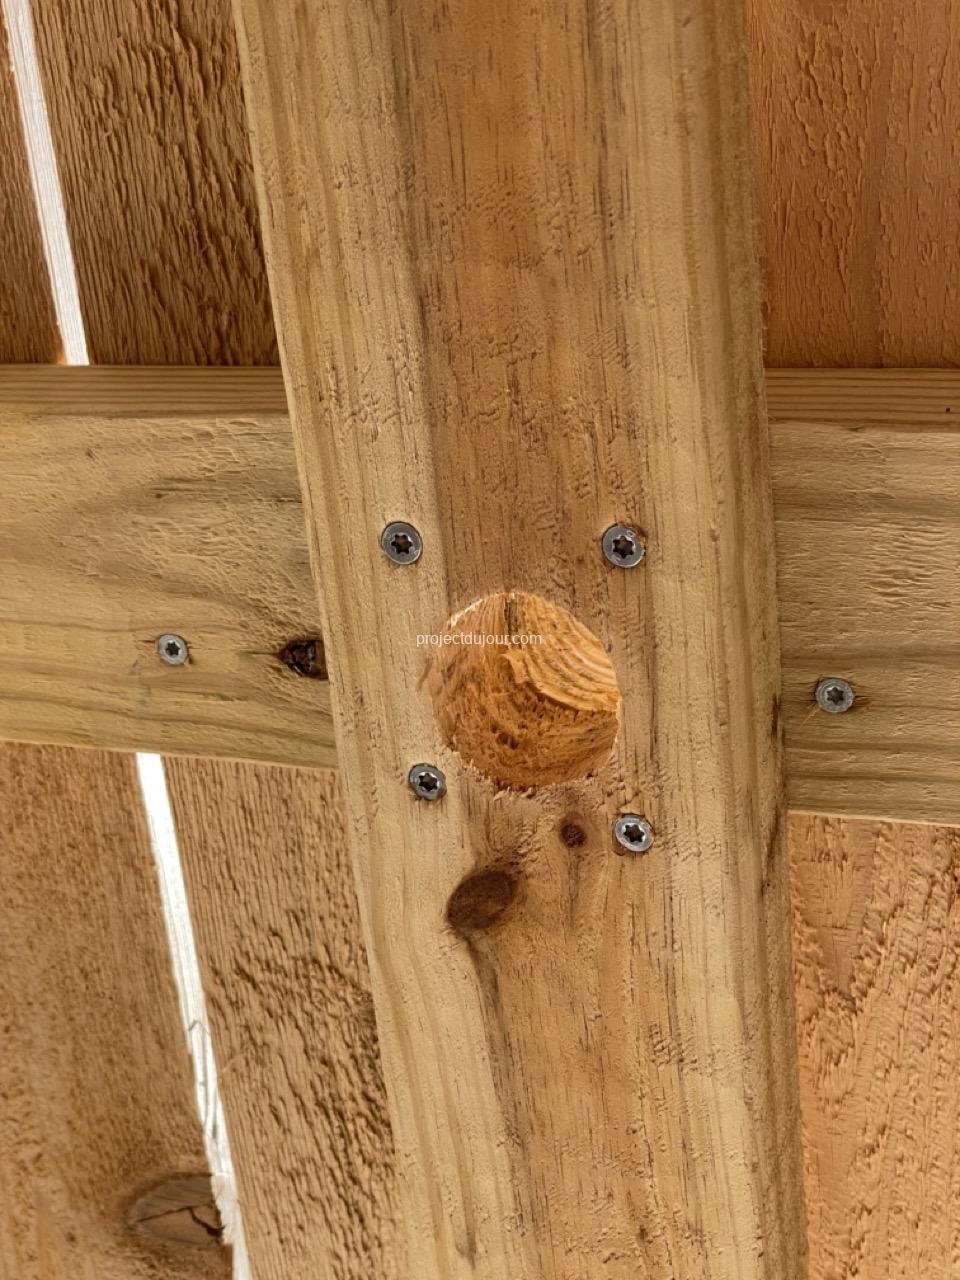
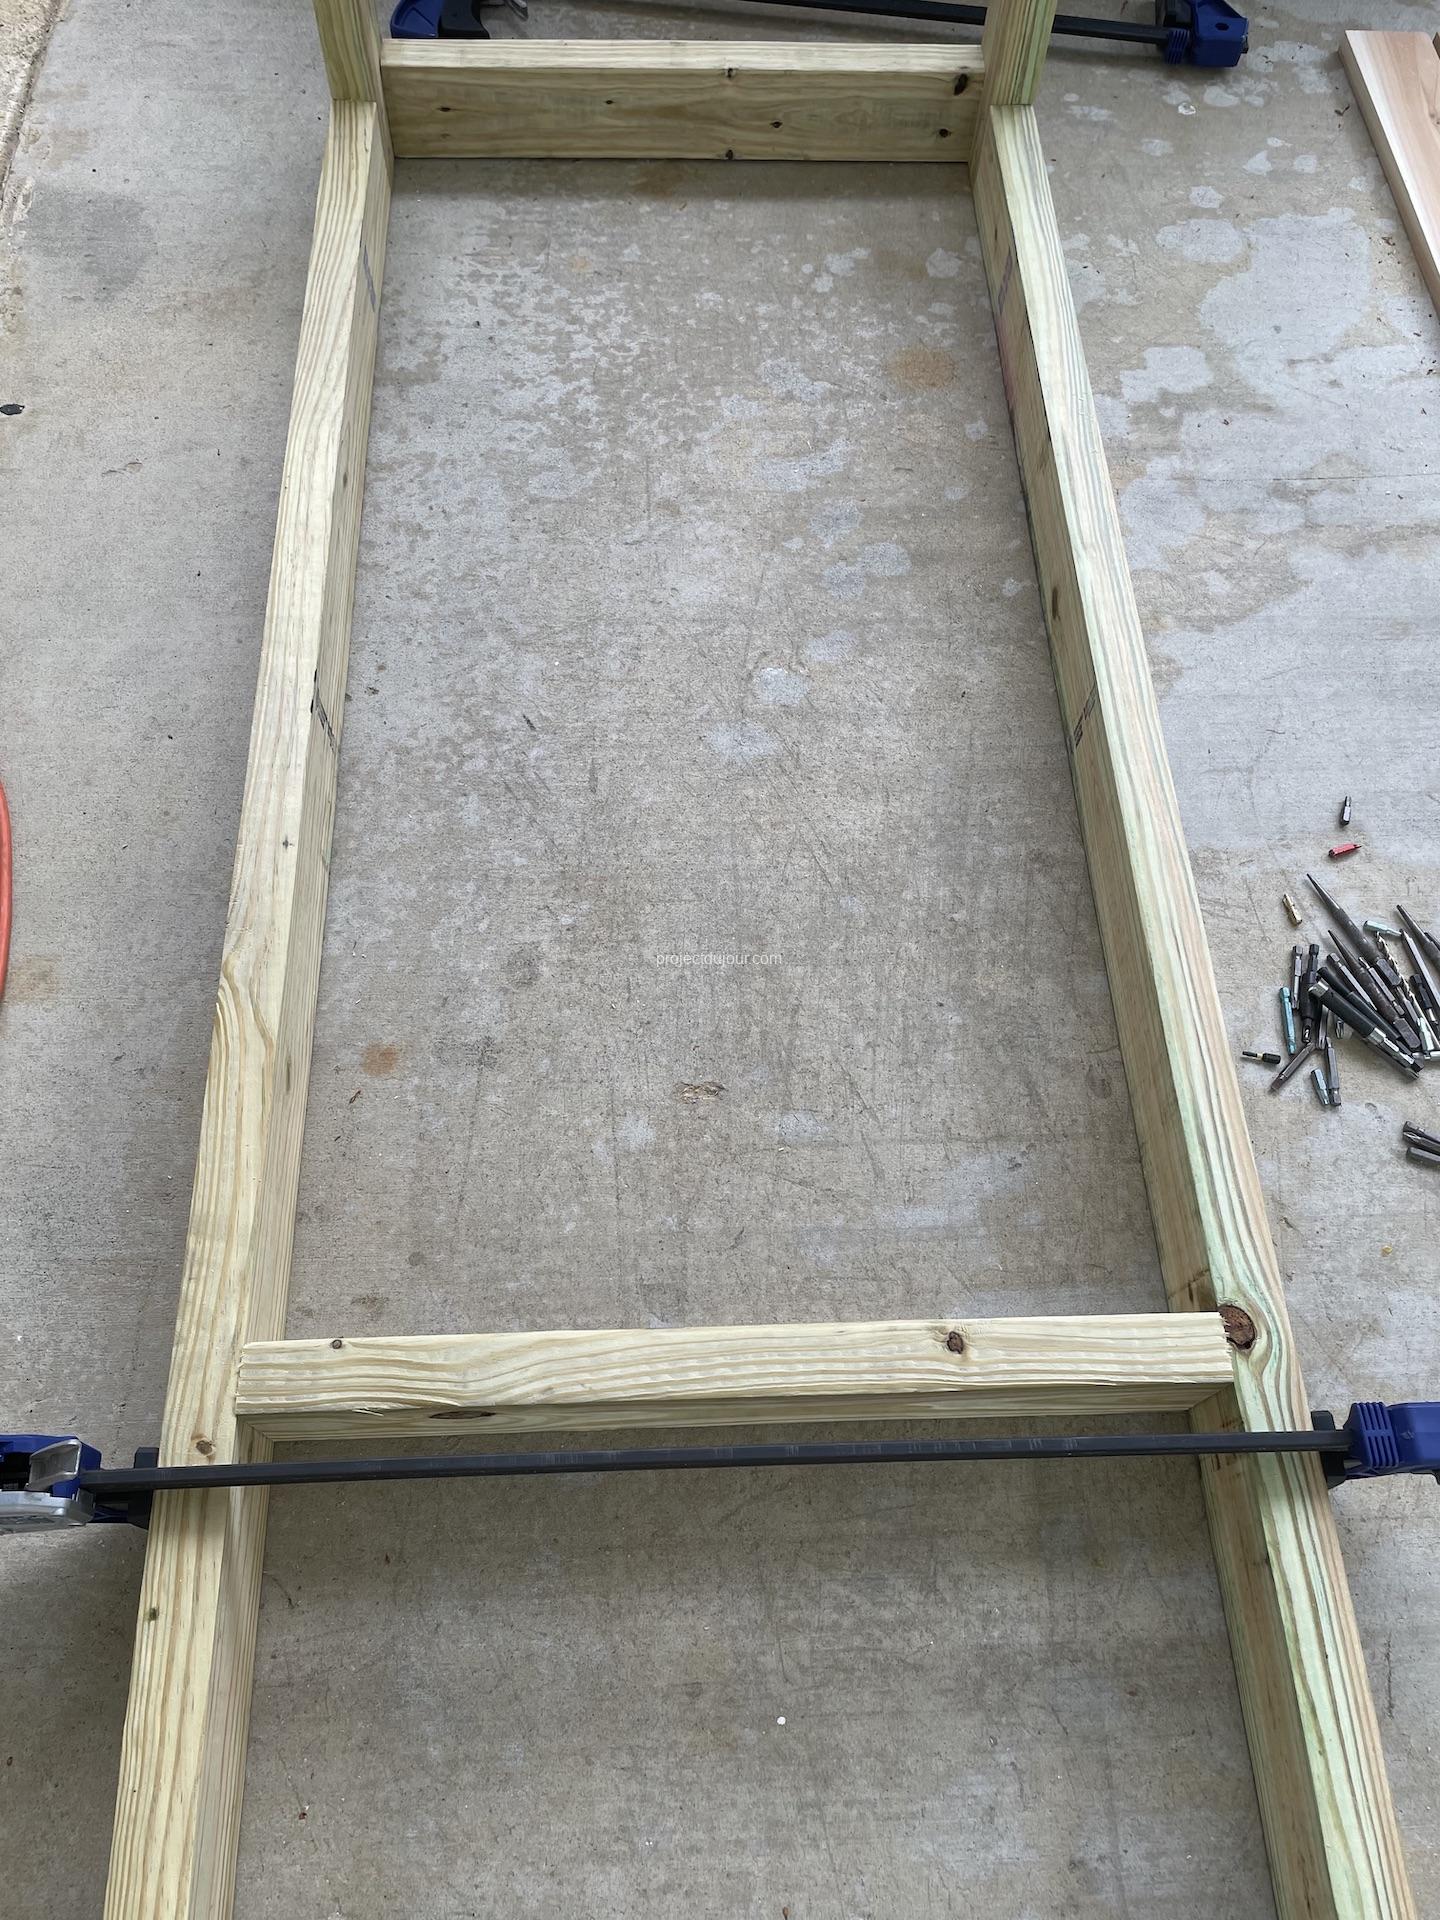
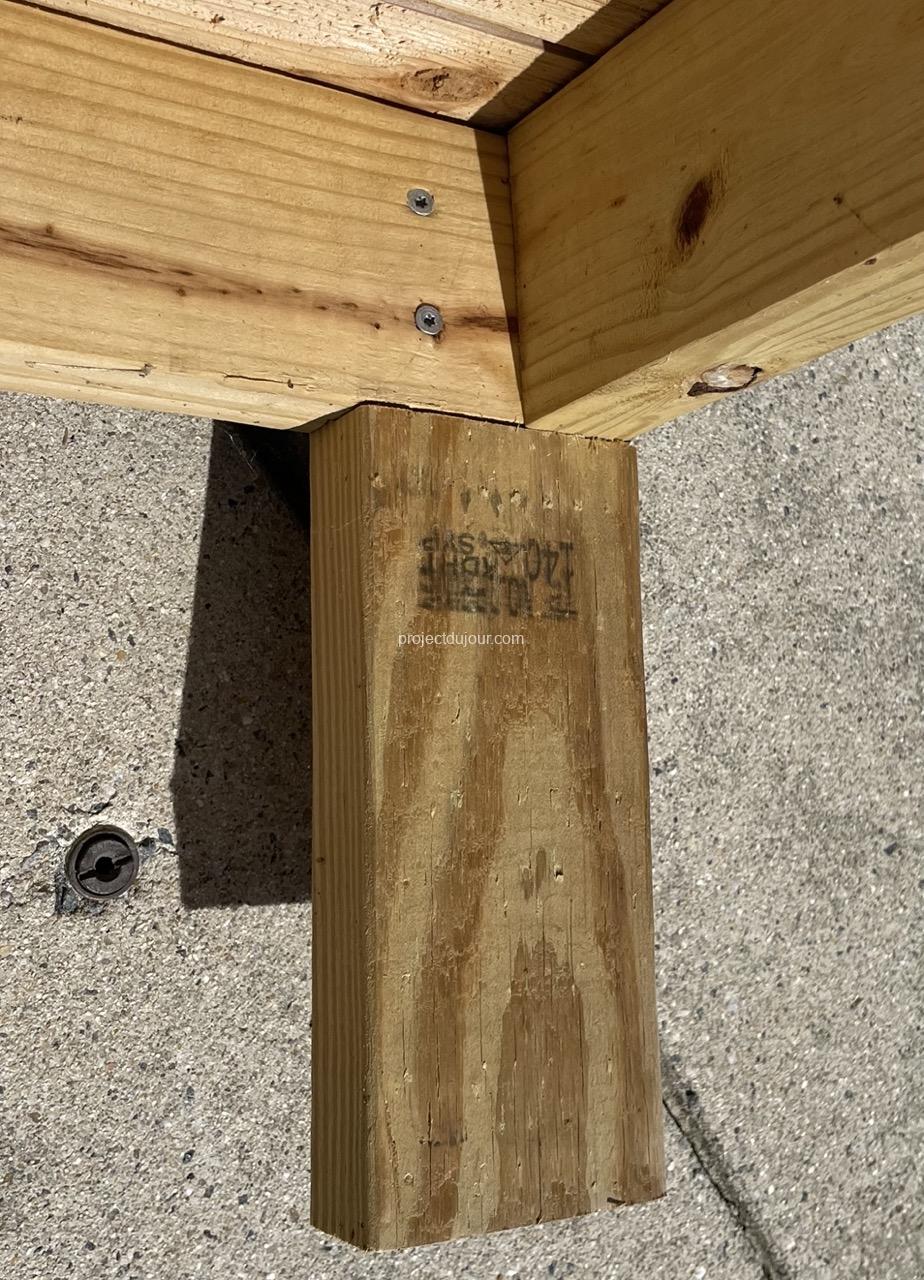
The frame is also built using tenons and mortises but the legs and the bottom H stretcher are made of 4×4 pressure treated lumber. There is an added 2×4 holding the top two end beams. The top frame is dropped on top of the bottom frame and help with two 3 1/2″ screws at each corner. These are screwed from under so I can remove the top. I also added four screws in the middle of the table, where the two 2×4 cross.
FrameFrame with bottom H stretcher Top frame assembled
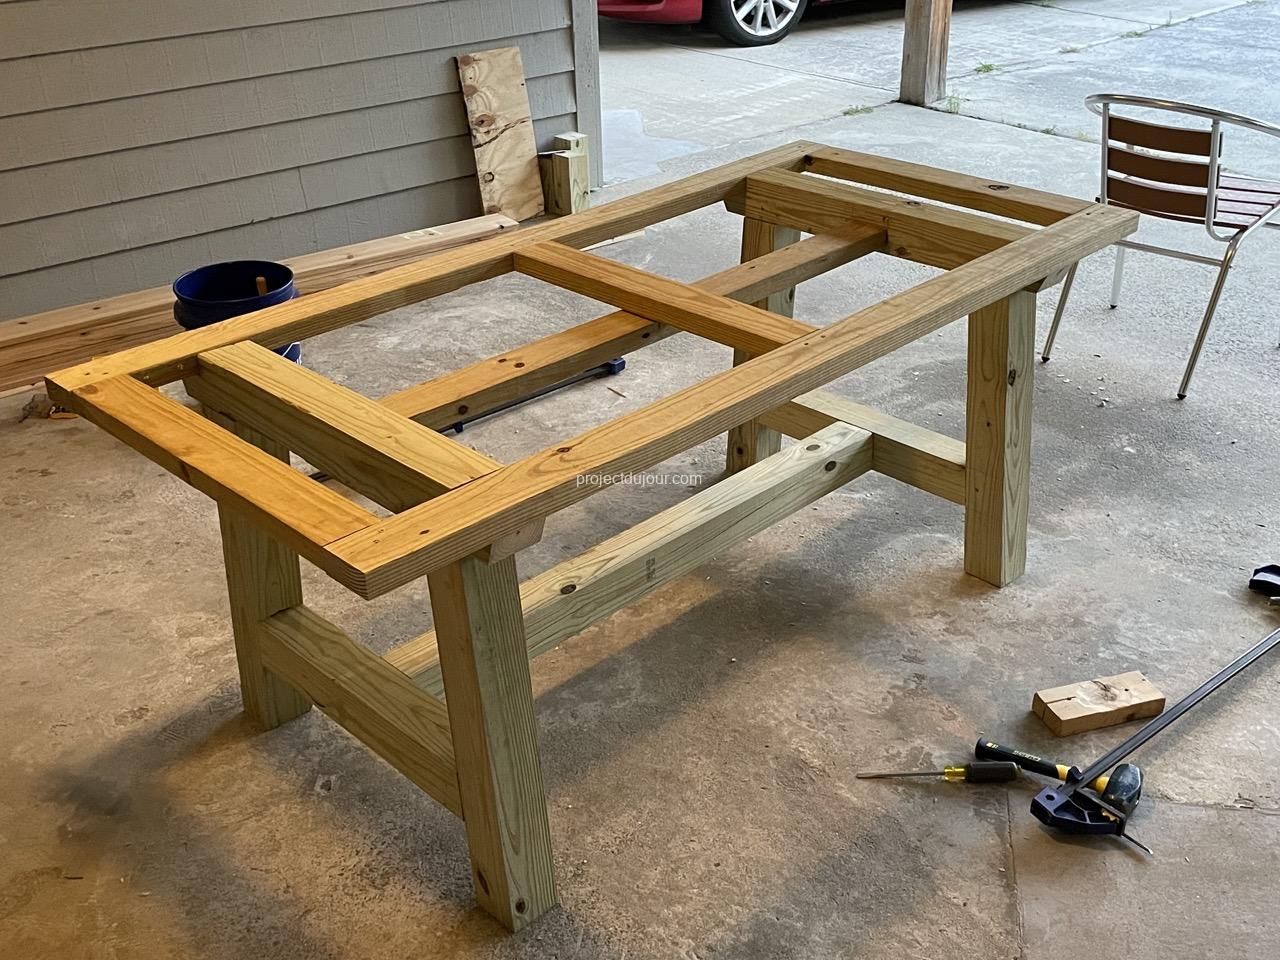
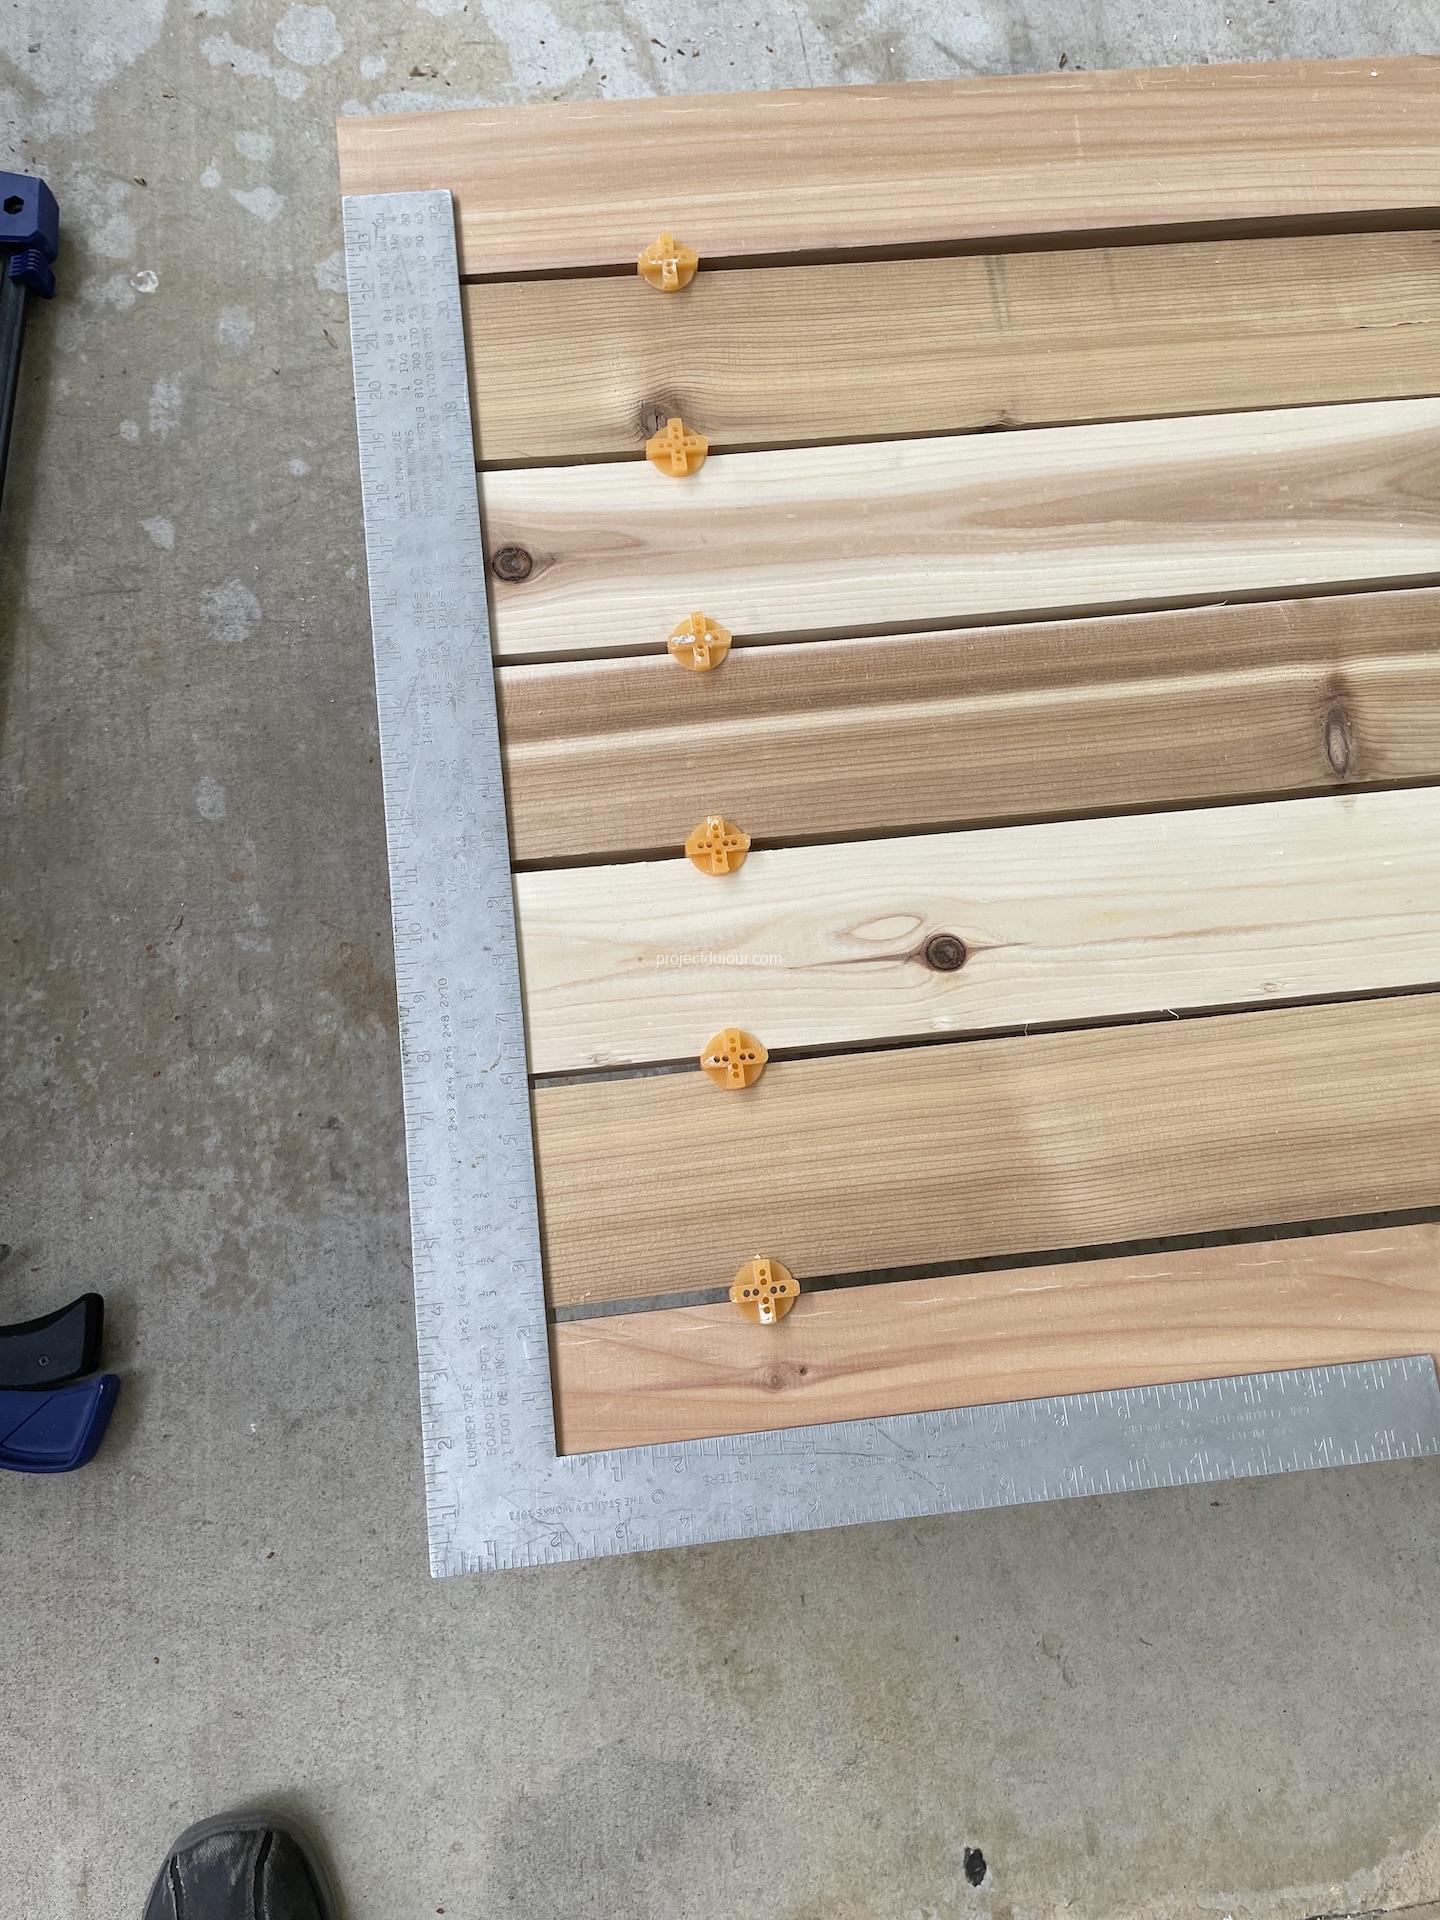
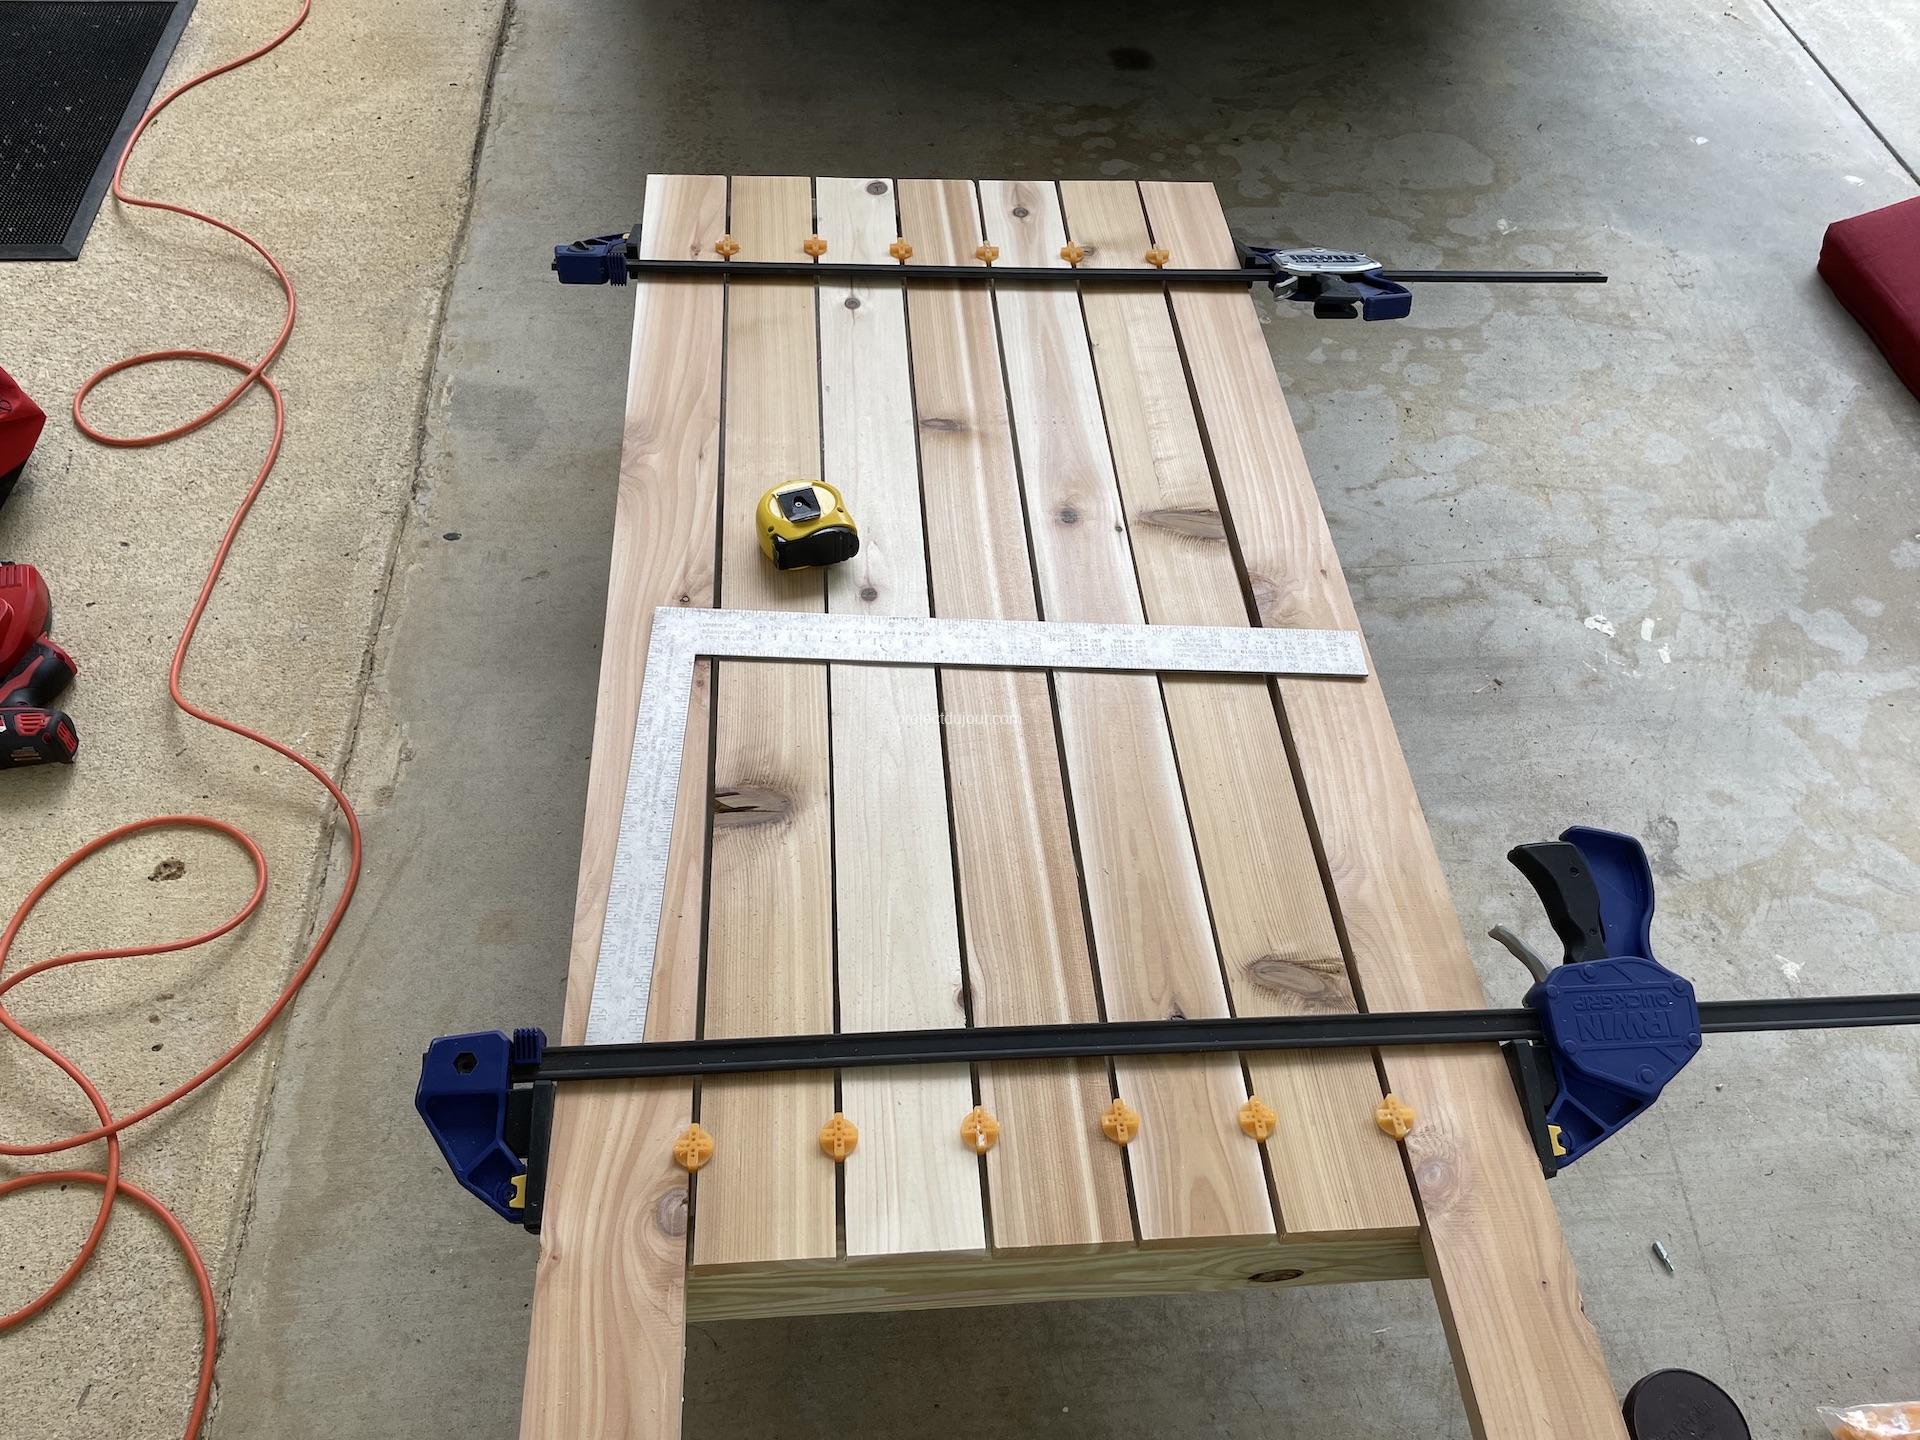
The table top is made of 1×6 cedar boards. The overall size is 72″ x 34 1/4″. I used 3 12 feet long 1×6 cedar boards cut in half for this build. The cedar boards are screwed to the top frame from under so the screws are hidden.
Screws holding the top frame to the legs Center of the table from underHole for the umbrella
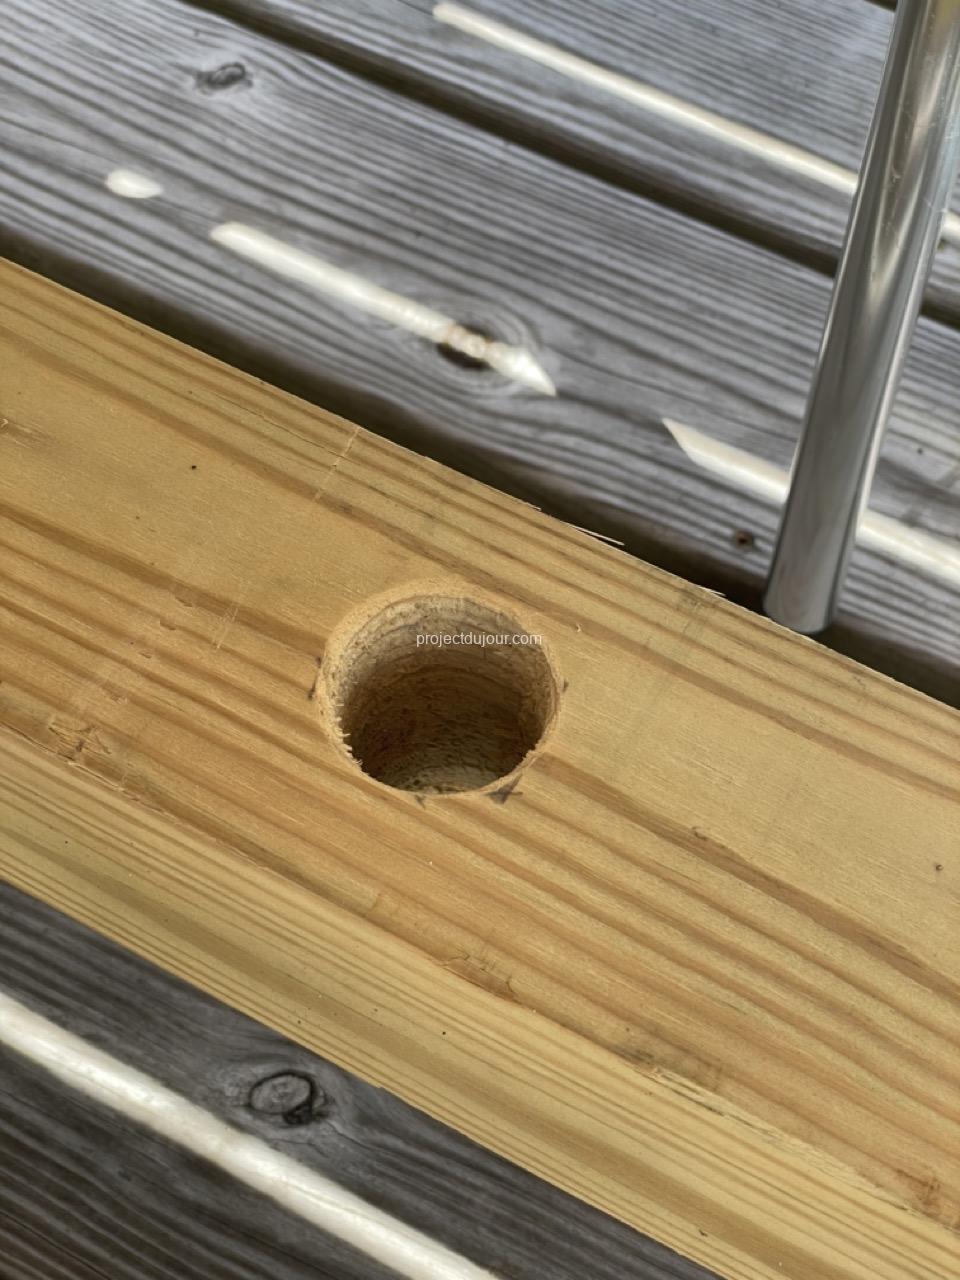
After everything was put together, I drilled a 1 5/8″ hole in the middle of the table top as well as the H stretcher to hold an umbrella.
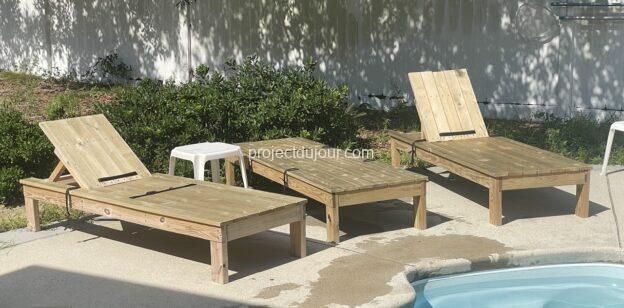
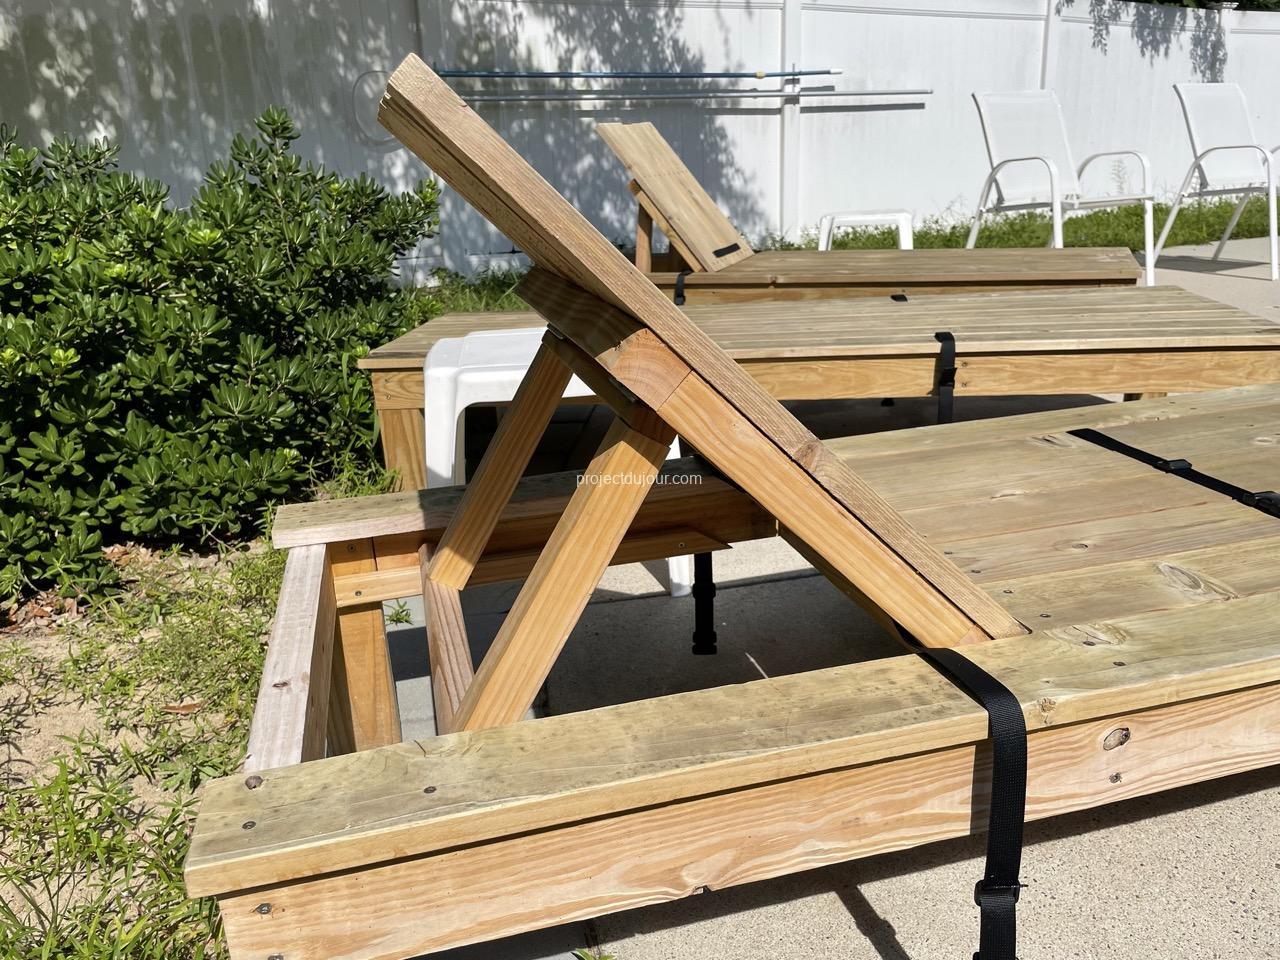
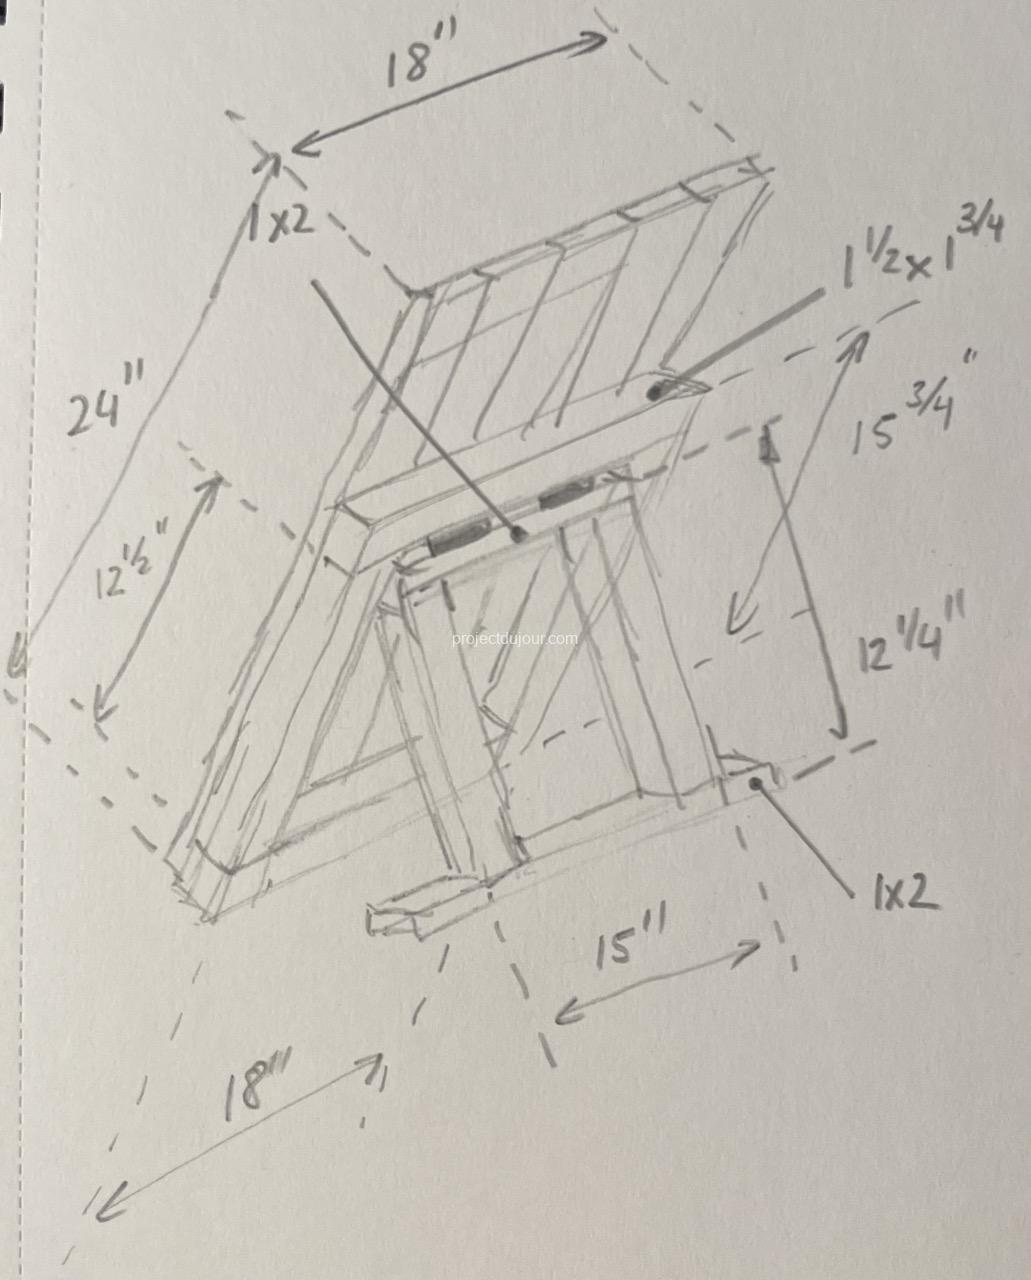
We’ve been looking for pool loungers that wouldn’t break the bank but would still look better than cheap plastic furniture. After some research on Pinterest, we decided to try to build our own. We estimated these would cost about $150, pretty much the same price as the plastic ones. This is based on 2021 prices, when lumber got really expensive and a 2×4, 8 feet long was around $10. The frame is built using pressure treaded lumber and the top is built out of cedar. All the screws are stainless steal and the hinges are galvanized.
The overall length of the loungers is 6 feet. The flat part is 4 feet long and the raised back is 2 feet long. This is apparently a standard size for pool loungers and you can find cushions for these in many stores (I can’t recall if we got ours at Lowe’s or Home Depot). The top boards are 1×4 cedar, 12 feet long cut in half so we ended up with no waste. Since we built an even number of loungers, we bought 7 cedar boards for each pair of loungers. For the frame, We used 2×4 pressure treated lumber, 8 feet long. The long horizontal part is a bit less than 6 feet long (71 1/2″) to create a small overhang with the cedar boards at both ends. The left over 2×4 is then cut in half for the legs, about a foot each.
The legs and side parts of the frames are assembled using halving joints and stainless steel screws. I used a table saw to make the initial cuts and finished with a hand saw.
Halving joint cuts using a table sawHalving joint
To hold the frame together I added 4 pieces of 2×4 pressure treated between the two sides of the frame. The length of the transversal pieces was determined empirically. I could have used the theoretical width of the cedar boards but I learned over time that these are never exact. So I first laid all the cedar boards I wanted on the ground with tile spacers between them. I then subtracted the width of the frame’s sides as well as a small overhang to match the overhang on the length of the lounger. At the end, of all this, I settled for 21 1/2″ for all the transversal pieces.
Frame alignment before screwsPlacing transversal supportScrews for the frameLong screws outsideShort screws inside
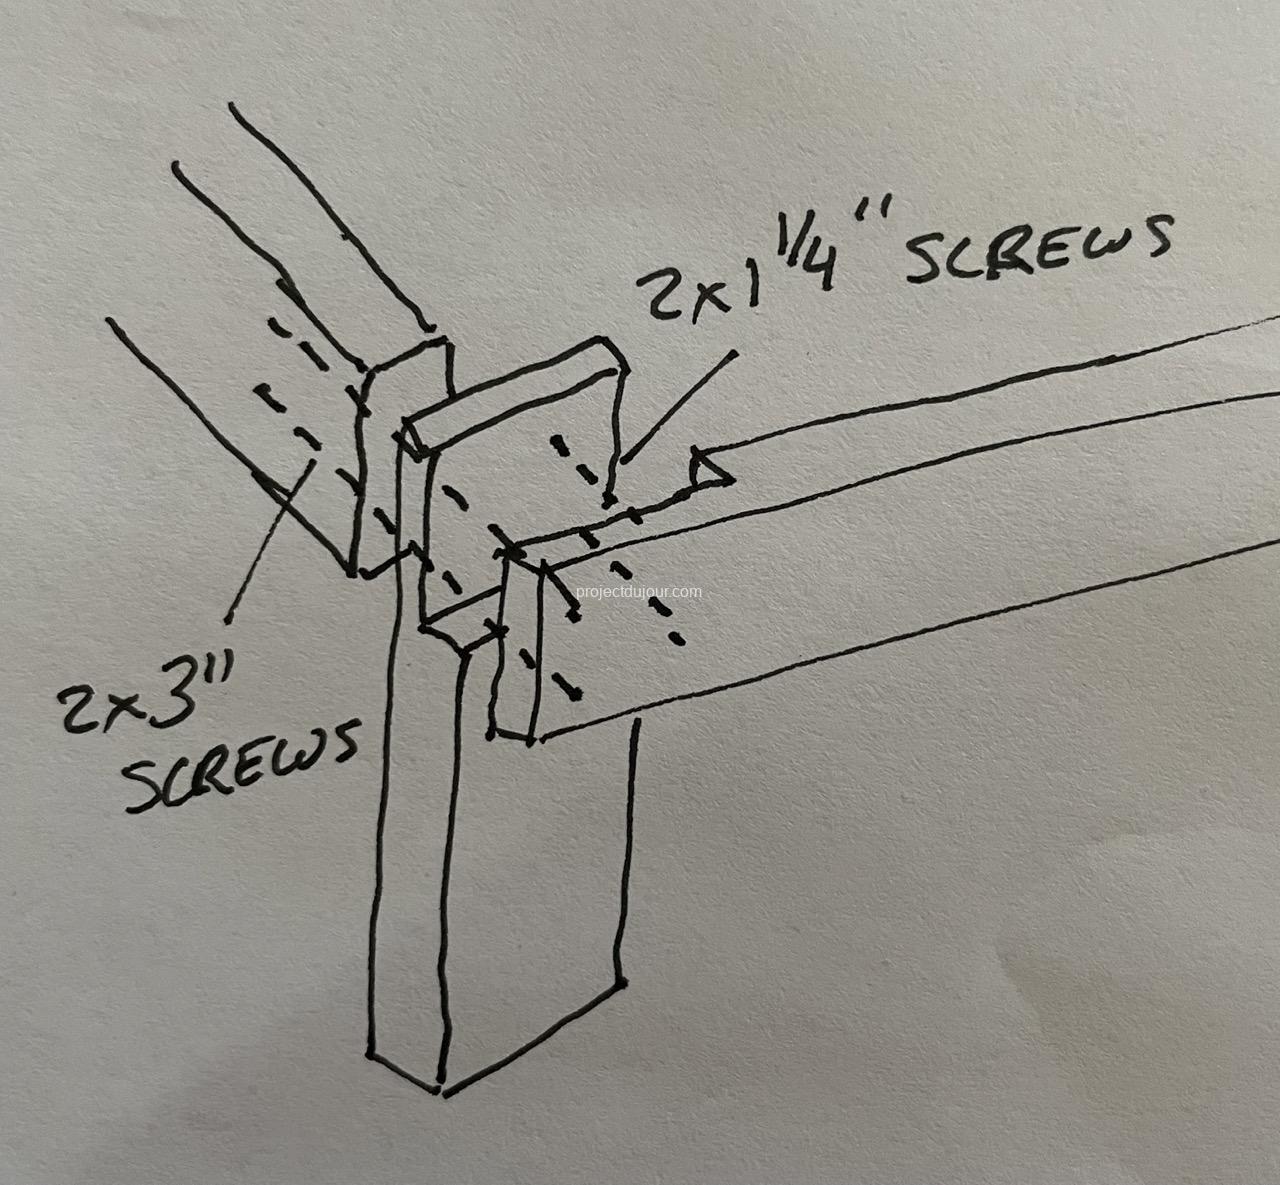
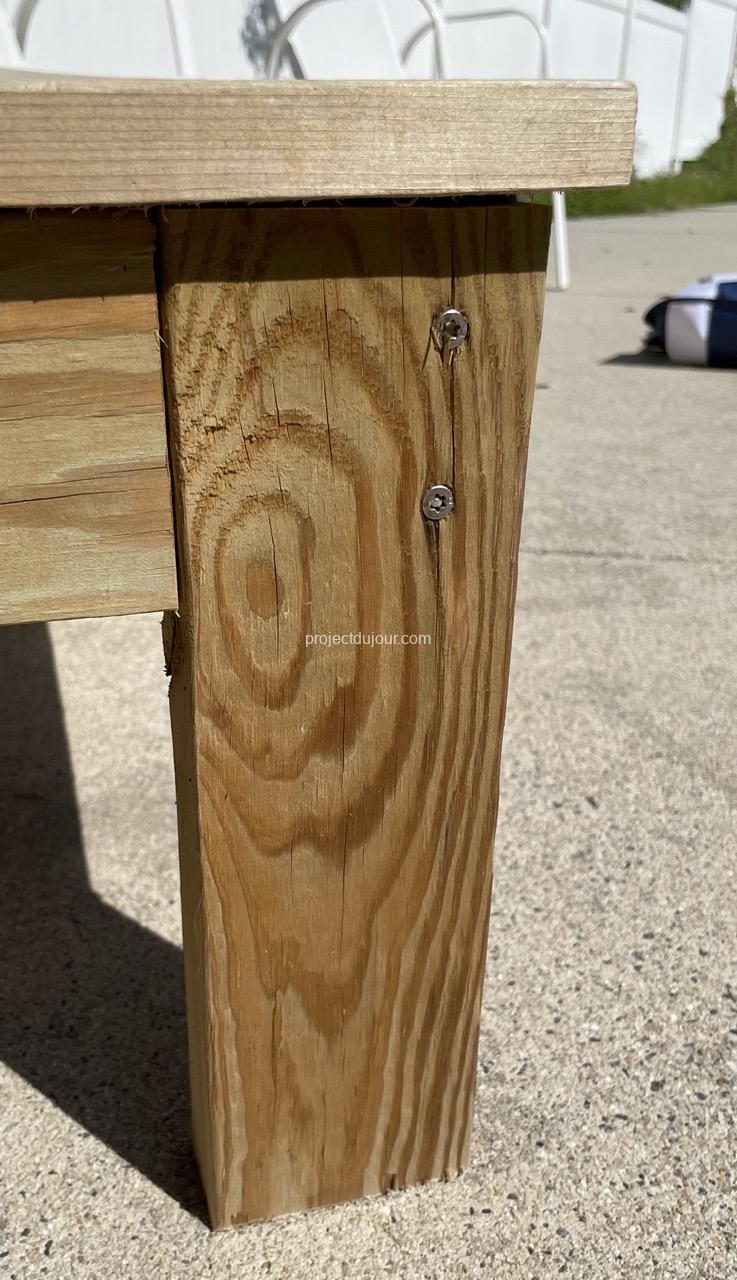
I used two 3″ long stainless screws at each corner, screwed from the outside of the frame. These tie together the leg, side beam and transversal piece. I added two 1 1/4″ long stainless screws on the inside of the halving joints. This way each leg holds with 4 screws.
The two extra transversal supports are located approximatively 2 feet from each end (one third of the length). The best way to figure out where to place the support close to the hinges is to first cut the 5 center cedar boards to 4 feet and place them on the frame. You also need to keep a small space for the hinge (see picture of hinge below). I ended up with the opening for the back being 22″ long.
To make sure the spacing between the boards was regular, I used tiling spacers.
Using tile spacer and square for alignmentPositioning over frame
Before screwing any cedar board to the frame, I clamped them together and moved them over the frame until the overhangs where even on all sides.
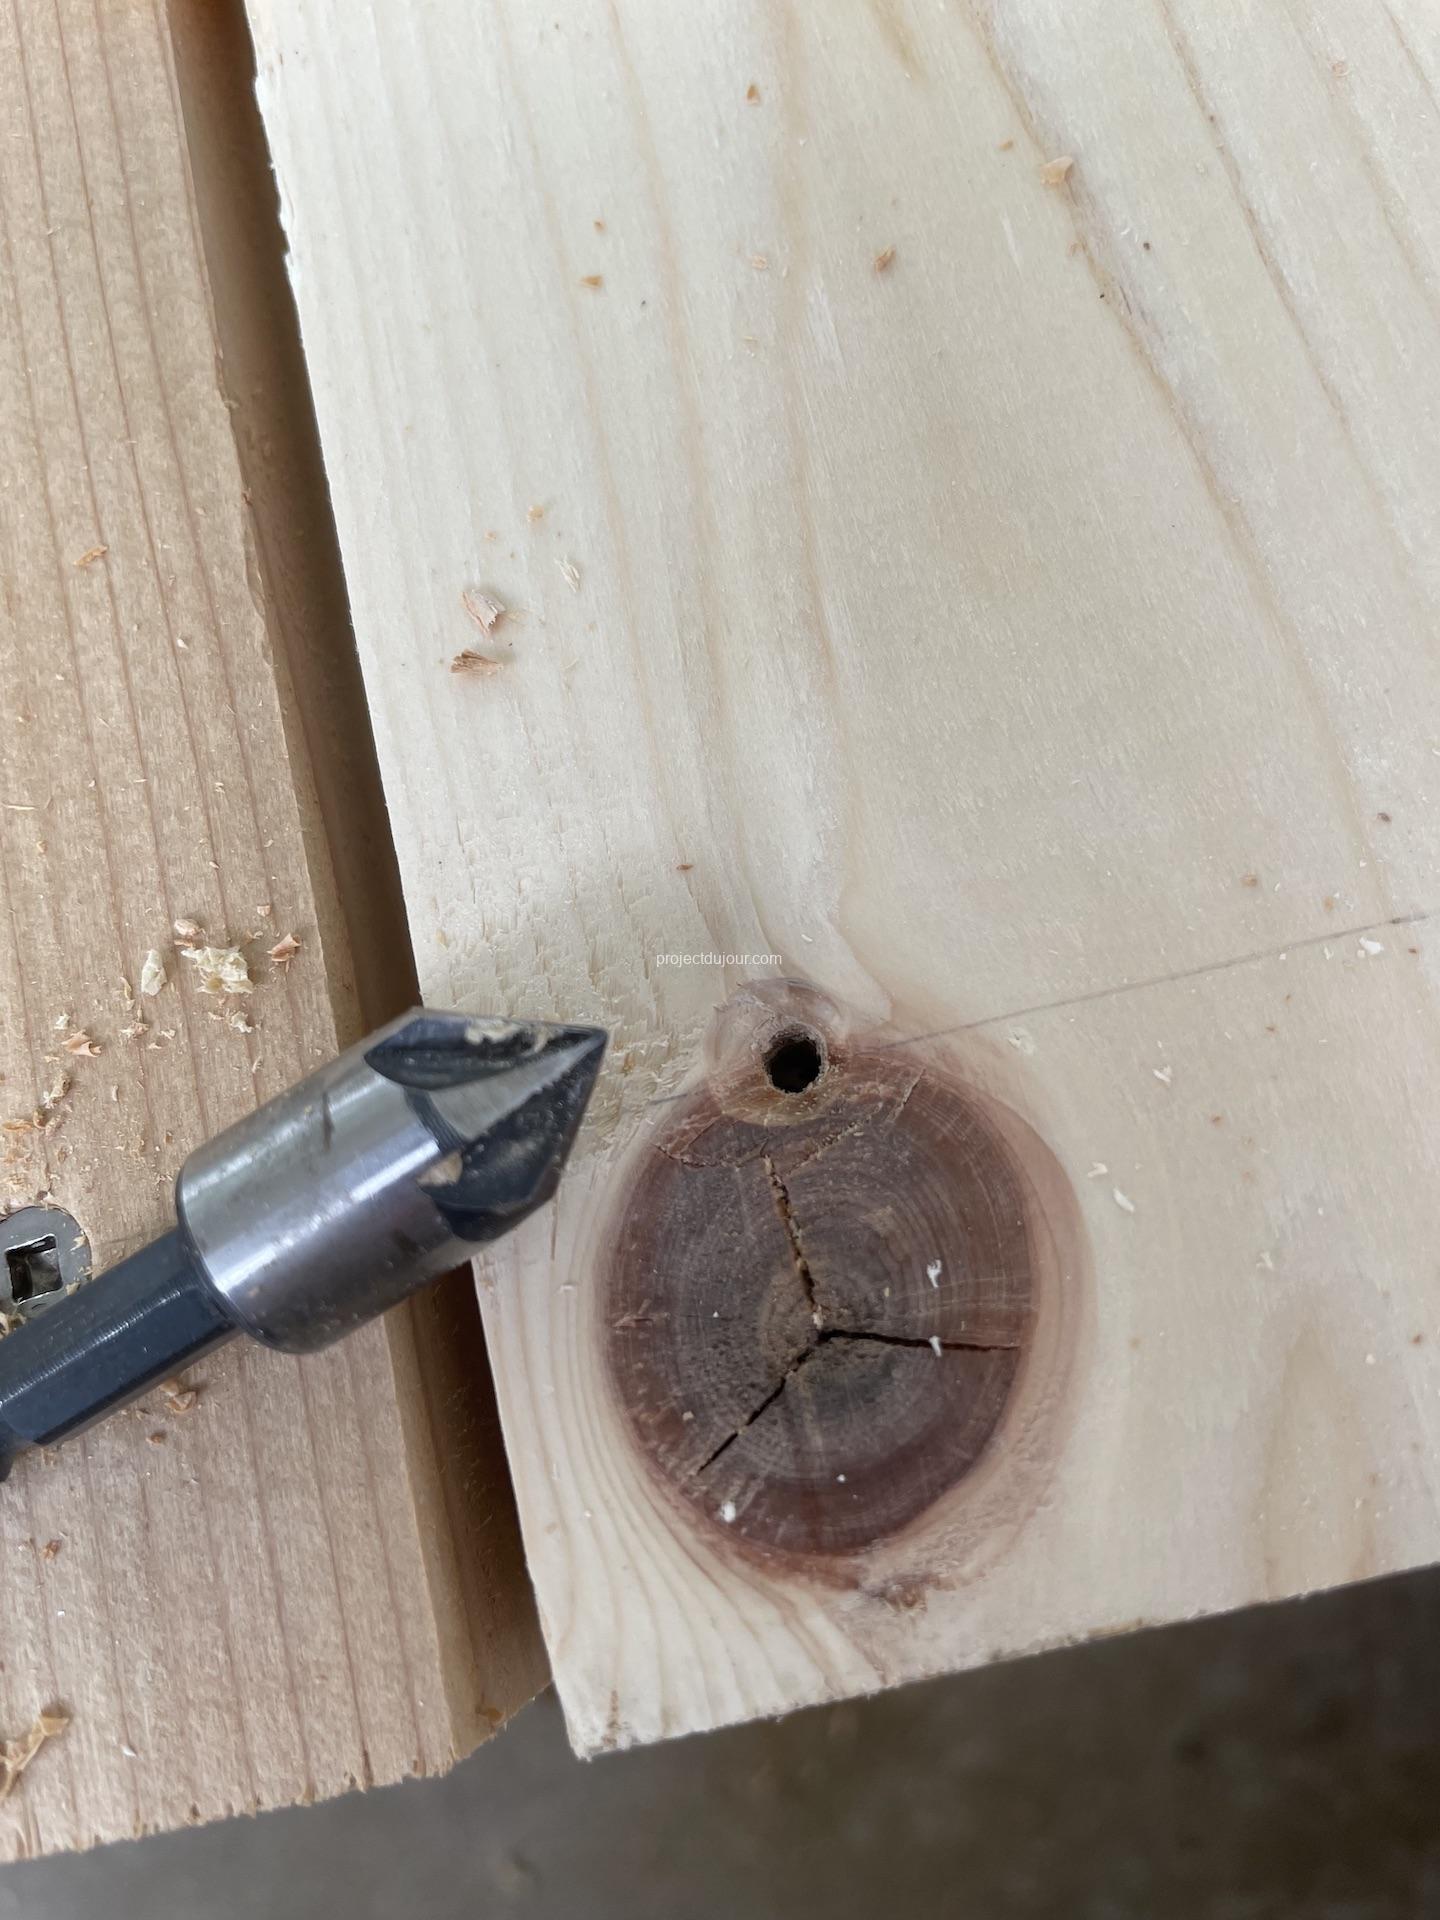
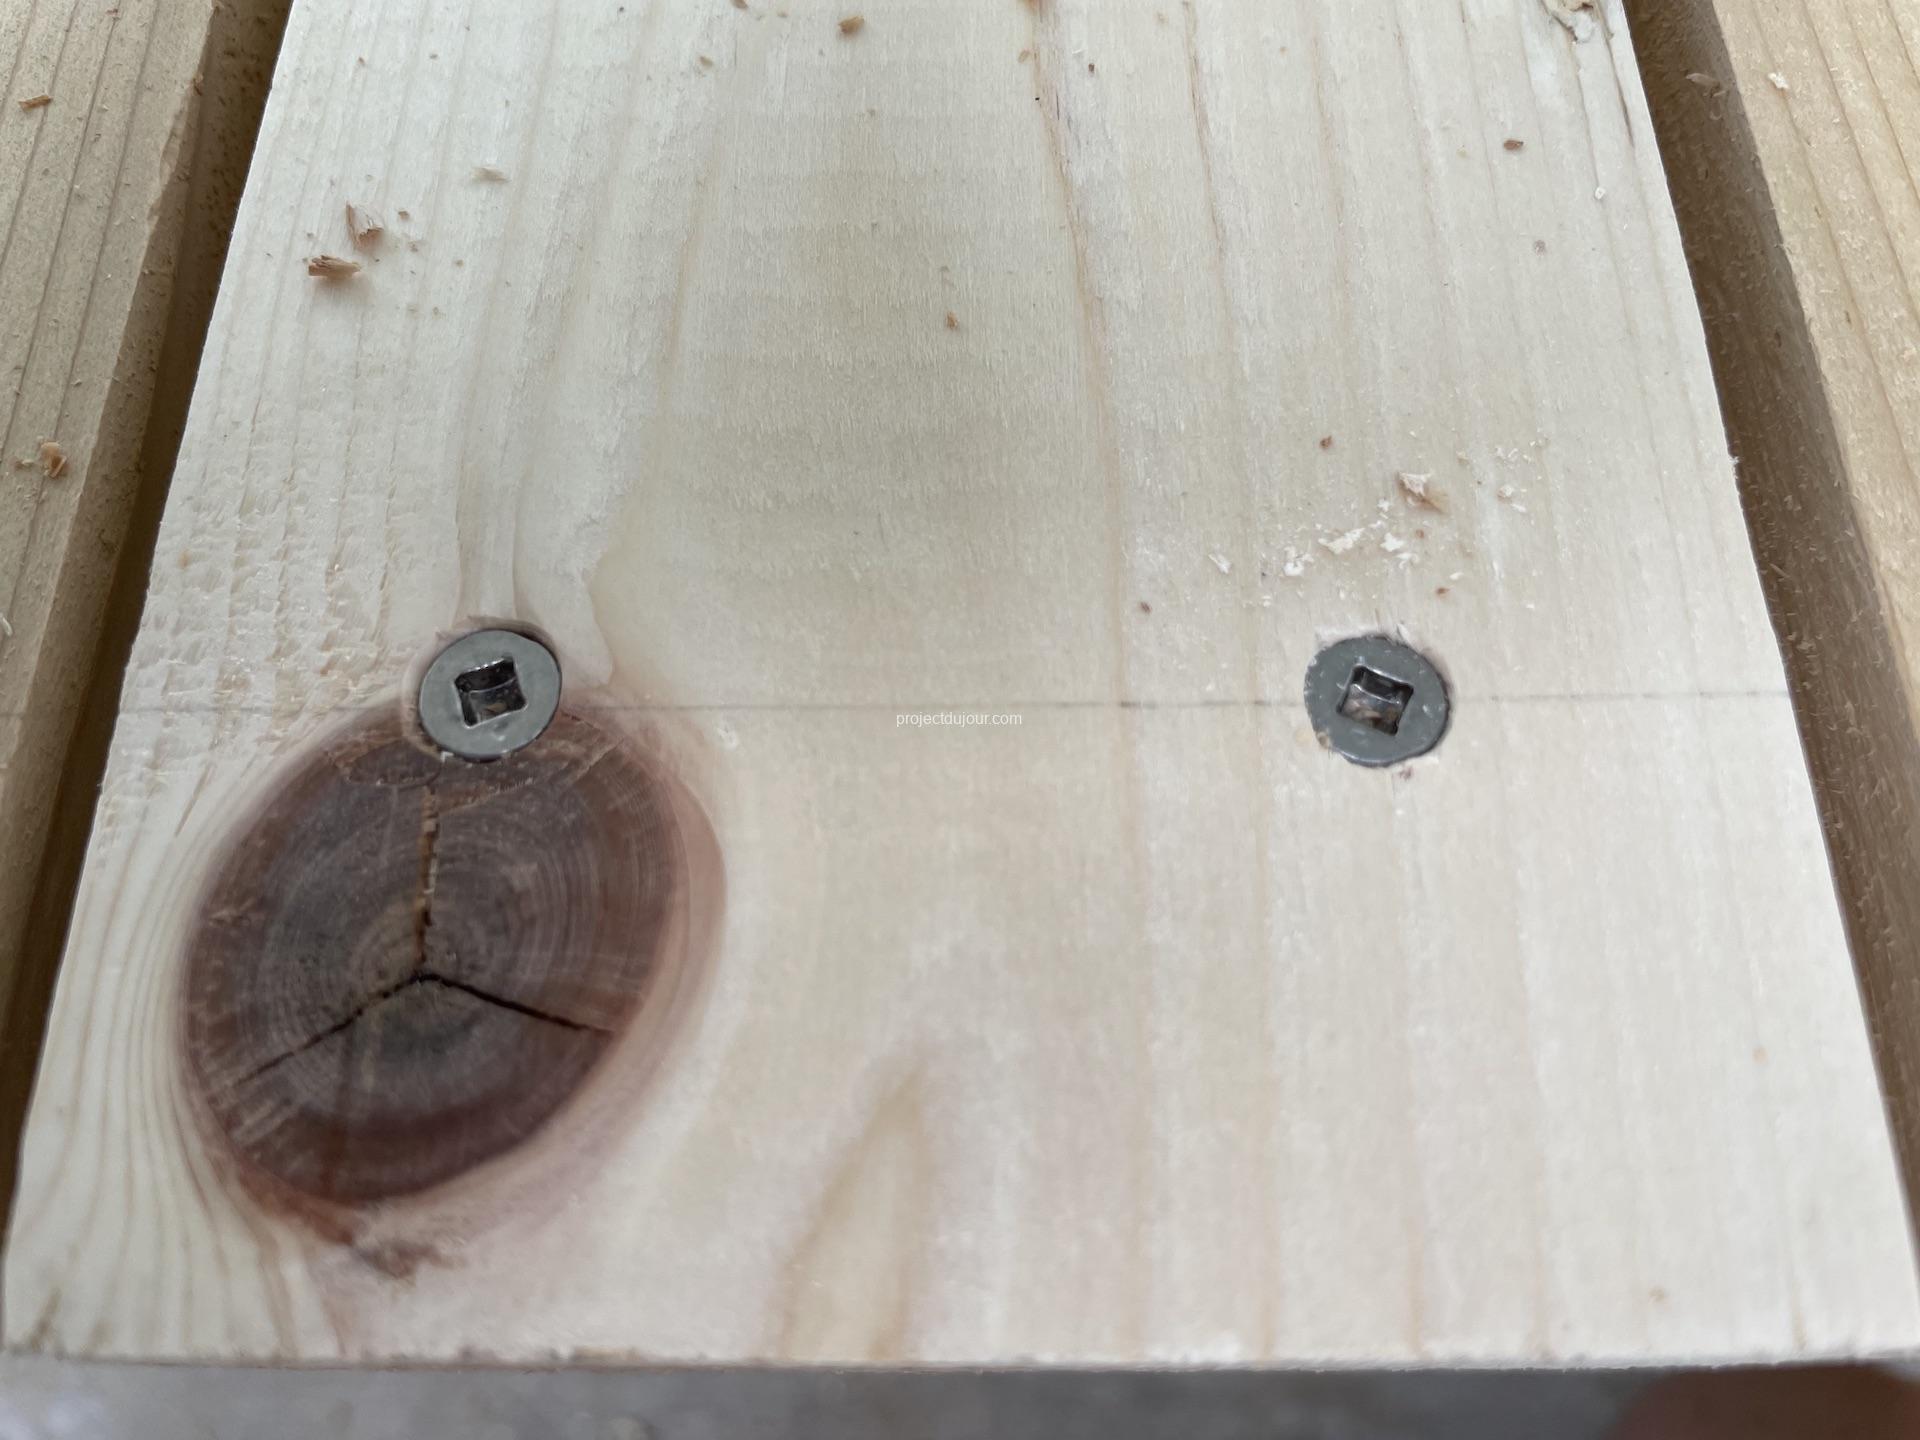
Since cedar has a nasty tendency to split, I decided to counter sink and pre-drill each hole. I don’t have a counter drill bit so I used first a counter bit and then a drill bit. It’s a bit time consuming so I would suggest buying a proper counter drill bit. To attach the cedar boards, I used some “SPAX #7 x 1-5/8in. Flat Head Stainless Steel Screws with Double Lock Thread” (found at Lowe’s or Amazon).
Counter sink and pre-drillFlush stainless screws
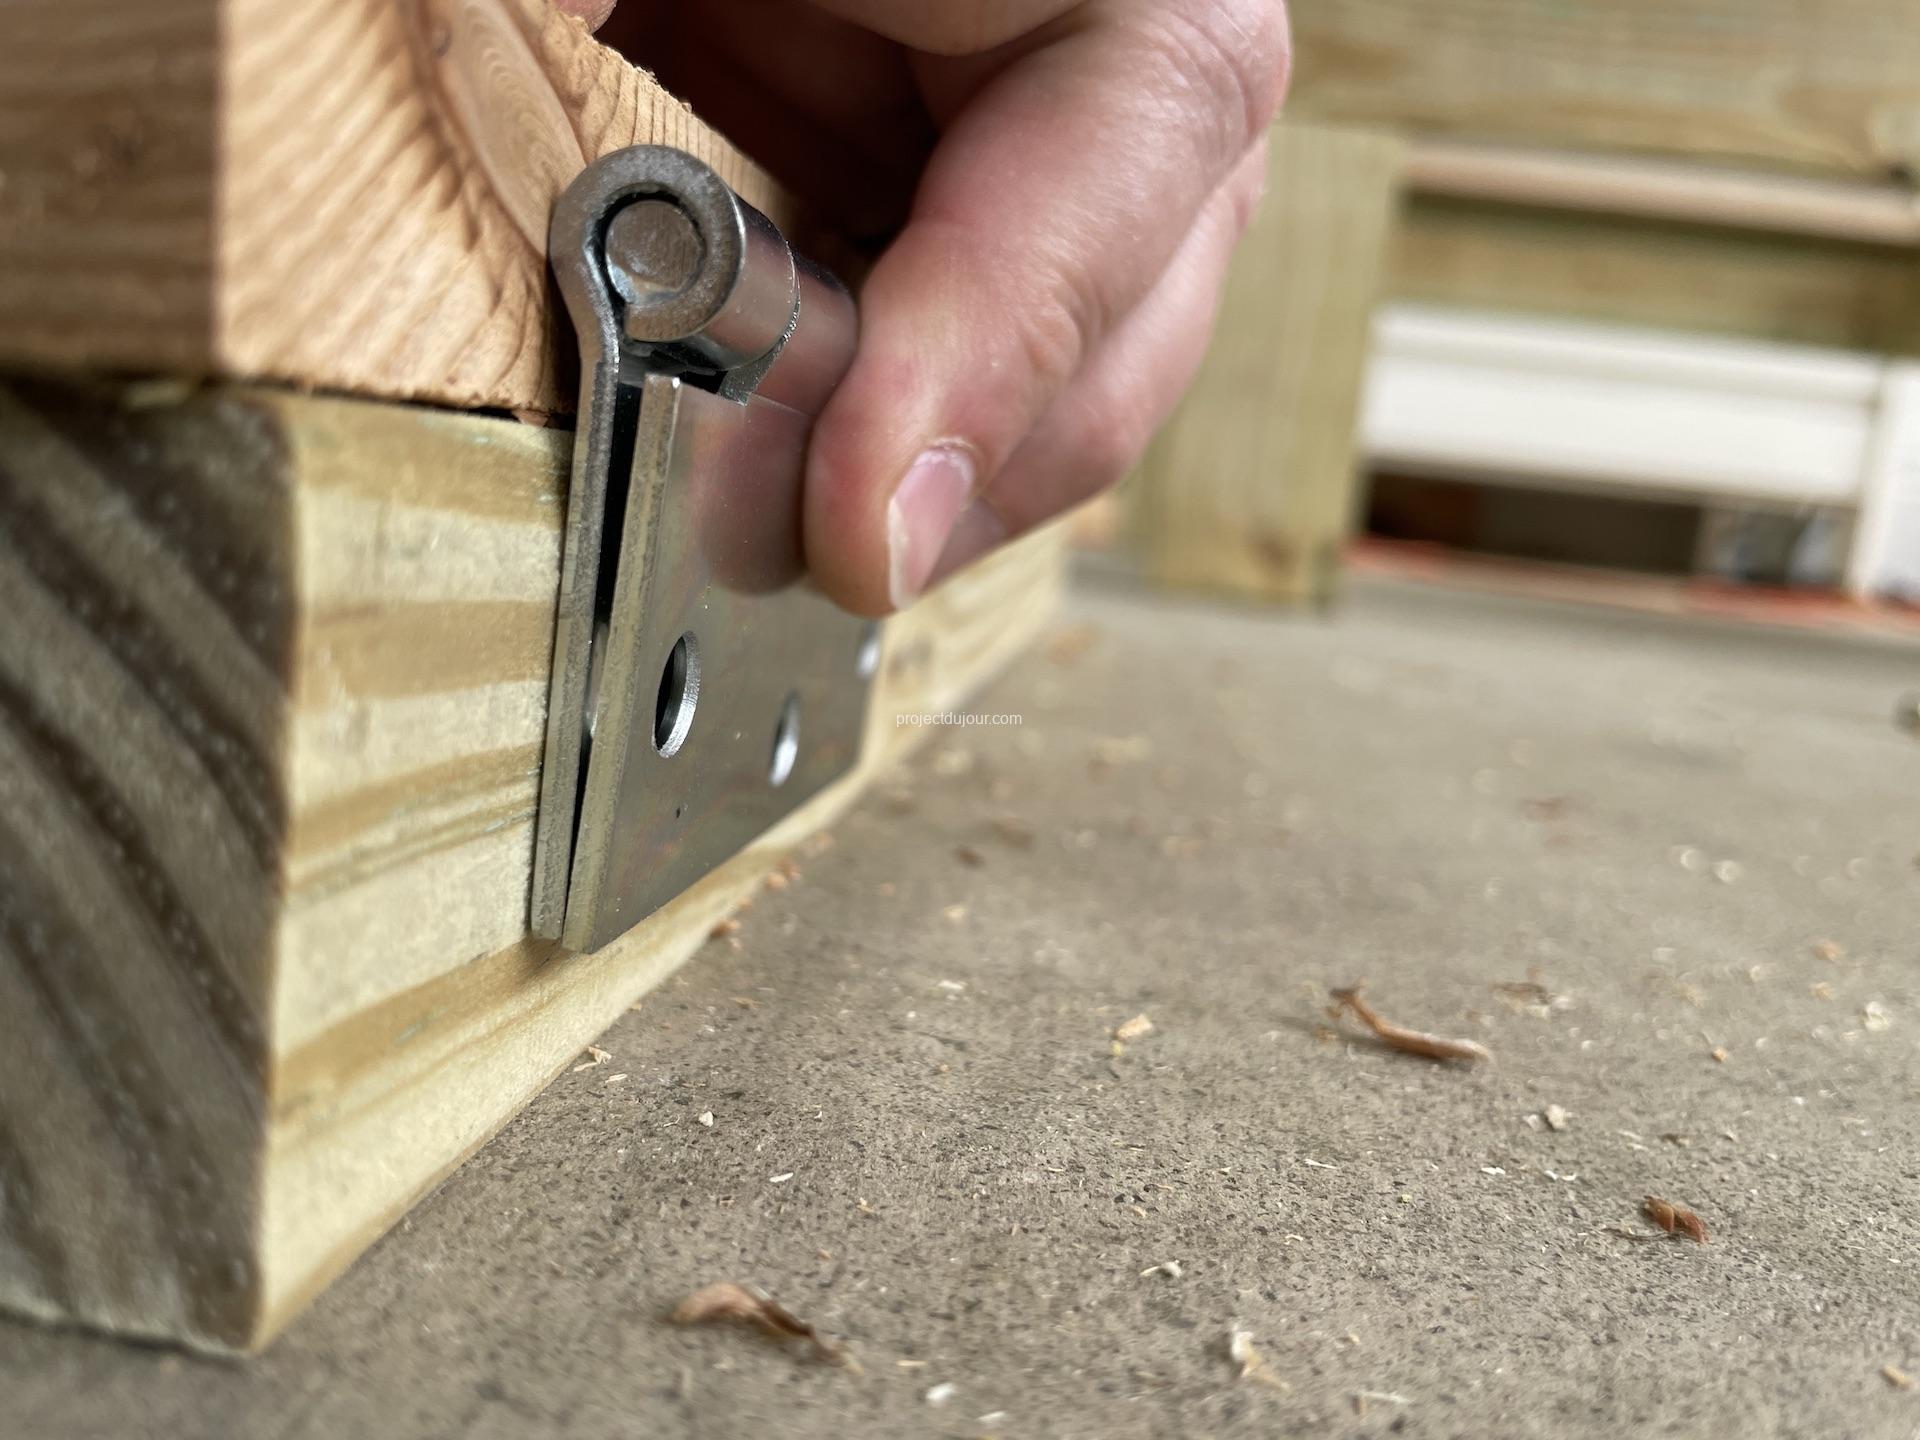
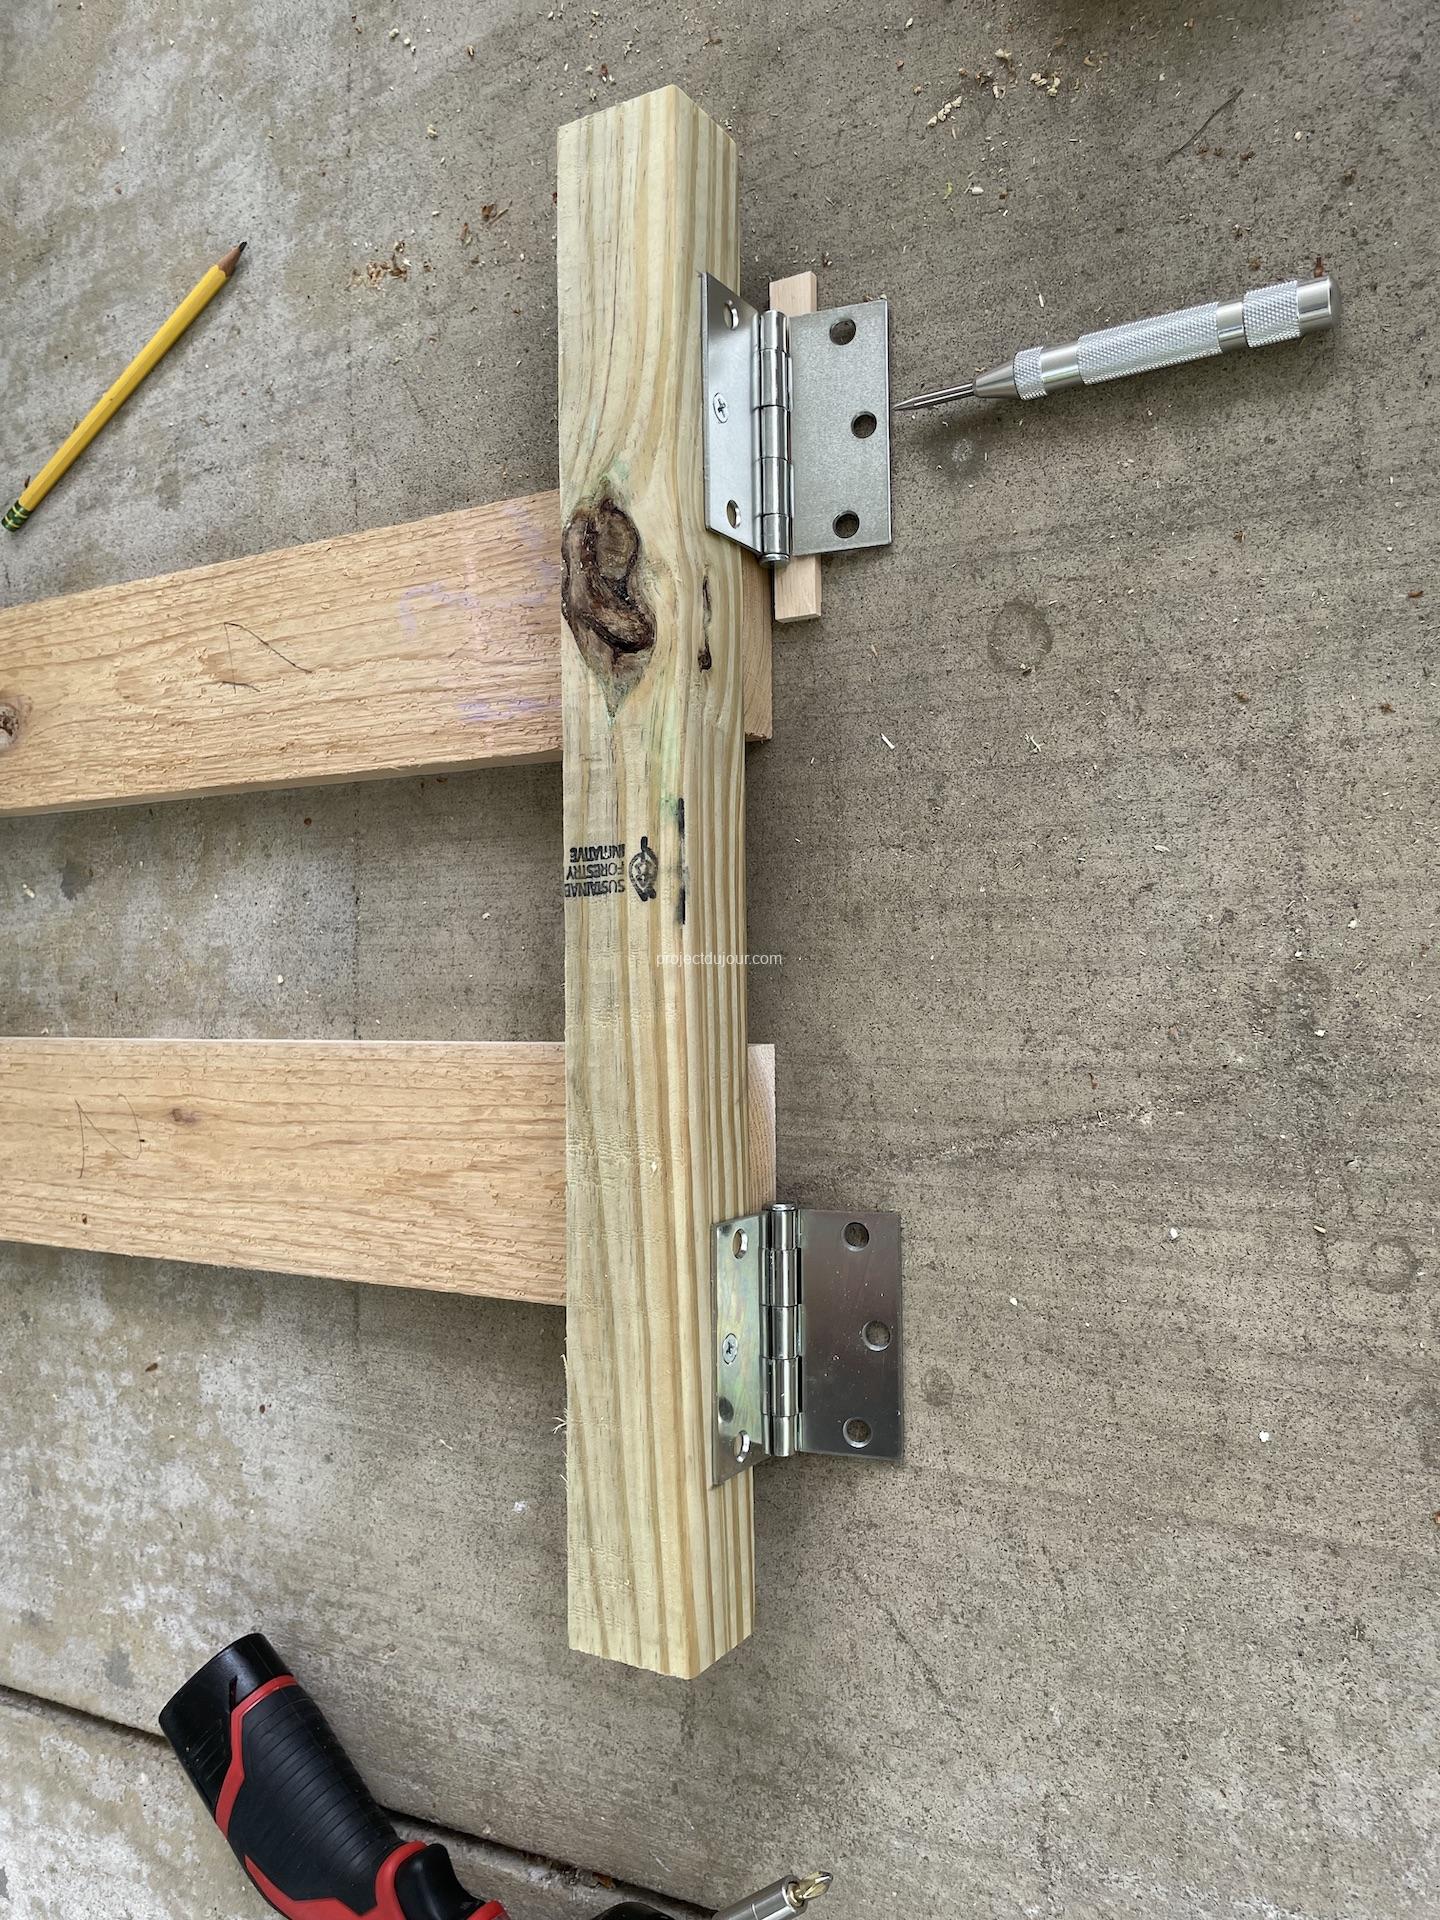
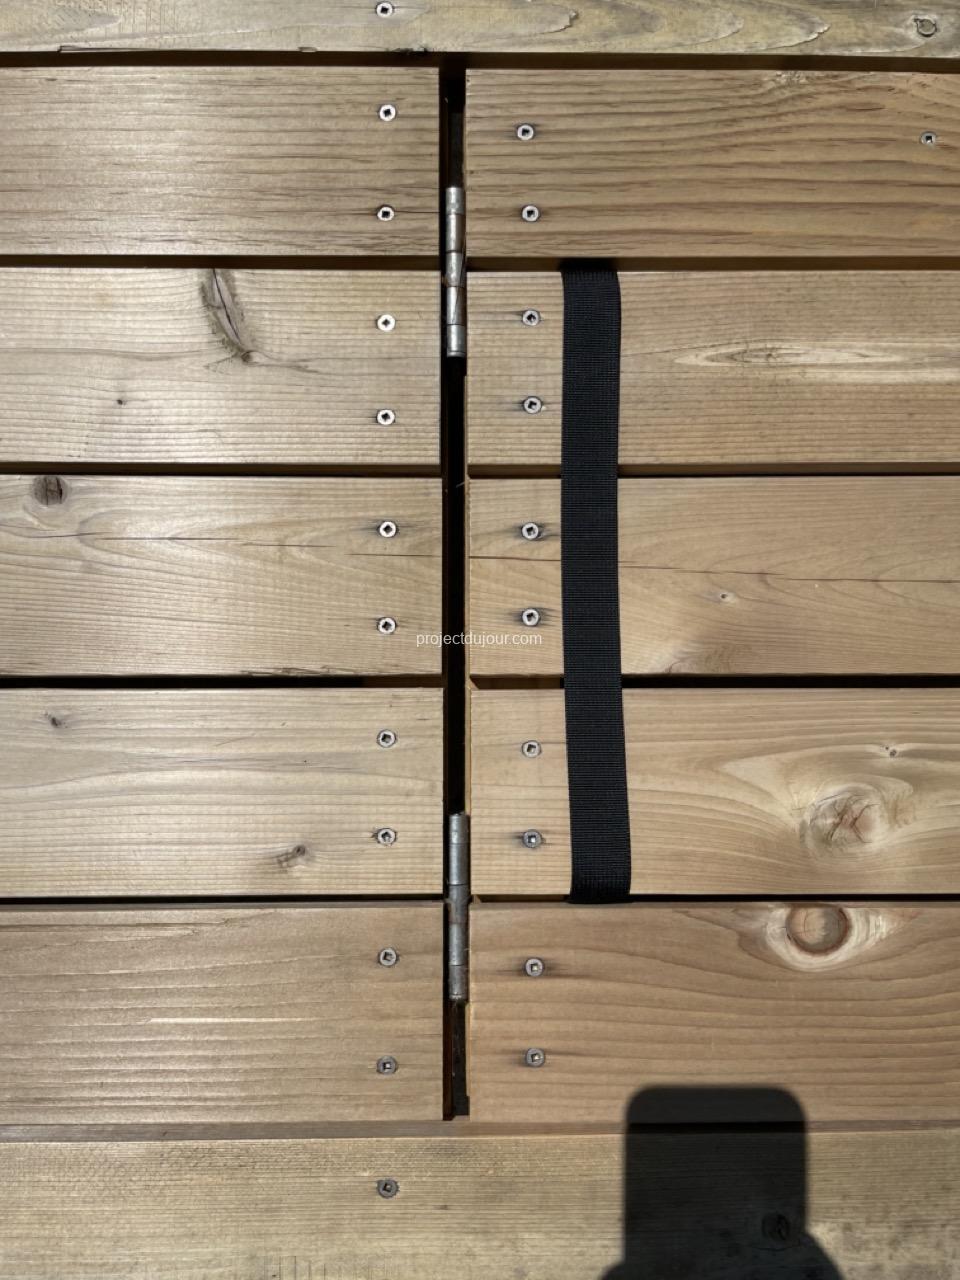
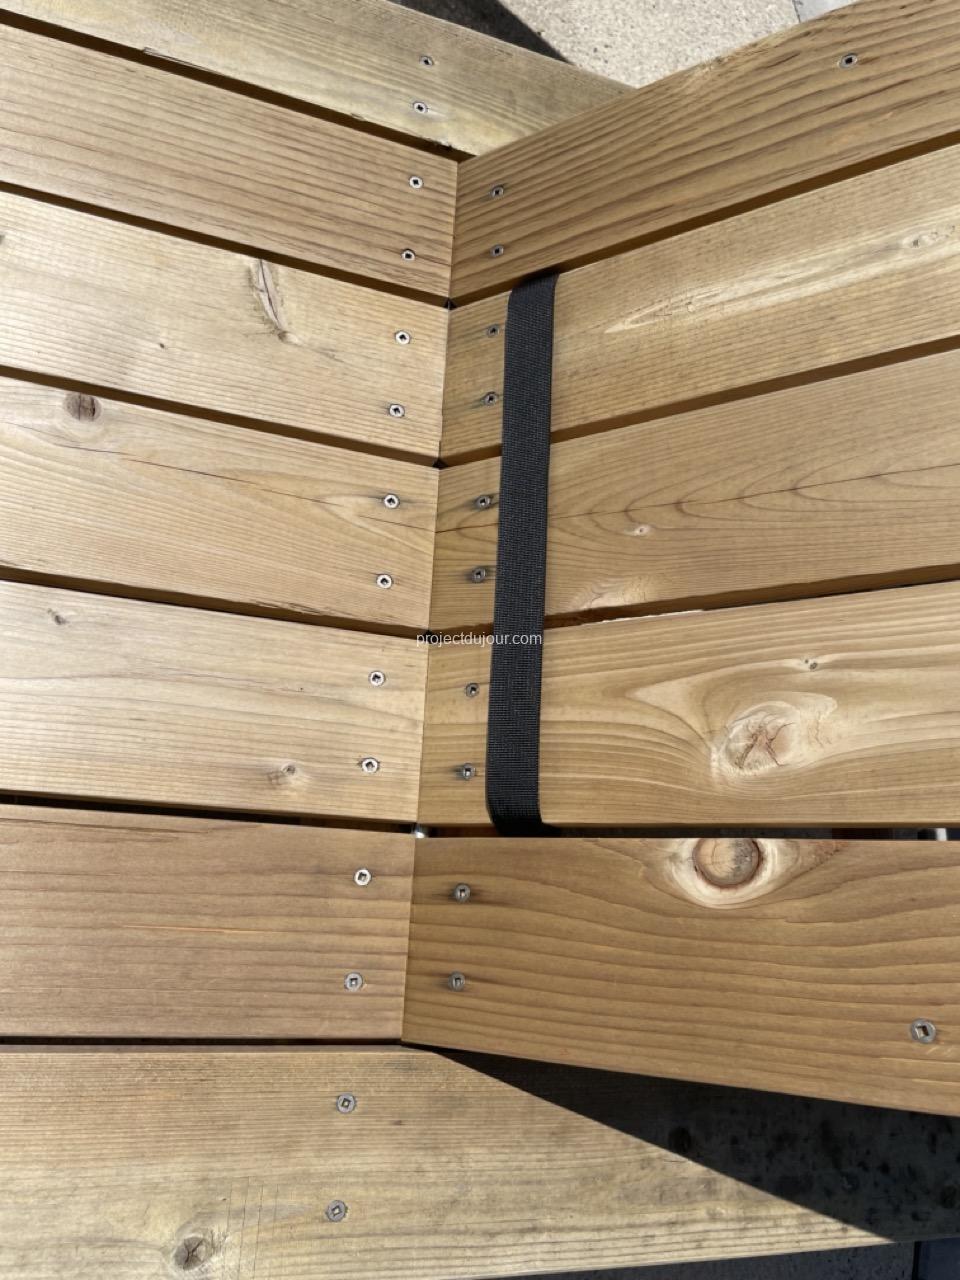
Mounting the hinges for the back was a bit tricky. My method might not be the simplest but it guaranteed that when the back was pushed down, everything was perfectly flat. Also, make sure all the cedar boards that are hitting the hinges are slightly recessed so there is space for the round part of the hinge. This space is also needed to be able to lift the back; without enough spacing between the cedar boards on the flat surface and the back, the back would hit the bottom part.
Small recess for the hinges
The frame for the back is built using left over 2×4 pressure treated lumber ripped in half. The actual size is 1 1/2″ by 1 3/4″. I started by cutting the piece close to the hinges. I used a small piece of scrap wood as a spacer to determine the depth of the hinges. Since I wasn’t sure the hinge placement was final, I used a single screw just to hold each hinge in place. I didn’t pre-drill for that screw but I marked the center with a punch tool.
Hinges placement on the back
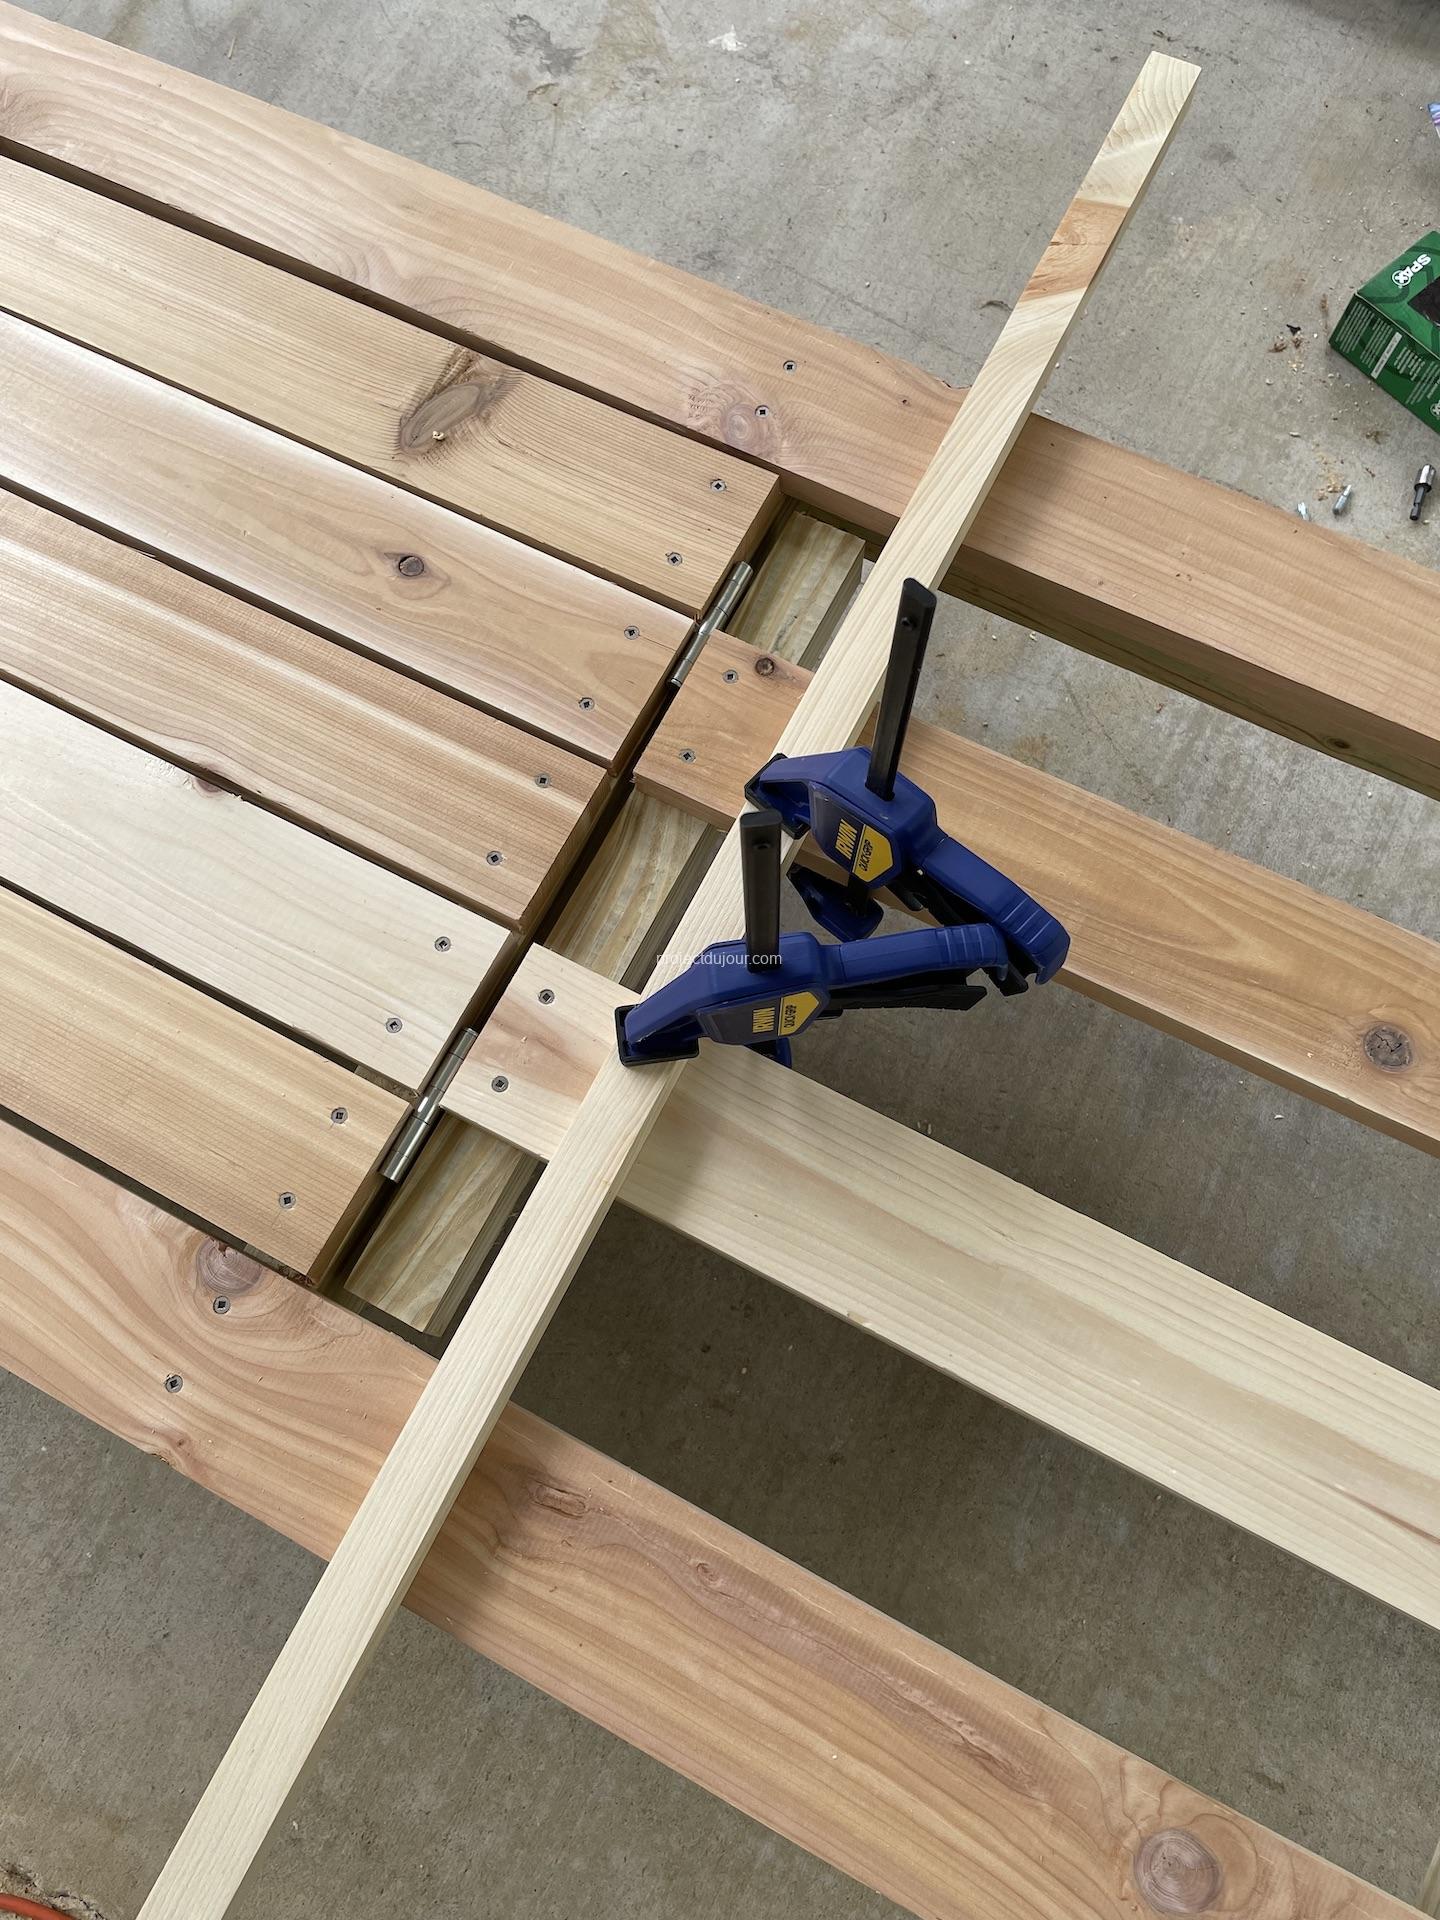
At that point, I attached two of the five boards for the back and used clamps with a piece of scrap wood to hold the back in place. With the back at the correct height, I used a pencil all around the hinges to mark their location on the transversal support of the base frame. I then lifted the back and added all the missing screws.
Marking hinge placement on frameBack loweredBack fully raised
It took me some time to figure where to position the hinges for the the legs holding the back in upright position. I experimented for a while with scraps of wood until I reached a compromised that I liked. The legs are built using 2×4 ripped in half as well as some 1×2 pressure treated lumber. The legs rest on a strip of 1×2 screwed inside the frame. that strip is 19 1/4″ long and is cut at an angle so the leg is lowered when the back is laid flat (see video below).
About 20 years ago I found an old bed frame in my great grand father’s attic. I have been told that it was used by my great aunt when she was a kid, so this frame must be at least 100 years old.
It all started with a LED strip I bought for a different project (amazon, about $12 for the LED strip). The LED strip didn’t really work for what I had in mind but my daughter really, really, really wanted to install the lights in her room. She wanted to put it under her bed but the LED seemed too modern for that old bed frame. So, we had to figure out something to mount the LED strip on…
I have a pair of speakers that have been sitting on the floor for many years. I wanted to raise them a bit so they wouldn’t get dinged when I vacuum, to improve the look and hopefully get a better sound. There are many speaker stands available but I wanted to play with a recently bought dowel jig so I headed to the store and bought a 6 feet oak board.
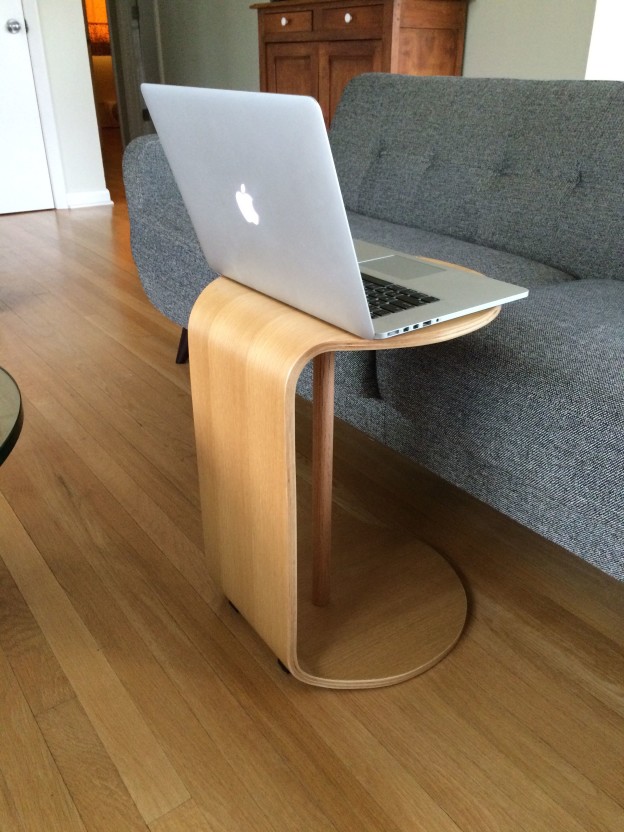
A few years ago I bought a CB2 Slip C side table, mostly to work on my laptop while seating comfortably on a couch. I ordered that table on sale online without seeing it person, it looked really good in photos.
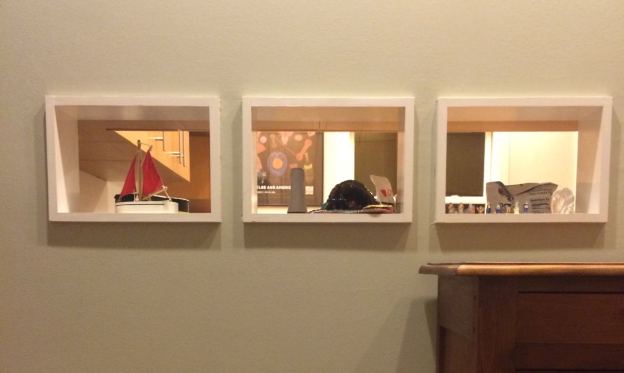
I come from a country where walls are made of cement blocks, concrete or bricks. Most houses in the US are wood framed and even if the exterior walls are made of solid bricks, the interior walls are hollow. There’s a lot of lost space in there and it’s easy to make little openings or built in storage space. Plenty of holes in the walls.
This lamp, initially used as a desk lamp, was built and partially designed by my grandfather. I came up with the overall concept and dimensions but since I didn’t know (and still don’t) how to weld, he did all the manufacturing. He was also really good at finding and repurposing parts designed for different applications. The interesting thing about this lamp are the parallelograms at the base and elbow. These allow to have 6 points of friction to maintain the angle and hold the lamp in place without having springs or counter-weights.
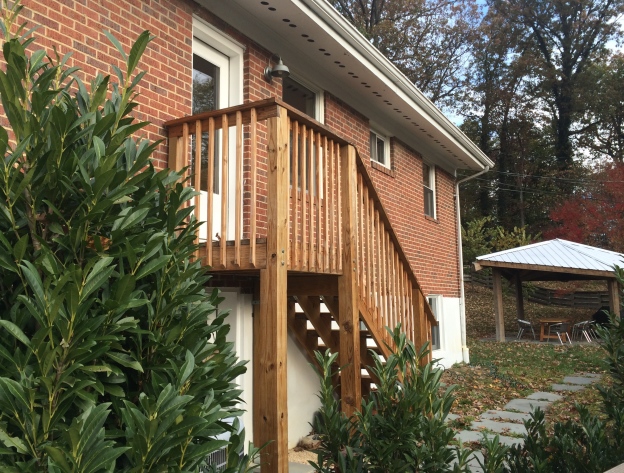
There used to be a deck wrapped around the house. It was really old and not up to code anymore so I decided to knock it down. Breaking it into pieces was trivial, getting rid of the old lumber was more troublesome and expensive, I had to rent a dumpster. At that point, I had a door on the second floor that lead to nowhere. It stayed like that for a couple of years until I finally got some time to build the stairs.