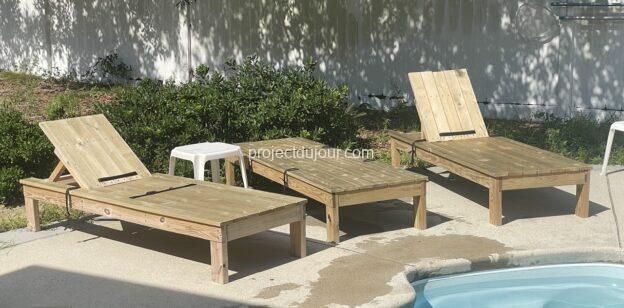
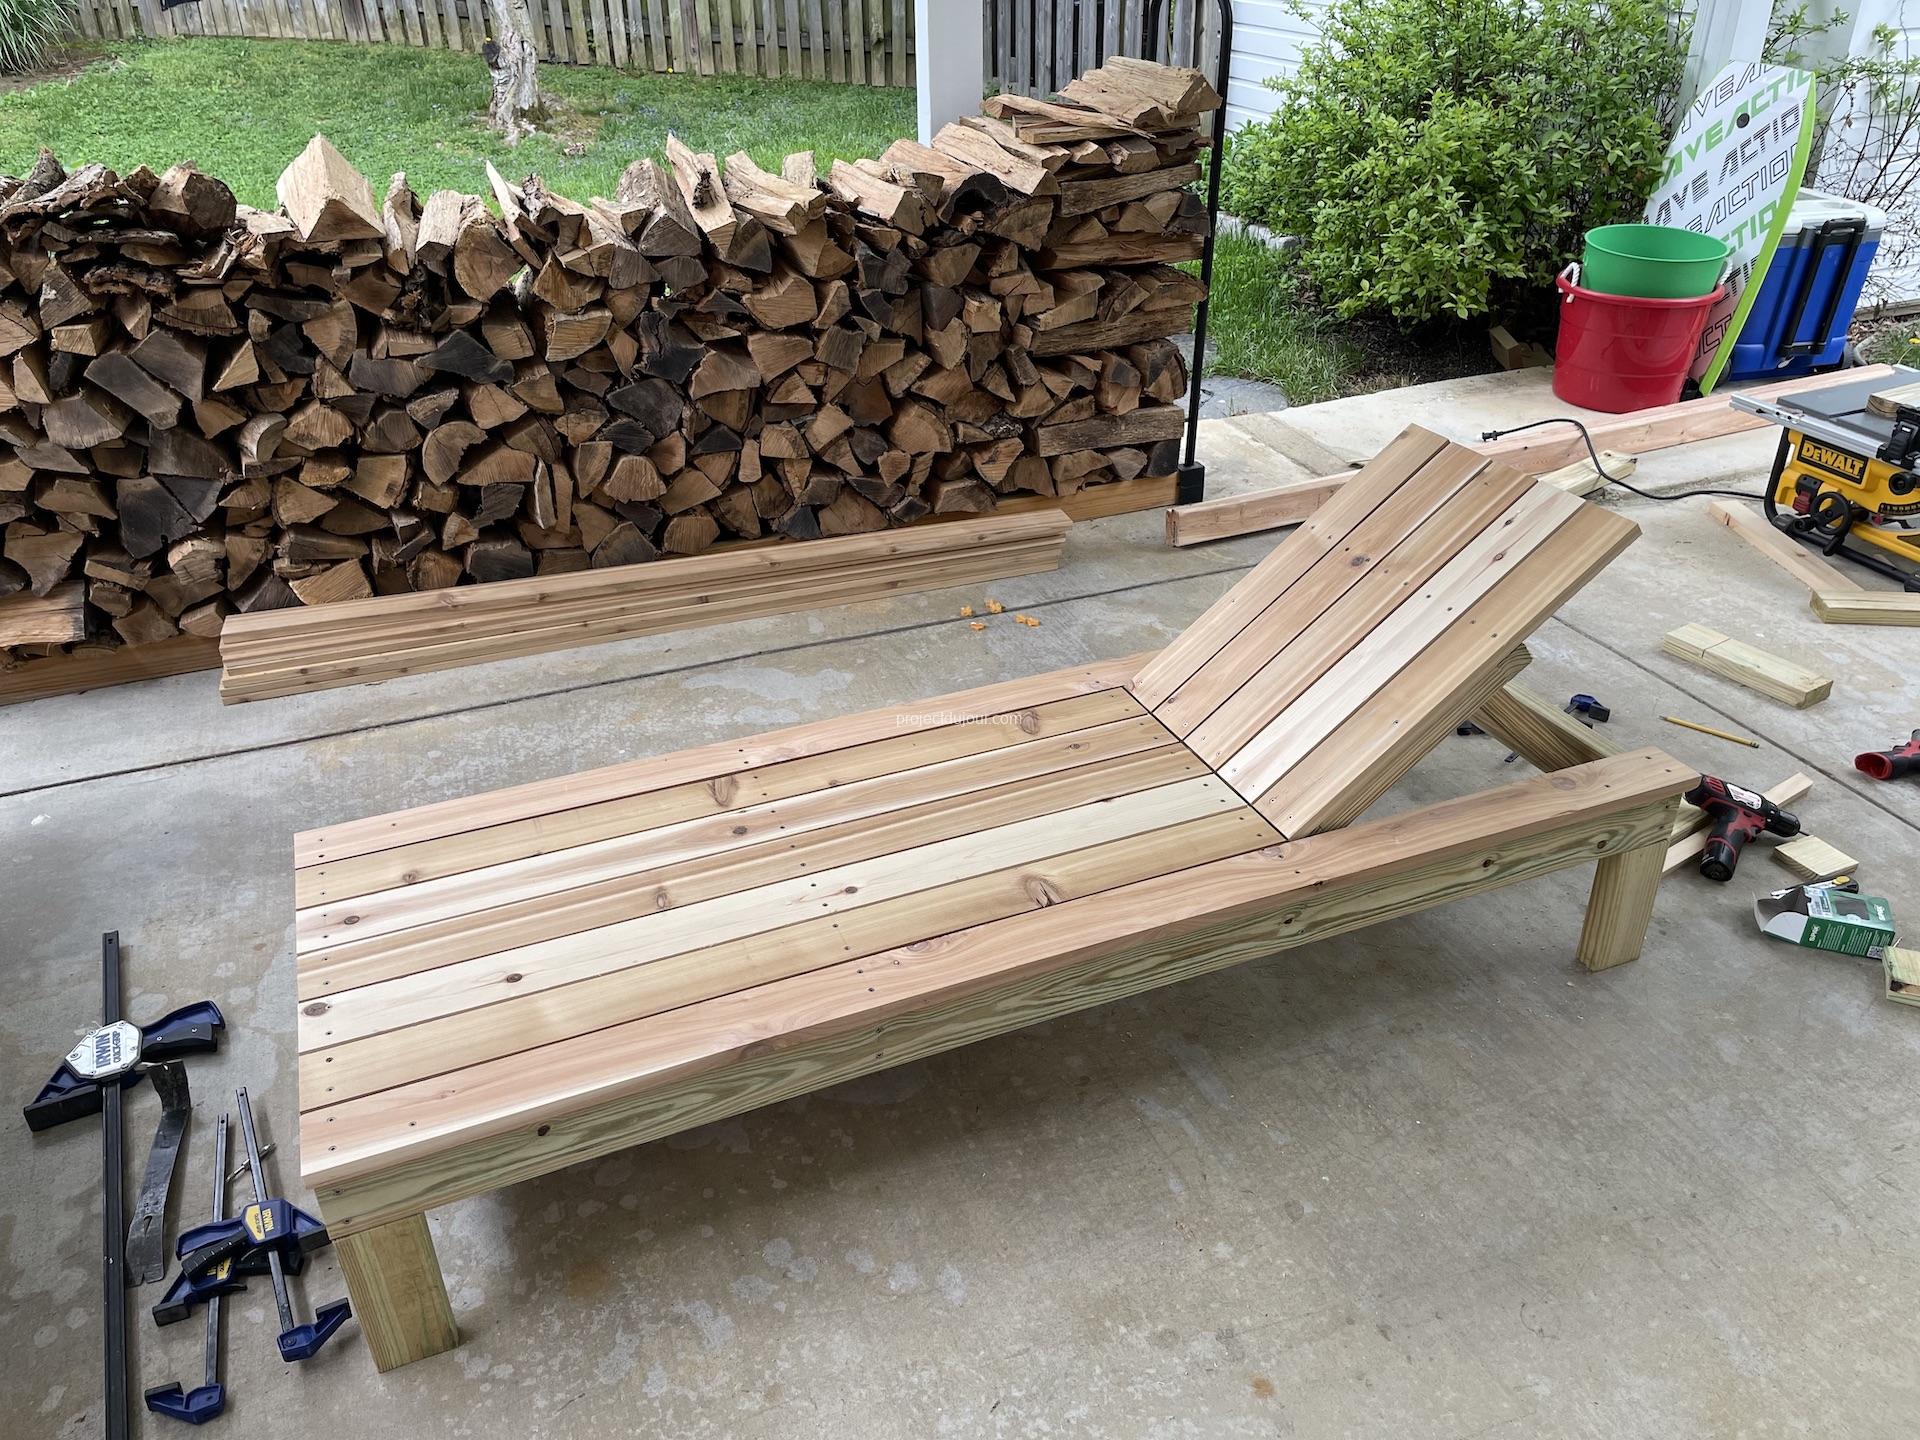
We’ve been looking for pool loungers that wouldn’t break the bank but would still look better than cheap plastic furniture. After some research on Pinterest, we decided to try to build our own. We estimated these would cost about $150, pretty much the same price as the plastic ones. This is based on 2021 prices, when lumber got really expensive and a 2×4, 8 feet long was around $10. The frame is built using pressure treaded lumber and the top is built out of cedar. All the screws are stainless steal and the hinges are galvanized.
The overall length of the loungers is 6 feet. The flat part is 4 feet long and the raised back is 2 feet long. This is apparently a standard size for pool loungers and you can find cushions for these in many stores (I can’t recall if we got ours at Lowe’s or Home Depot). The top boards are 1×4 cedar, 12 feet long cut in half so we ended up with no waste. Since we built an even number of loungers, we bought 7 cedar boards for each pair of loungers. For the frame, We used 2×4 pressure treated lumber, 8 feet long. The long horizontal part is a bit less than 6 feet long (71 1/2″) to create a small overhang with the cedar boards at both ends. The left over 2×4 is then cut in half for the legs, about a foot each.
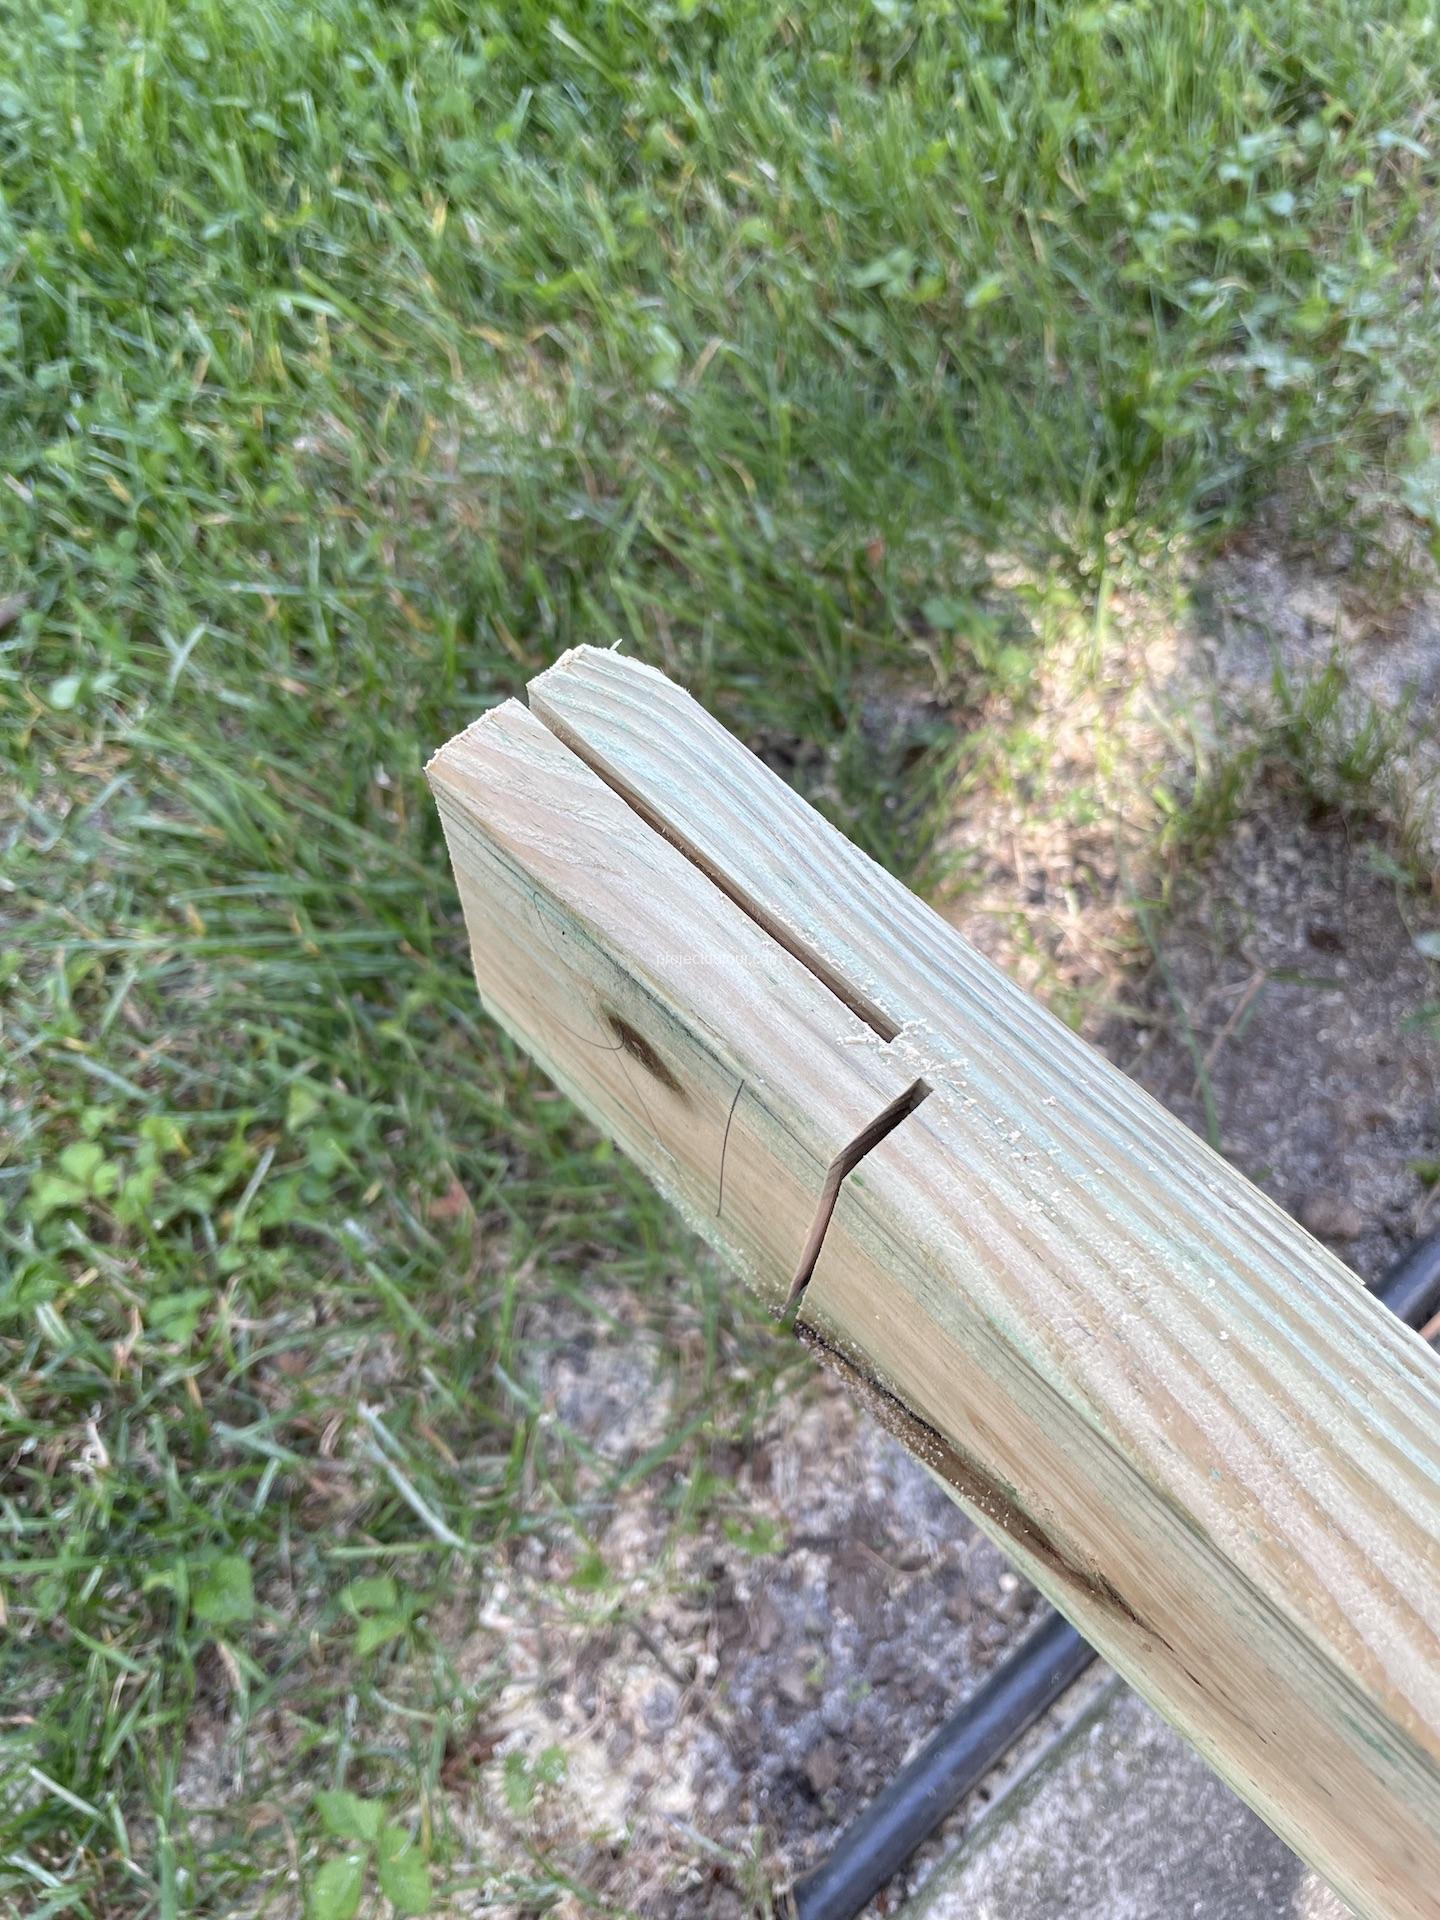
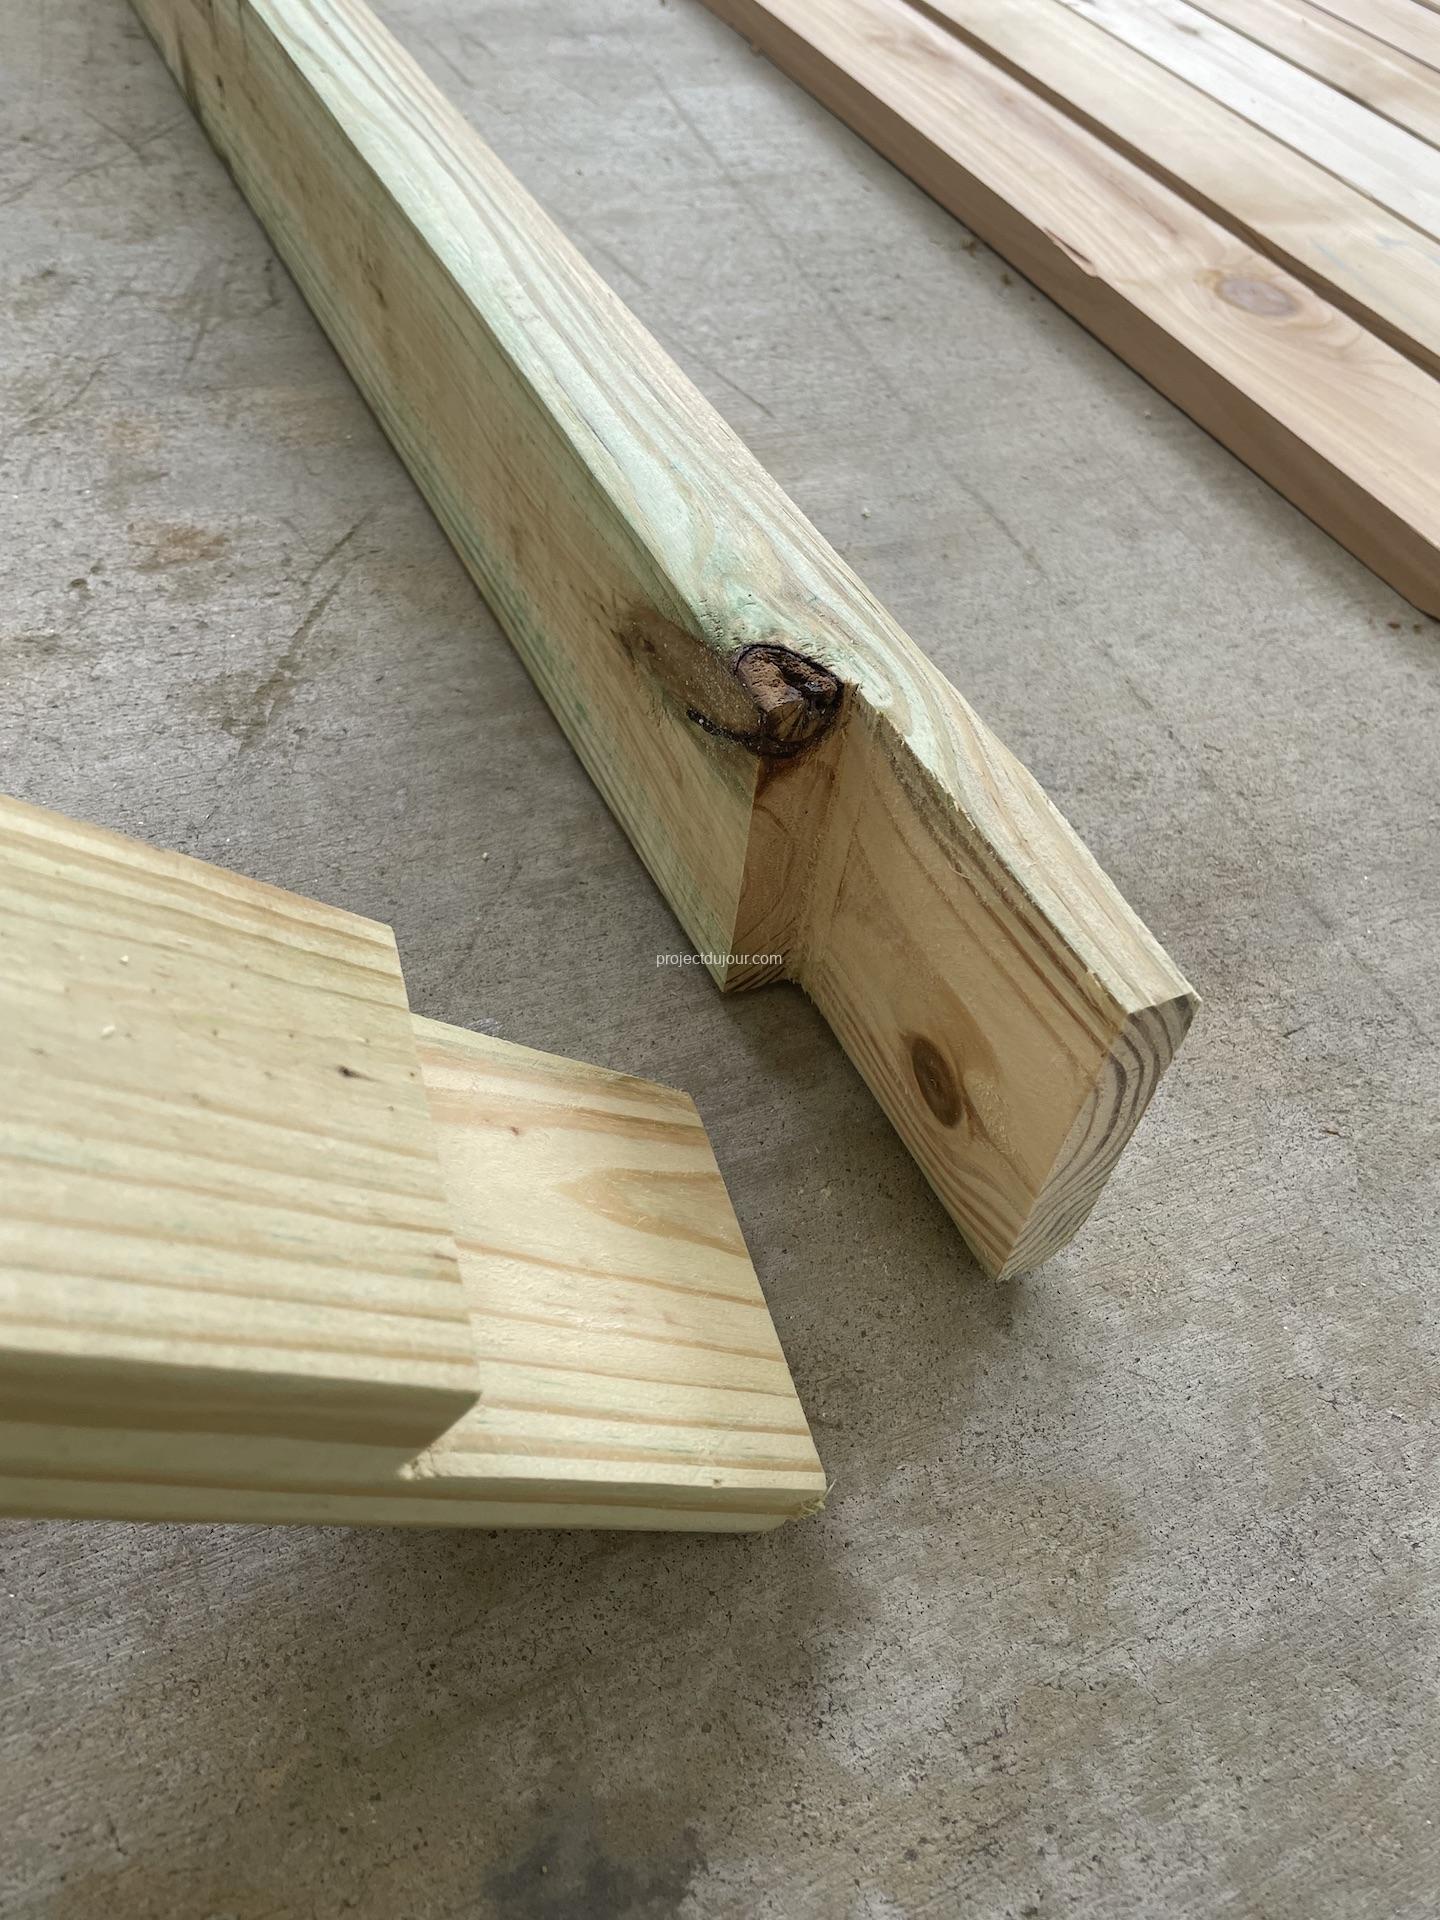
The legs and side parts of the frames are assembled using halving joints and stainless steel screws. I used a table saw to make the initial cuts and finished with a hand saw.
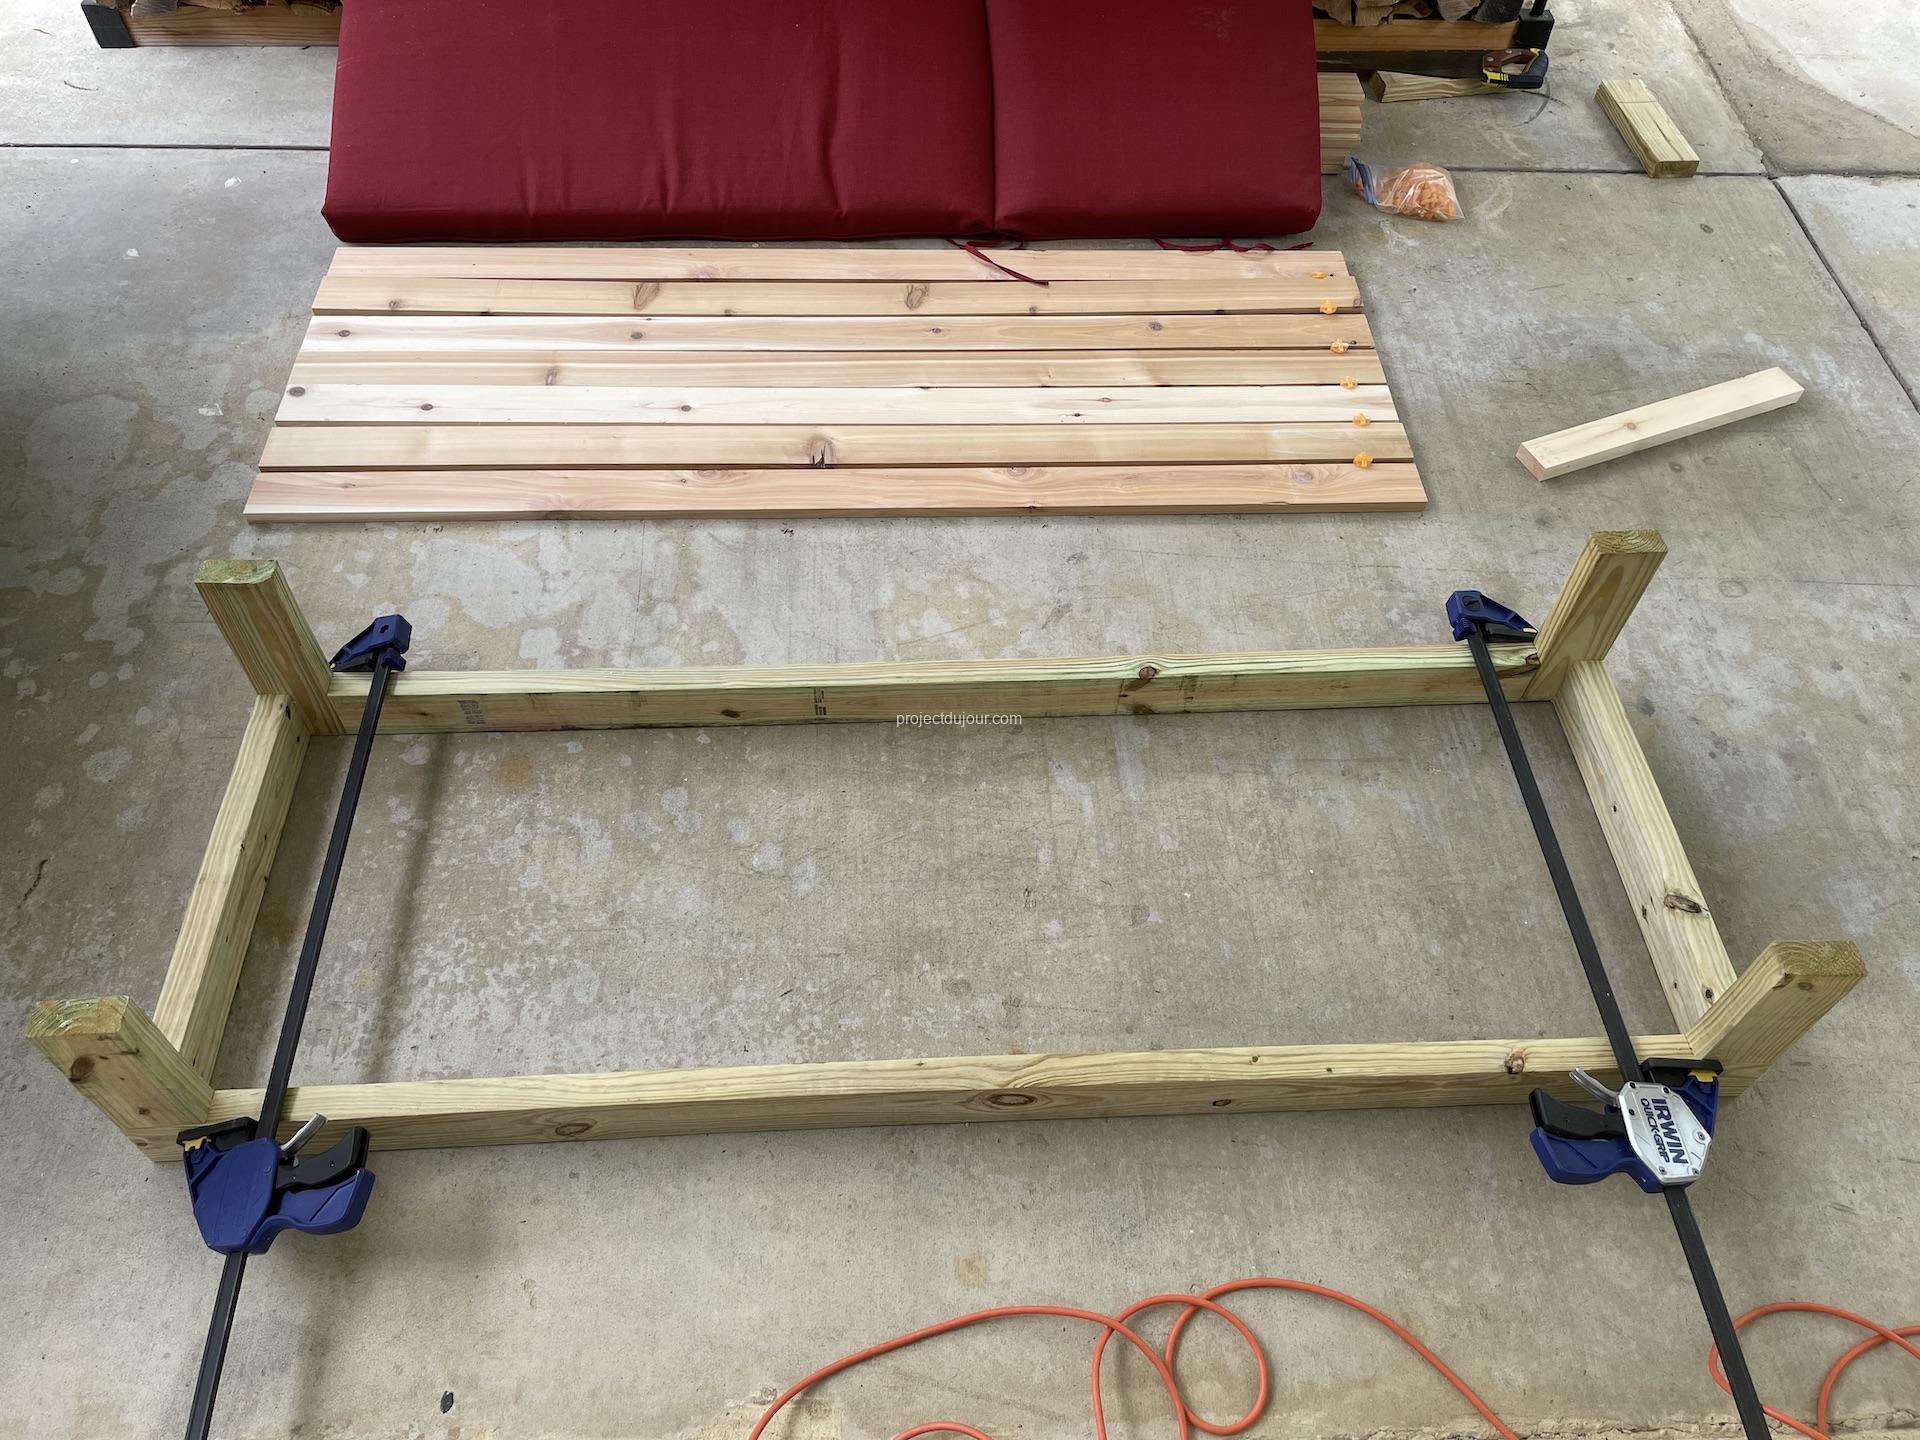
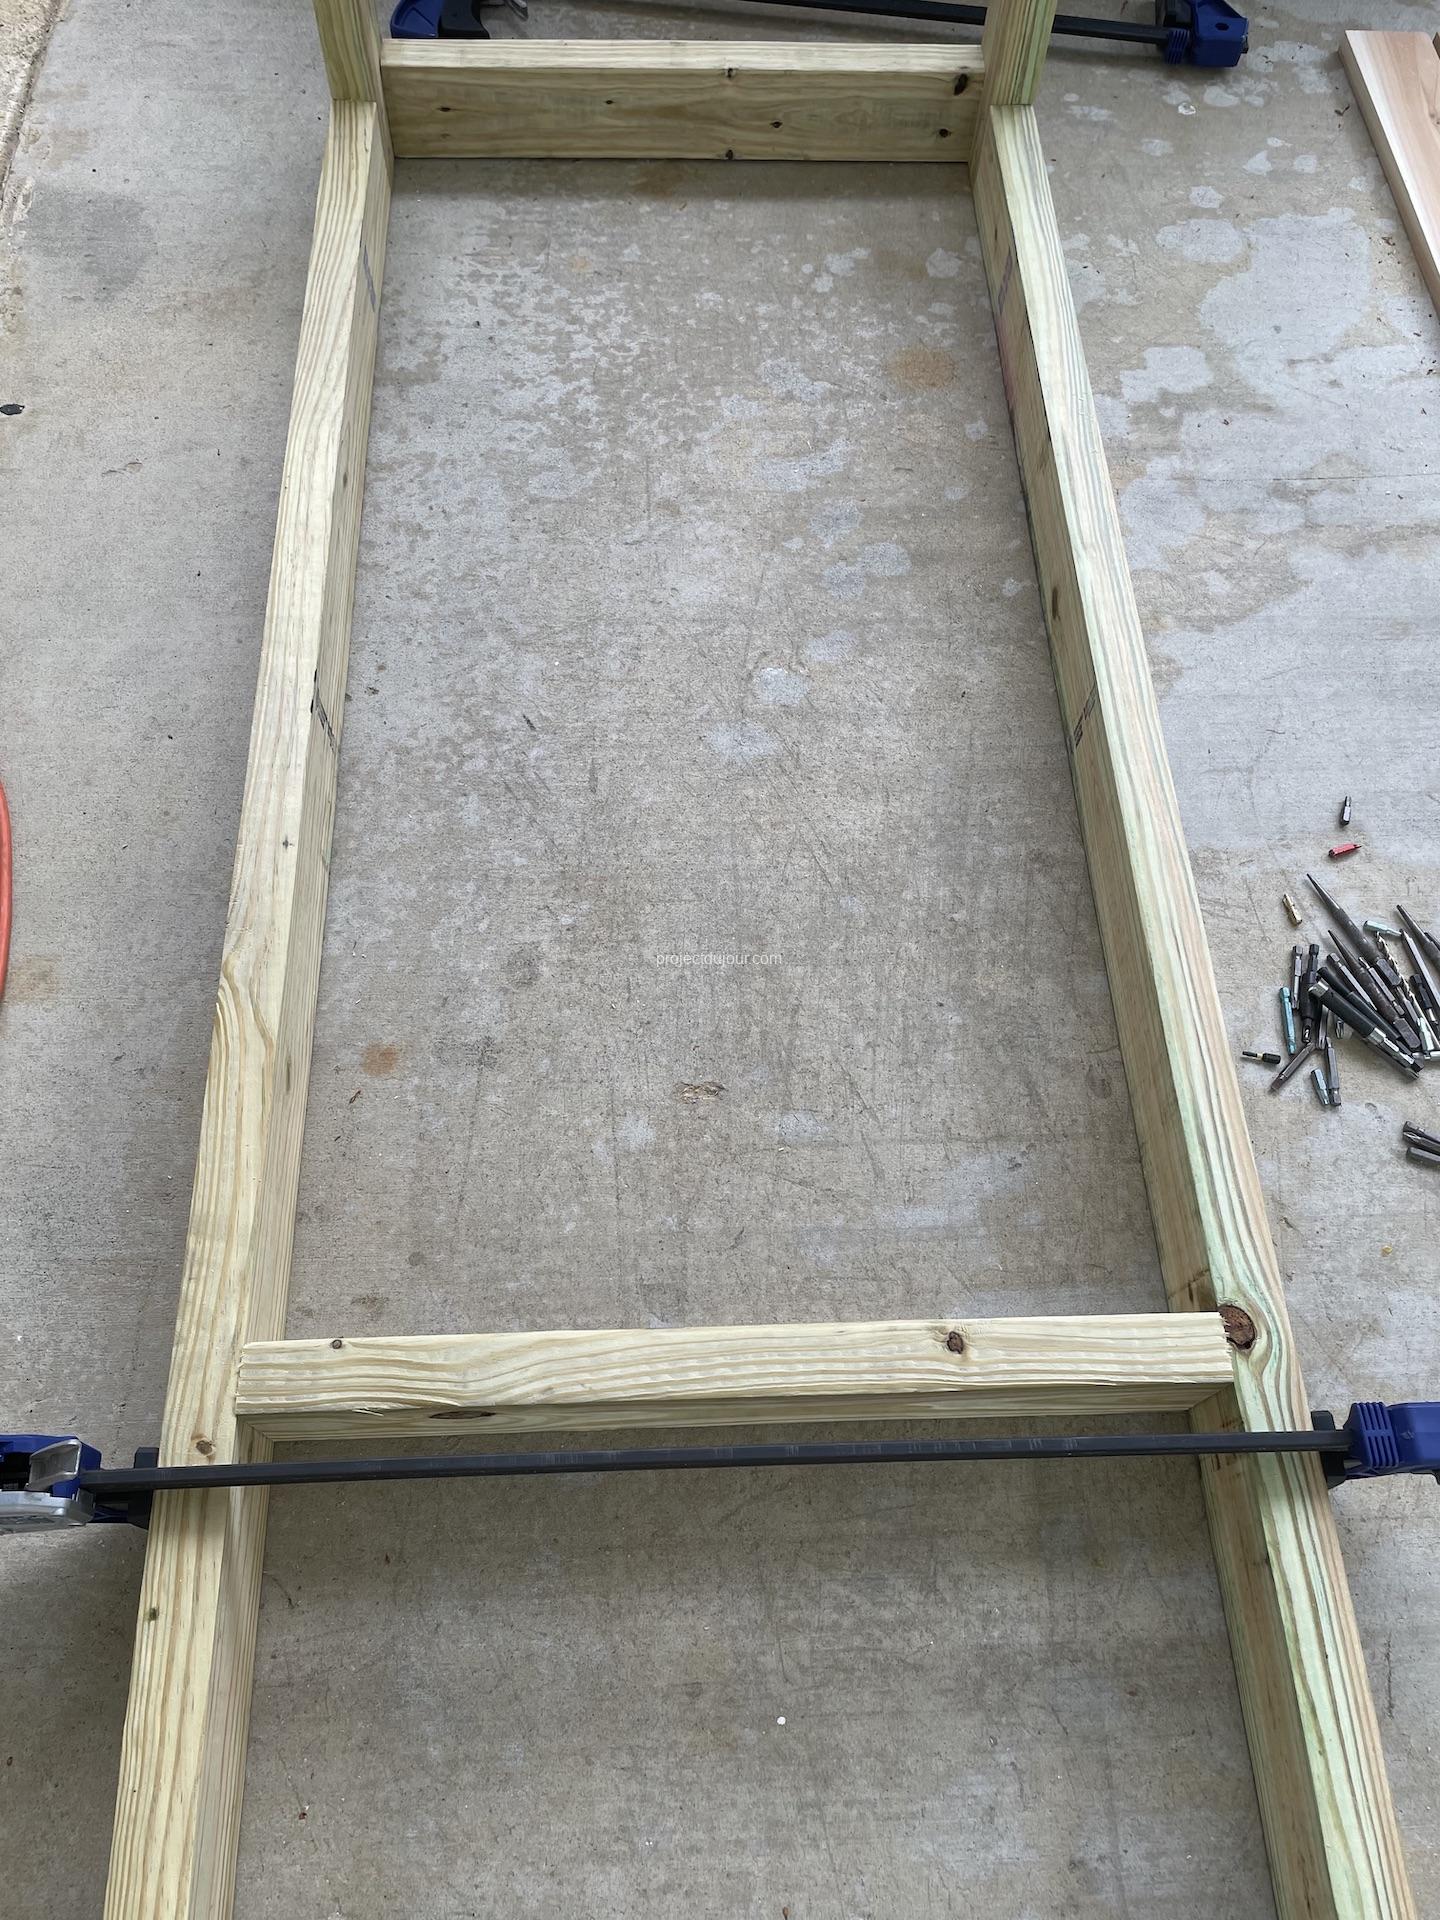
To hold the frame together I added 4 pieces of 2×4 pressure treated between the two sides of the frame. The length of the transversal pieces was determined empirically. I could have used the theoretical width of the cedar boards but I learned over time that these are never exact. So I first laid all the cedar boards I wanted on the ground with tile spacers between them. I then subtracted the width of the frame’s sides as well as a small overhang to match the overhang on the length of the lounger. At the end, of all this, I settled for 21 1/2″ for all the transversal pieces.
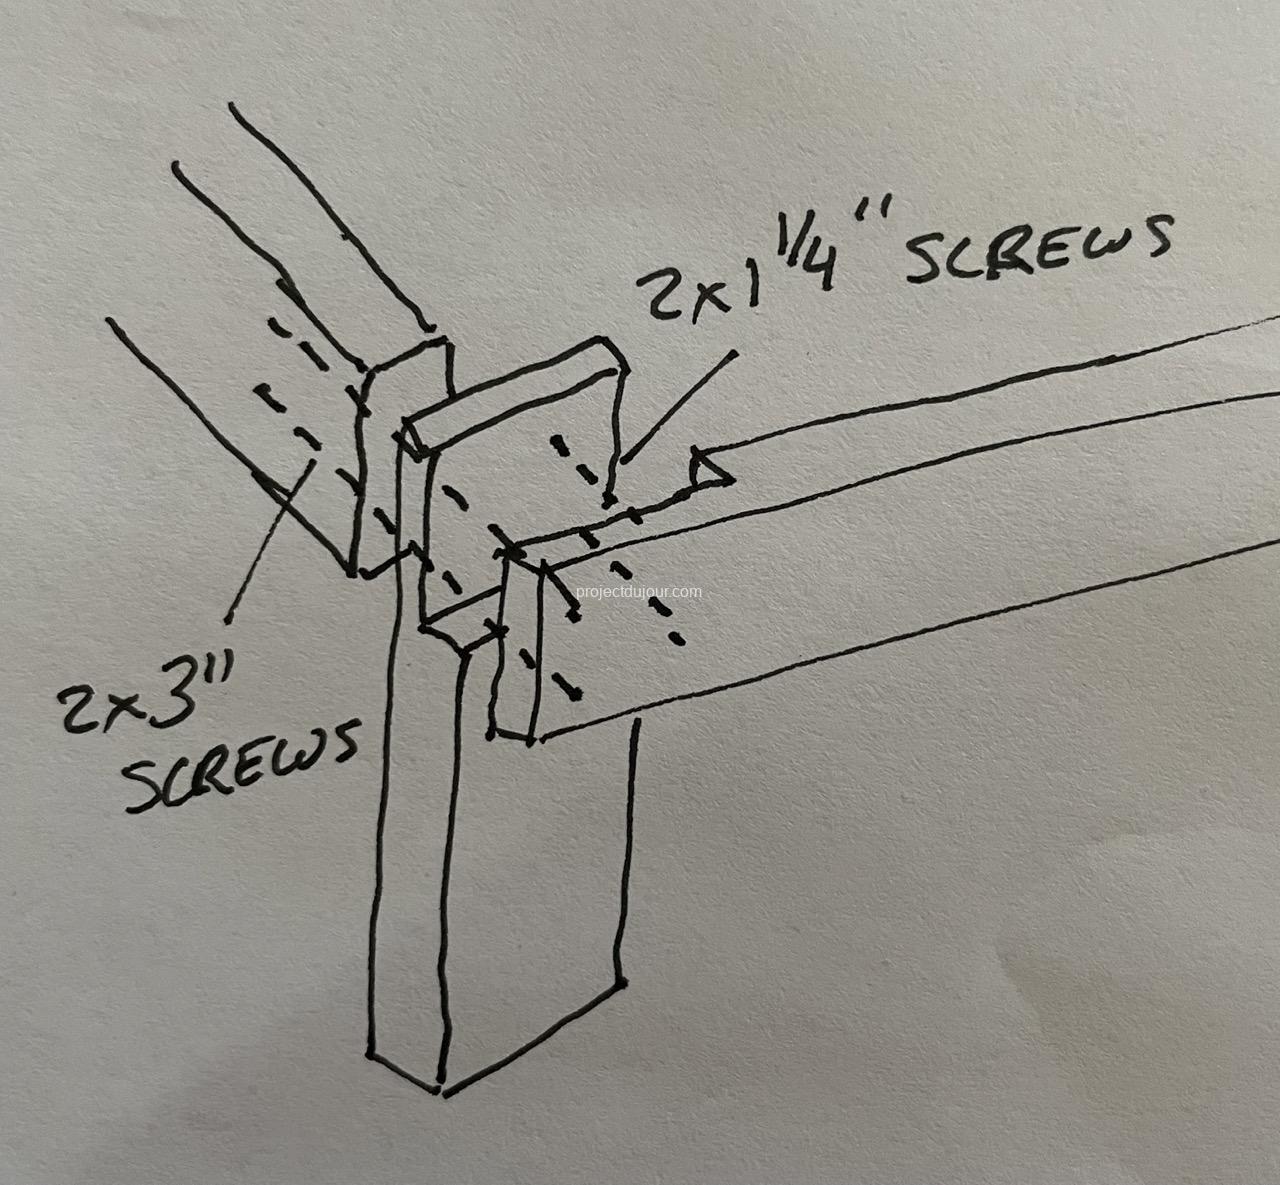
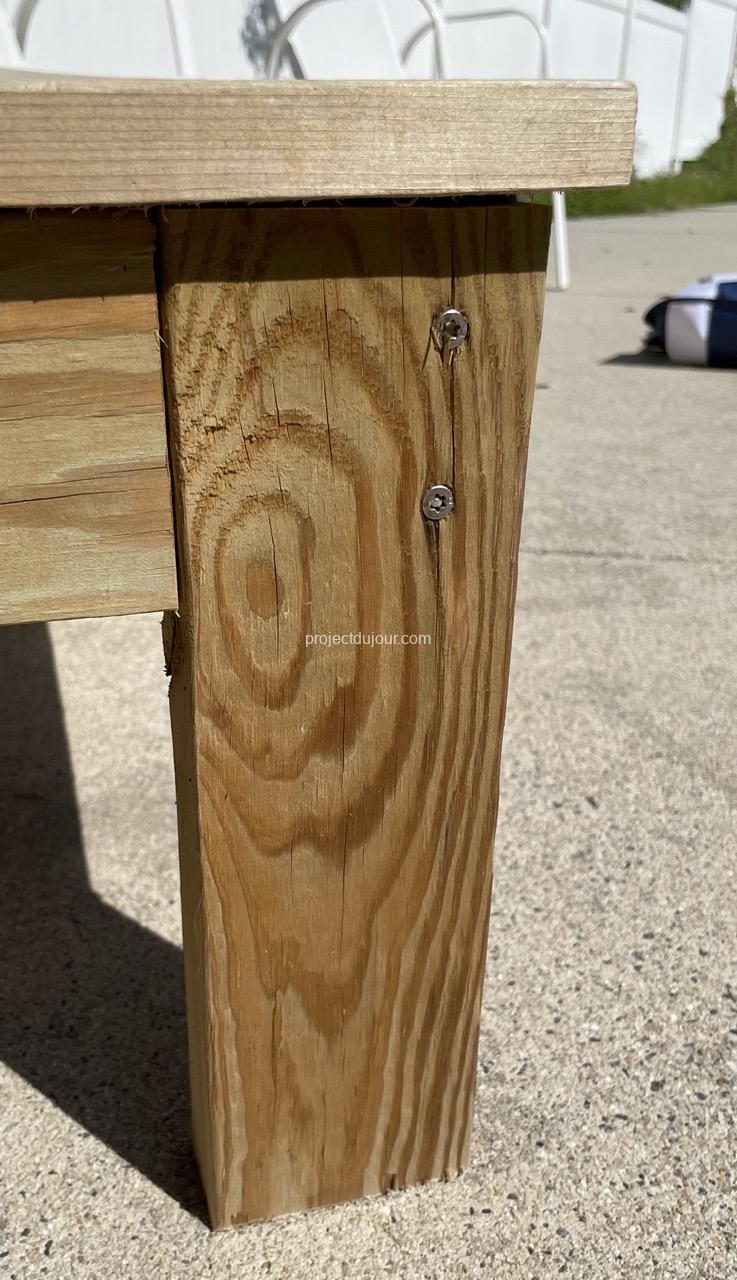
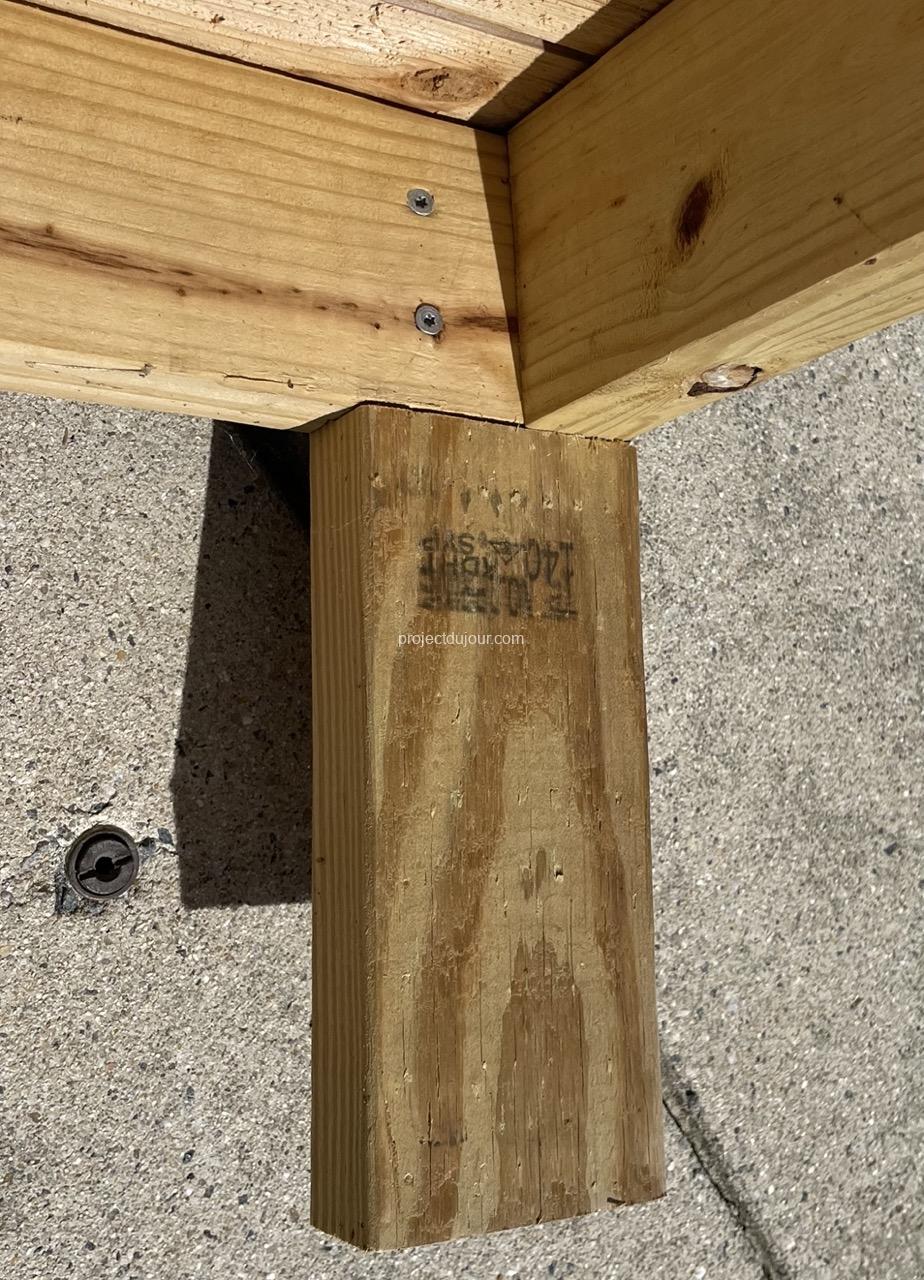
I used two 3″ long stainless screws at each corner, screwed from the outside of the frame. These tie together the leg, side beam and transversal piece. I added two 1 1/4″ long stainless screws on the inside of the halving joints. This way each leg holds with 4 screws.
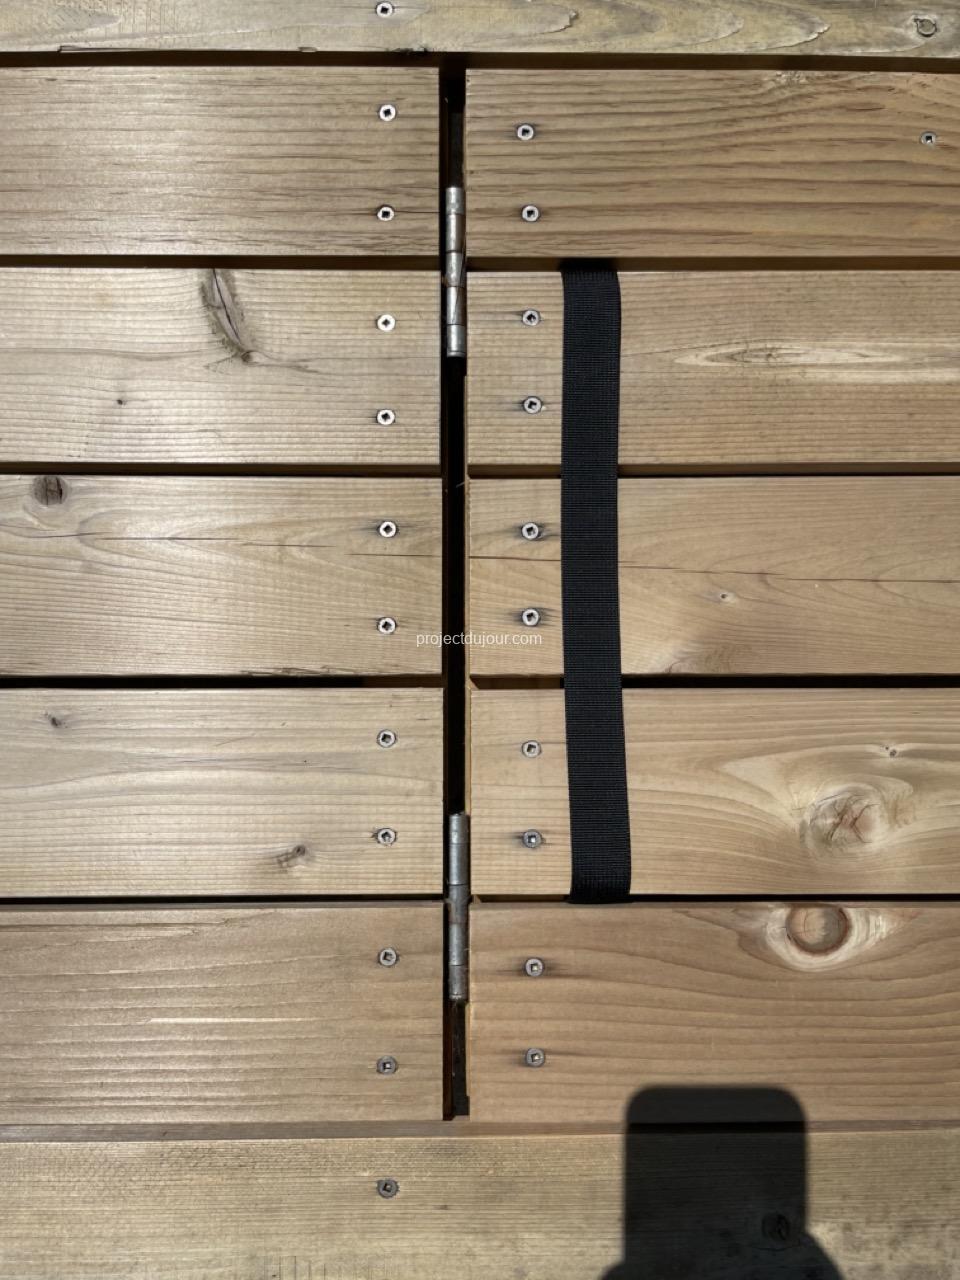
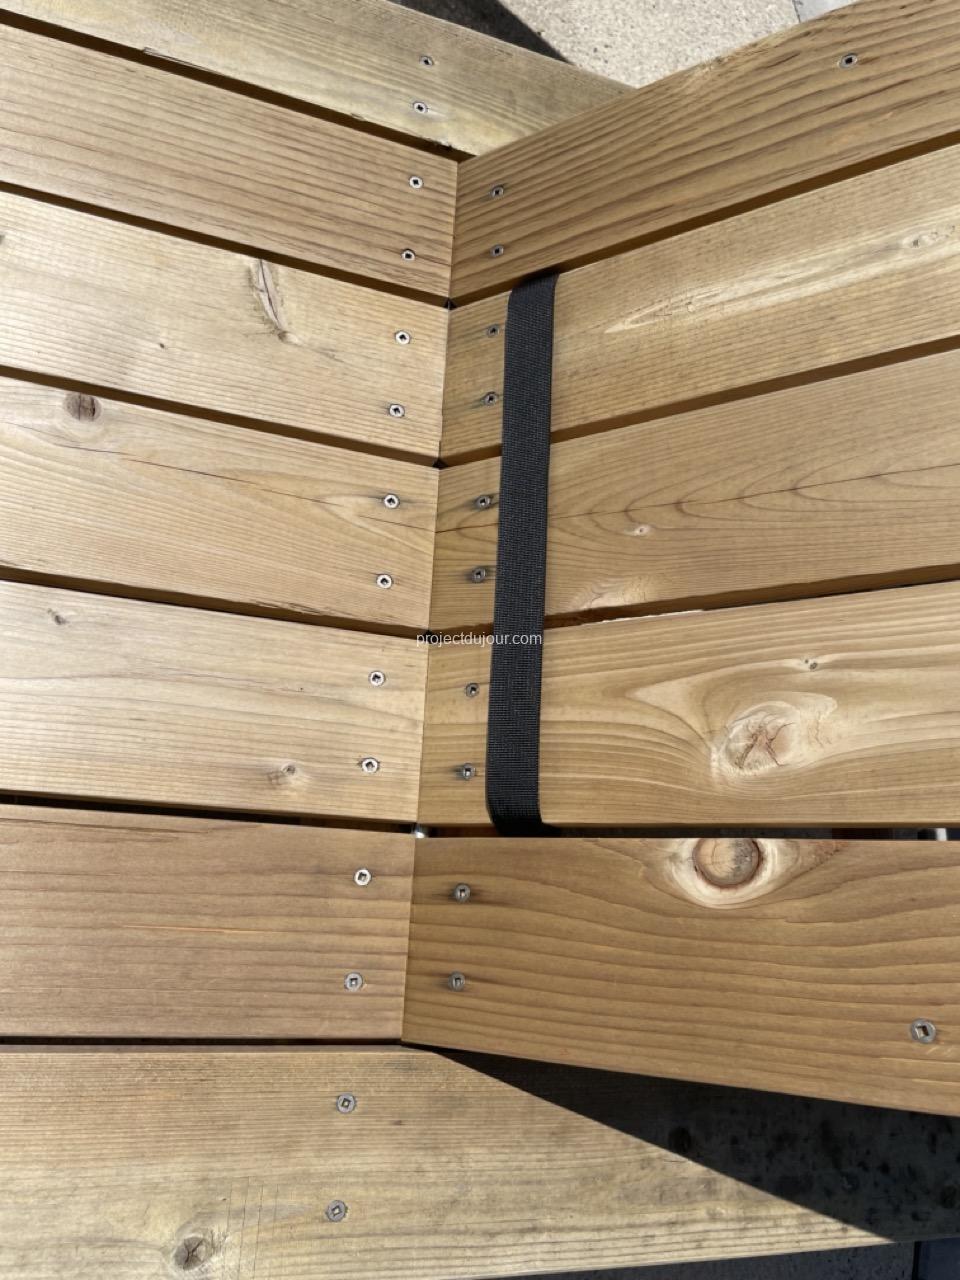
The two extra transversal supports are located approximatively 2 feet from each end (one third of the length). The best way to figure out where to place the support close to the hinges is to first cut the 5 center cedar boards to 4 feet and place them on the frame. You also need to keep a small space for the hinge (see picture of hinge below). I ended up with the opening for the back being 22″ long.
To make sure the spacing between the boards was regular, I used tiling spacers.
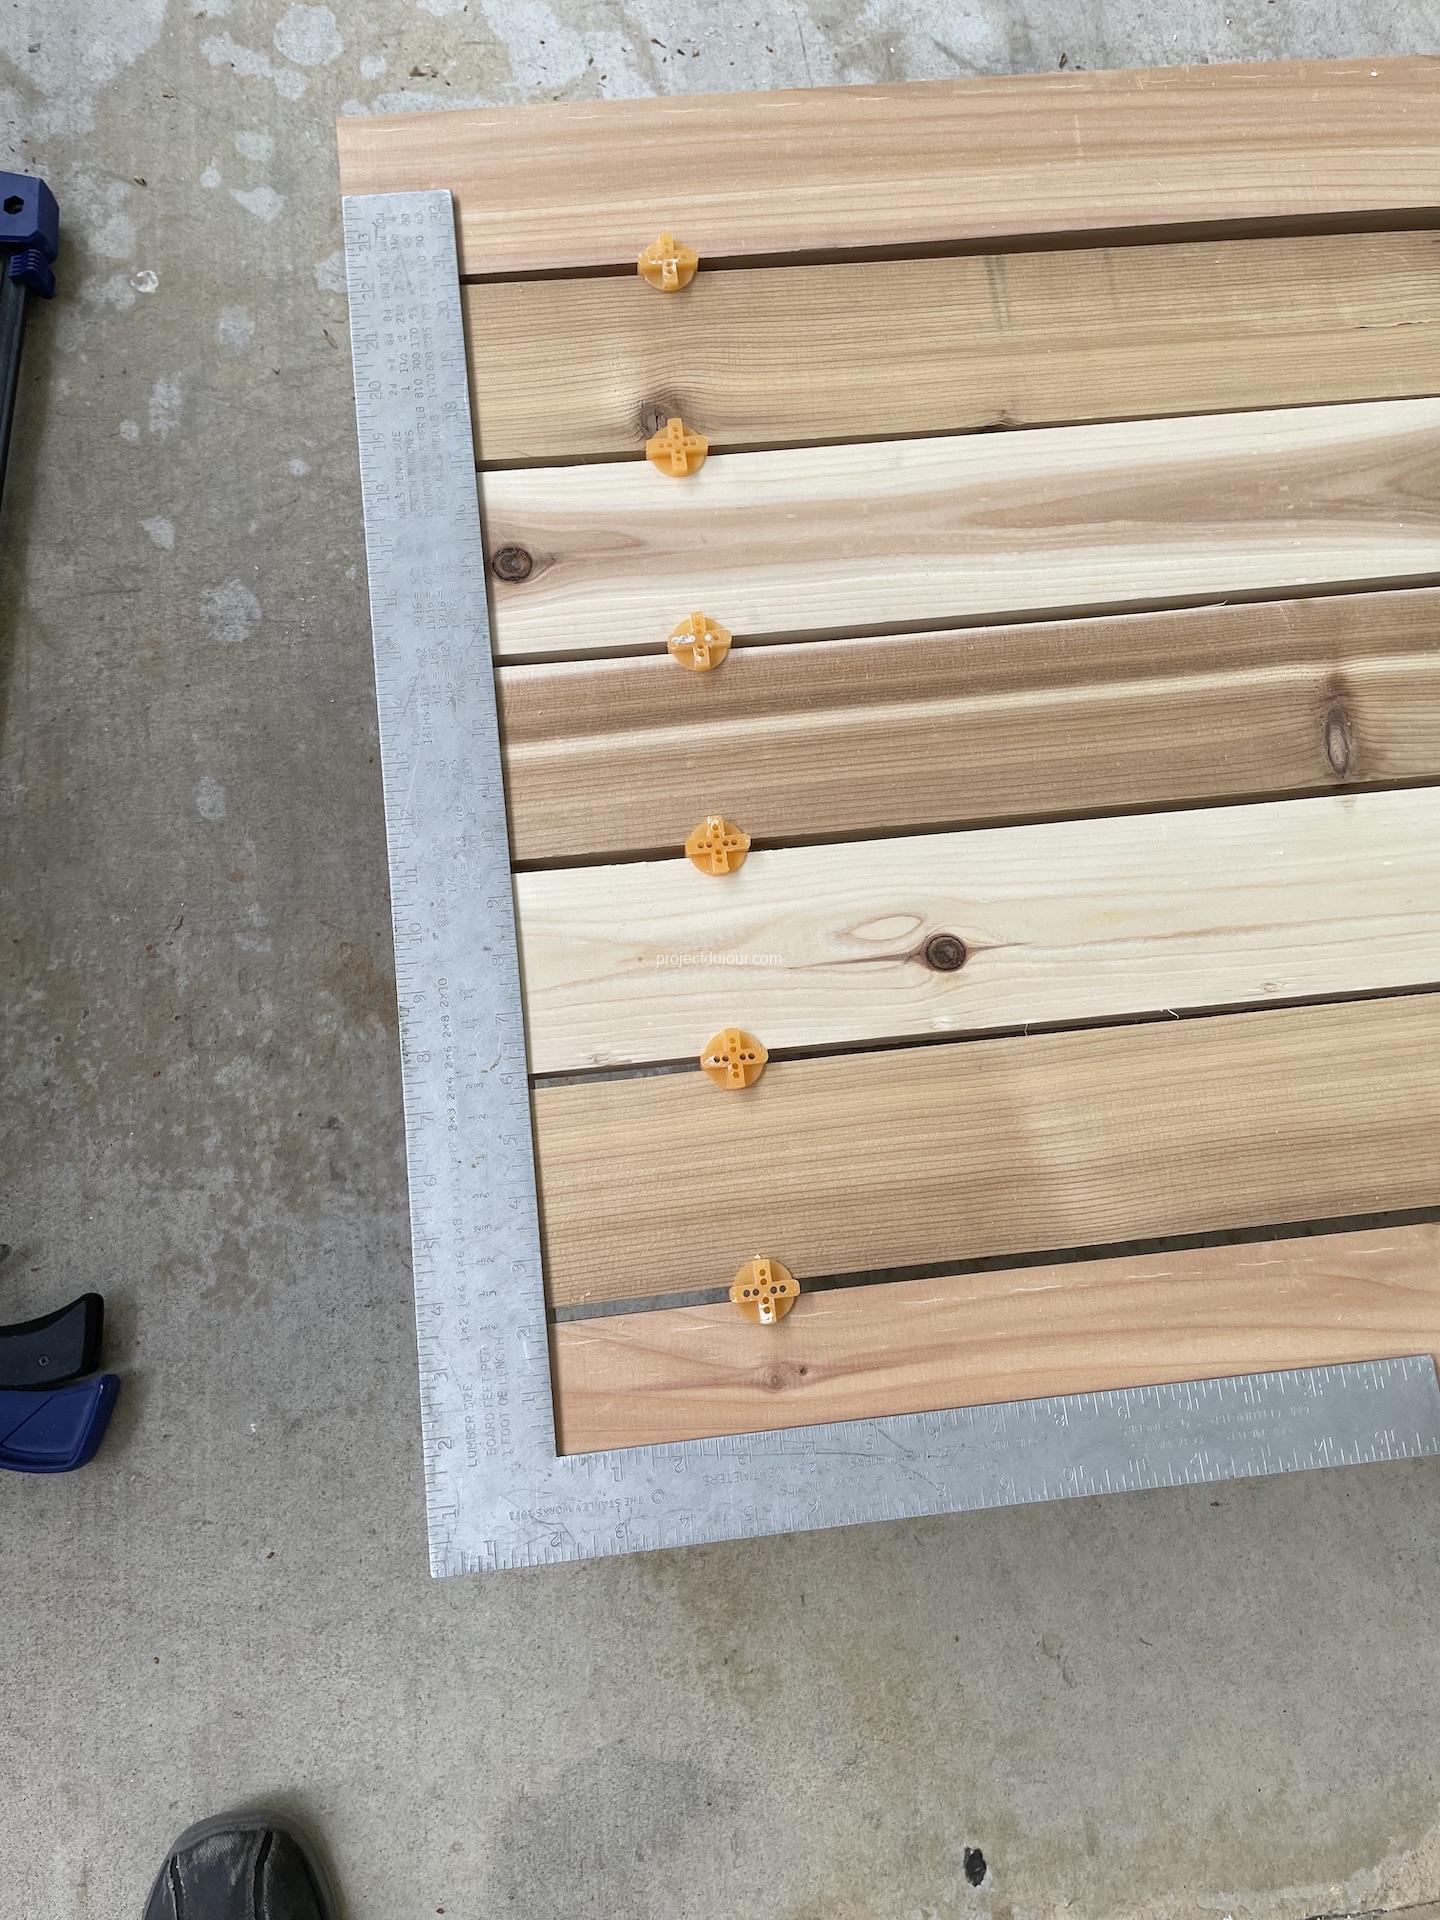
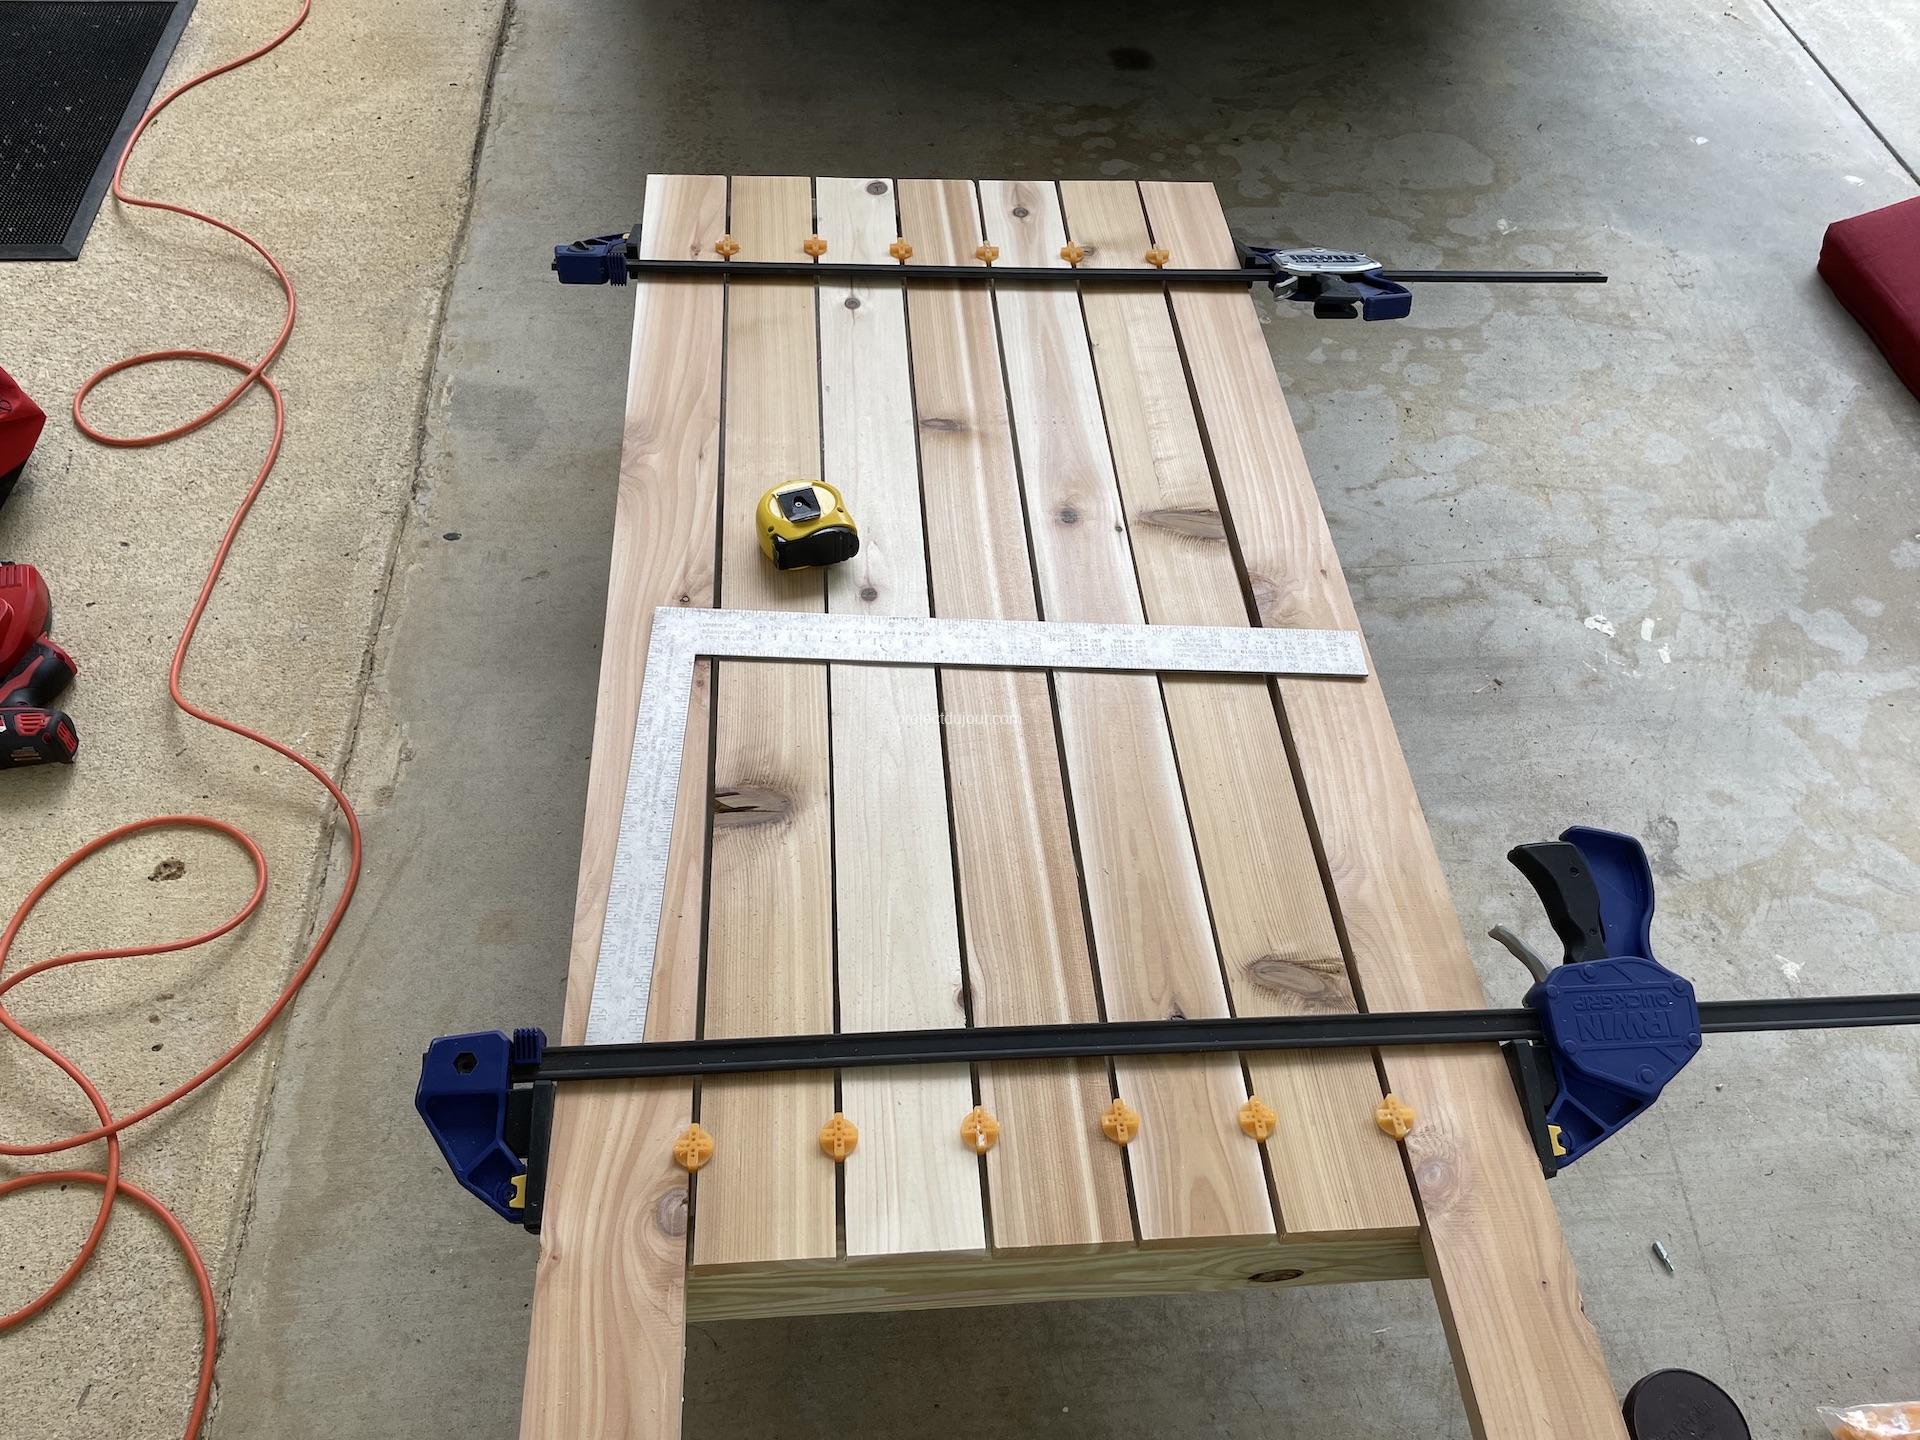
Before screwing any cedar board to the frame, I clamped them together and moved them over the frame until the overhangs where even on all sides.
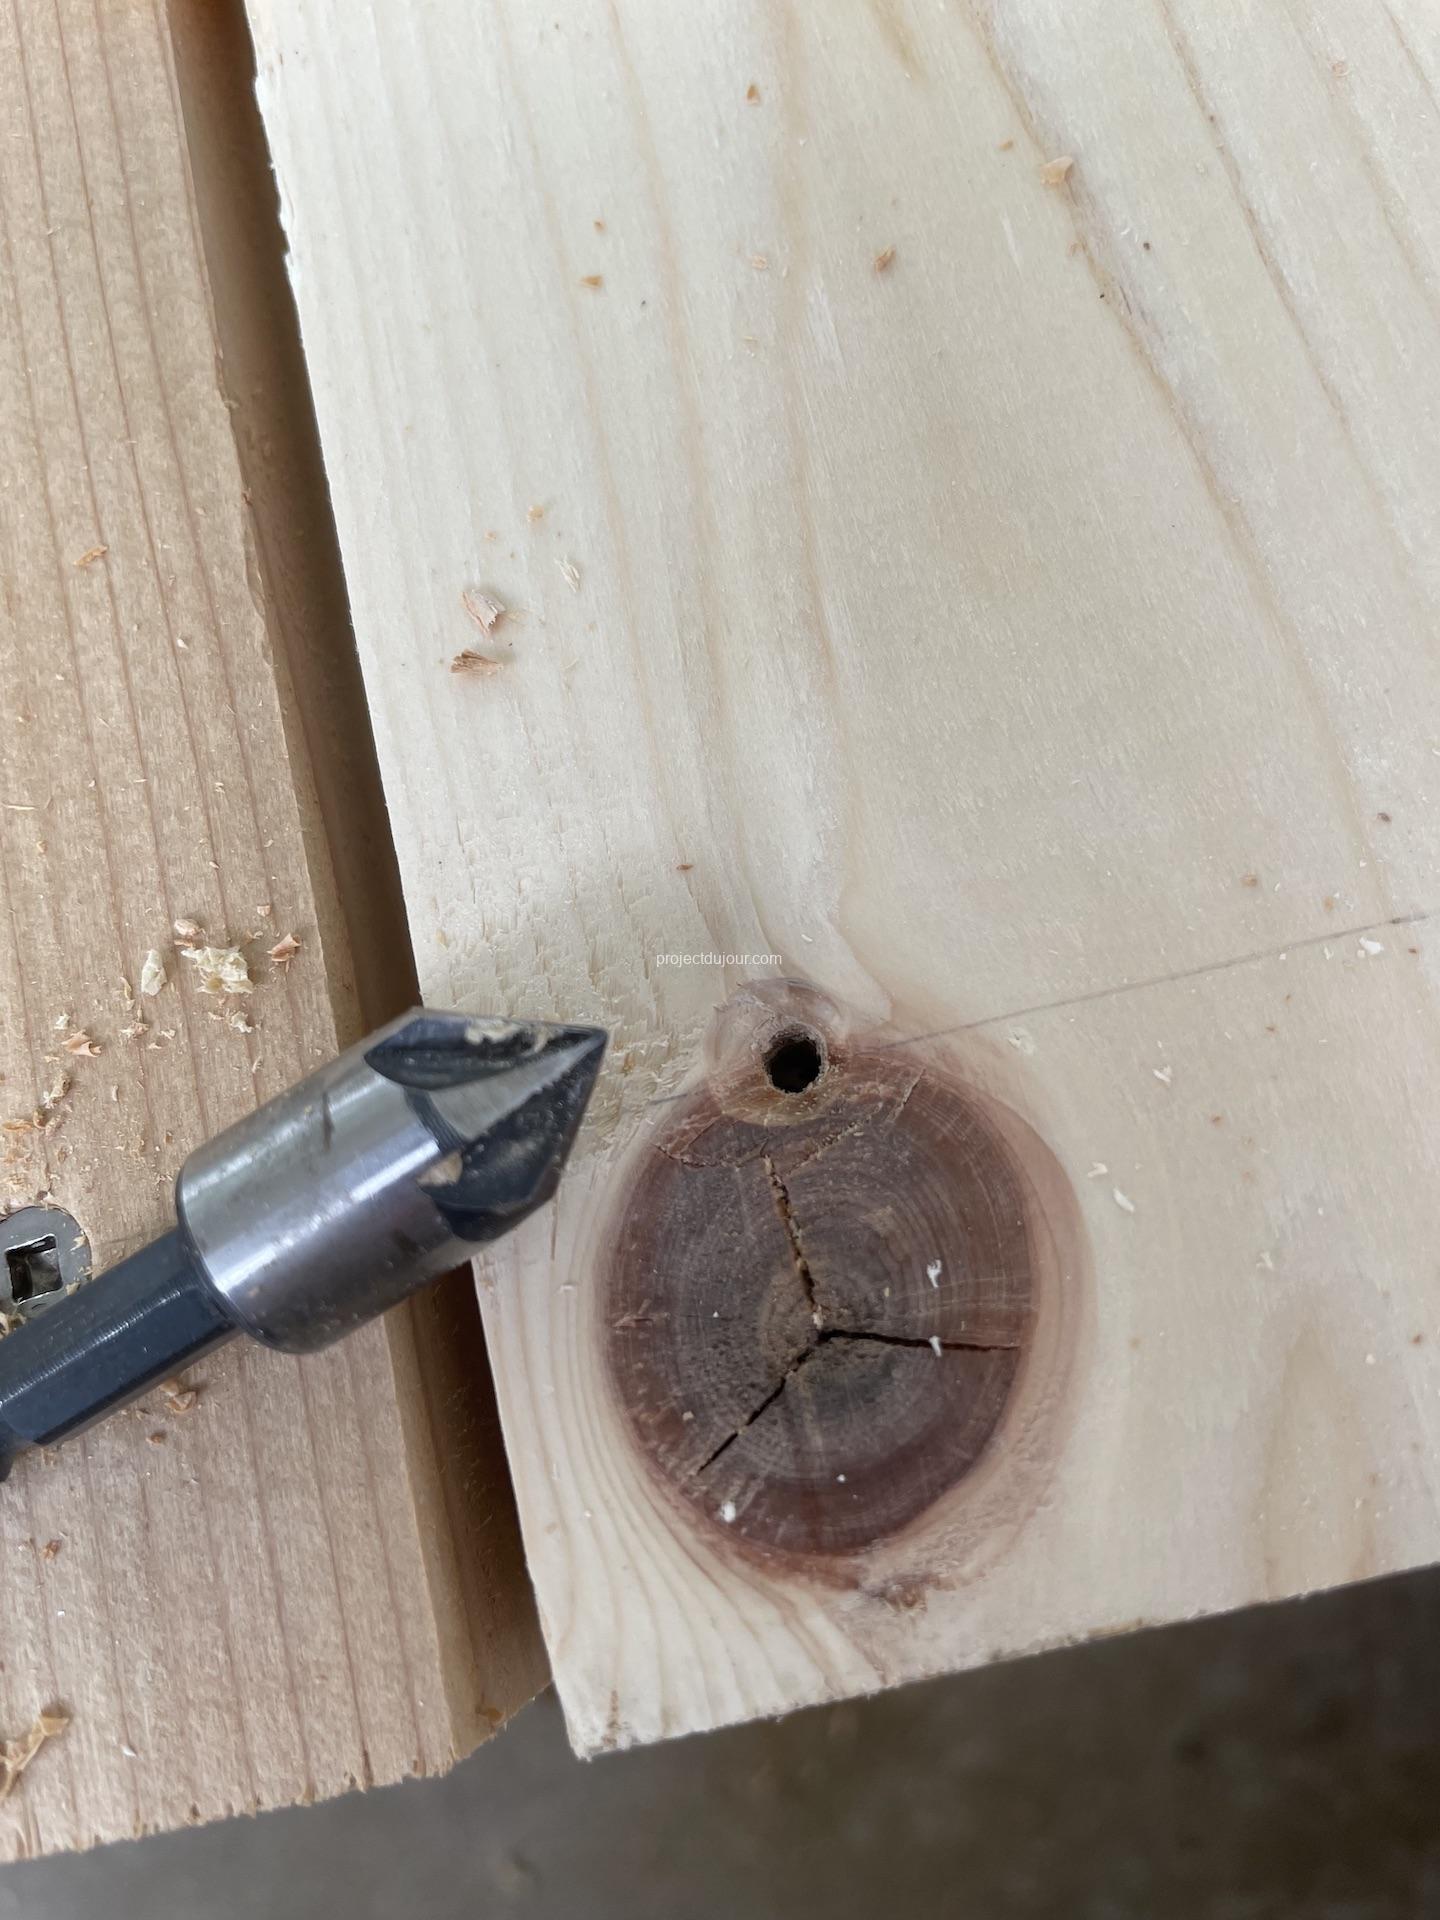
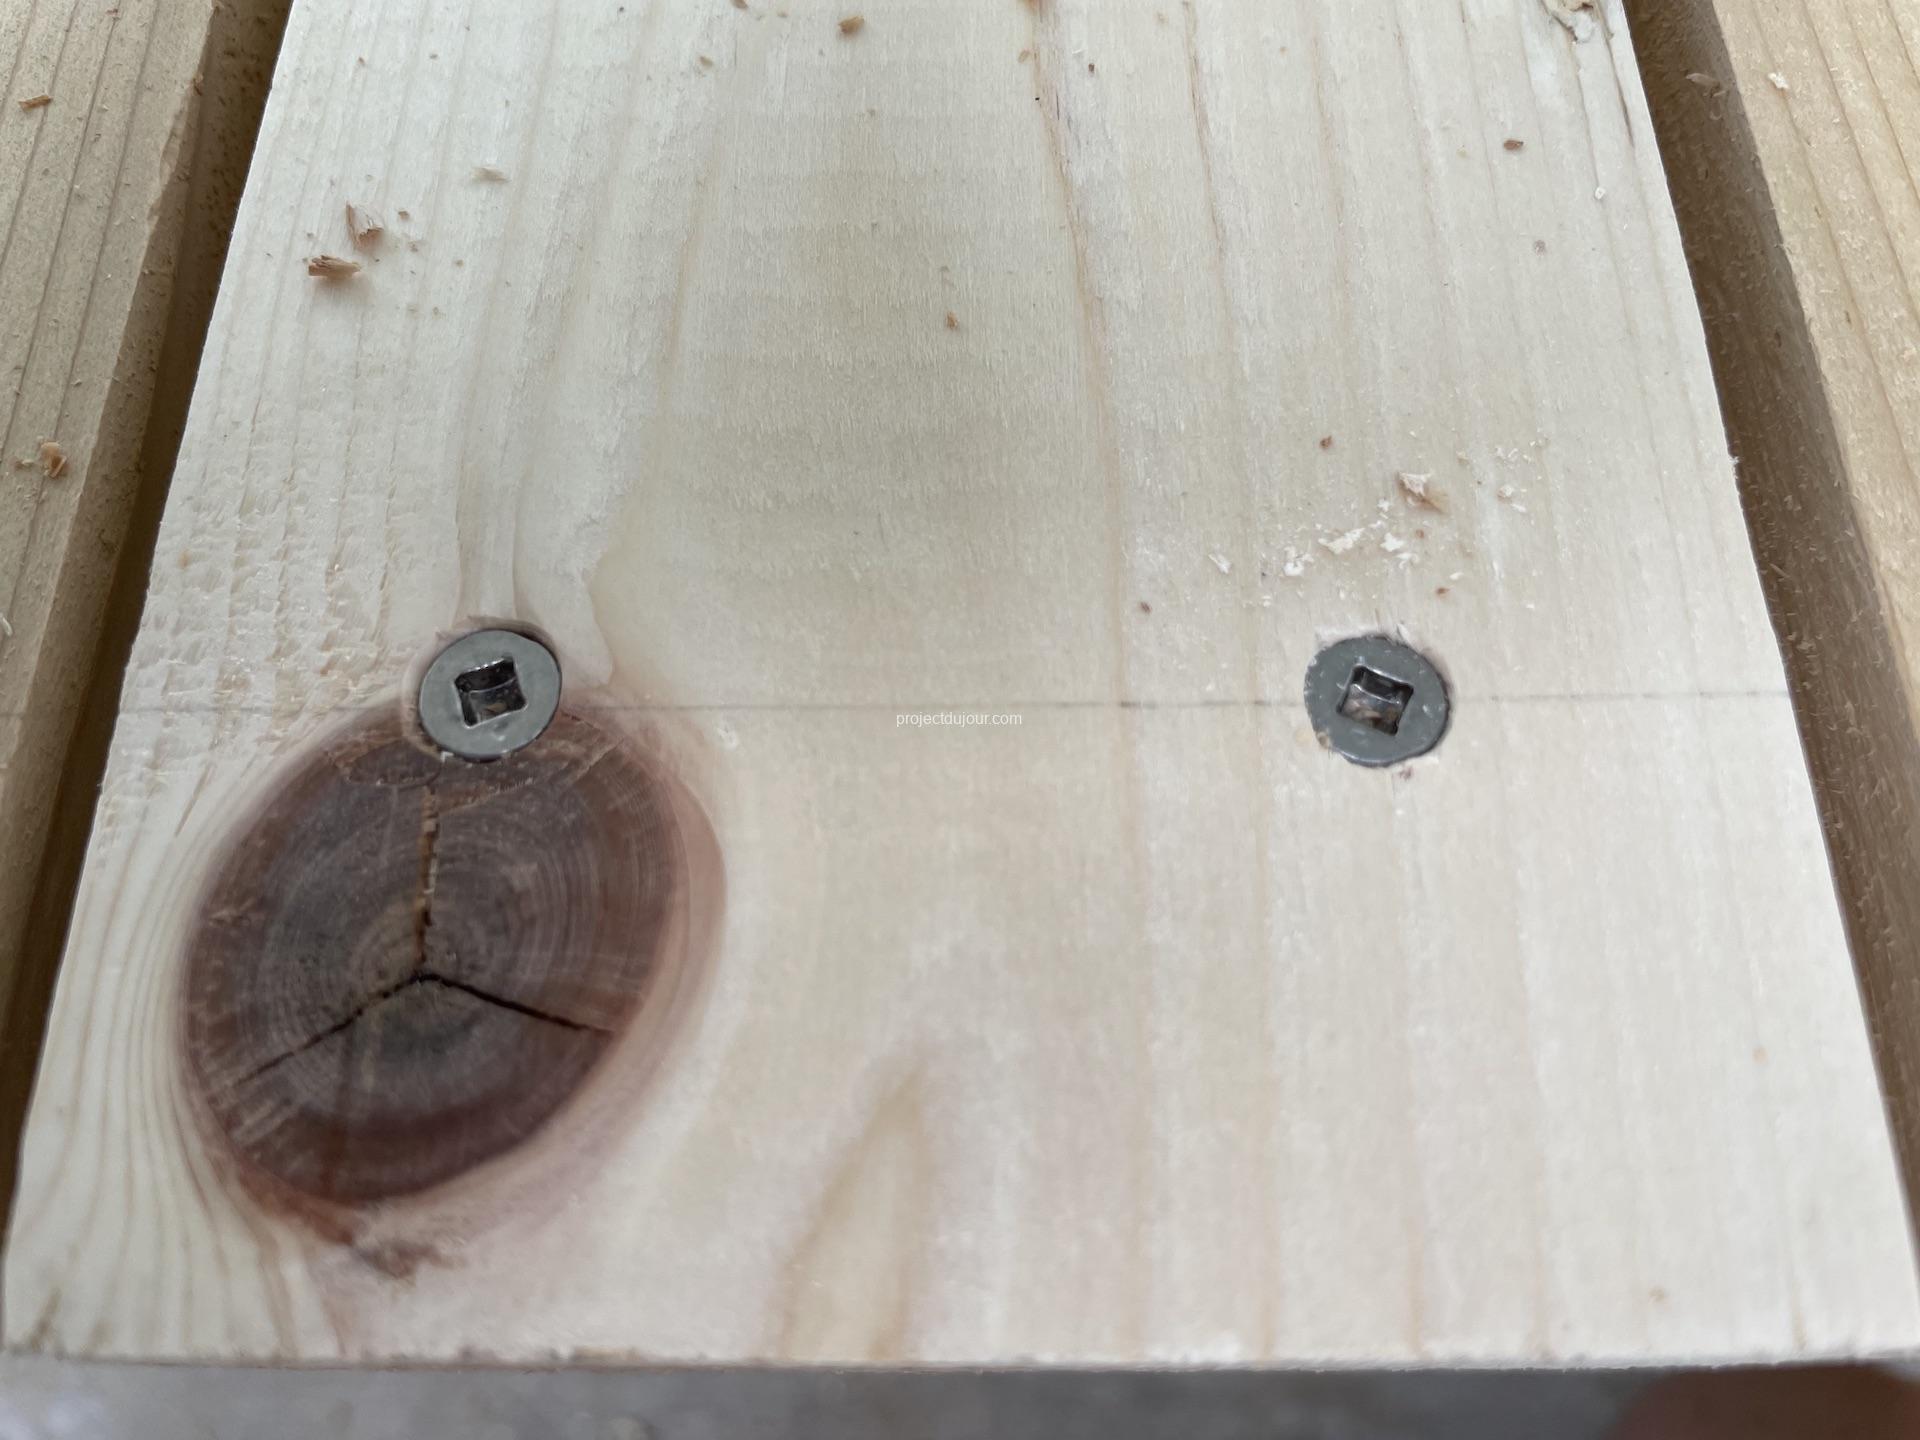
Since cedar has a nasty tendency to split, I decided to counter sink and pre-drill each hole. I don’t have a counter drill bit so I used first a counter bit and then a drill bit. It’s a bit time consuming so I would suggest buying a proper counter drill bit. To attach the cedar boards, I used some “SPAX #7 x 1-5/8in. Flat Head Stainless Steel Screws with Double Lock Thread” (found at Lowe’s or Amazon).
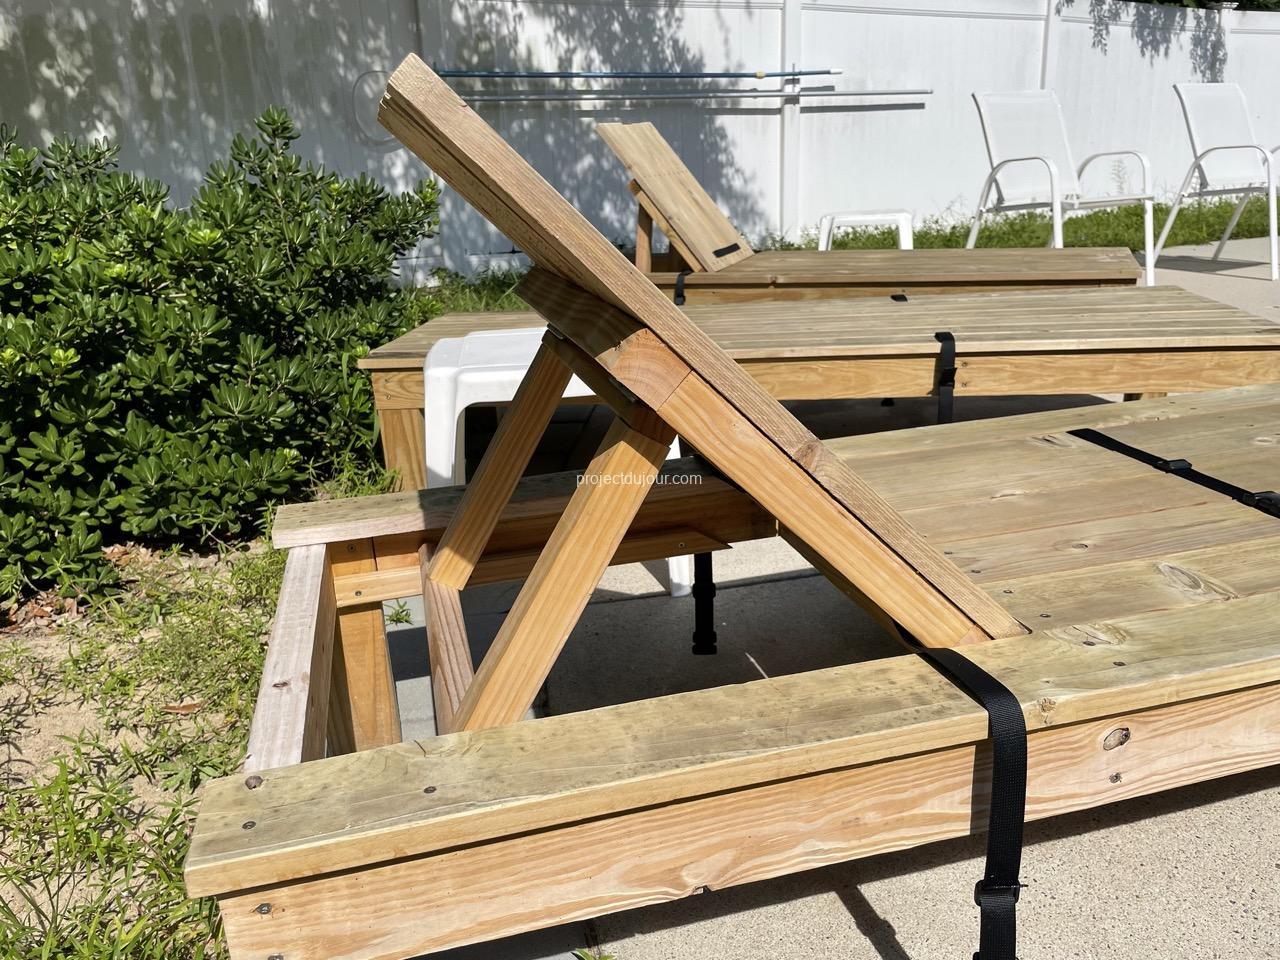
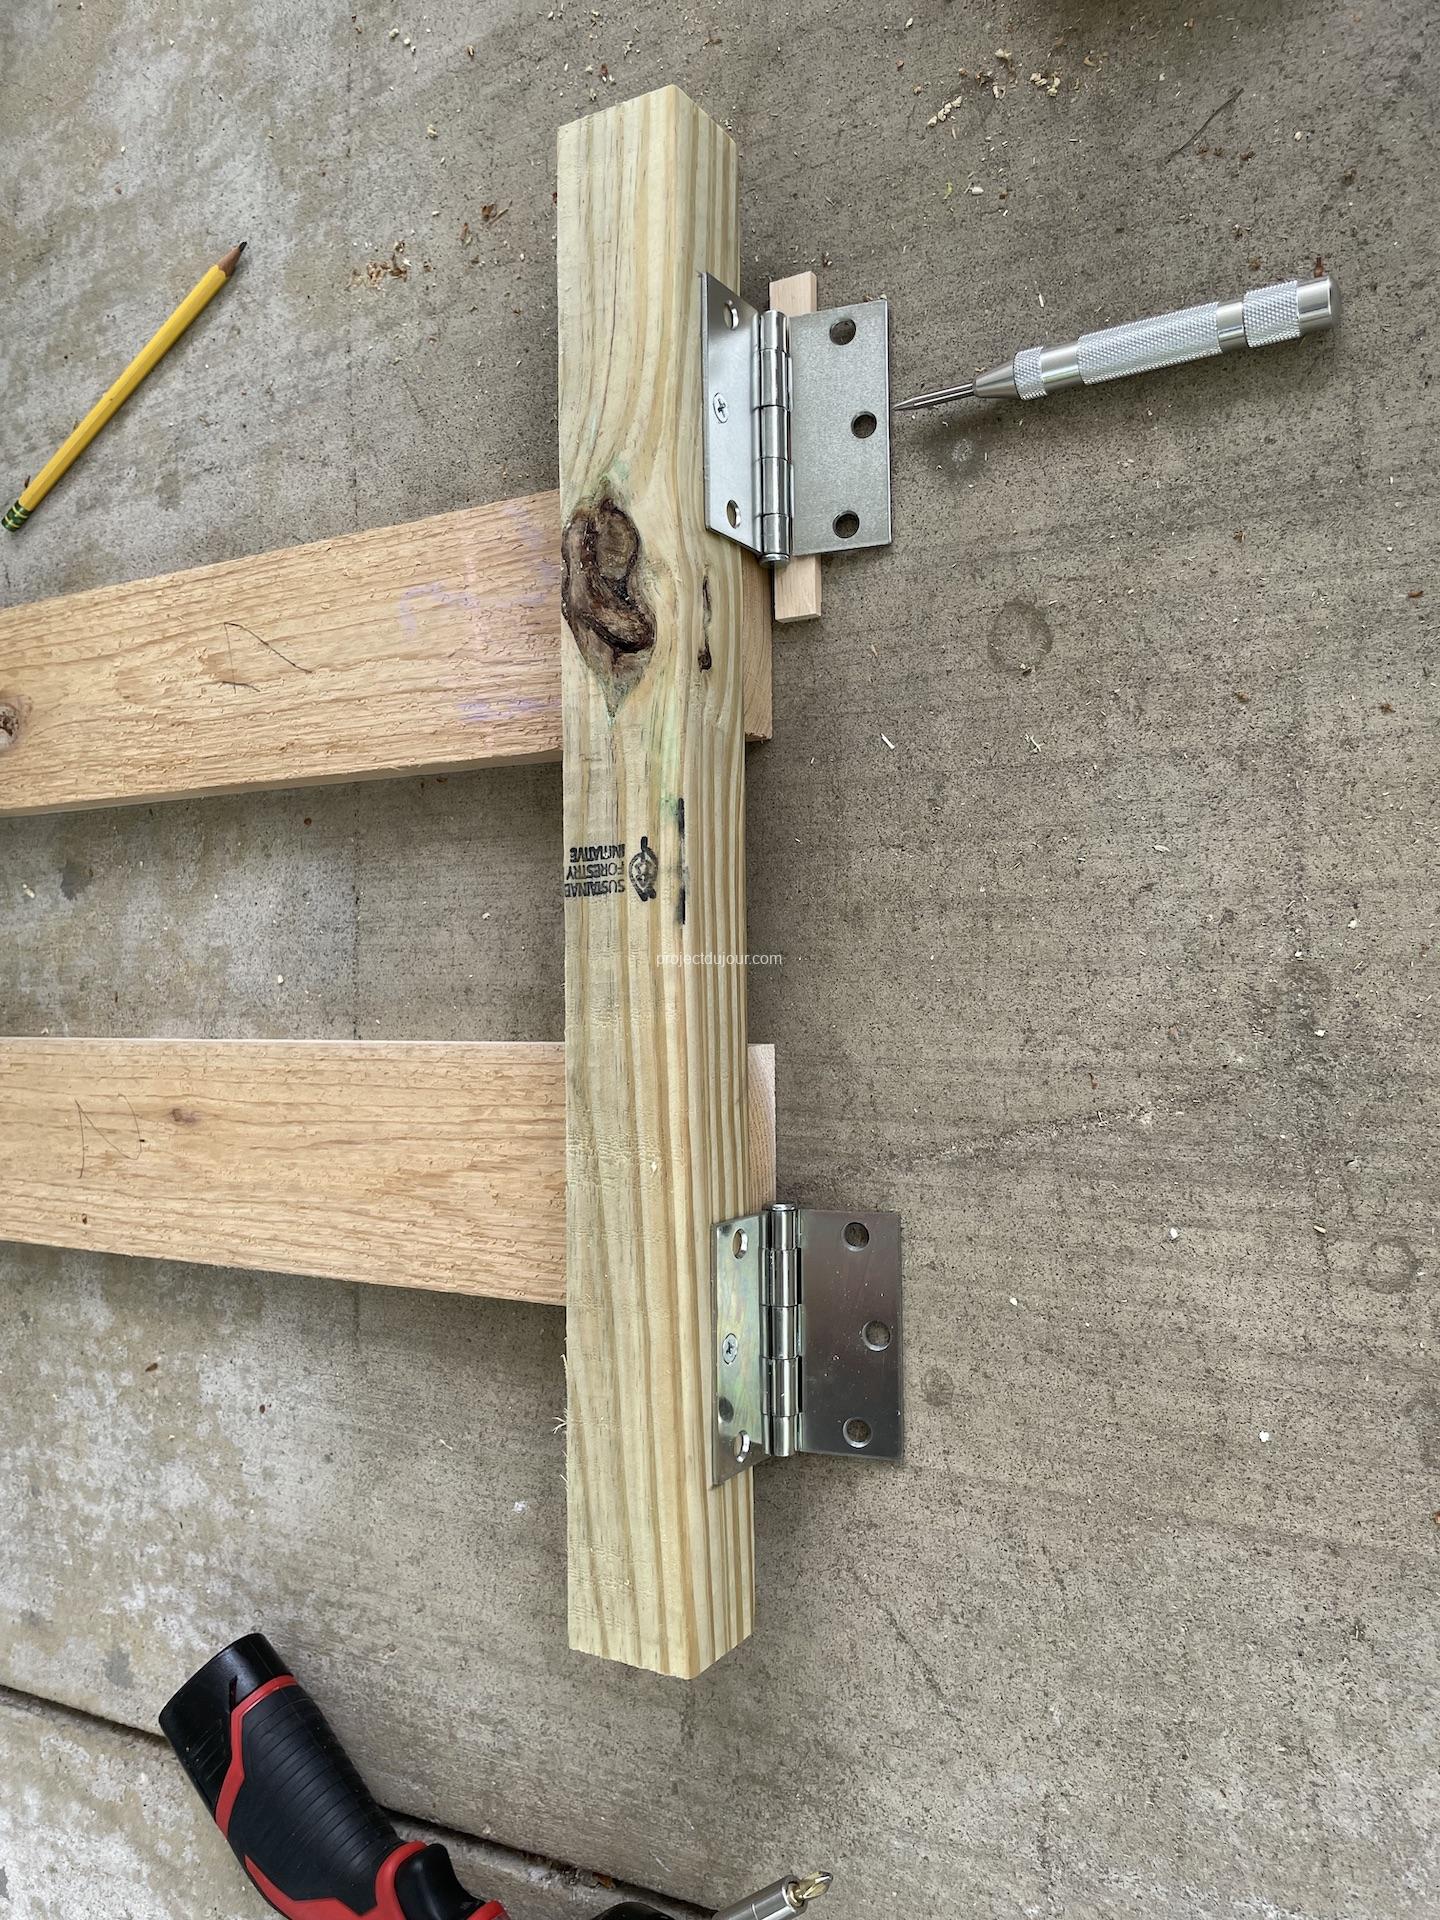
Mounting the hinges for the back was a bit tricky. My method might not be the simplest but it guaranteed that when the back was pushed down, everything was perfectly flat. Also, make sure all the cedar boards that are hitting the hinges are slightly recessed so there is space for the round part of the hinge. This space is also needed to be able to lift the back; without enough spacing between the cedar boards on the flat surface and the back, the back would hit the bottom part.
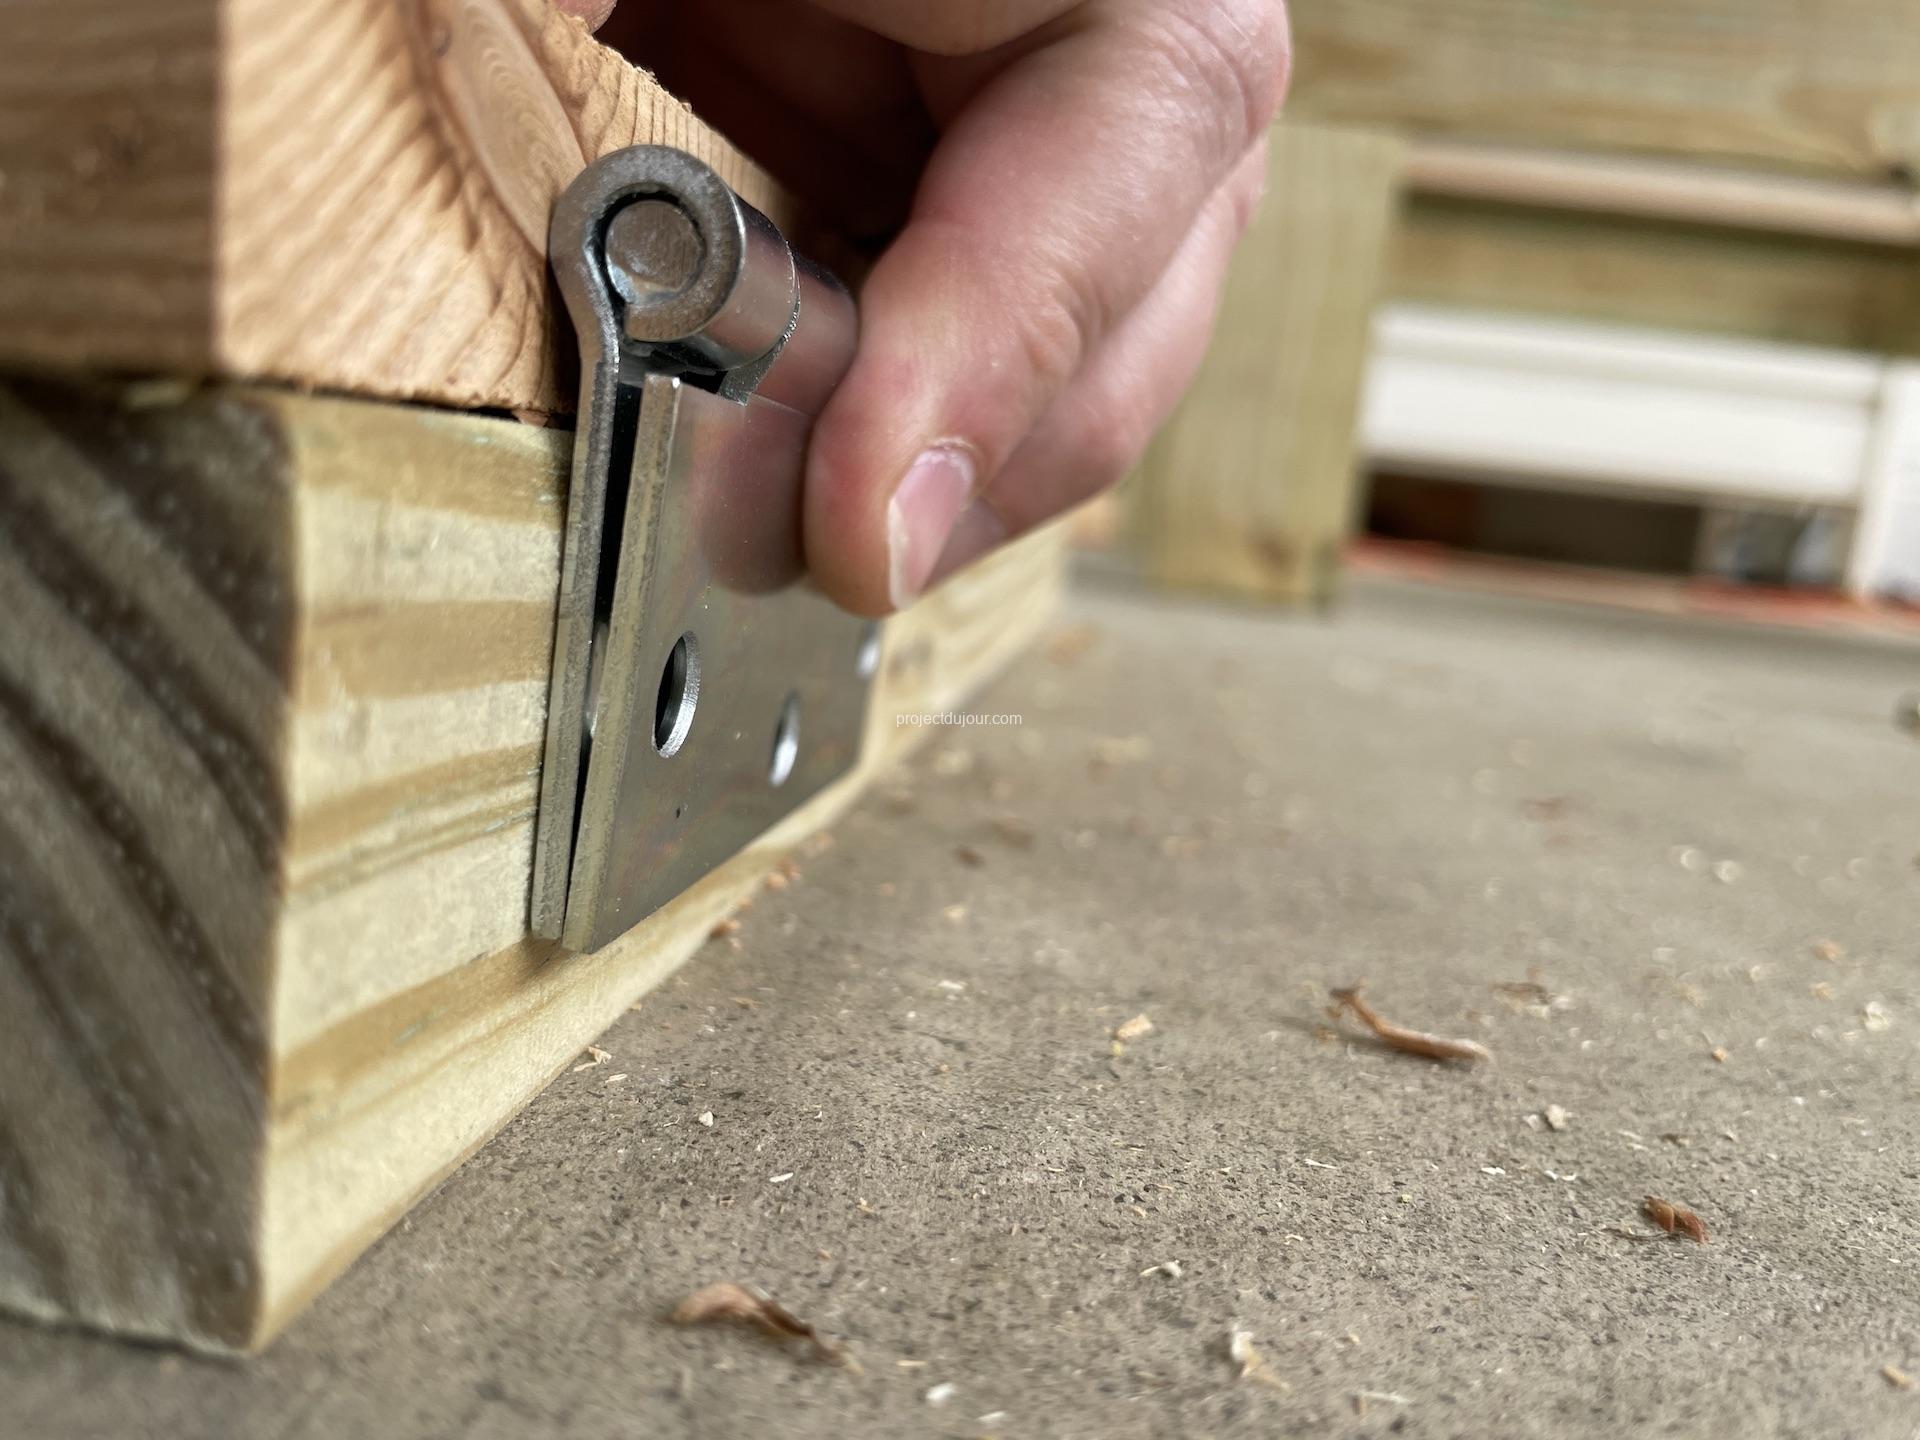
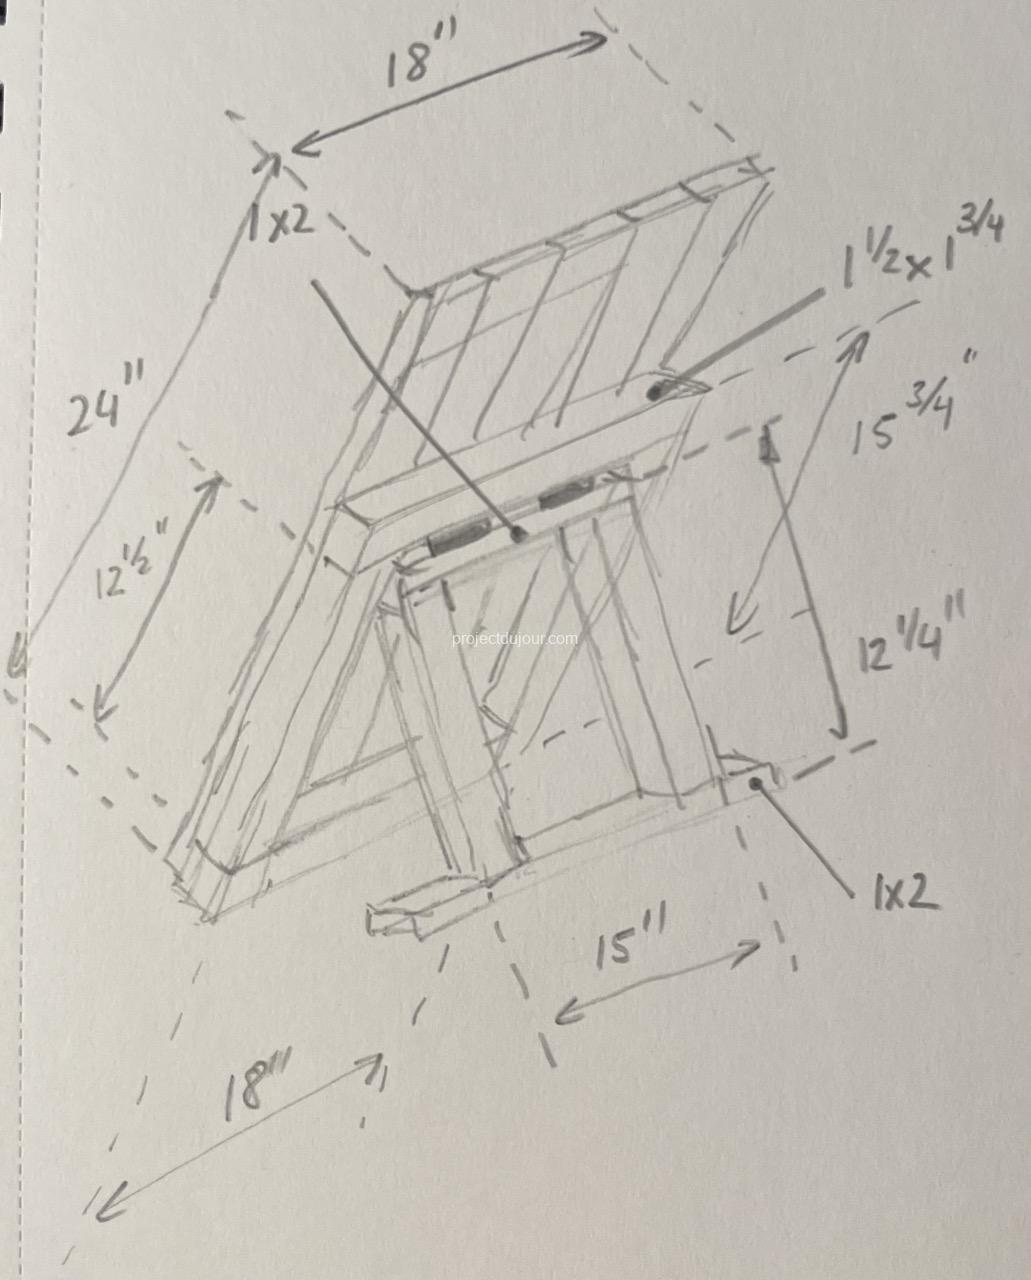
The frame for the back is built using left over 2×4 pressure treated lumber ripped in half. The actual size is 1 1/2″ by 1 3/4″. I started by cutting the piece close to the hinges. I used a small piece of scrap wood as a spacer to determine the depth of the hinges. Since I wasn’t sure the hinge placement was final, I used a single screw just to hold each hinge in place. I didn’t pre-drill for that screw but I marked the center with a punch tool.
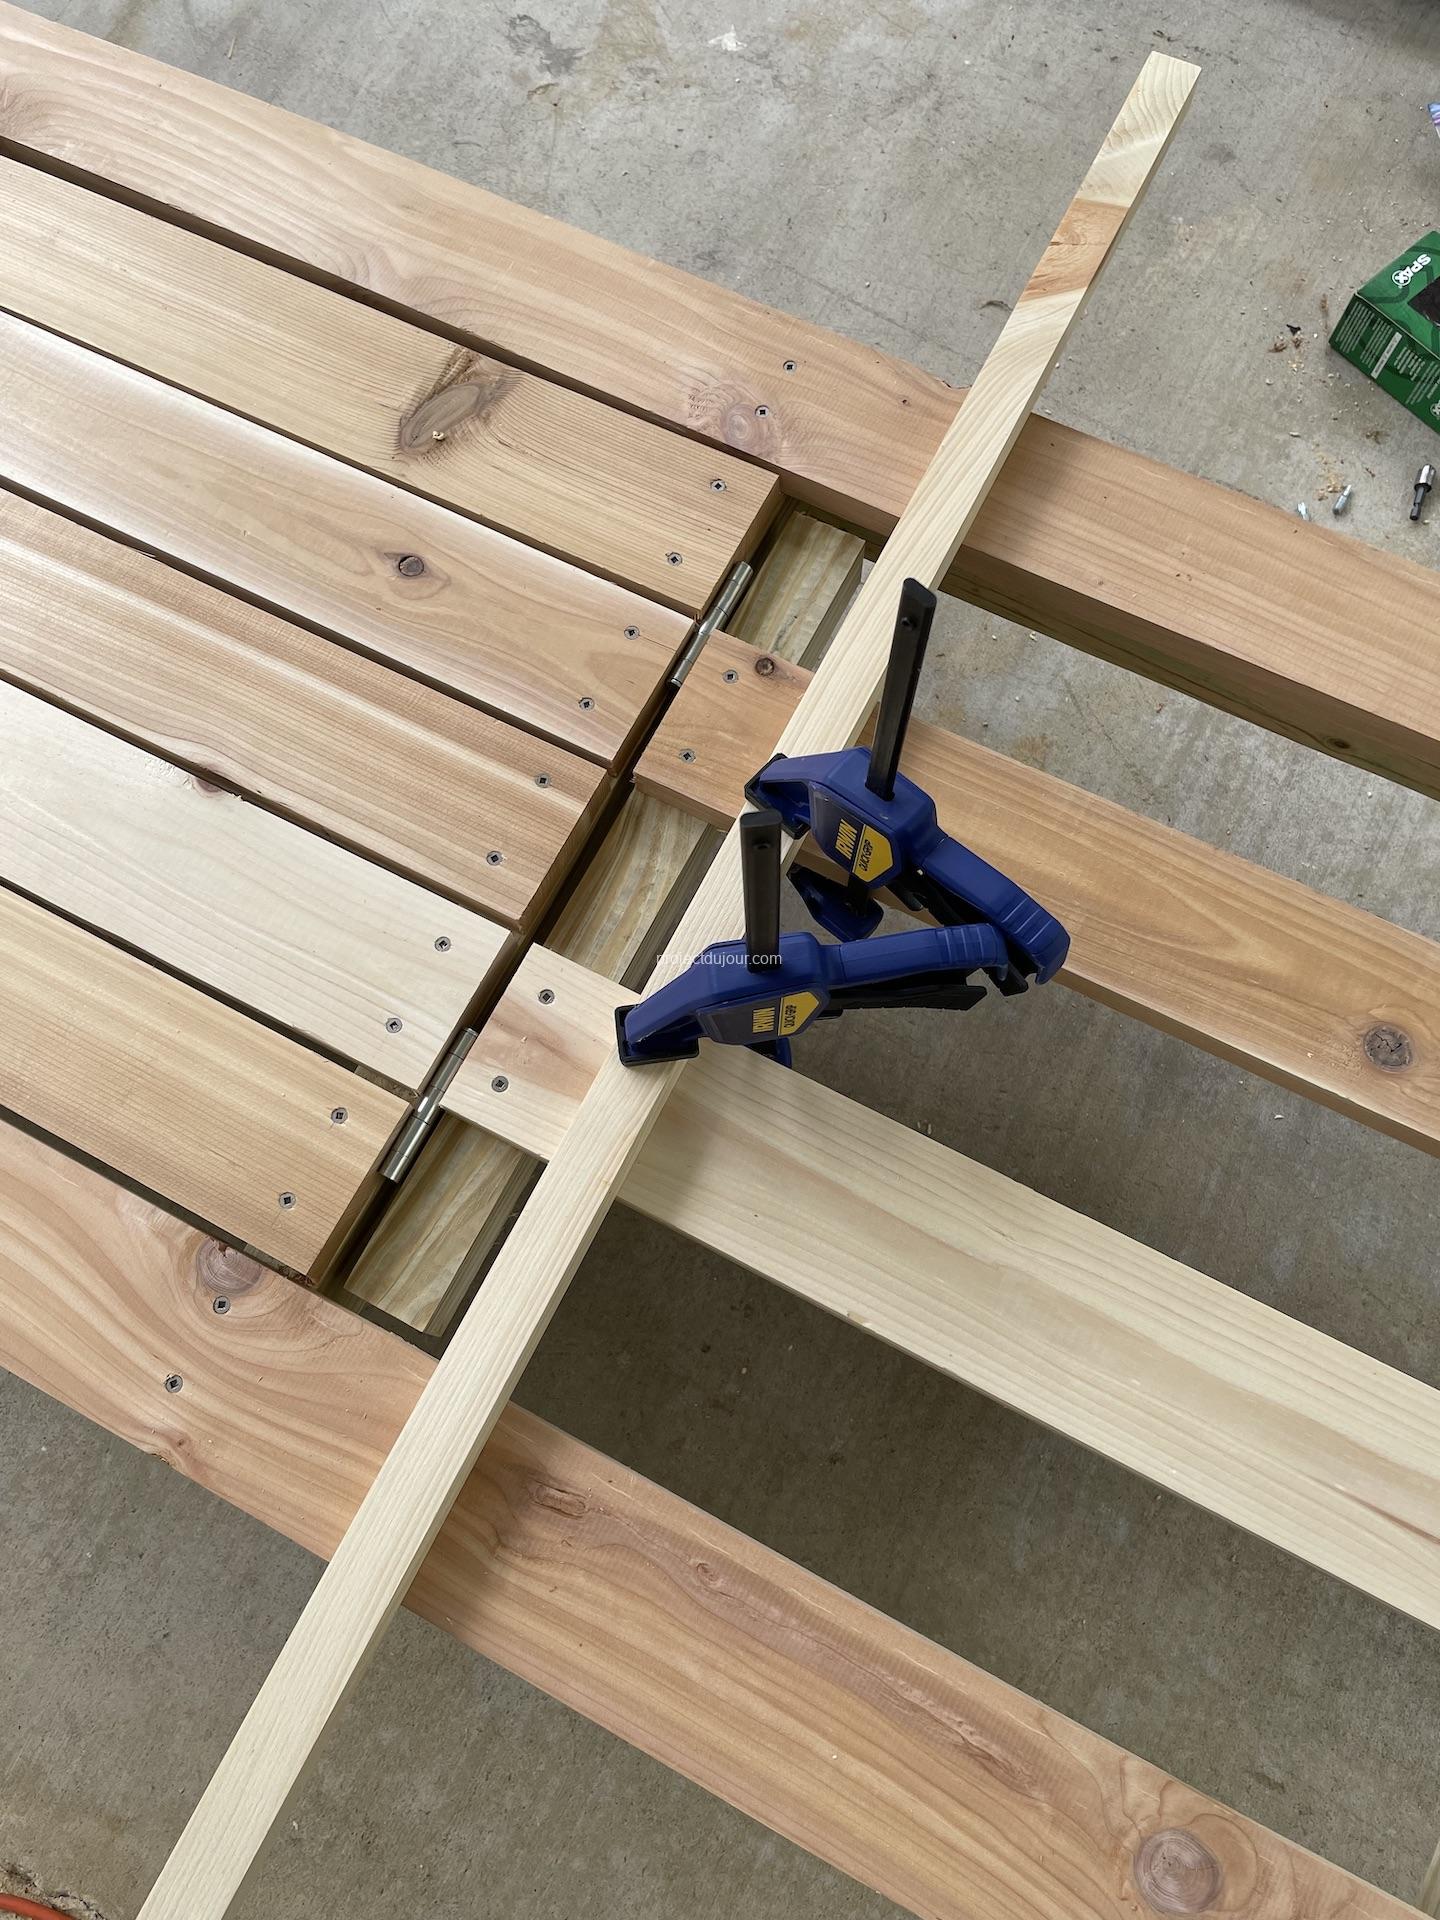
At that point, I attached two of the five boards for the back and used clamps with a piece of scrap wood to hold the back in place. With the back at the correct height, I used a pencil all around the hinges to mark their location on the transversal support of the base frame. I then lifted the back and added all the missing screws.
It took me some time to figure where to position the hinges for the the legs holding the back in upright position. I experimented for a while with scraps of wood until I reached a compromised that I liked. The legs are built using 2×4 ripped in half as well as some 1×2 pressure treated lumber. The legs rest on a strip of 1×2 screwed inside the frame. that strip is 19 1/4″ long and is cut at an angle so the leg is lowered when the back is laid flat (see video below).