I needed an outdoor dining table and some chairs to go under my patio cover. I searched the internet and found some nice options. I really liked the modern lines of the Crate and Barrel Alfresco collection but it turned out to be on the pricy side. The IKEA Falster collection is similar but felt too small and fragile. In both cases, I found the chairs to be a bit too straight and I wasn’t a big fan of the fake wood (though it is low maintenance).
I ended up buying some Rex Grey Chairs on sale from CB2 (discontinued) and decided to build the table from scratch.
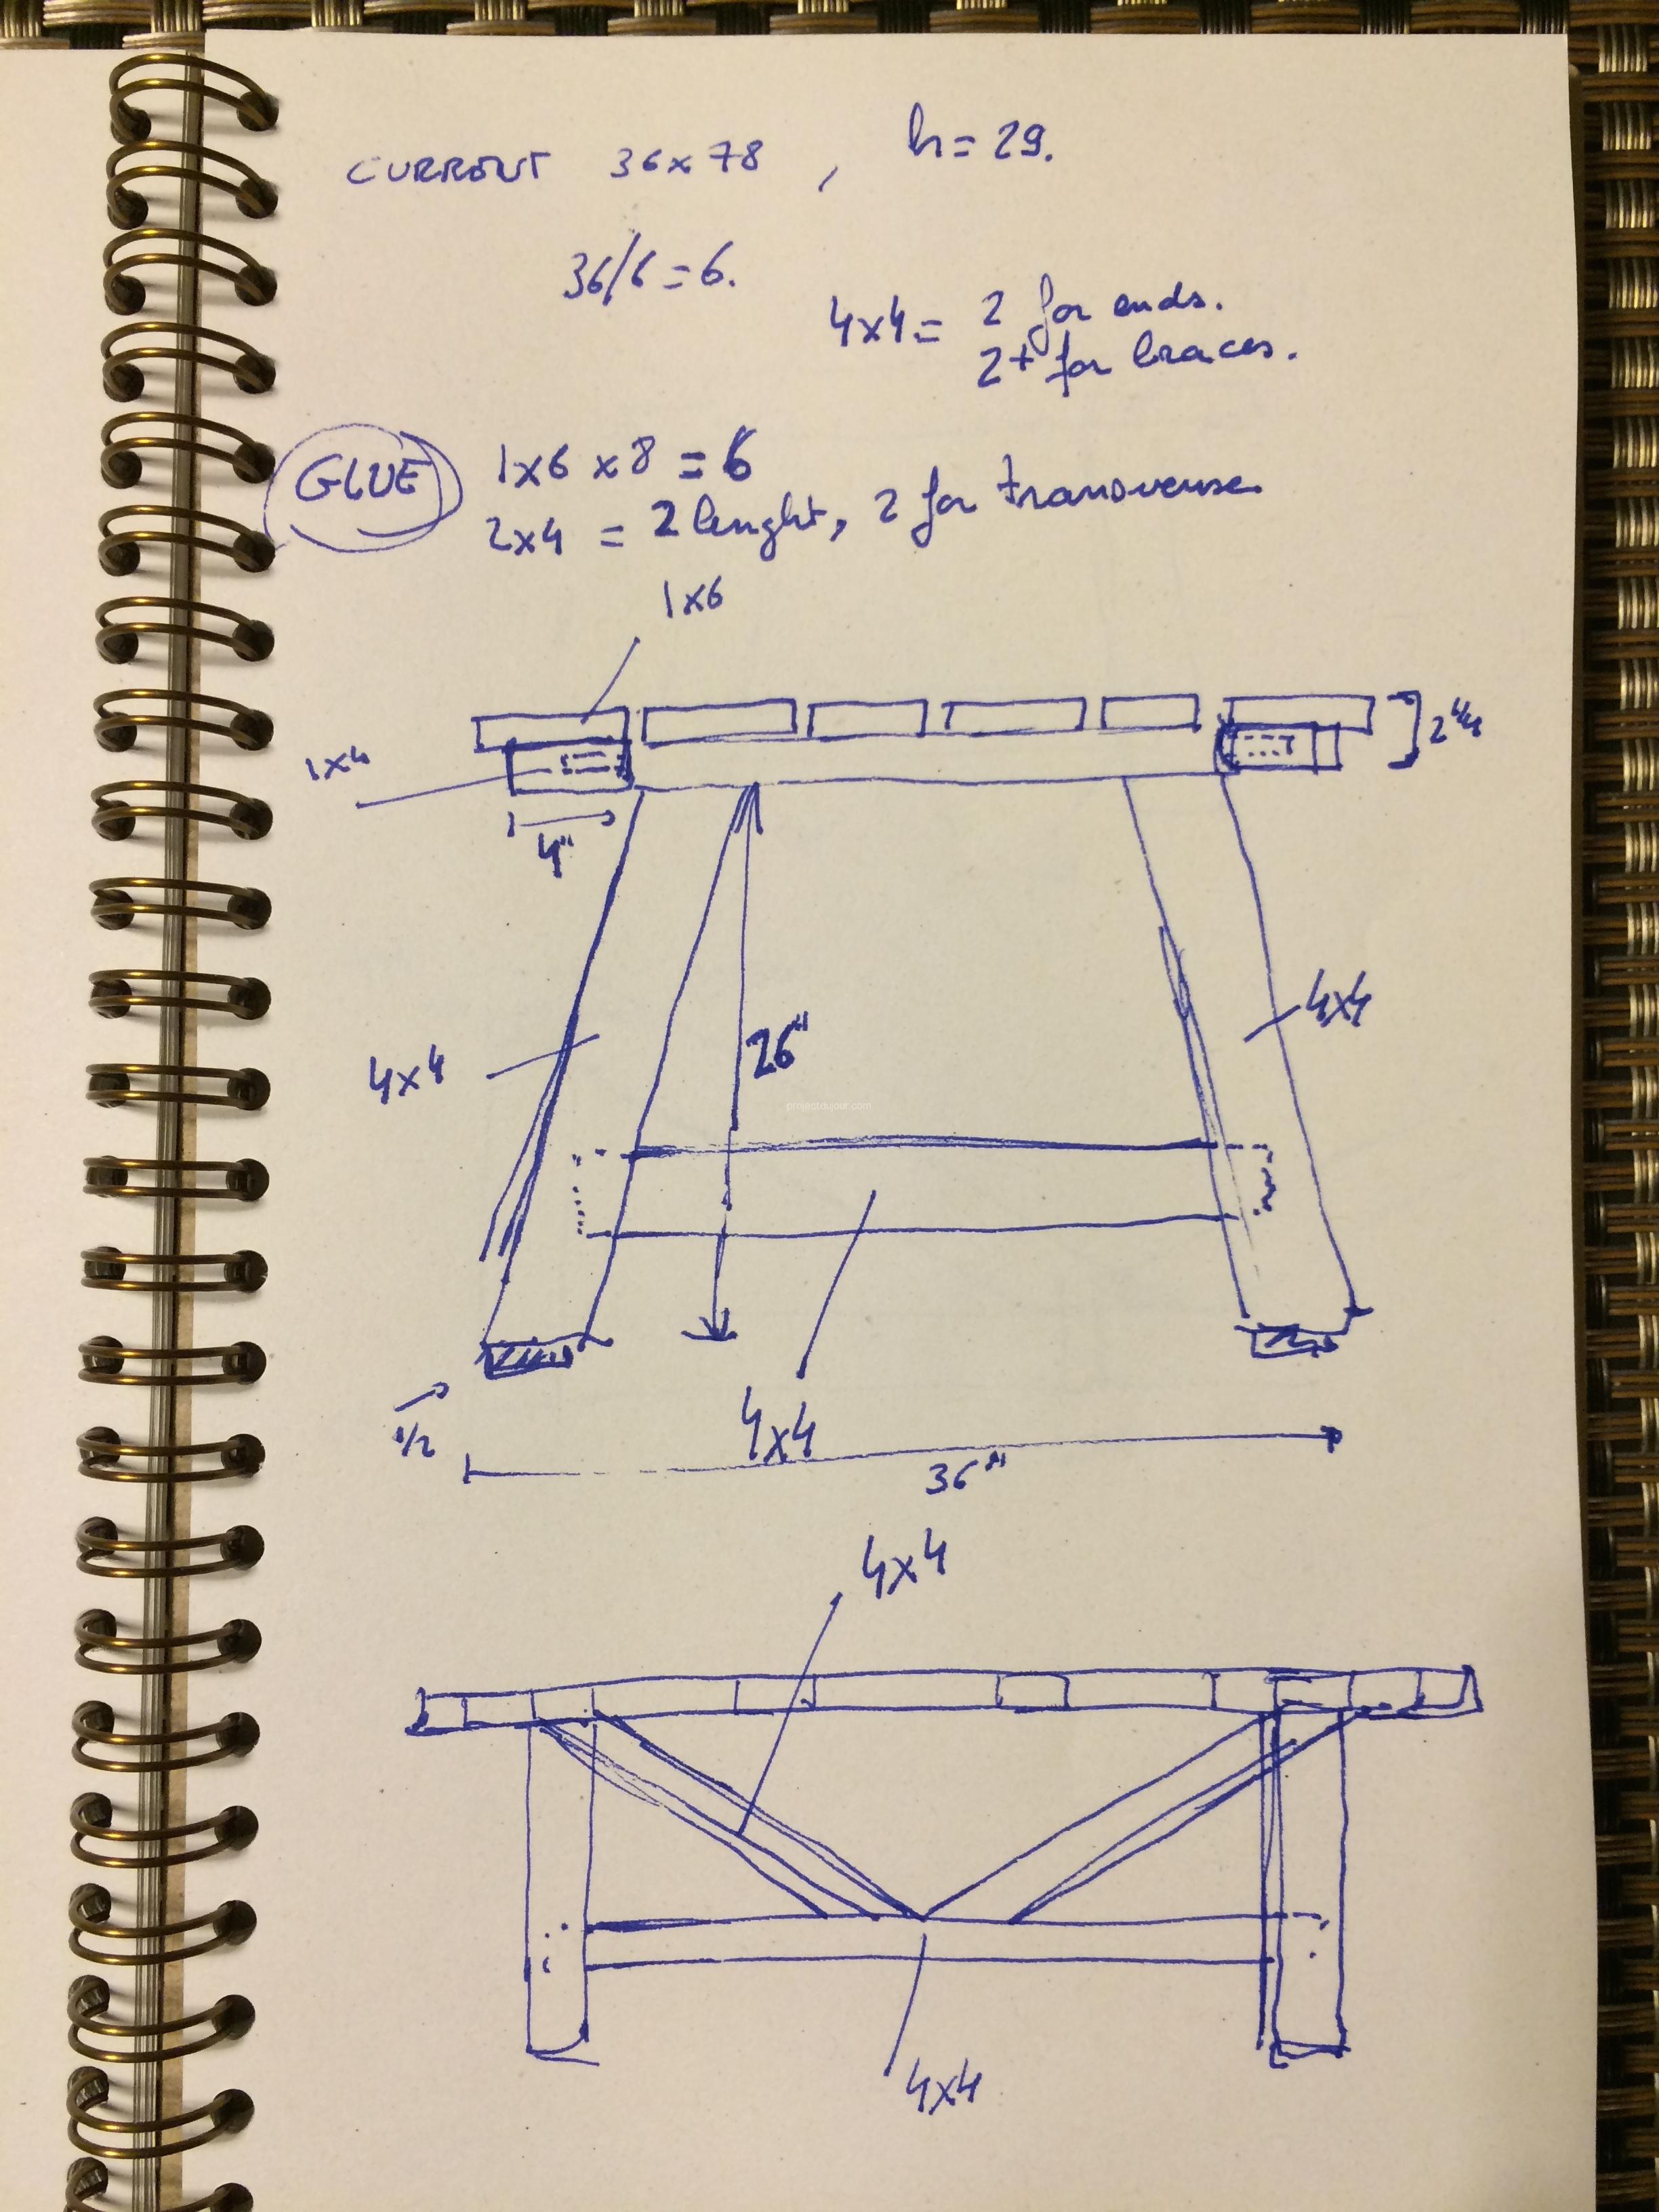
I started with a couple of drawings so I would know more or less what to buy. Since I’m not that good at making shopping lists I had to do a few runs to Lowes anyway.
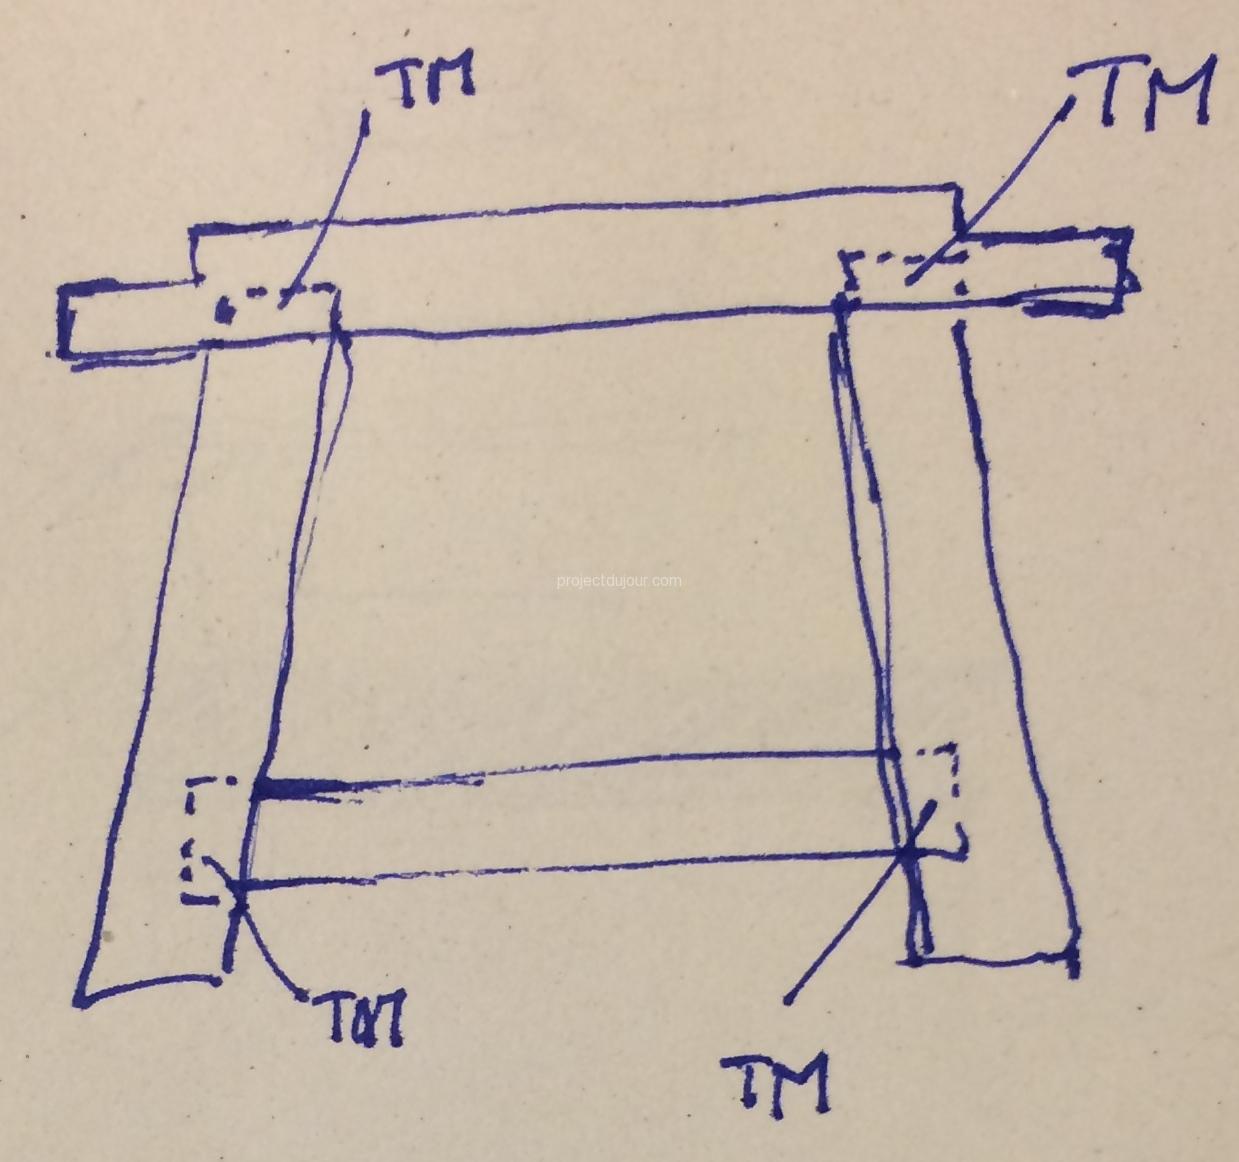
Leg details indicating tenon and mortise (TM)
View from end and side
I wanted the table to look solid so I picked some 4″ by 4″ for the legs. I found some wood at Lowes that had a darker color (something between Yellow Pine and Douglas Fir). For the table top, I bought some 1″ by 6″ cedar planks. The frame under the table top is made of regular 2″ by 4″ studs. The frame overall size is 1″ shorter than the cedar boards and 1″ narrower than the table width, so I have a 1/2″ overhang all around the table, just for the look.
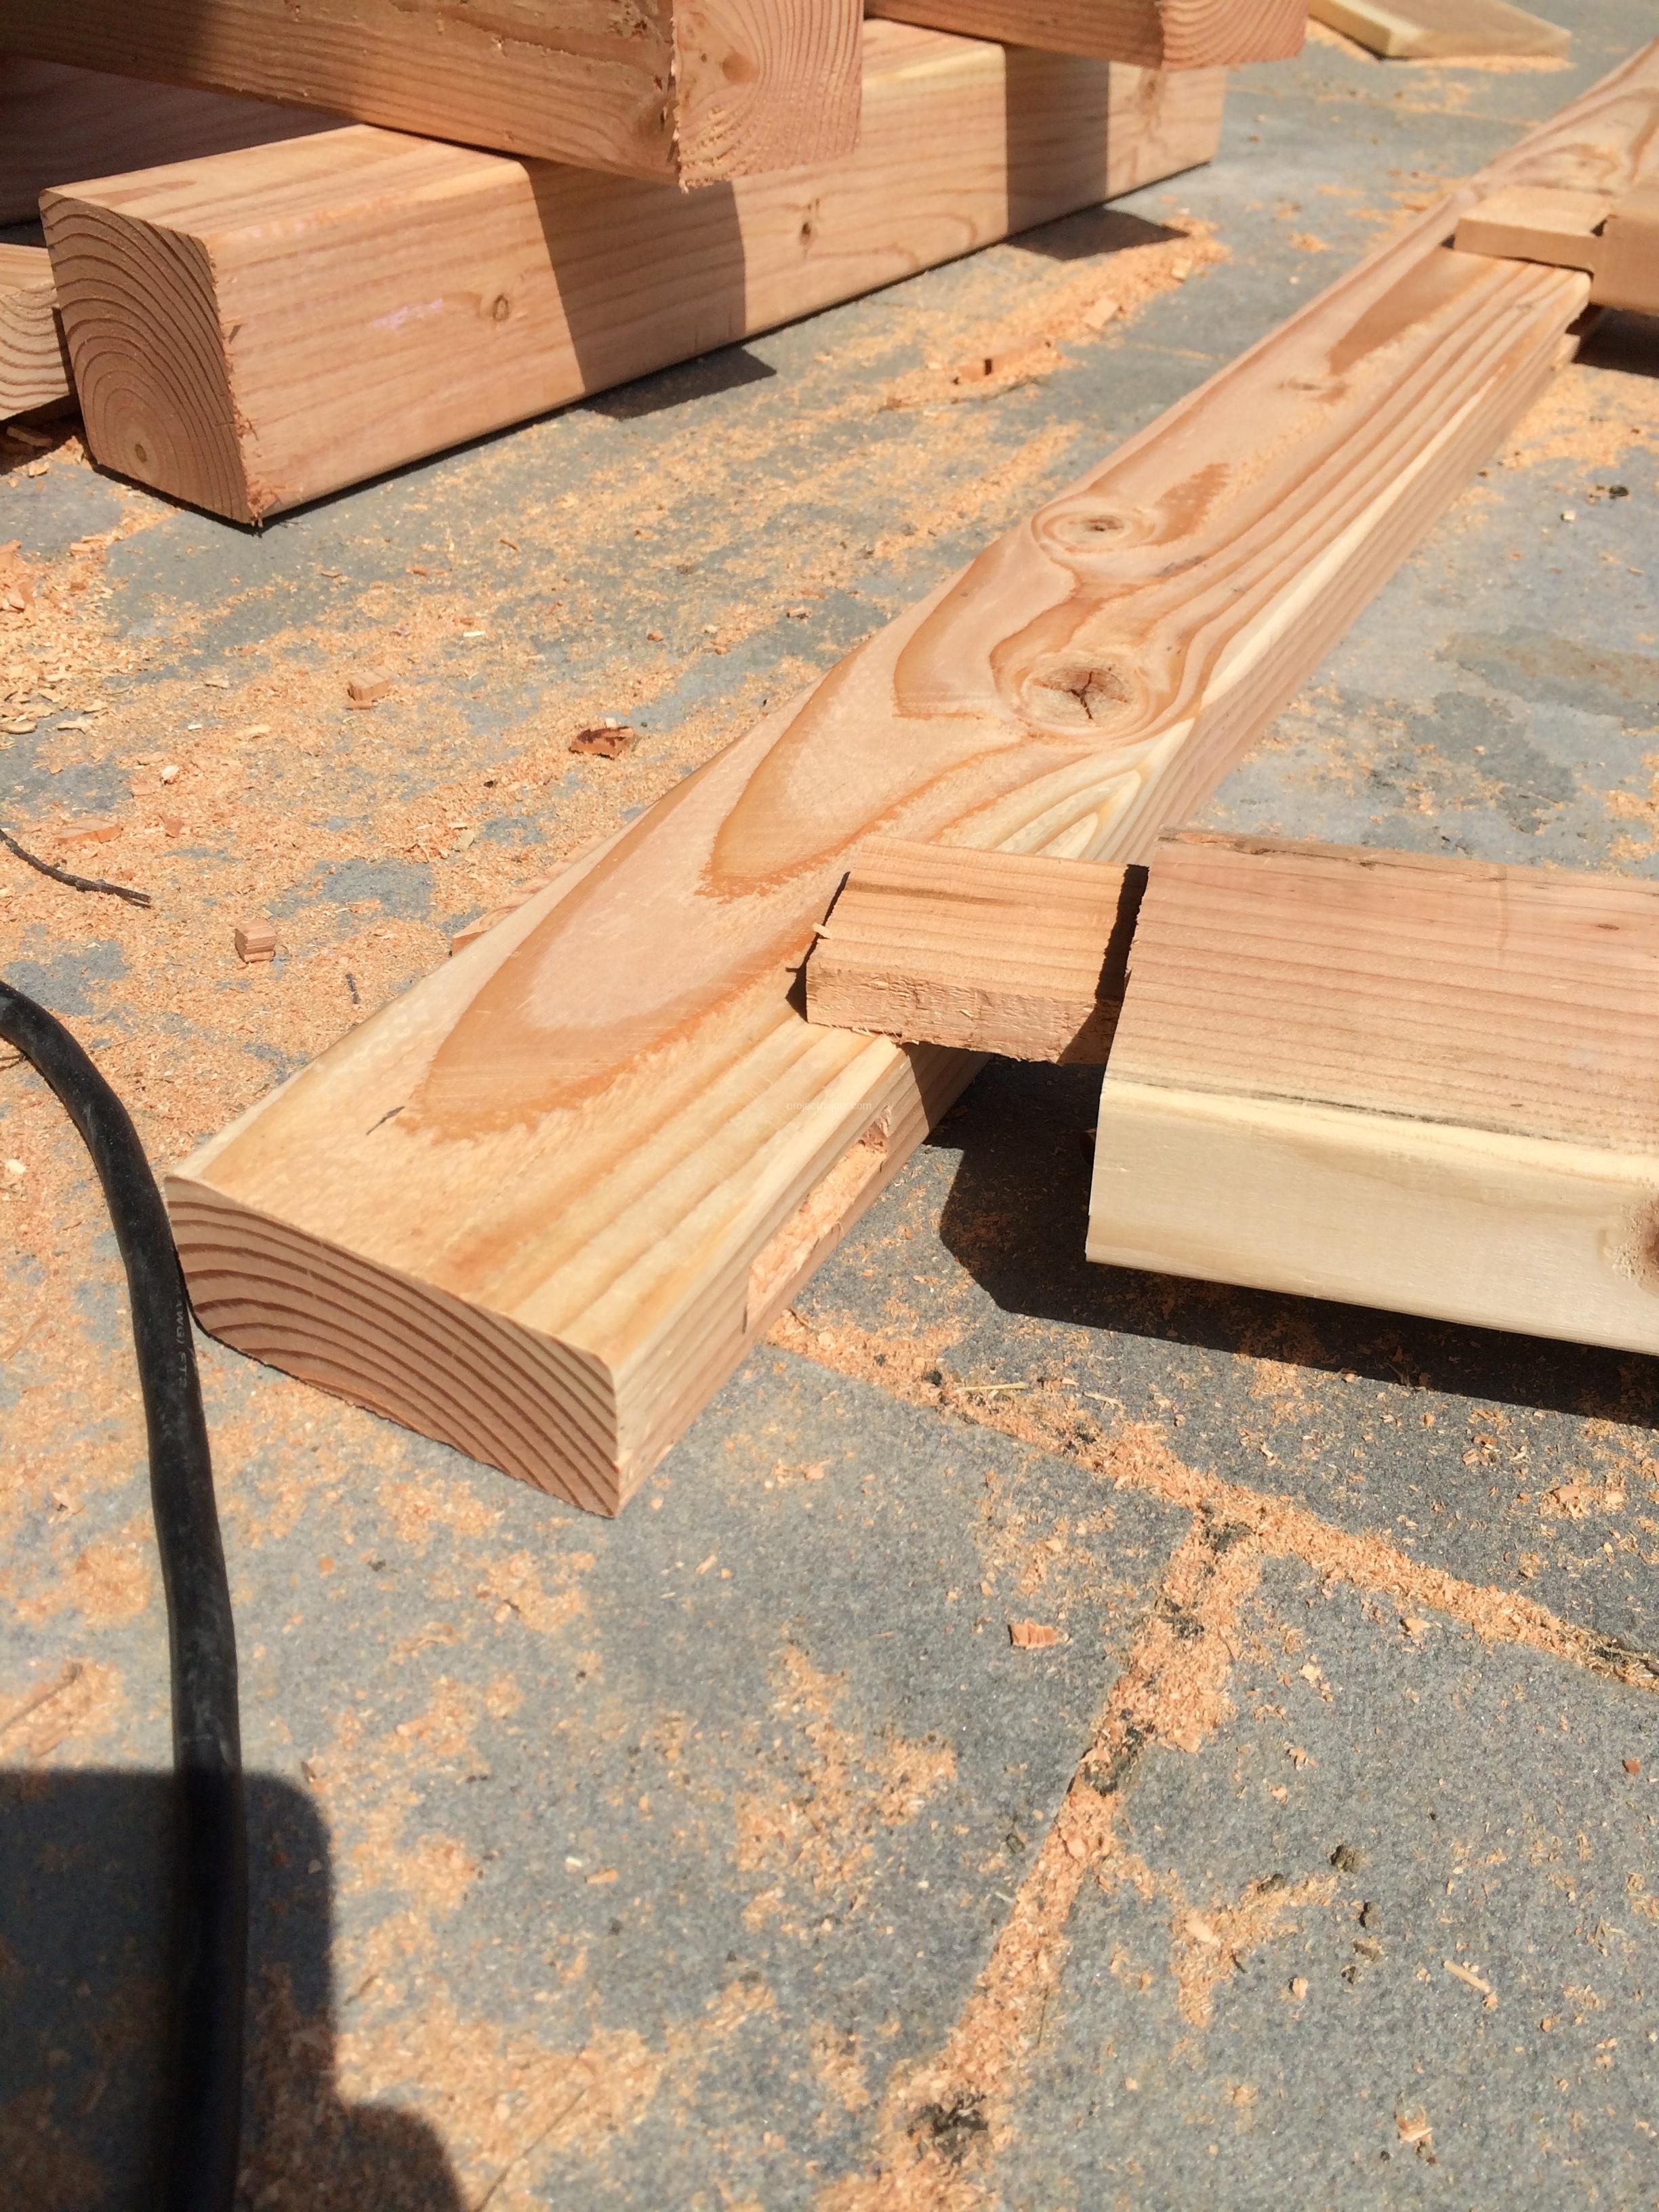
Stub tenon on end piece
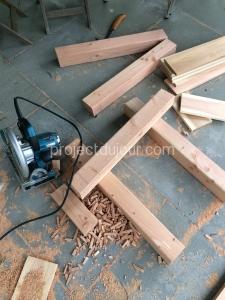
Preparing all mortises and tenons
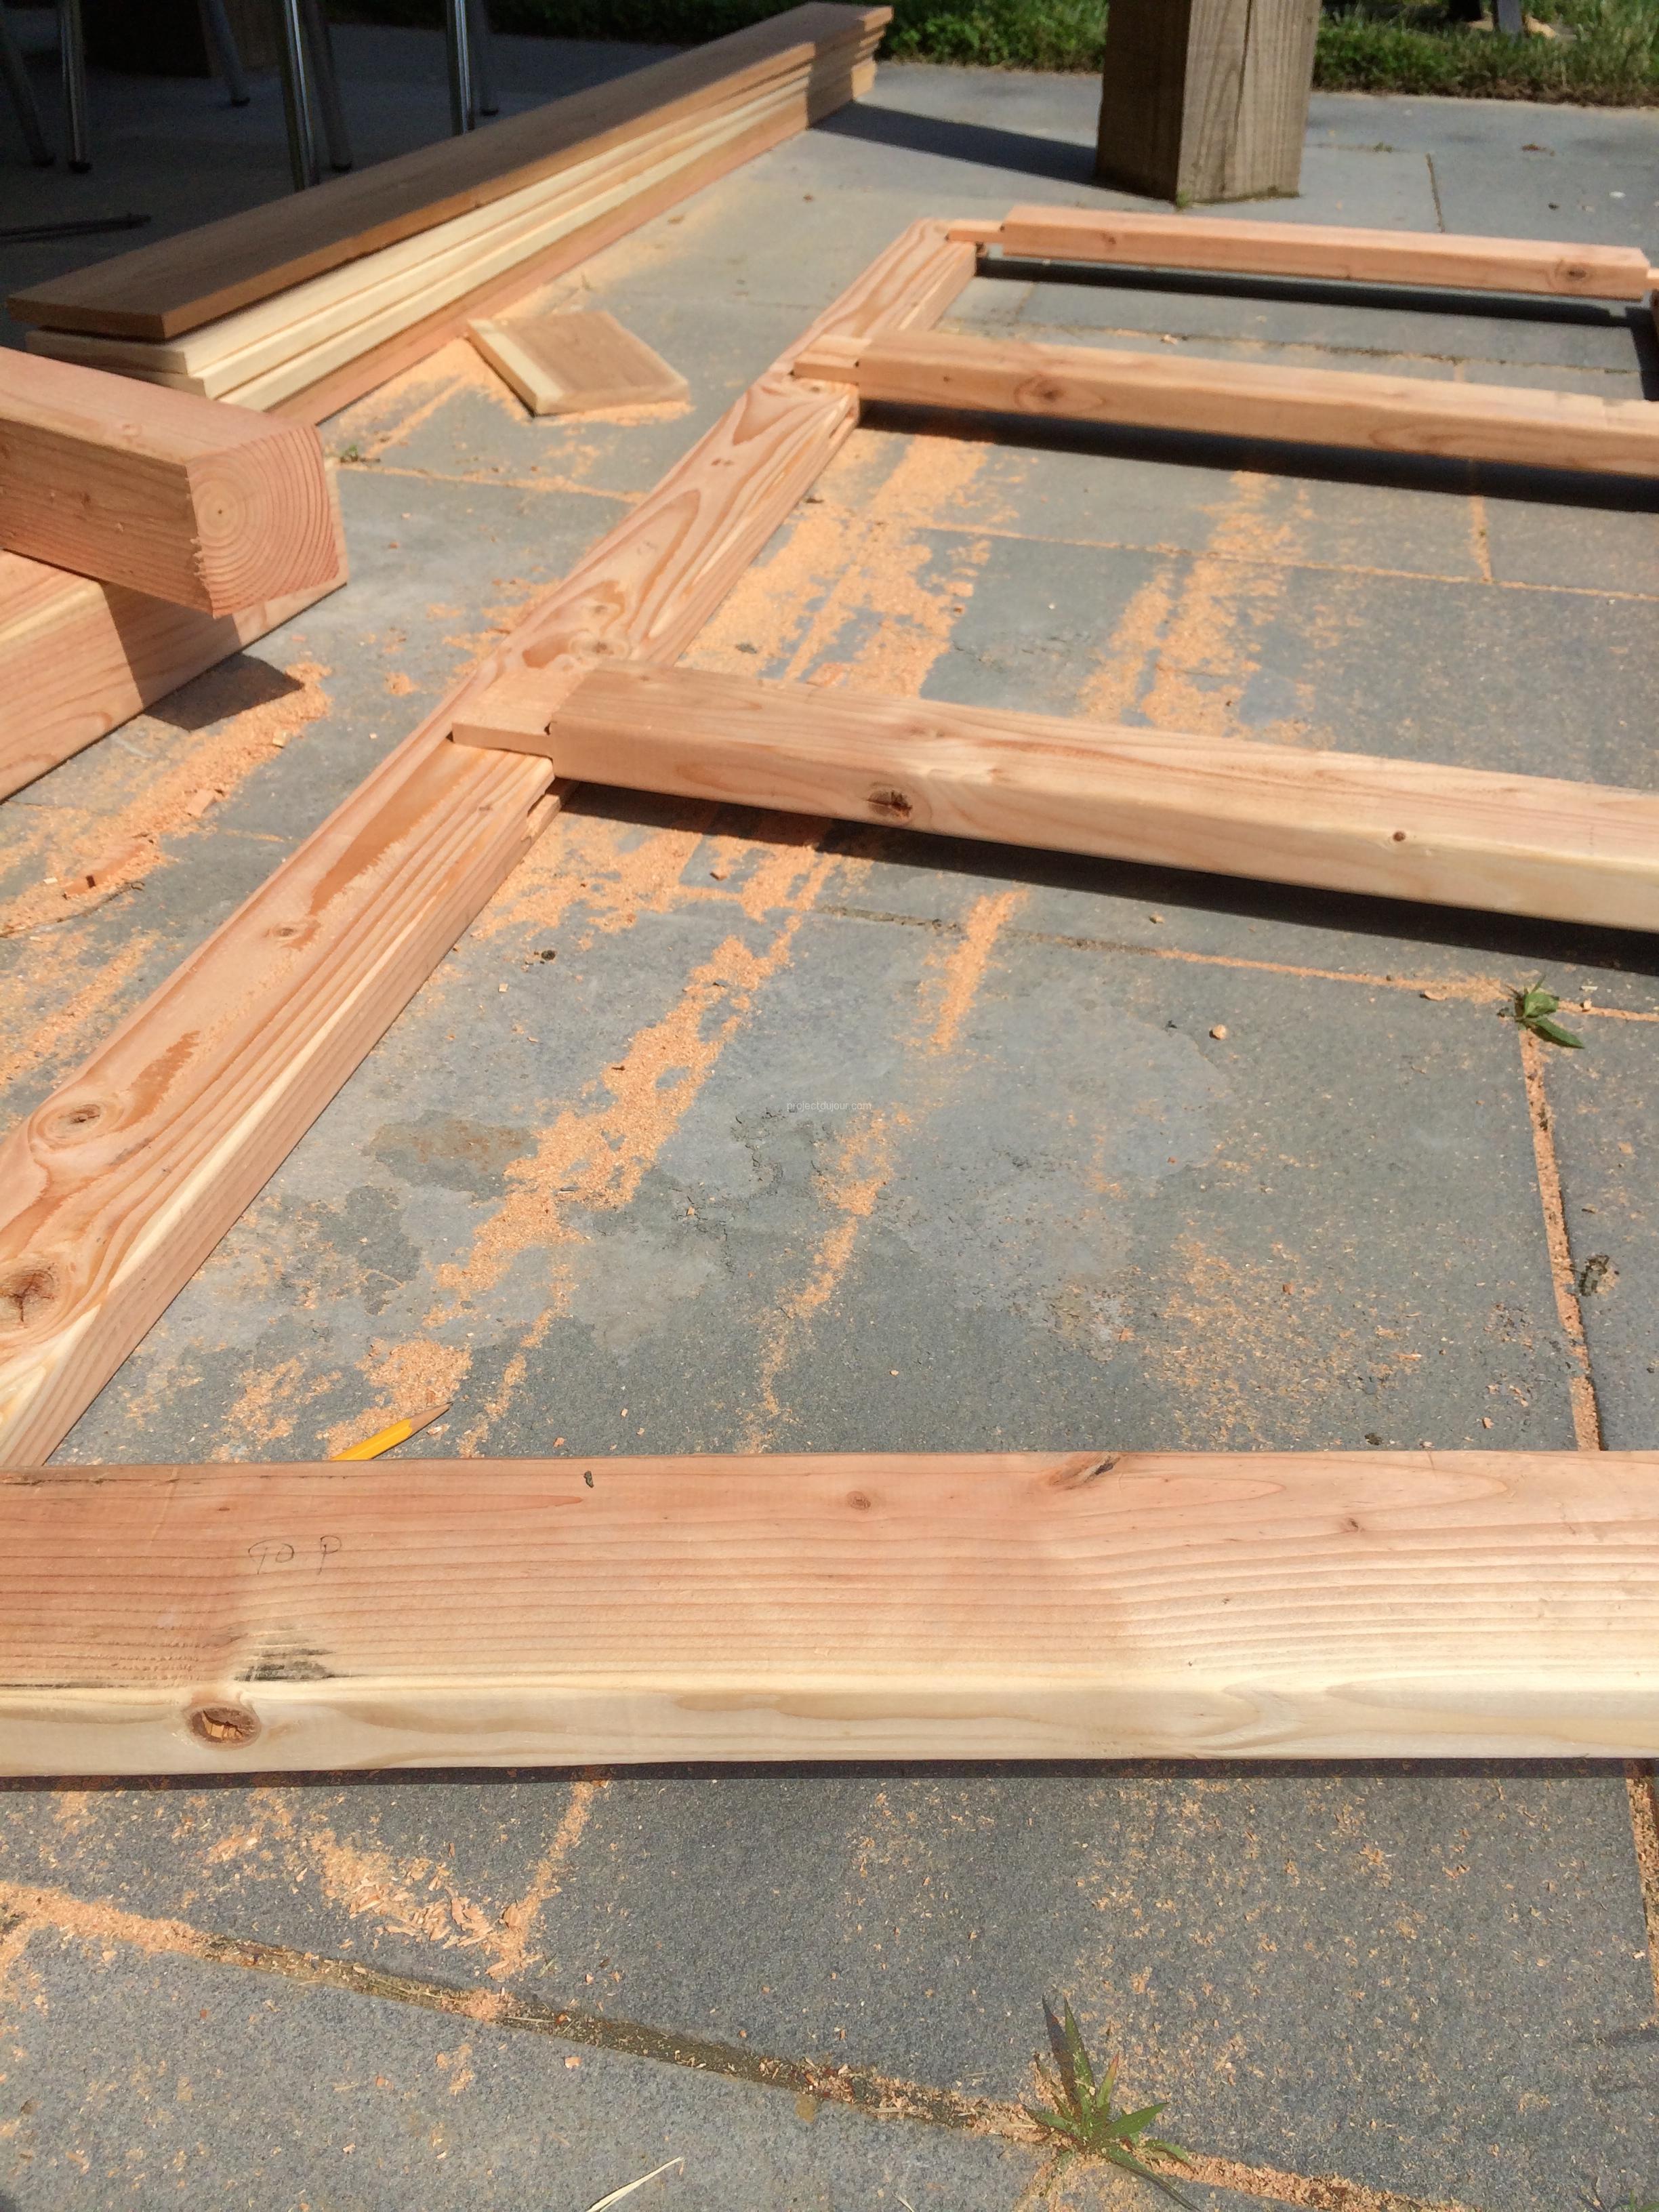
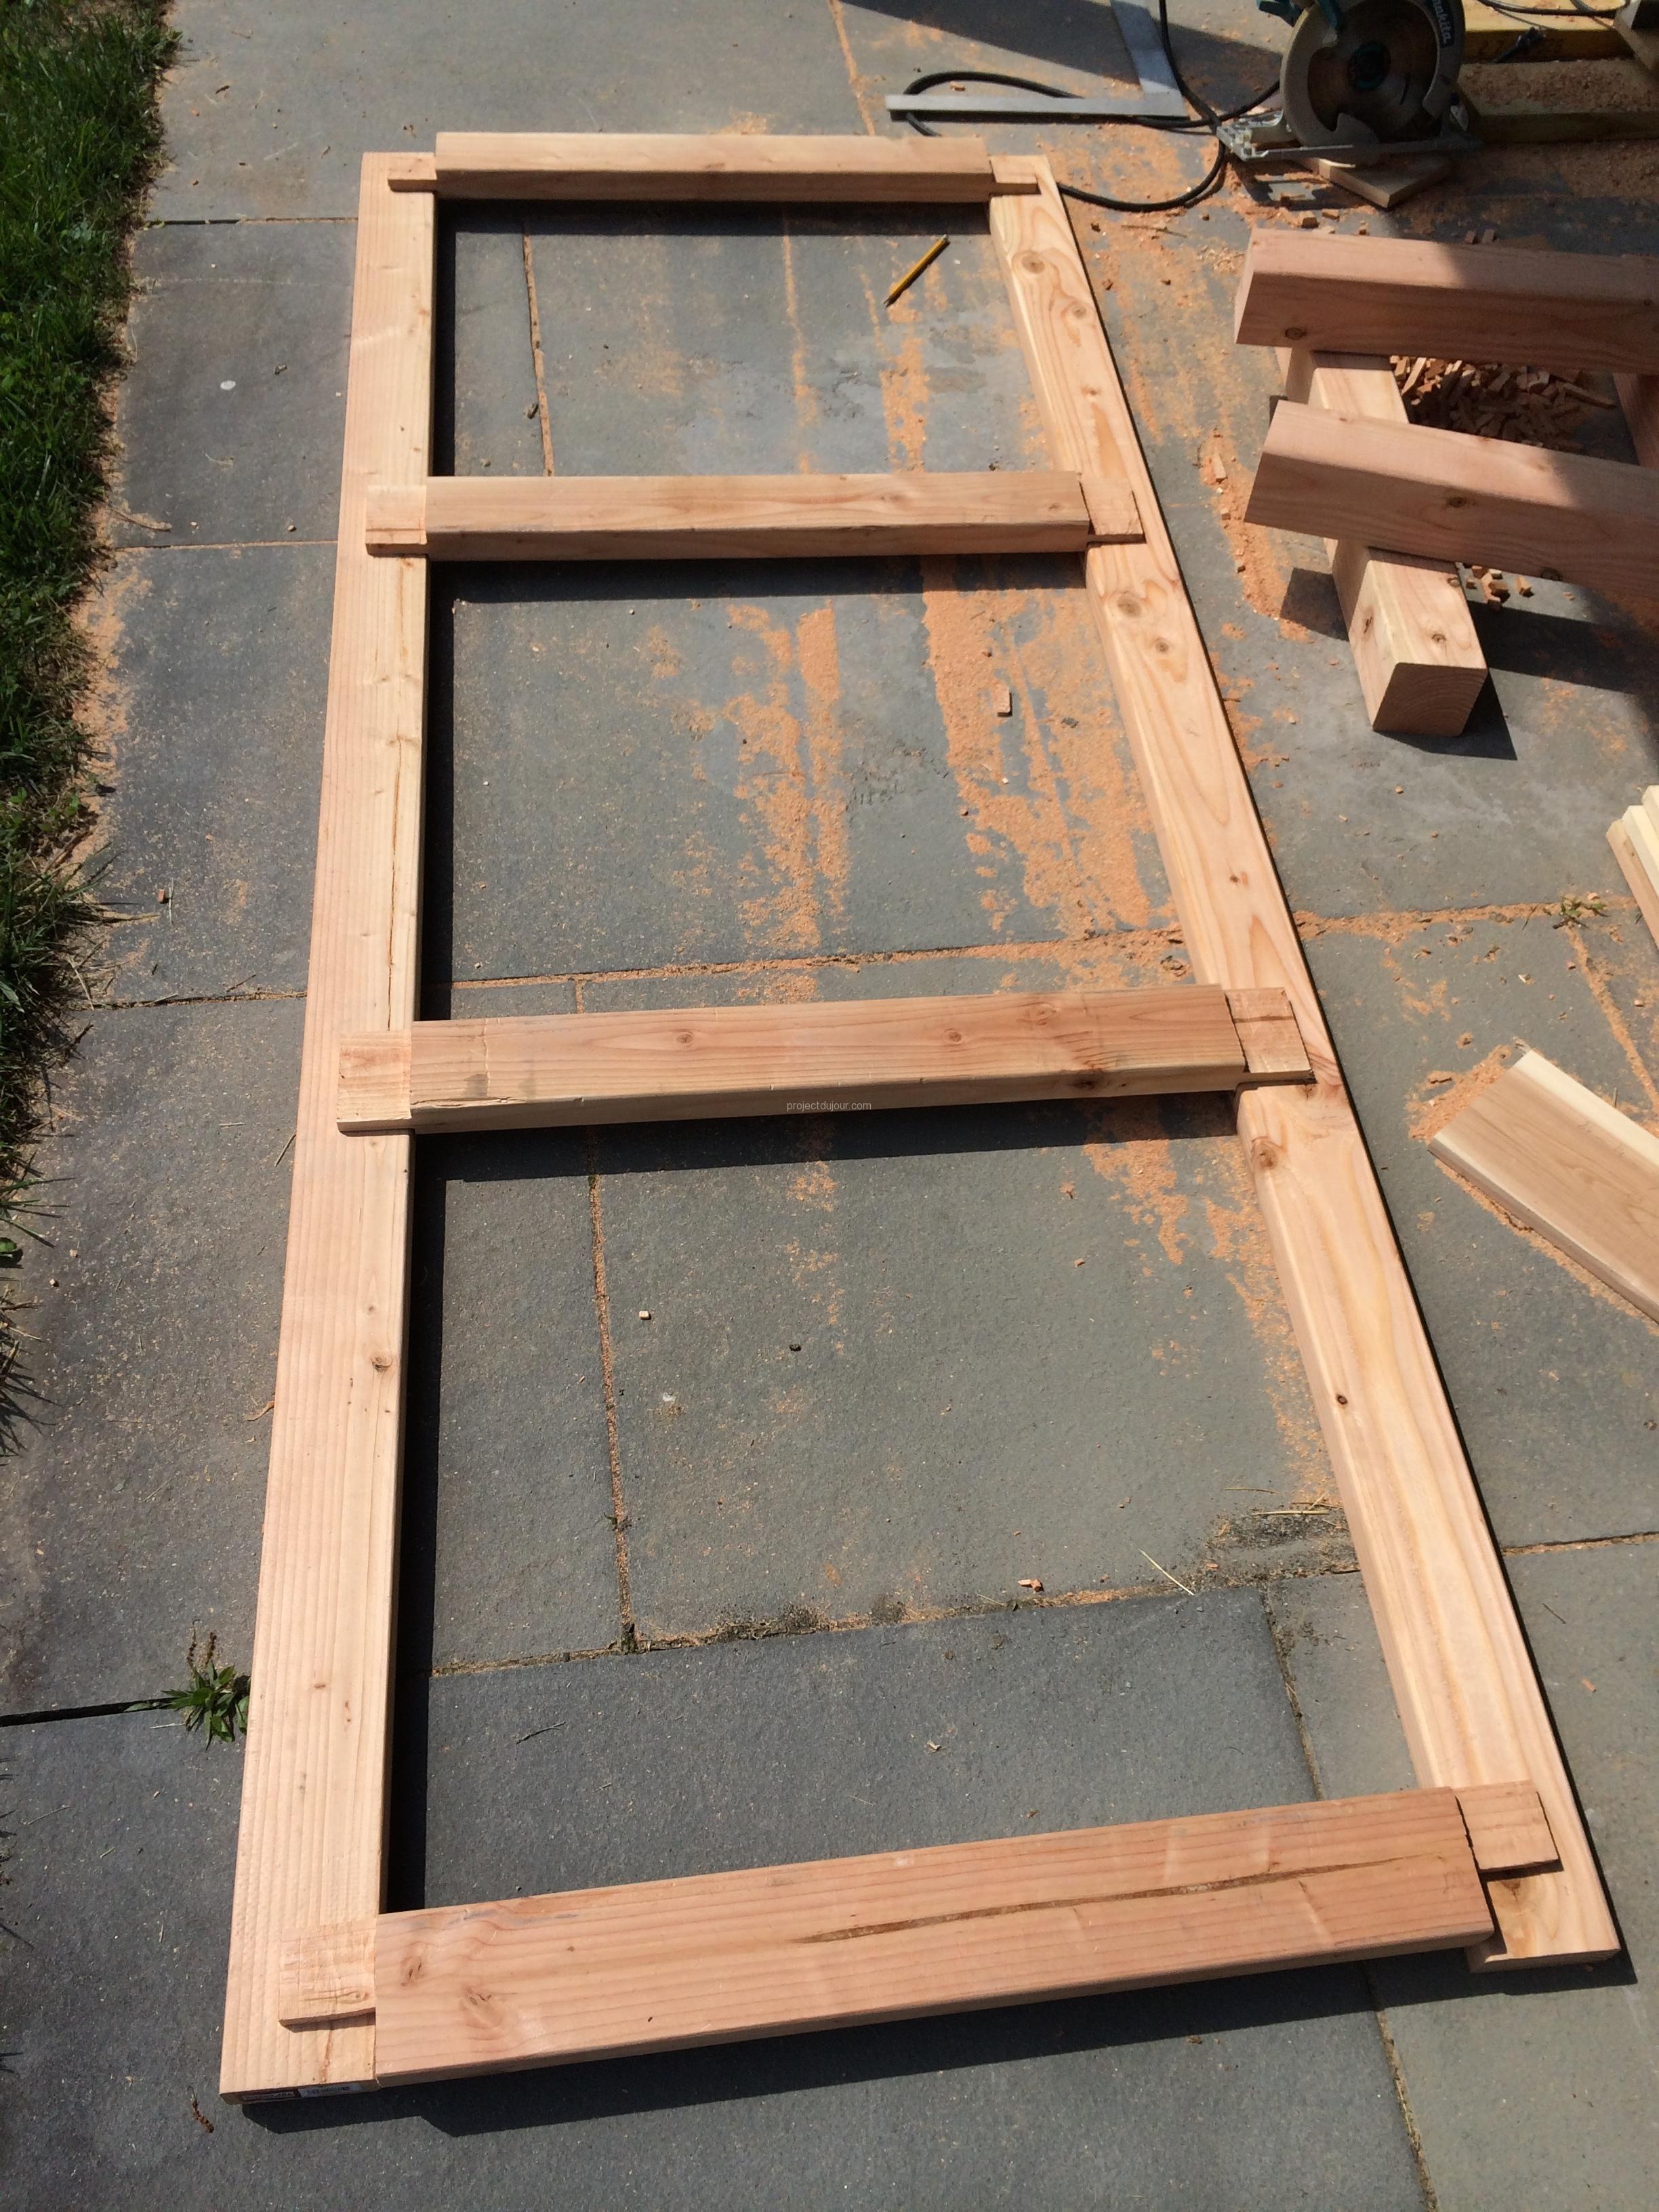
The frame is composed of two long pieces and 4 ties between them. They’re assembled using tenons and mortises… and quite a bit of wood glue.
Last verification before glue
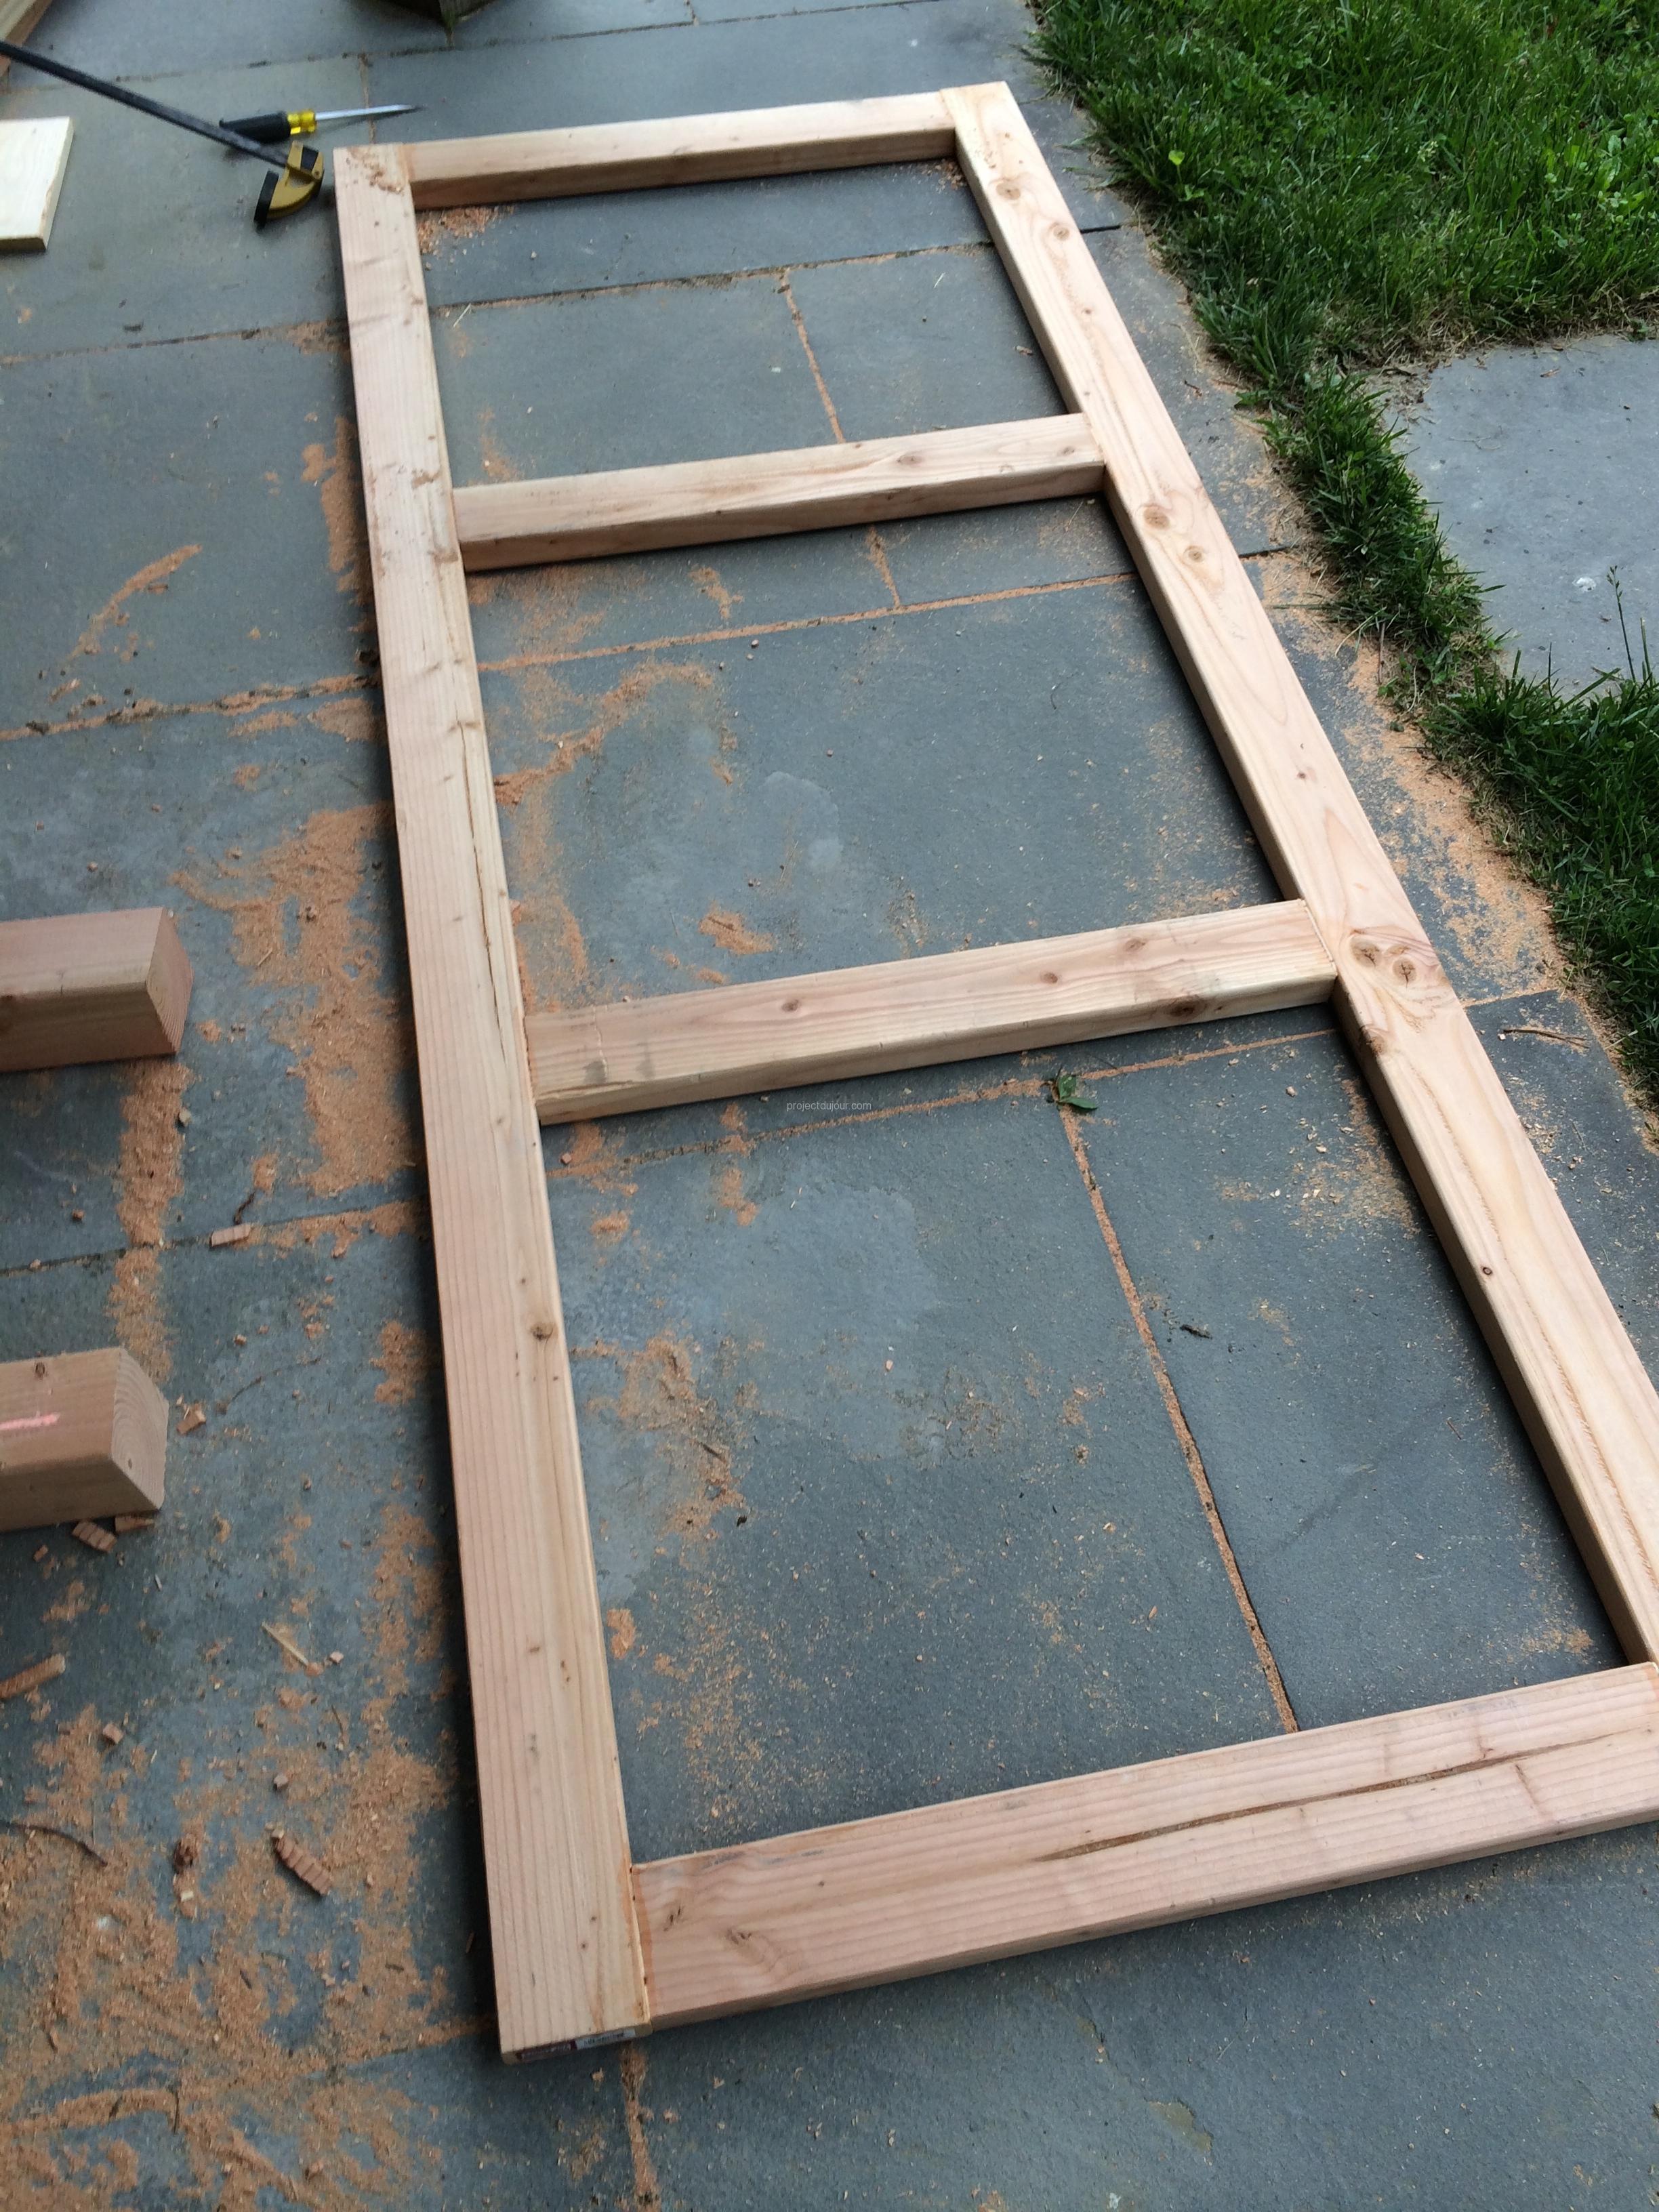
Frame assembled
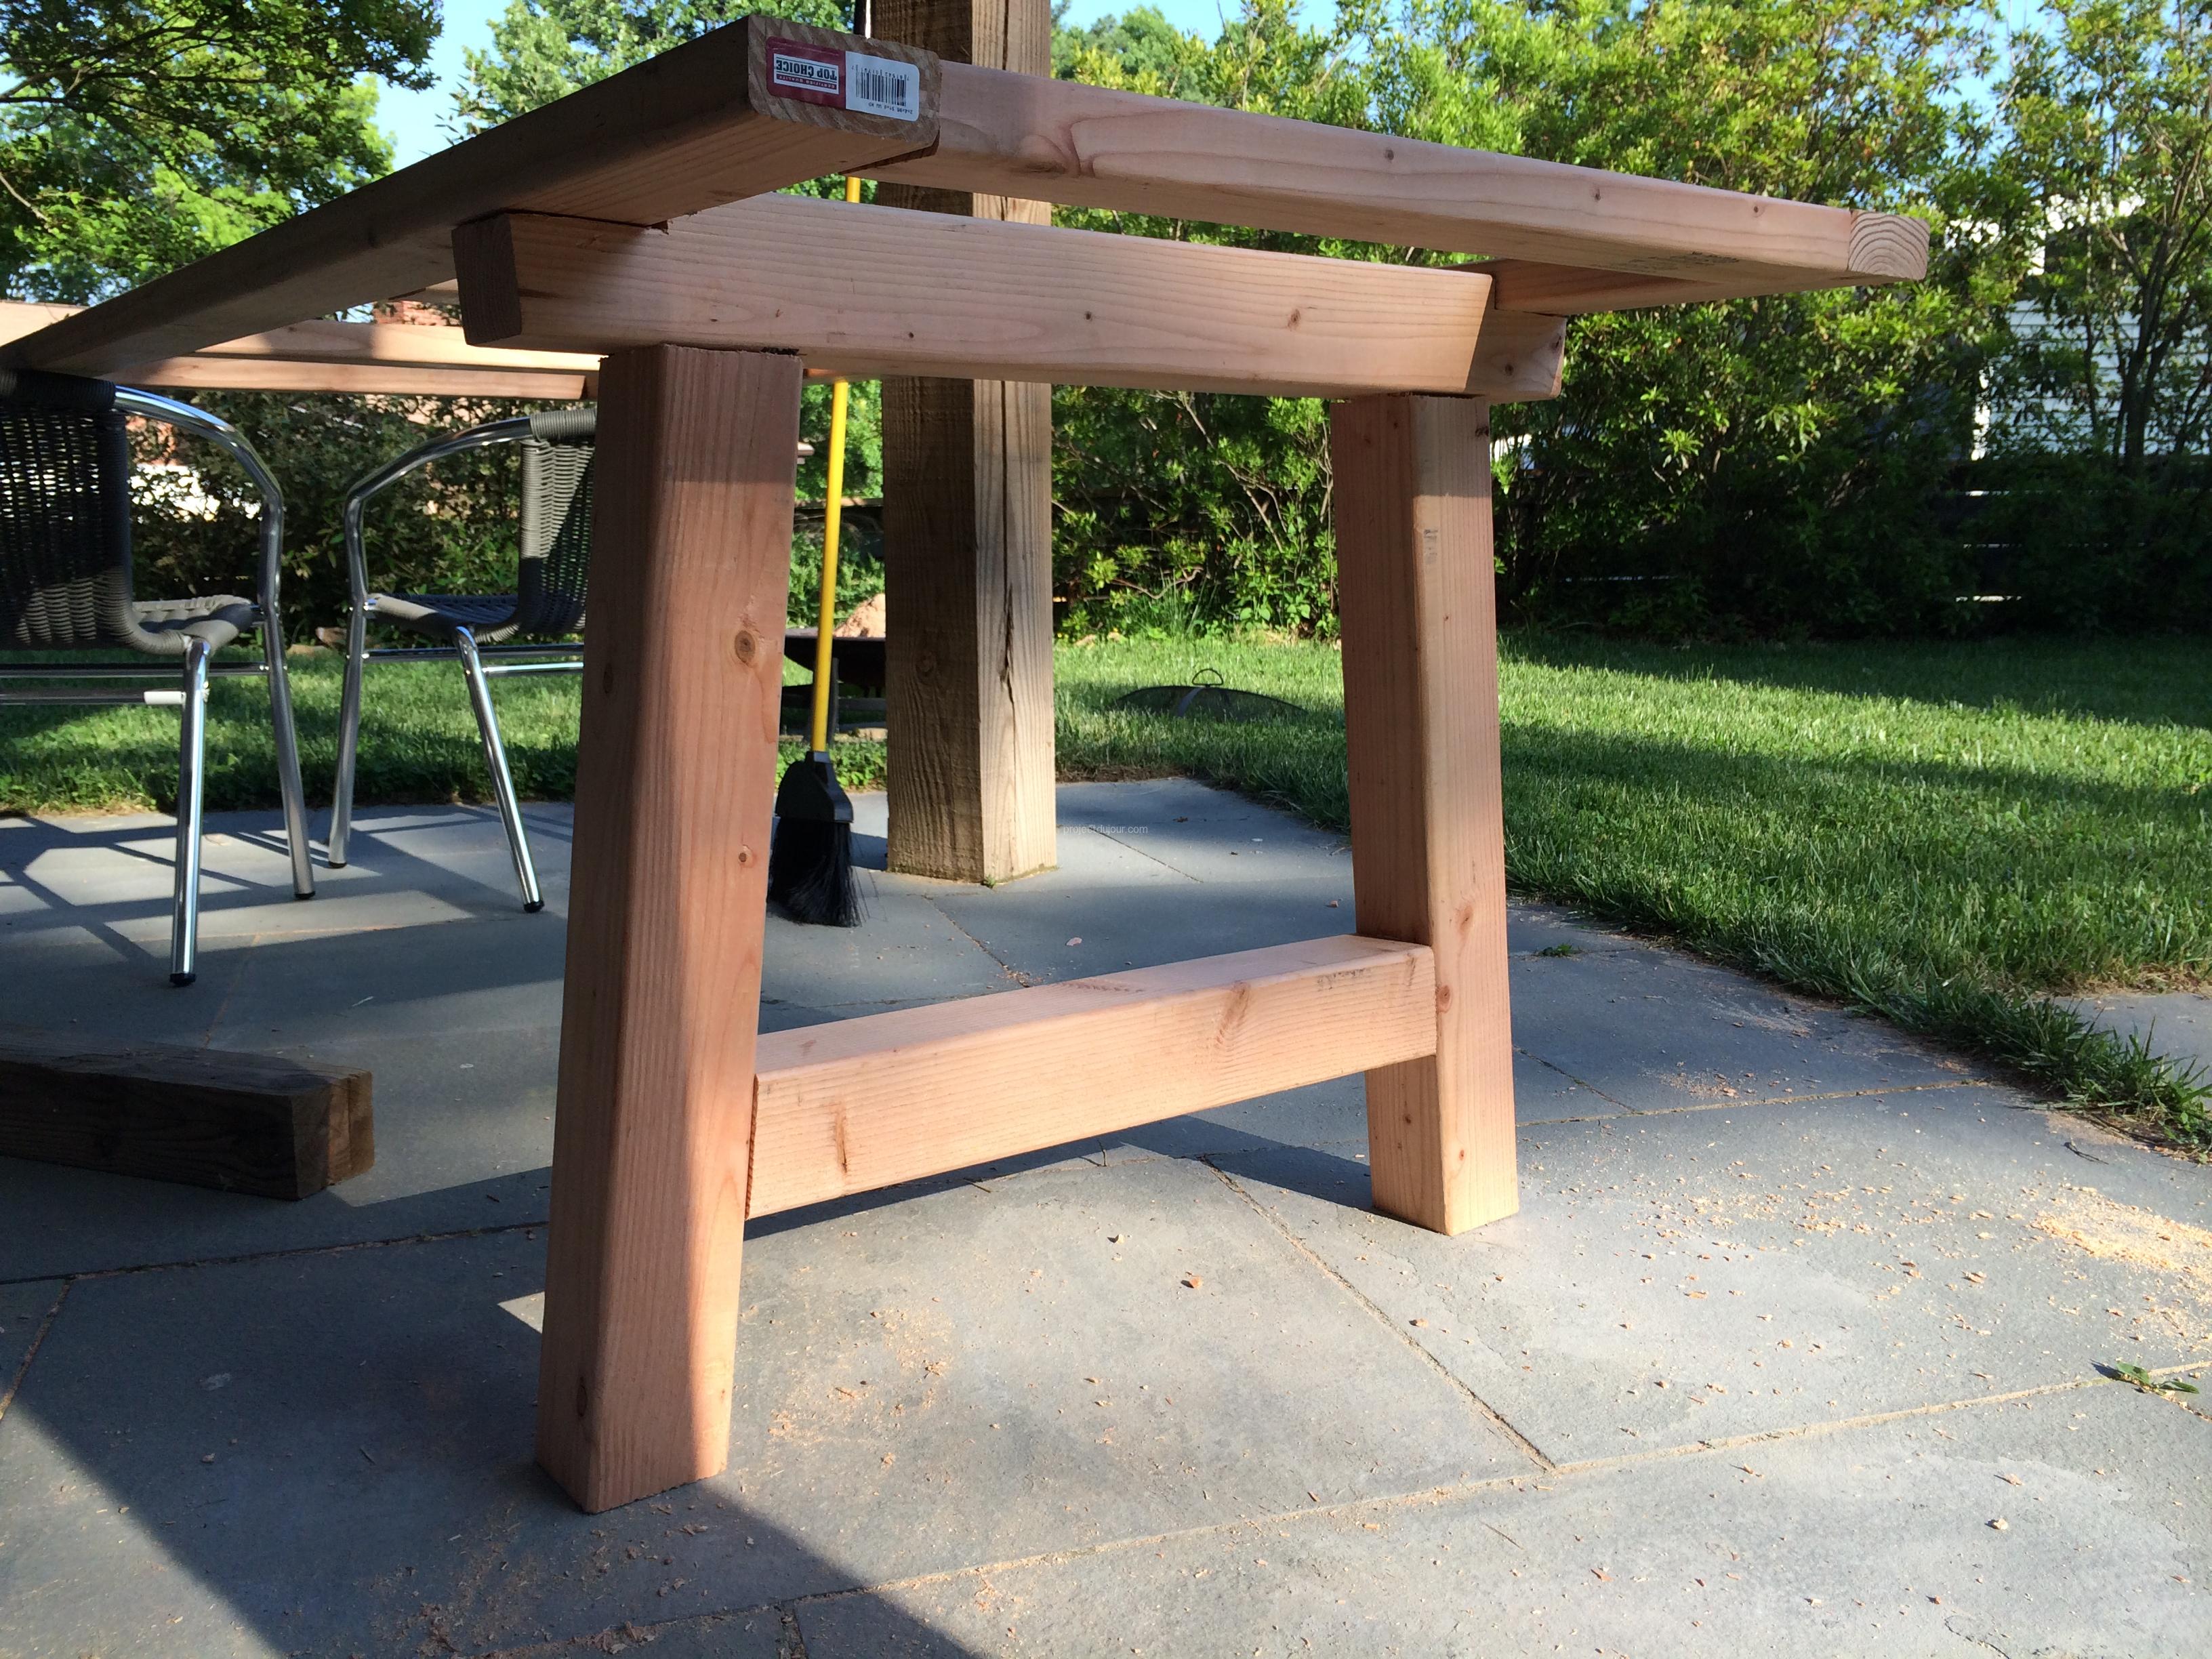
For the legs, I decided to give them a slight angle. I can pretend it was to increase the stability but it was mostly for the visual effect. The angle is about 5 degrees, all dimensions are eye-balled using pieces I put on top of each other.
Testing angles and proportions
Cutting the mortises was a bit time consuming as I was using a 1/2 inch bit. I cut all around and chiseled out the inner part.
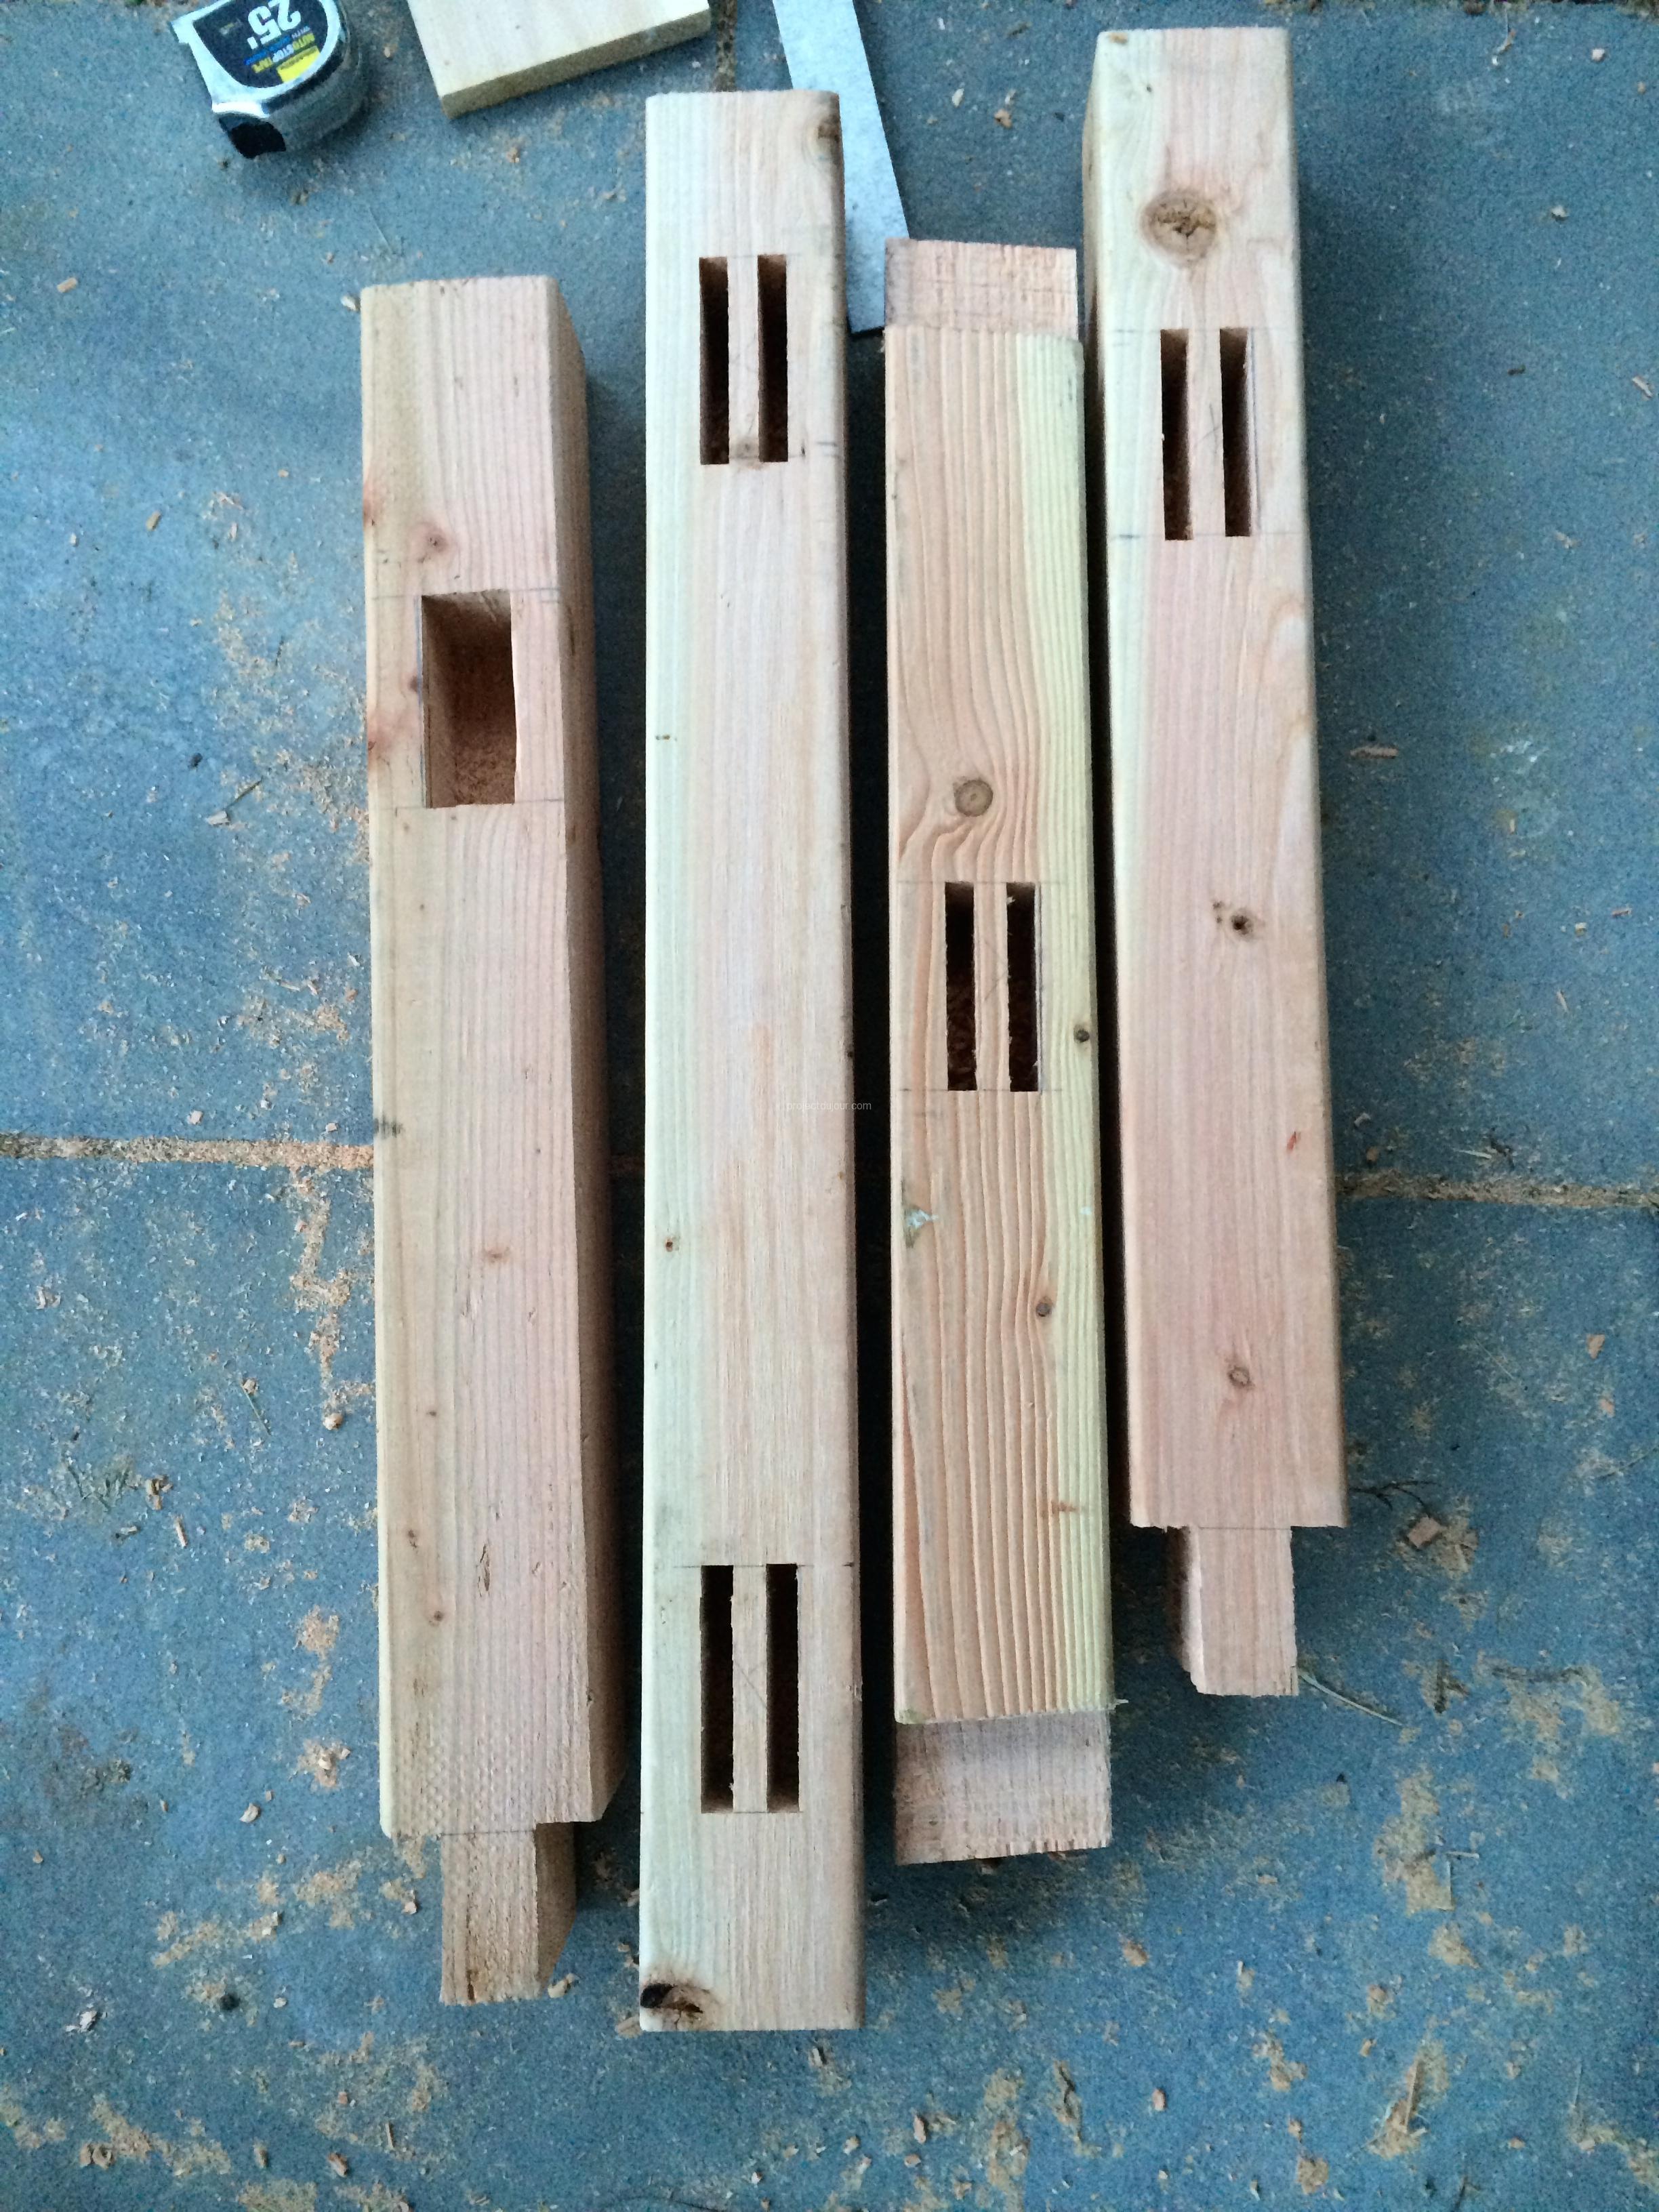
Mortises and tenons on legs
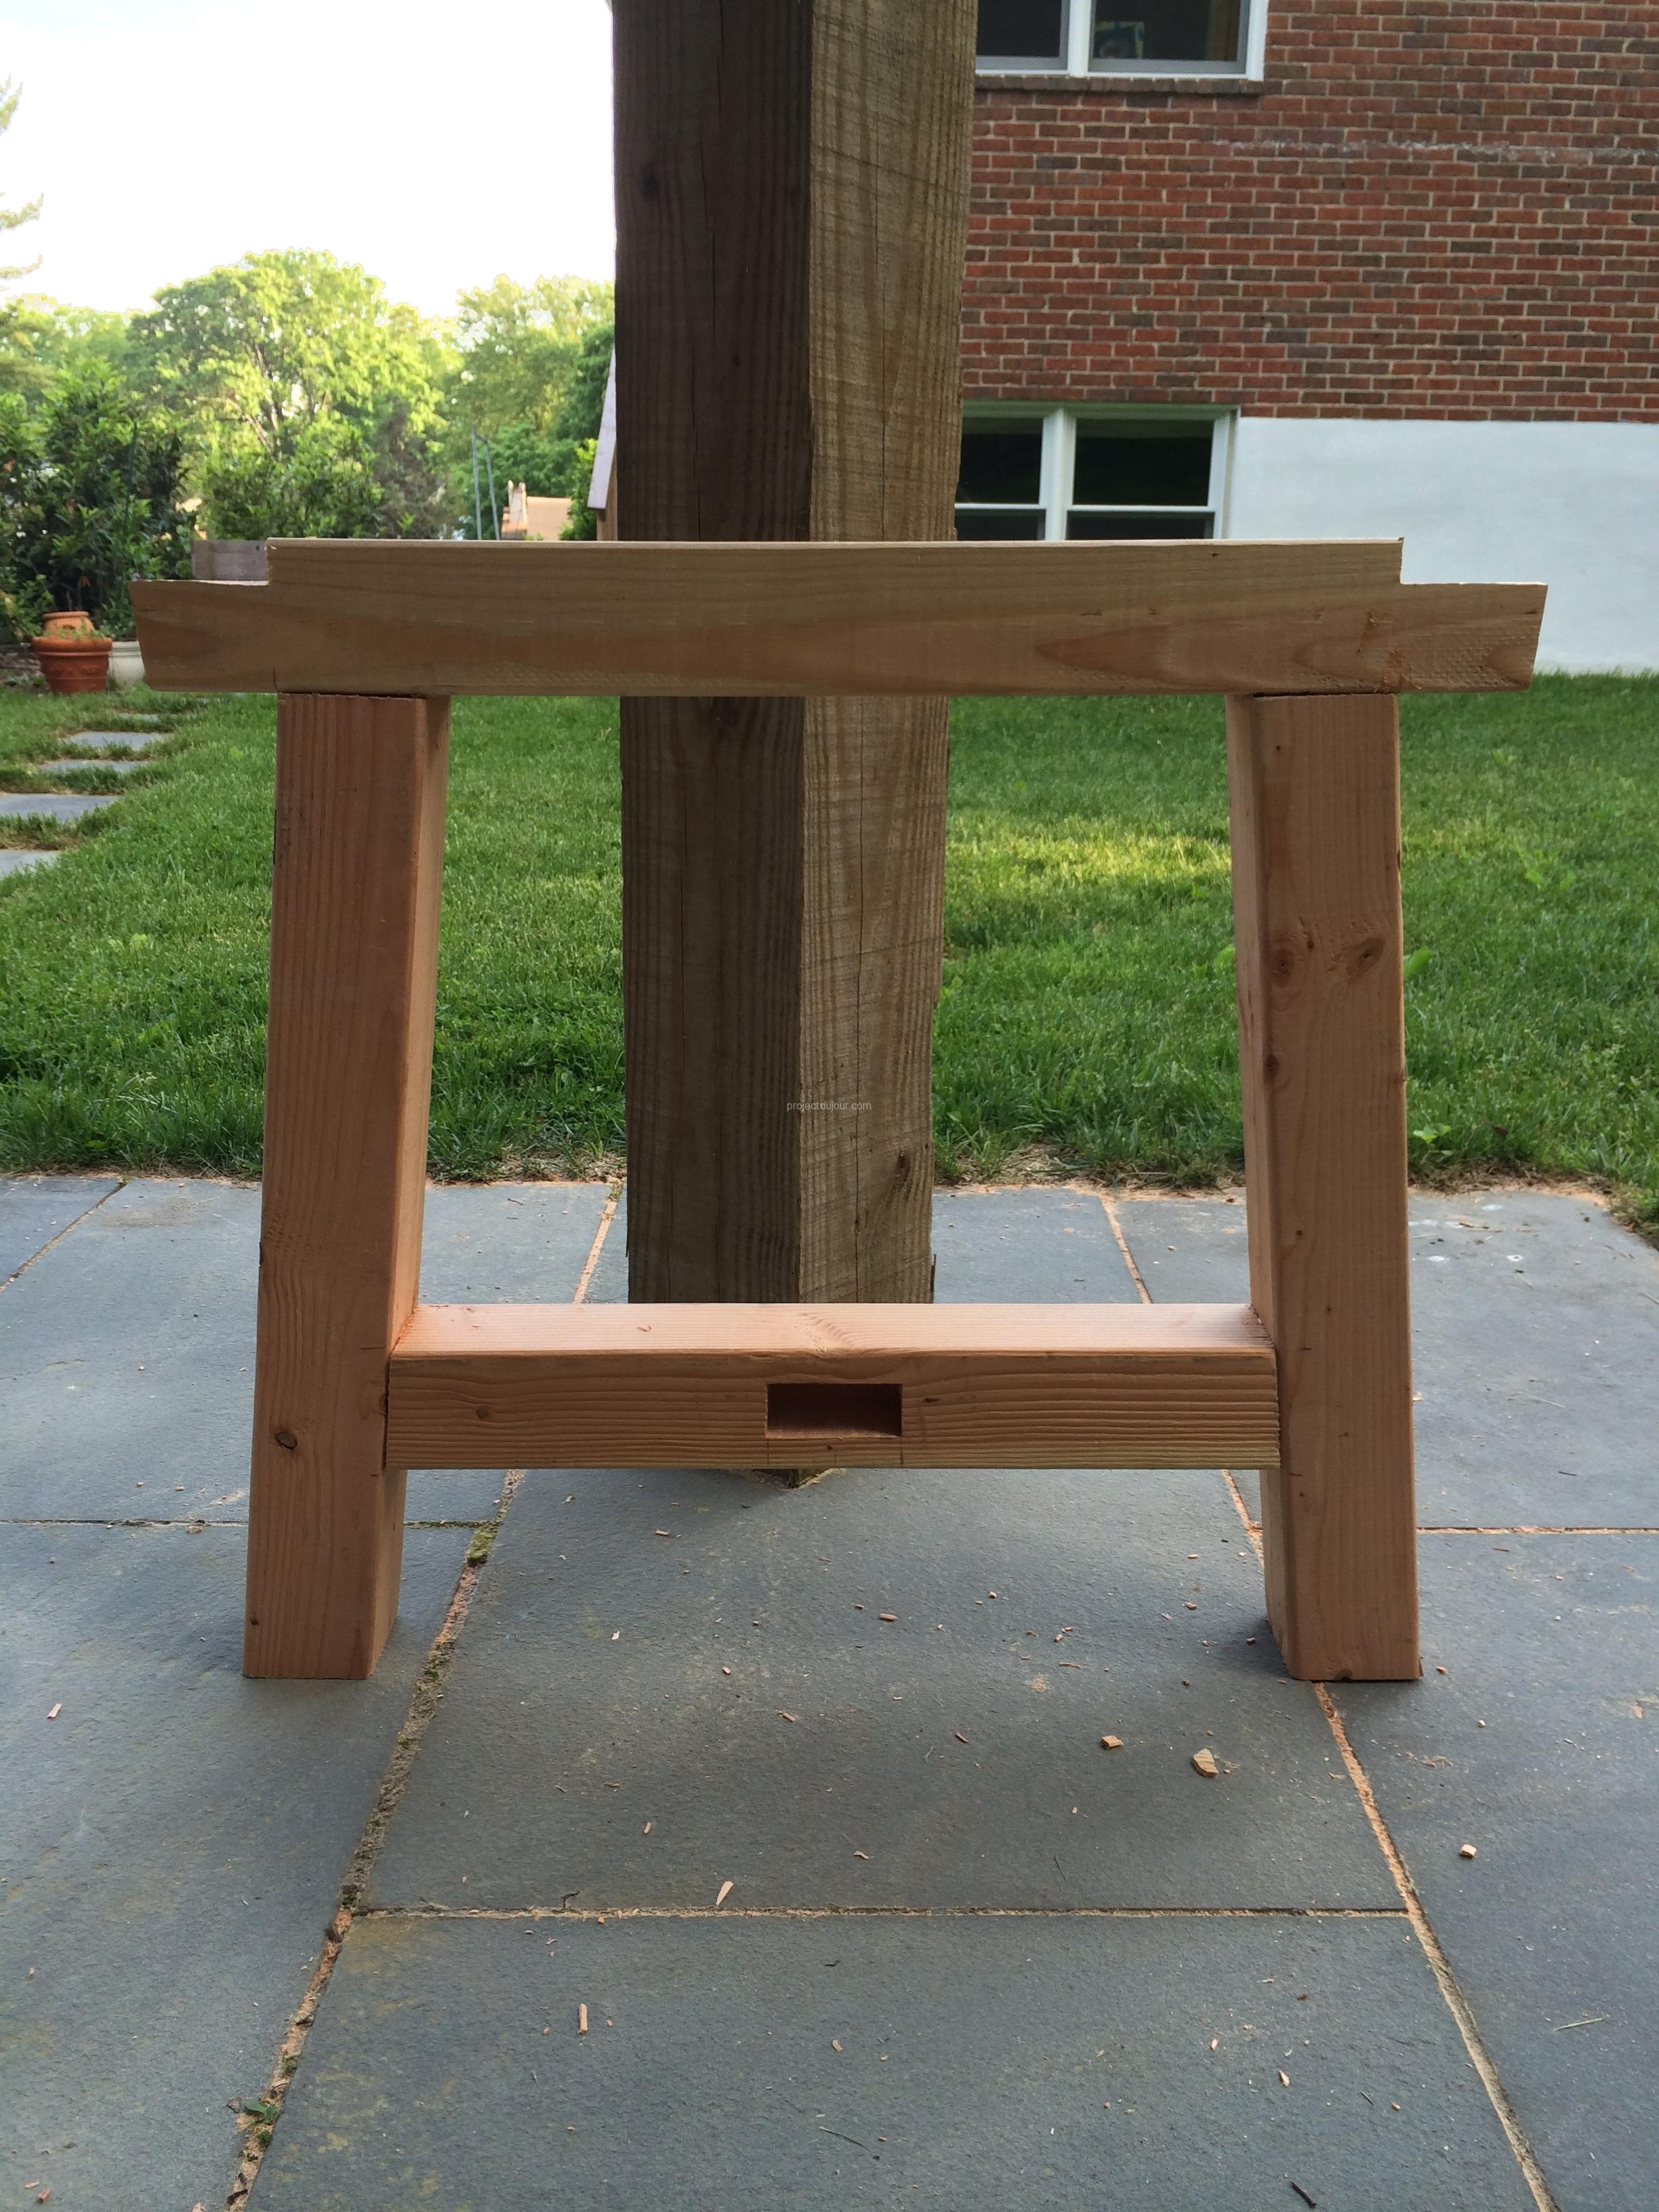
The different parts of the legs hold together with wood glue as well as a wood dowel. The top of each leg has notches on both ends to fit the frame’s long pieces.
Testing the frame on set of legs
First set of legs assembled
The cedar boards I bought were smooth on top and rough underneath so I decided to plane them using a 12″ wood planer. This is not a necessary step but this way I was able to flip the boards to get the best side. I screwed the cedar boards from under the frame to hide the screws. I found some composite post bases to use as feet at Home Depot (Simpson Strong-Tie Standoff Base). Finally, I attached the table top to the legs using some lag screws.
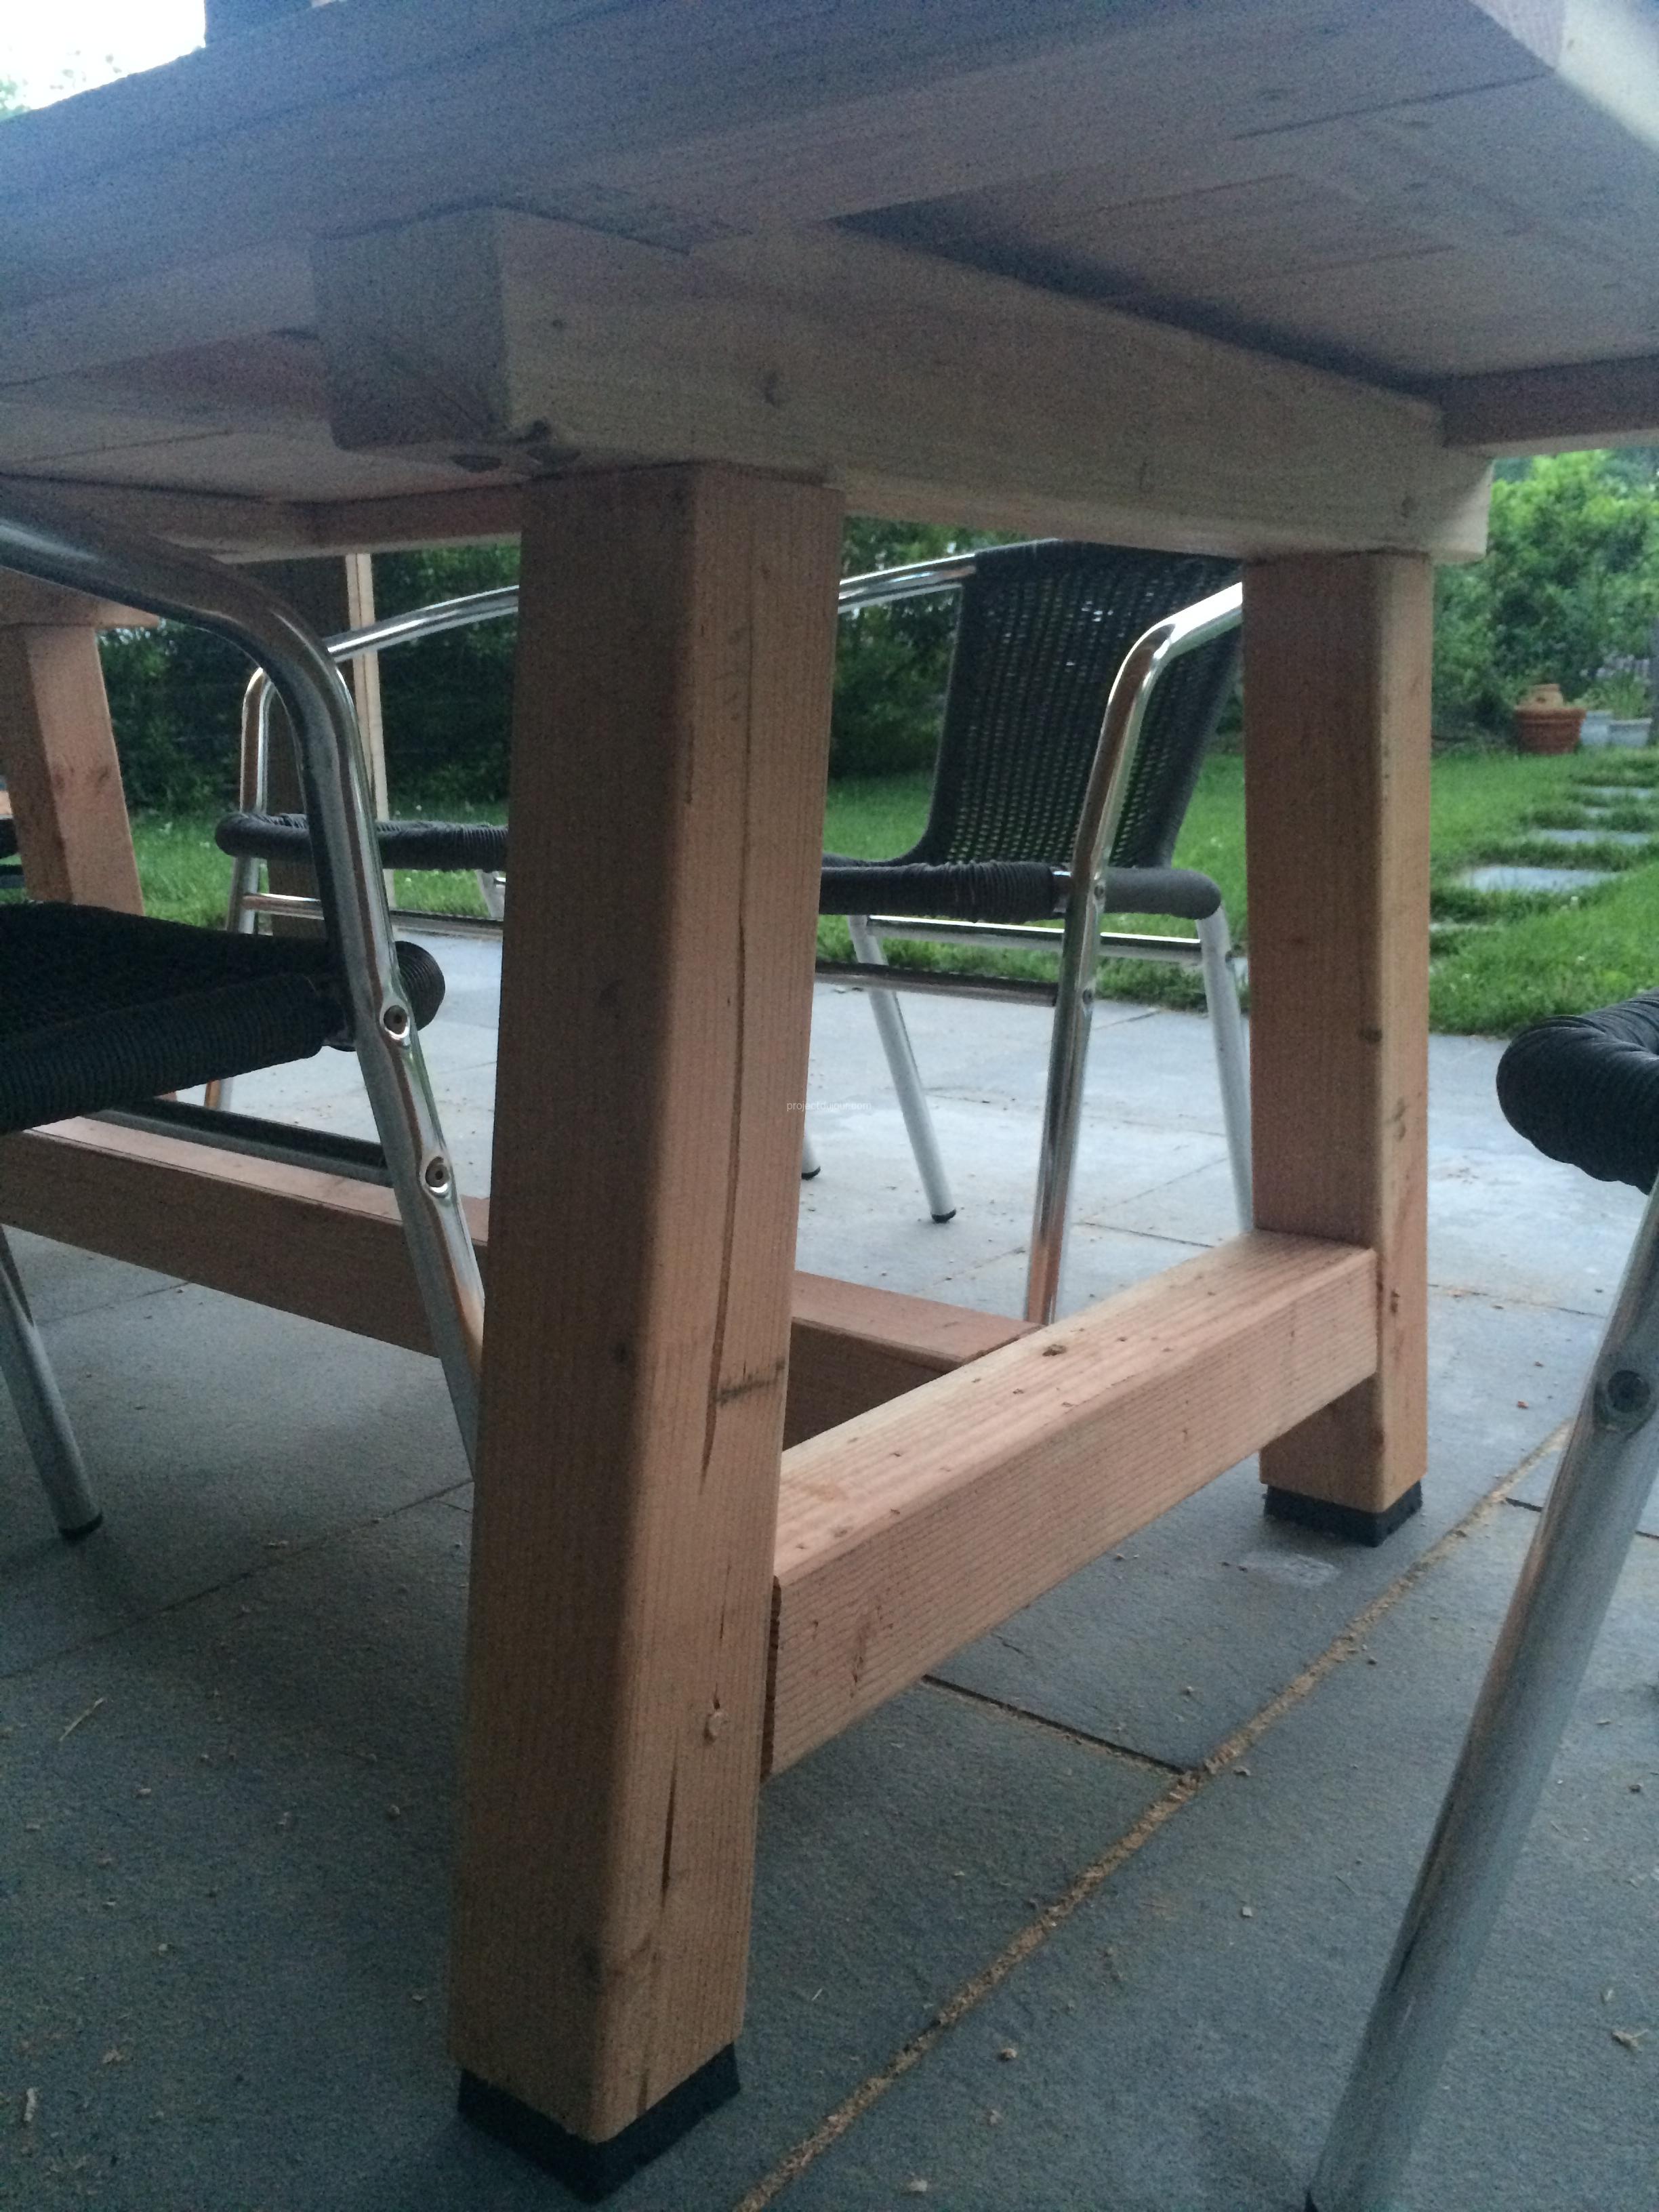
Finished table from under, with the feet
To protect the wood, I applied two different oil based finishes. For the feet and frame I used some Velvit CDF (Cabin Deck Finish) that I bought online for the club house. For the top, I used some food grade oil from IKEA (I think any product sold for butcher blocks would work).
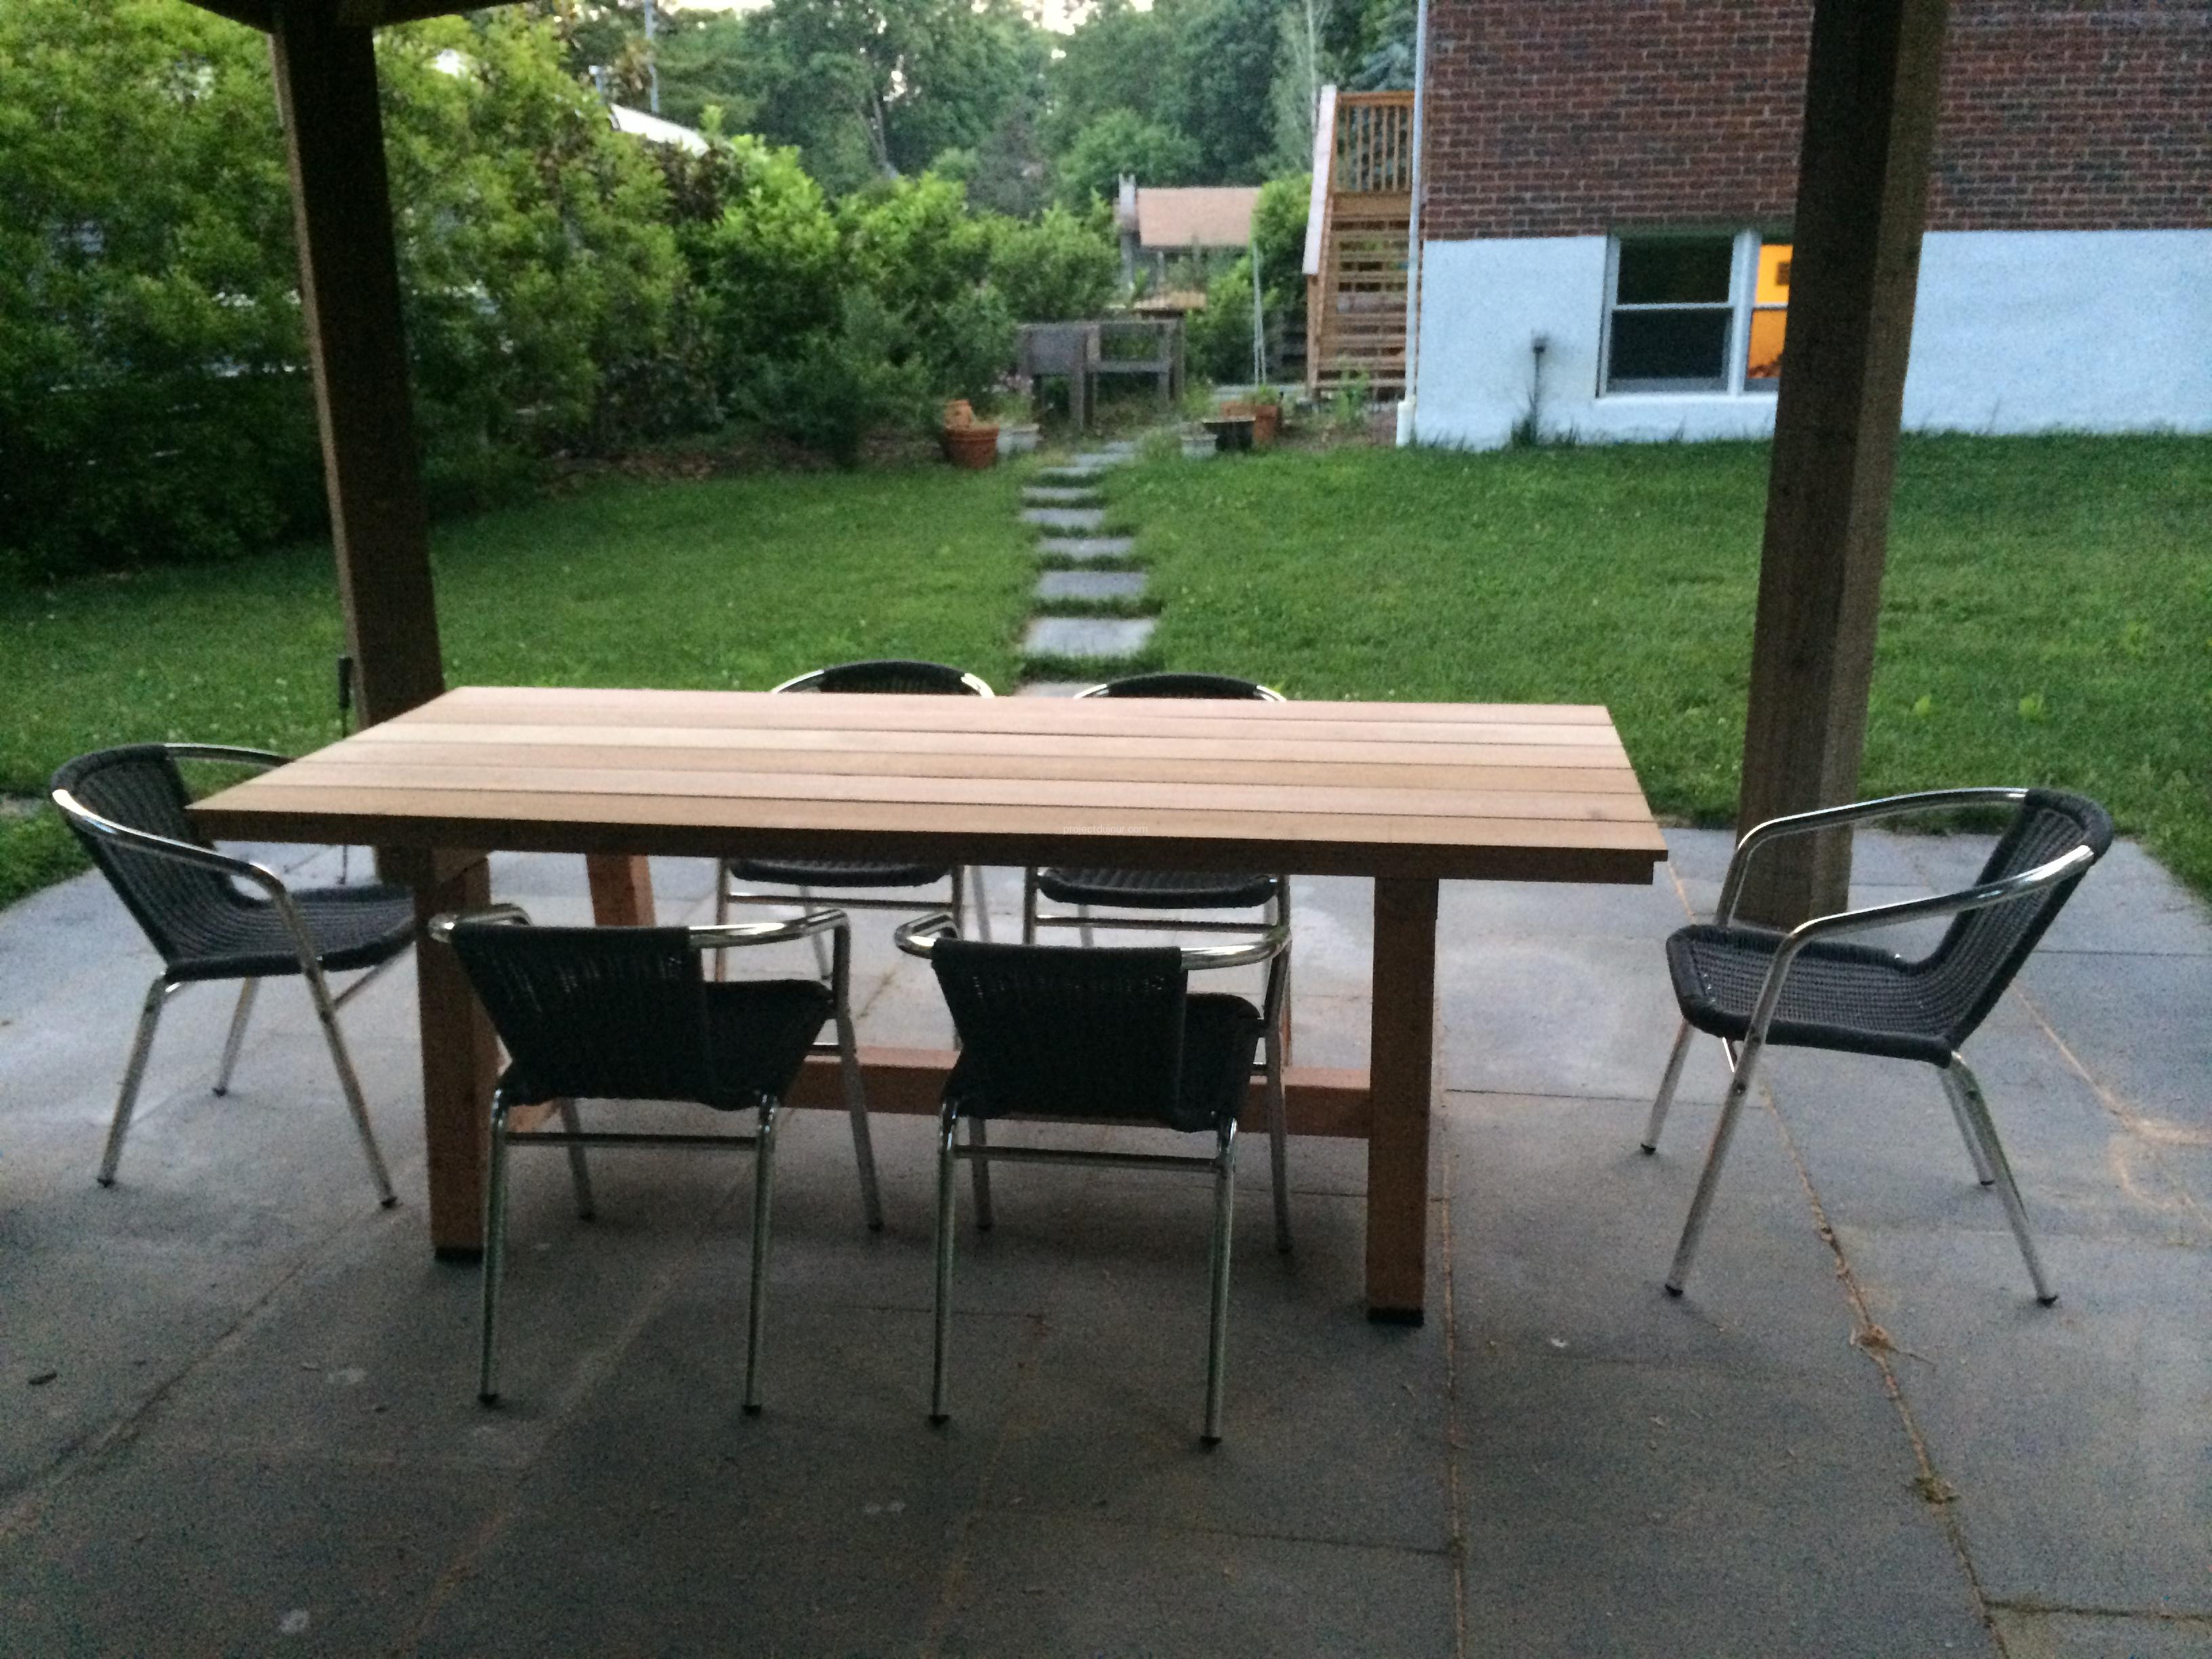
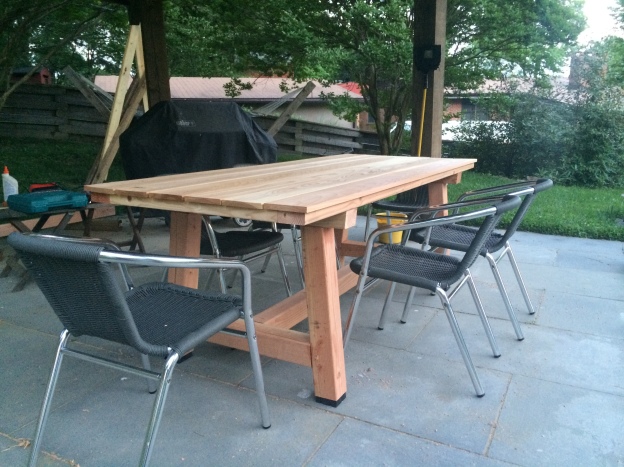
Finished table
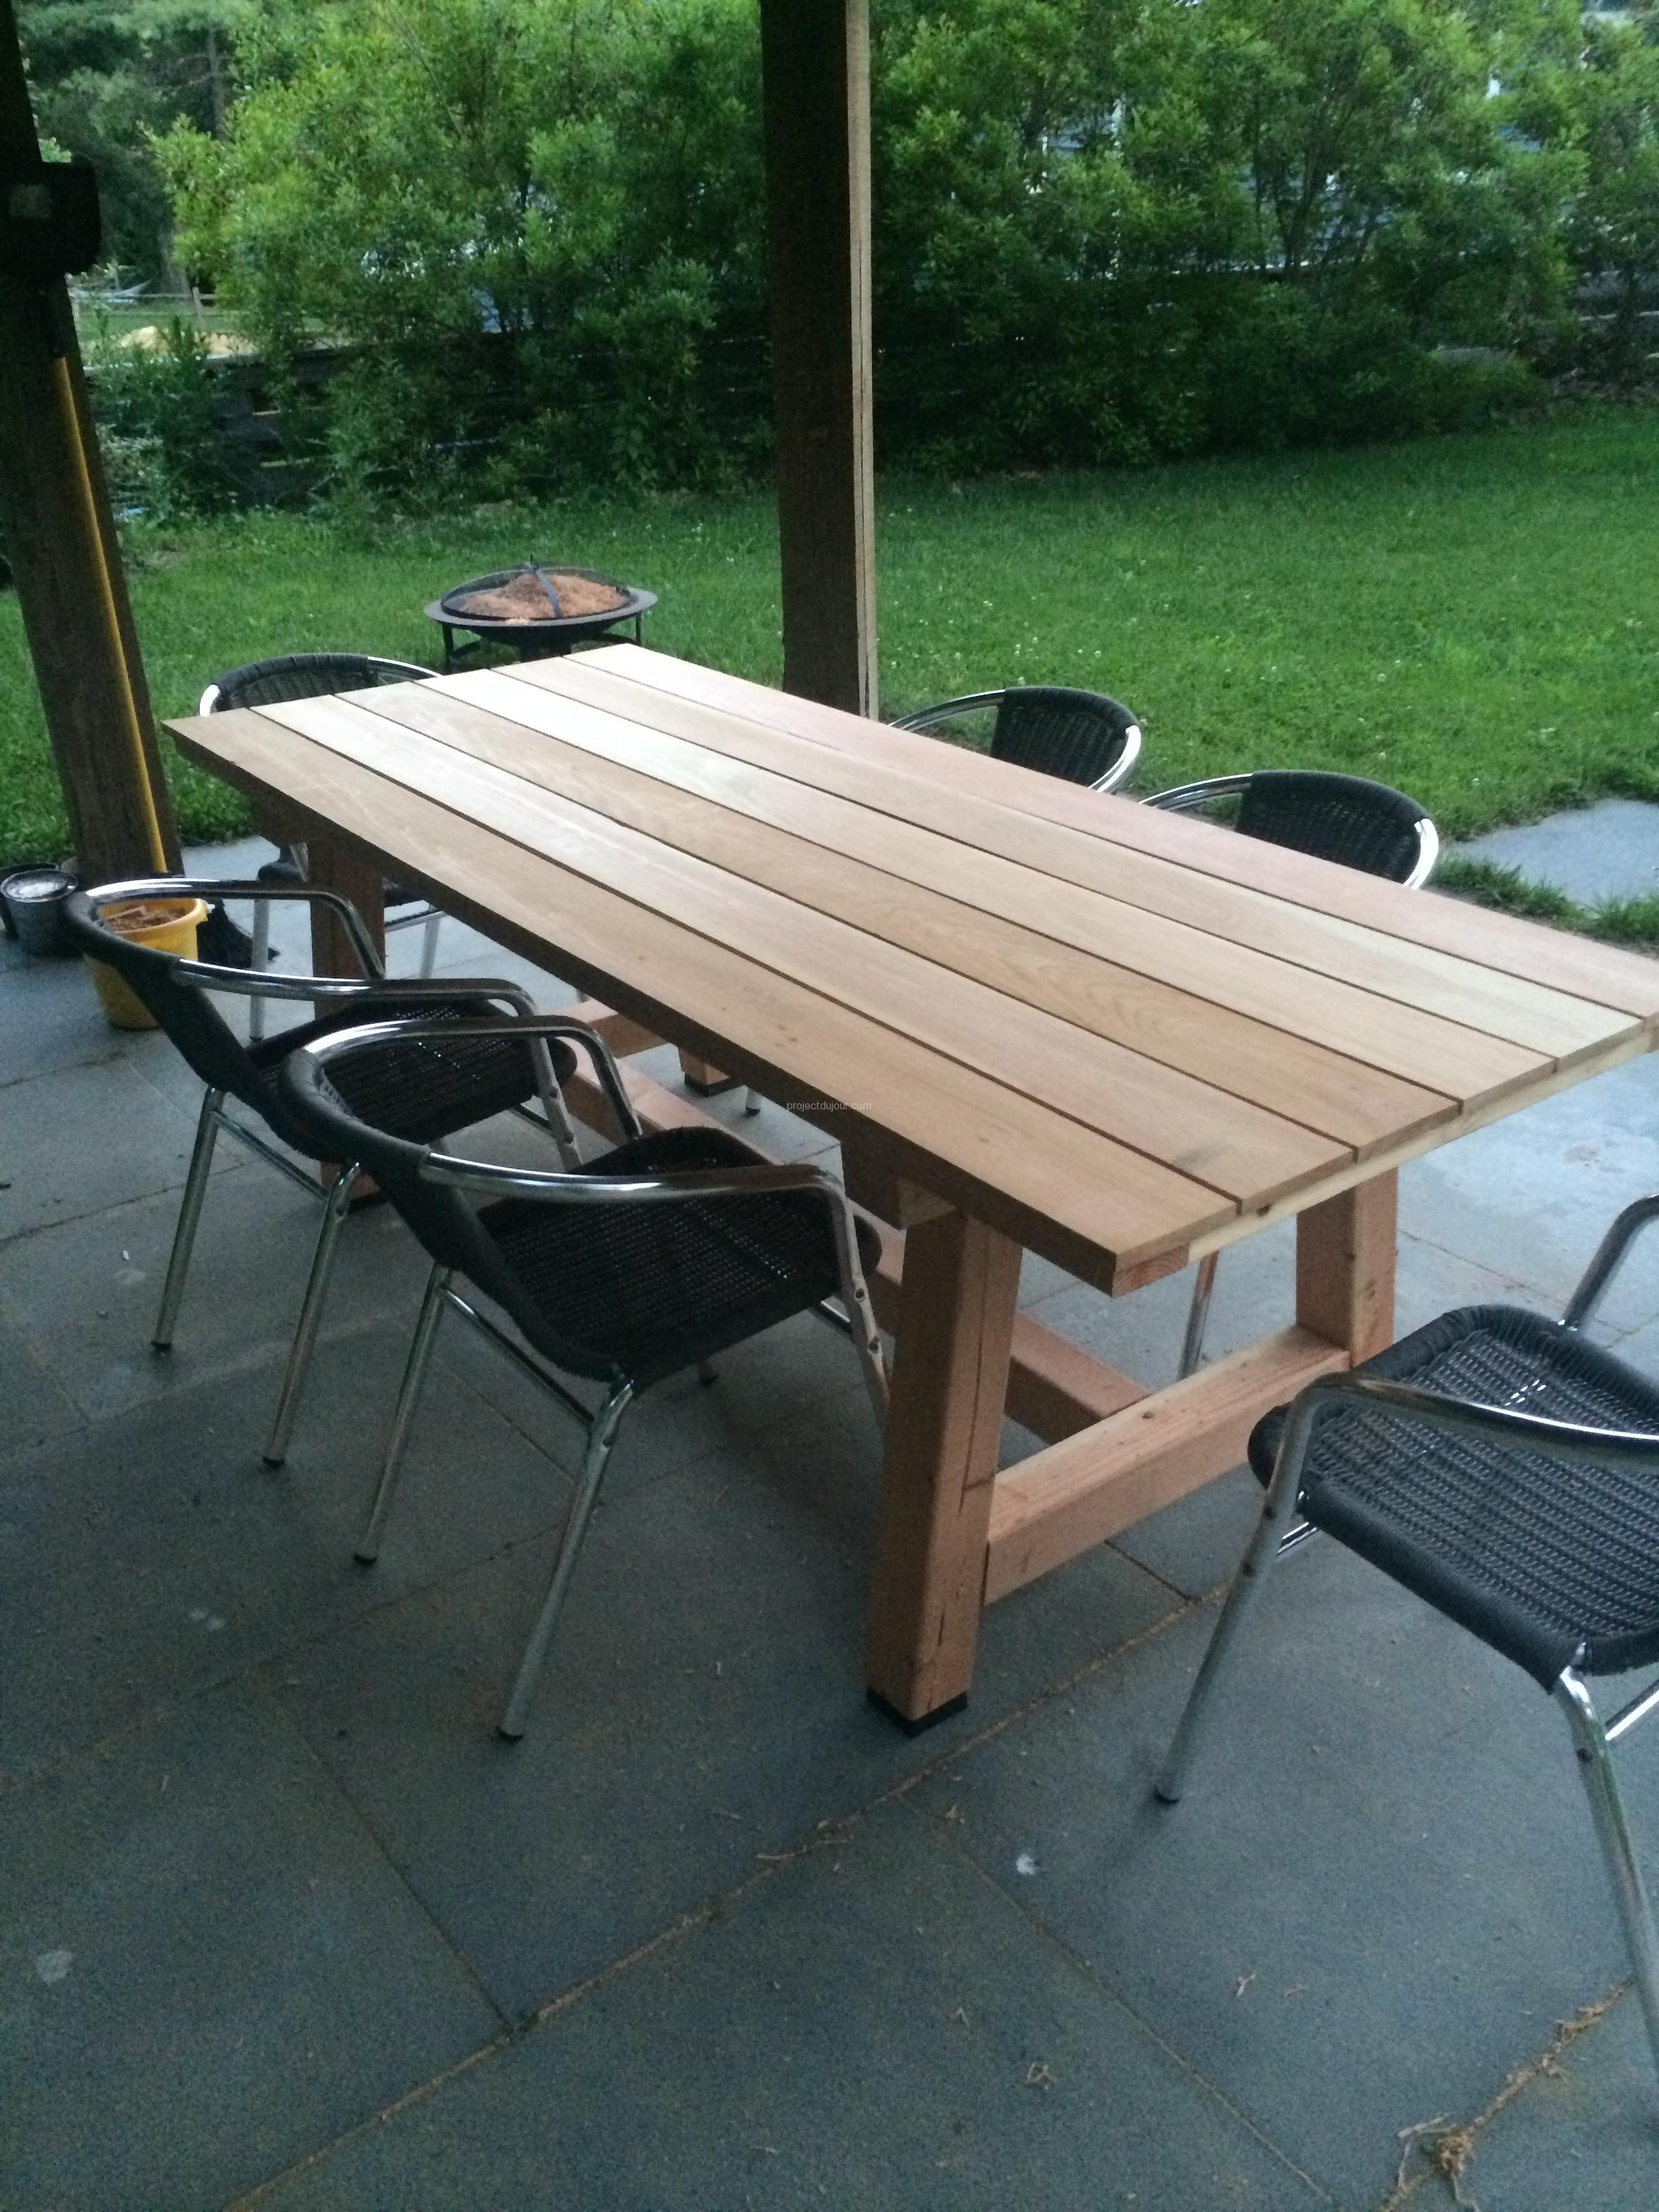
Finished table

Finished table
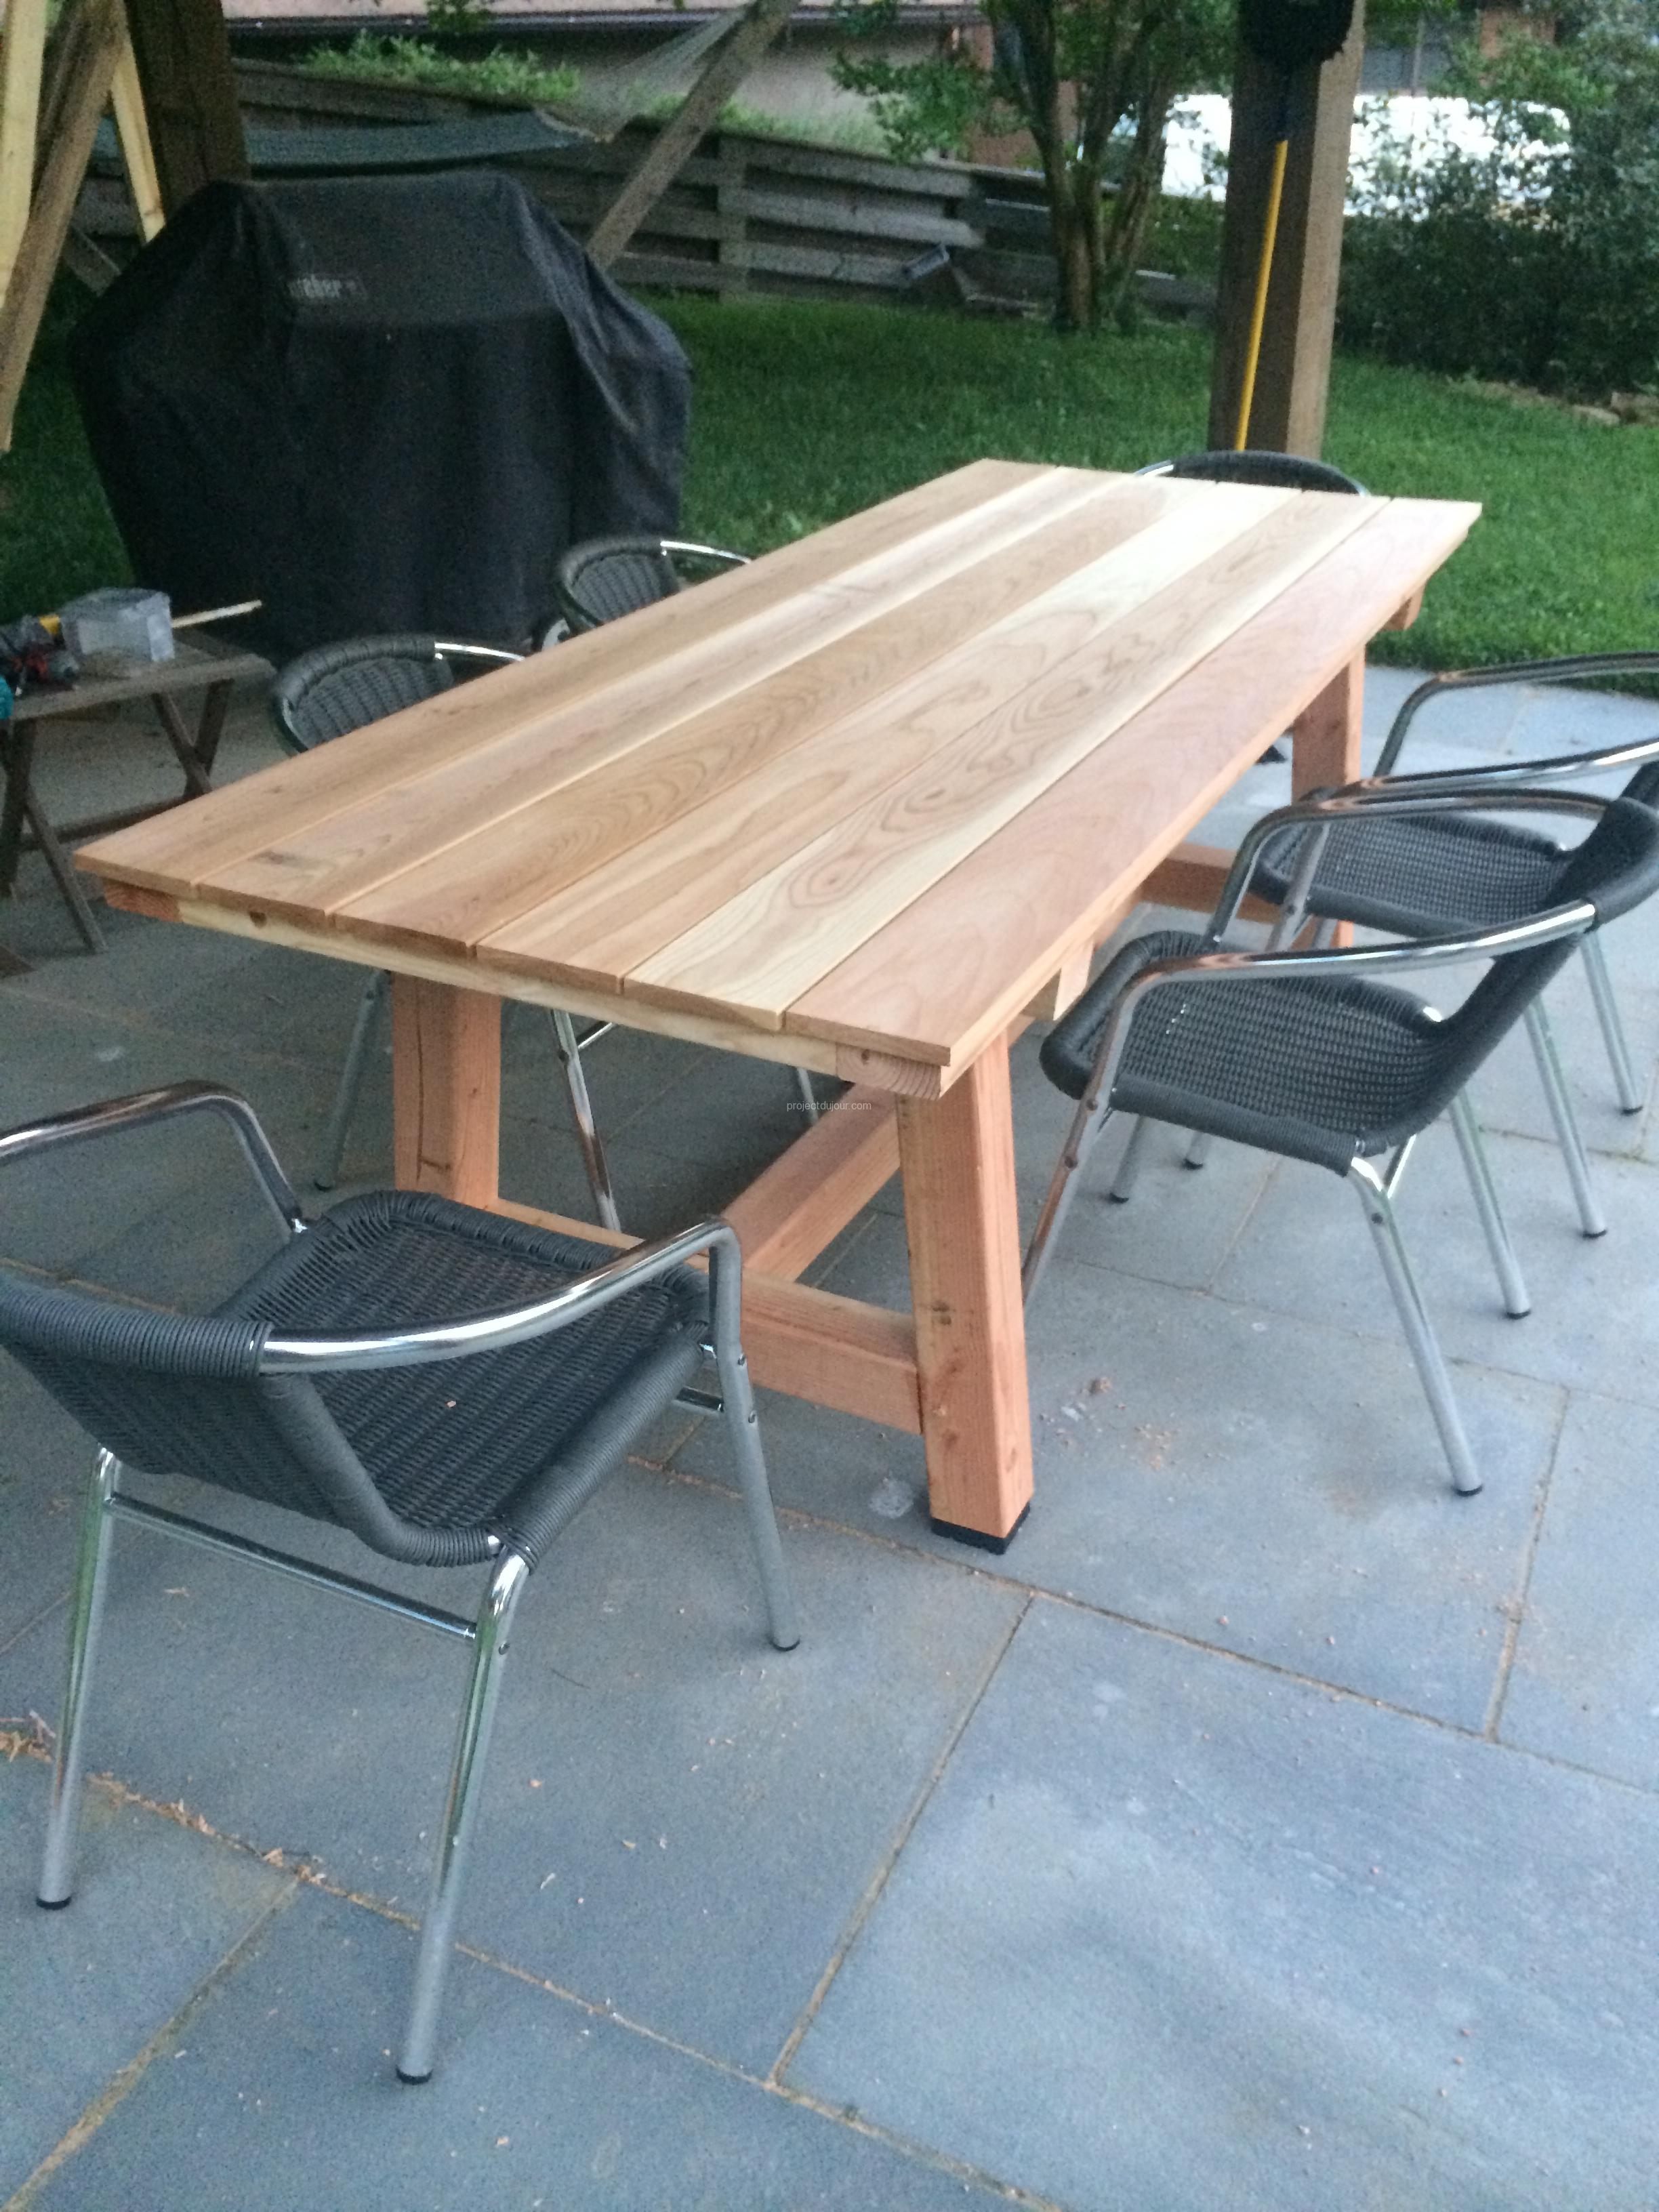
Finished table
The total cost for this DIY outdoor dining table was about $120 and it took me a couple of days to finish it. I used a miter saw for all the straight and angled cuts, a mortiser for all the mortises, a circular saw for the tenons and a 12″ wood planer to smooth the back of the cedar boards. The last step is really extra so one could do without the wood planer.
