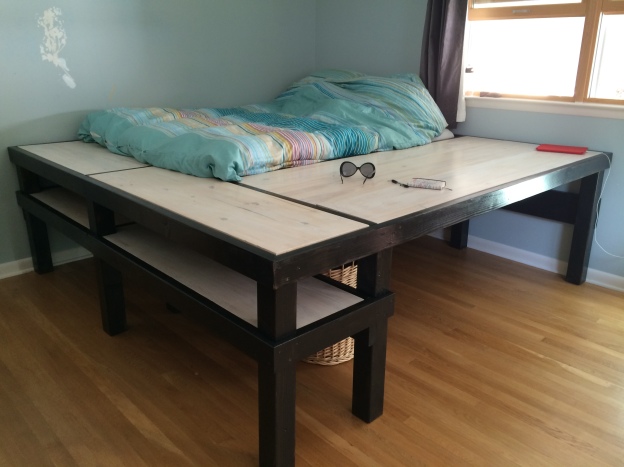
My 12 year old daughter wanted a raised bed that would also be a platform she could walk on. She saw something like that on a TV show and naturally assumed I could build it. I quickly realized that what she wanted would probably require a 500 square foot bedroom. So I decided to lump together a bed, a desk and some shelves to create a large flat surface that would resemble a platform. It’s a bed, it’s a desk, a besk, a ded, a badass bedesk.
I initially thought I would use some type of hardwood and spend some time on tenon and mortise joinery. One of my initial goals was also to be able to disassemble and reassemble the whole thing so I could move it if needed. After further reflection, I decided to go the other way, i.e. cheap material and simple assembly with screws. This way, I would have no scruple using a sawzall to get rid of the bedesk if it was too unsightly or didn’t match my daughter’s expectations.
The bedesk is a 8′ by 8′ square (so I could use dimensional lumber), the height is close to the standard height for a table (31″) and the bed is recessed so the mattress is almost flush with the tabletop.
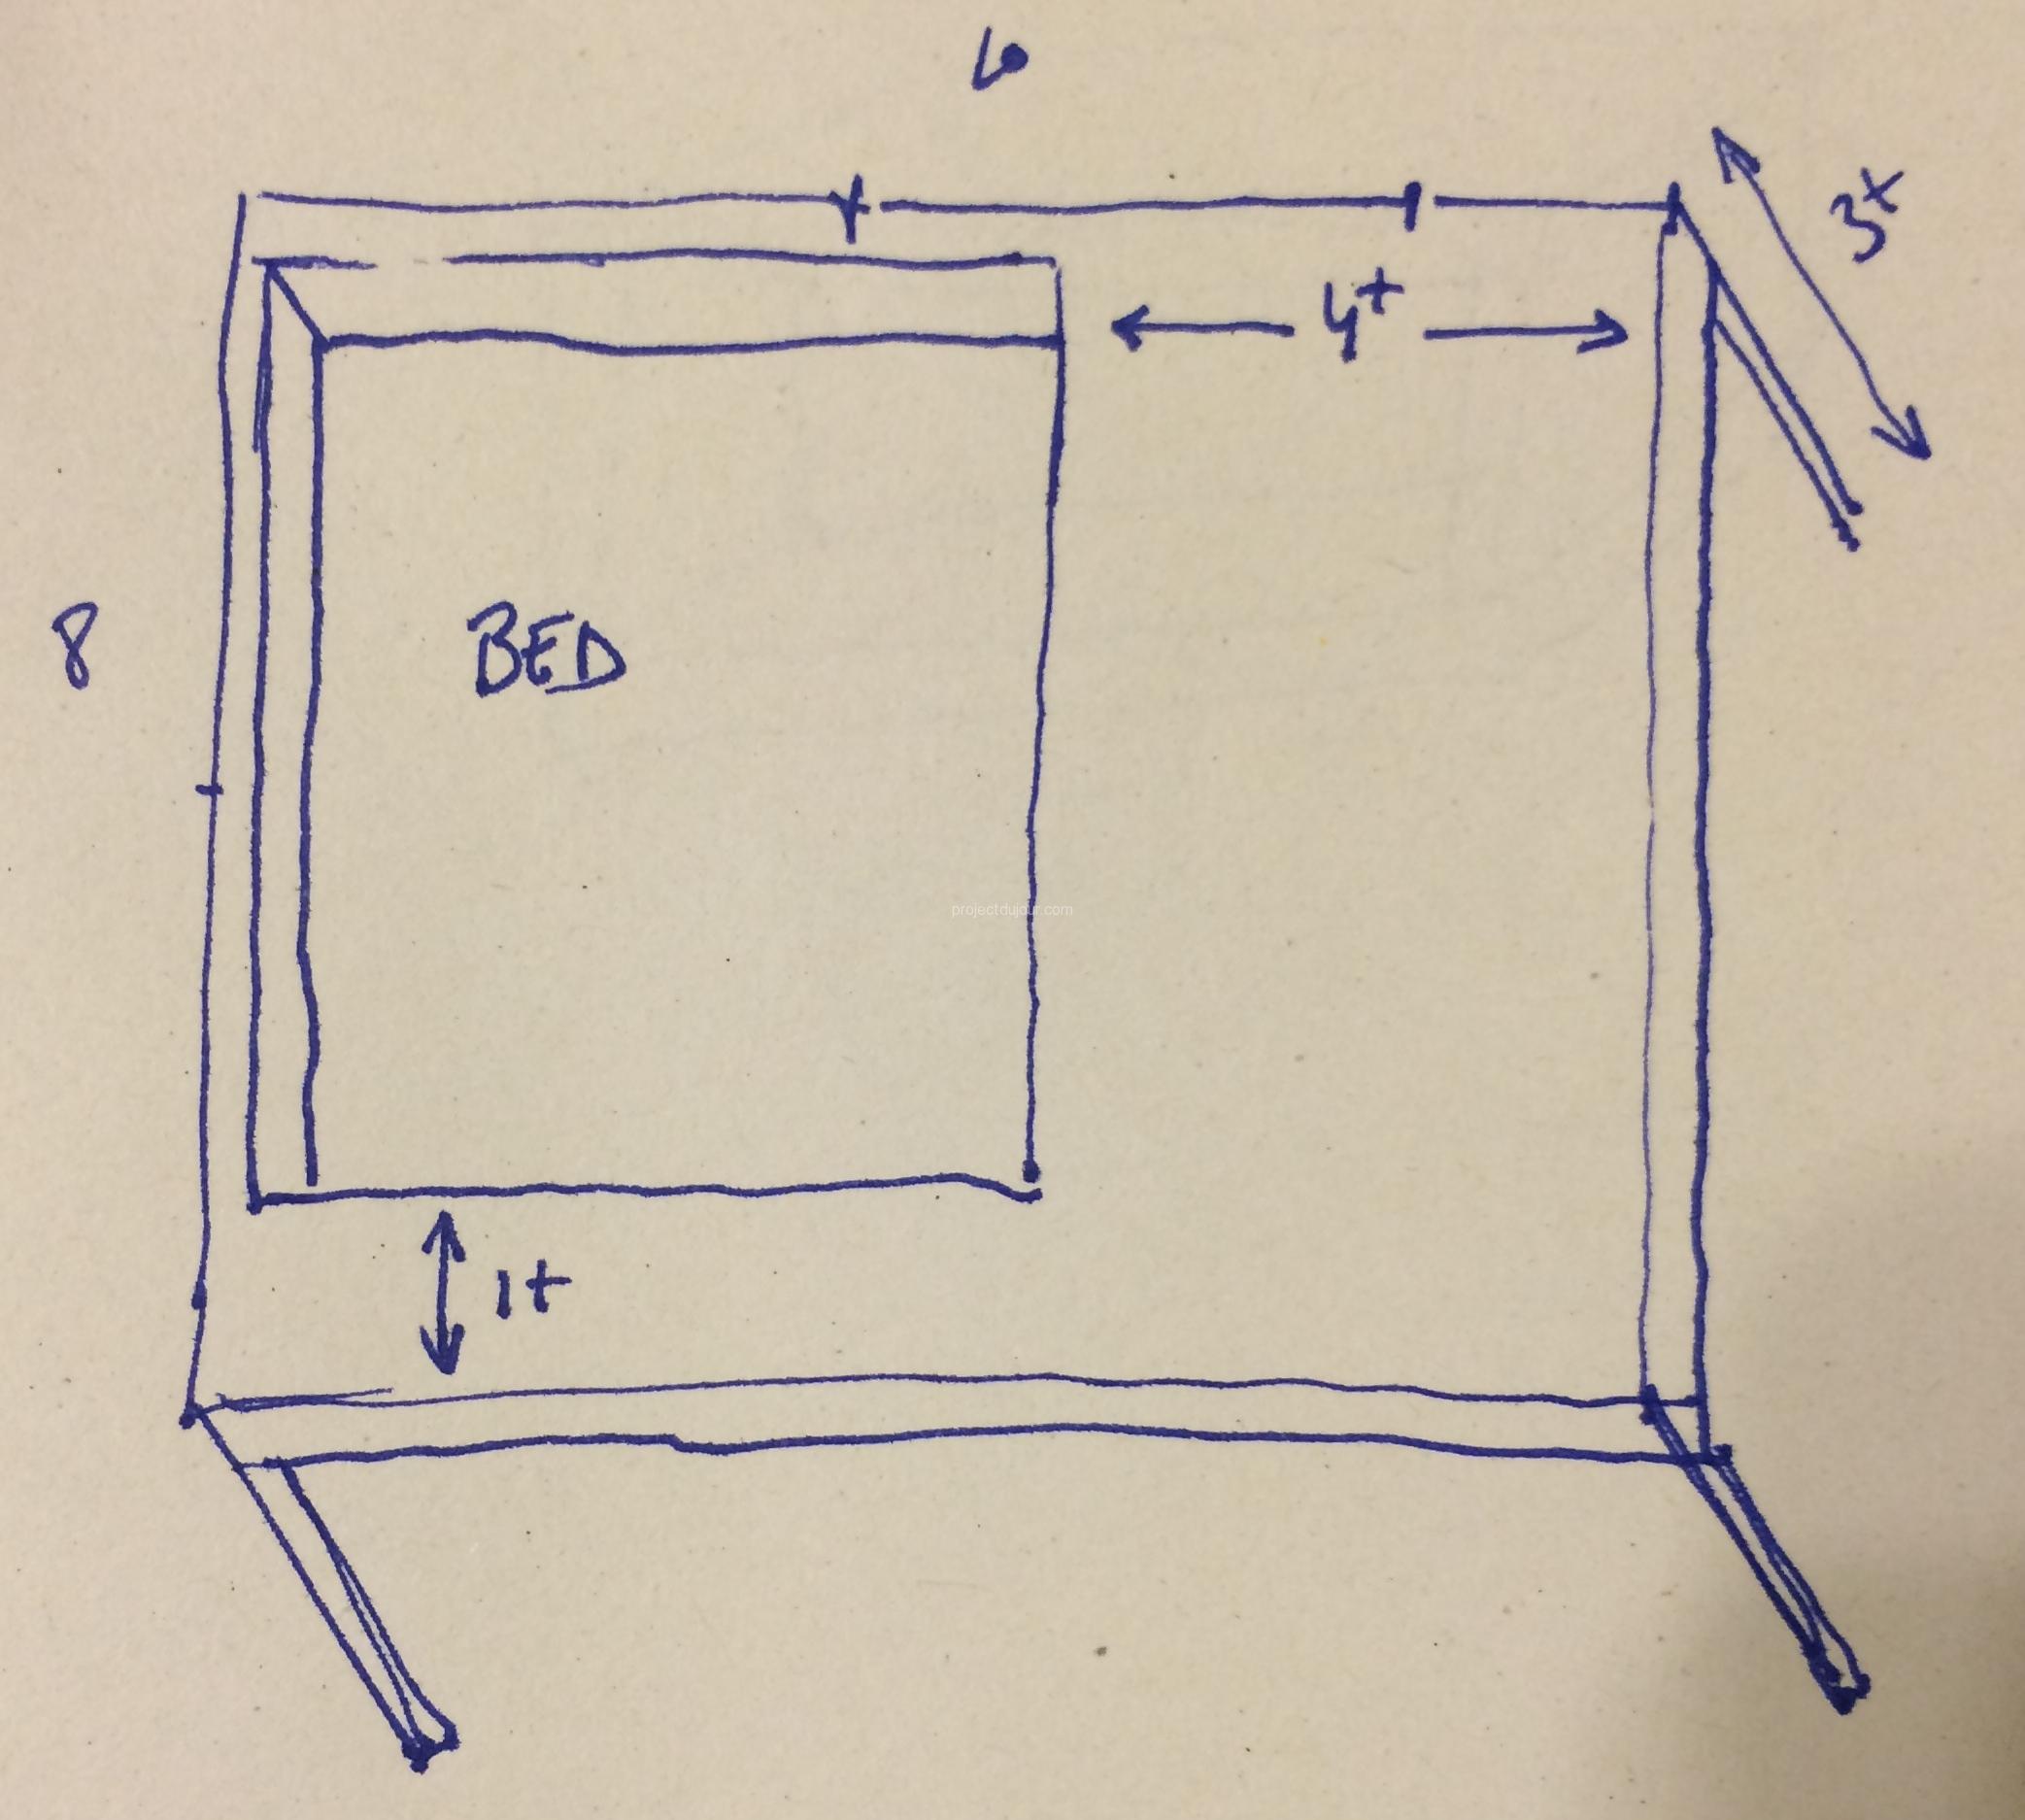
Starting idea with rough layout
I used some 4″ by 4″ posts for the legs. There are two layers of horizontal beams to tie the posts. The top layer uses 2″ by 4″ all around and some inner frames made of 2″ by 3″ to support the shelves and tabletop. The lower level uses 2″ by 8″ all around the bed as well as some 2″ by 4″ for the lower shelves with some 2″ by 3″ inner frames.
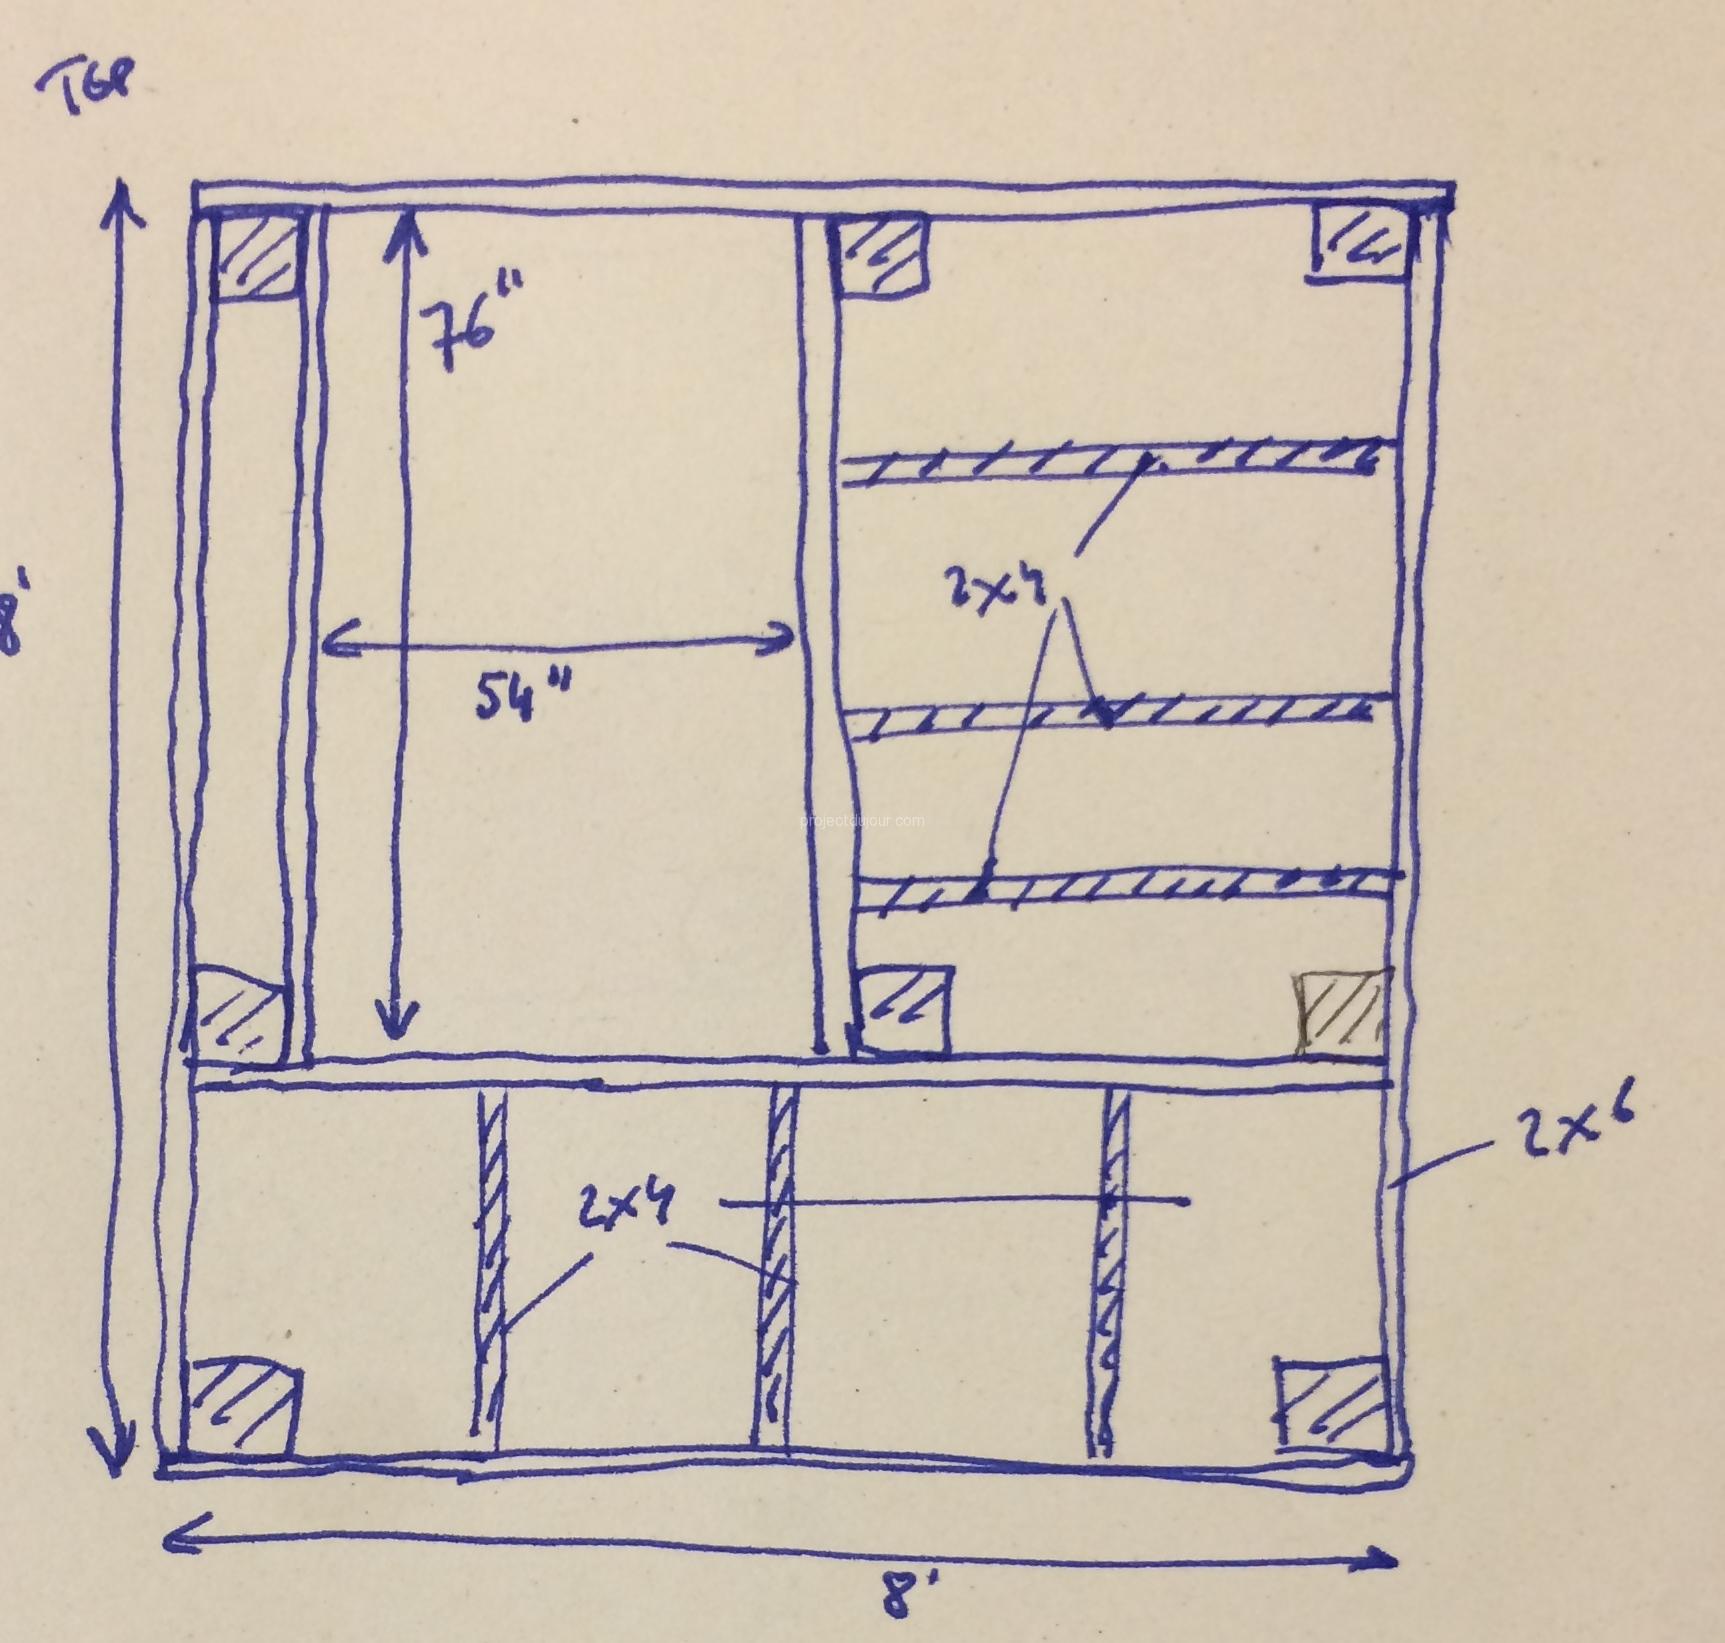
Posts layout and main beams
To make sure the bed frame and shelves would be strong, I decided to make some grooves on the posts. This way, the weight rests on a “shoulder” instead of being fully carried by the screws or bolts. To fix the beams to the posts, I used two 4″ long screws for the 2″ by 4″ and four 4″ long screws for the 2″ by 8″. It turned out to be quite sturdy. Each post has a different shape, i.e. the grooves are on different sides and at different heights. The top groove is narrower so that the 4″ horizontal beams stick up by 3/4″ and wraps around the tabletop.

Grooves and notches for the beams and tabletop
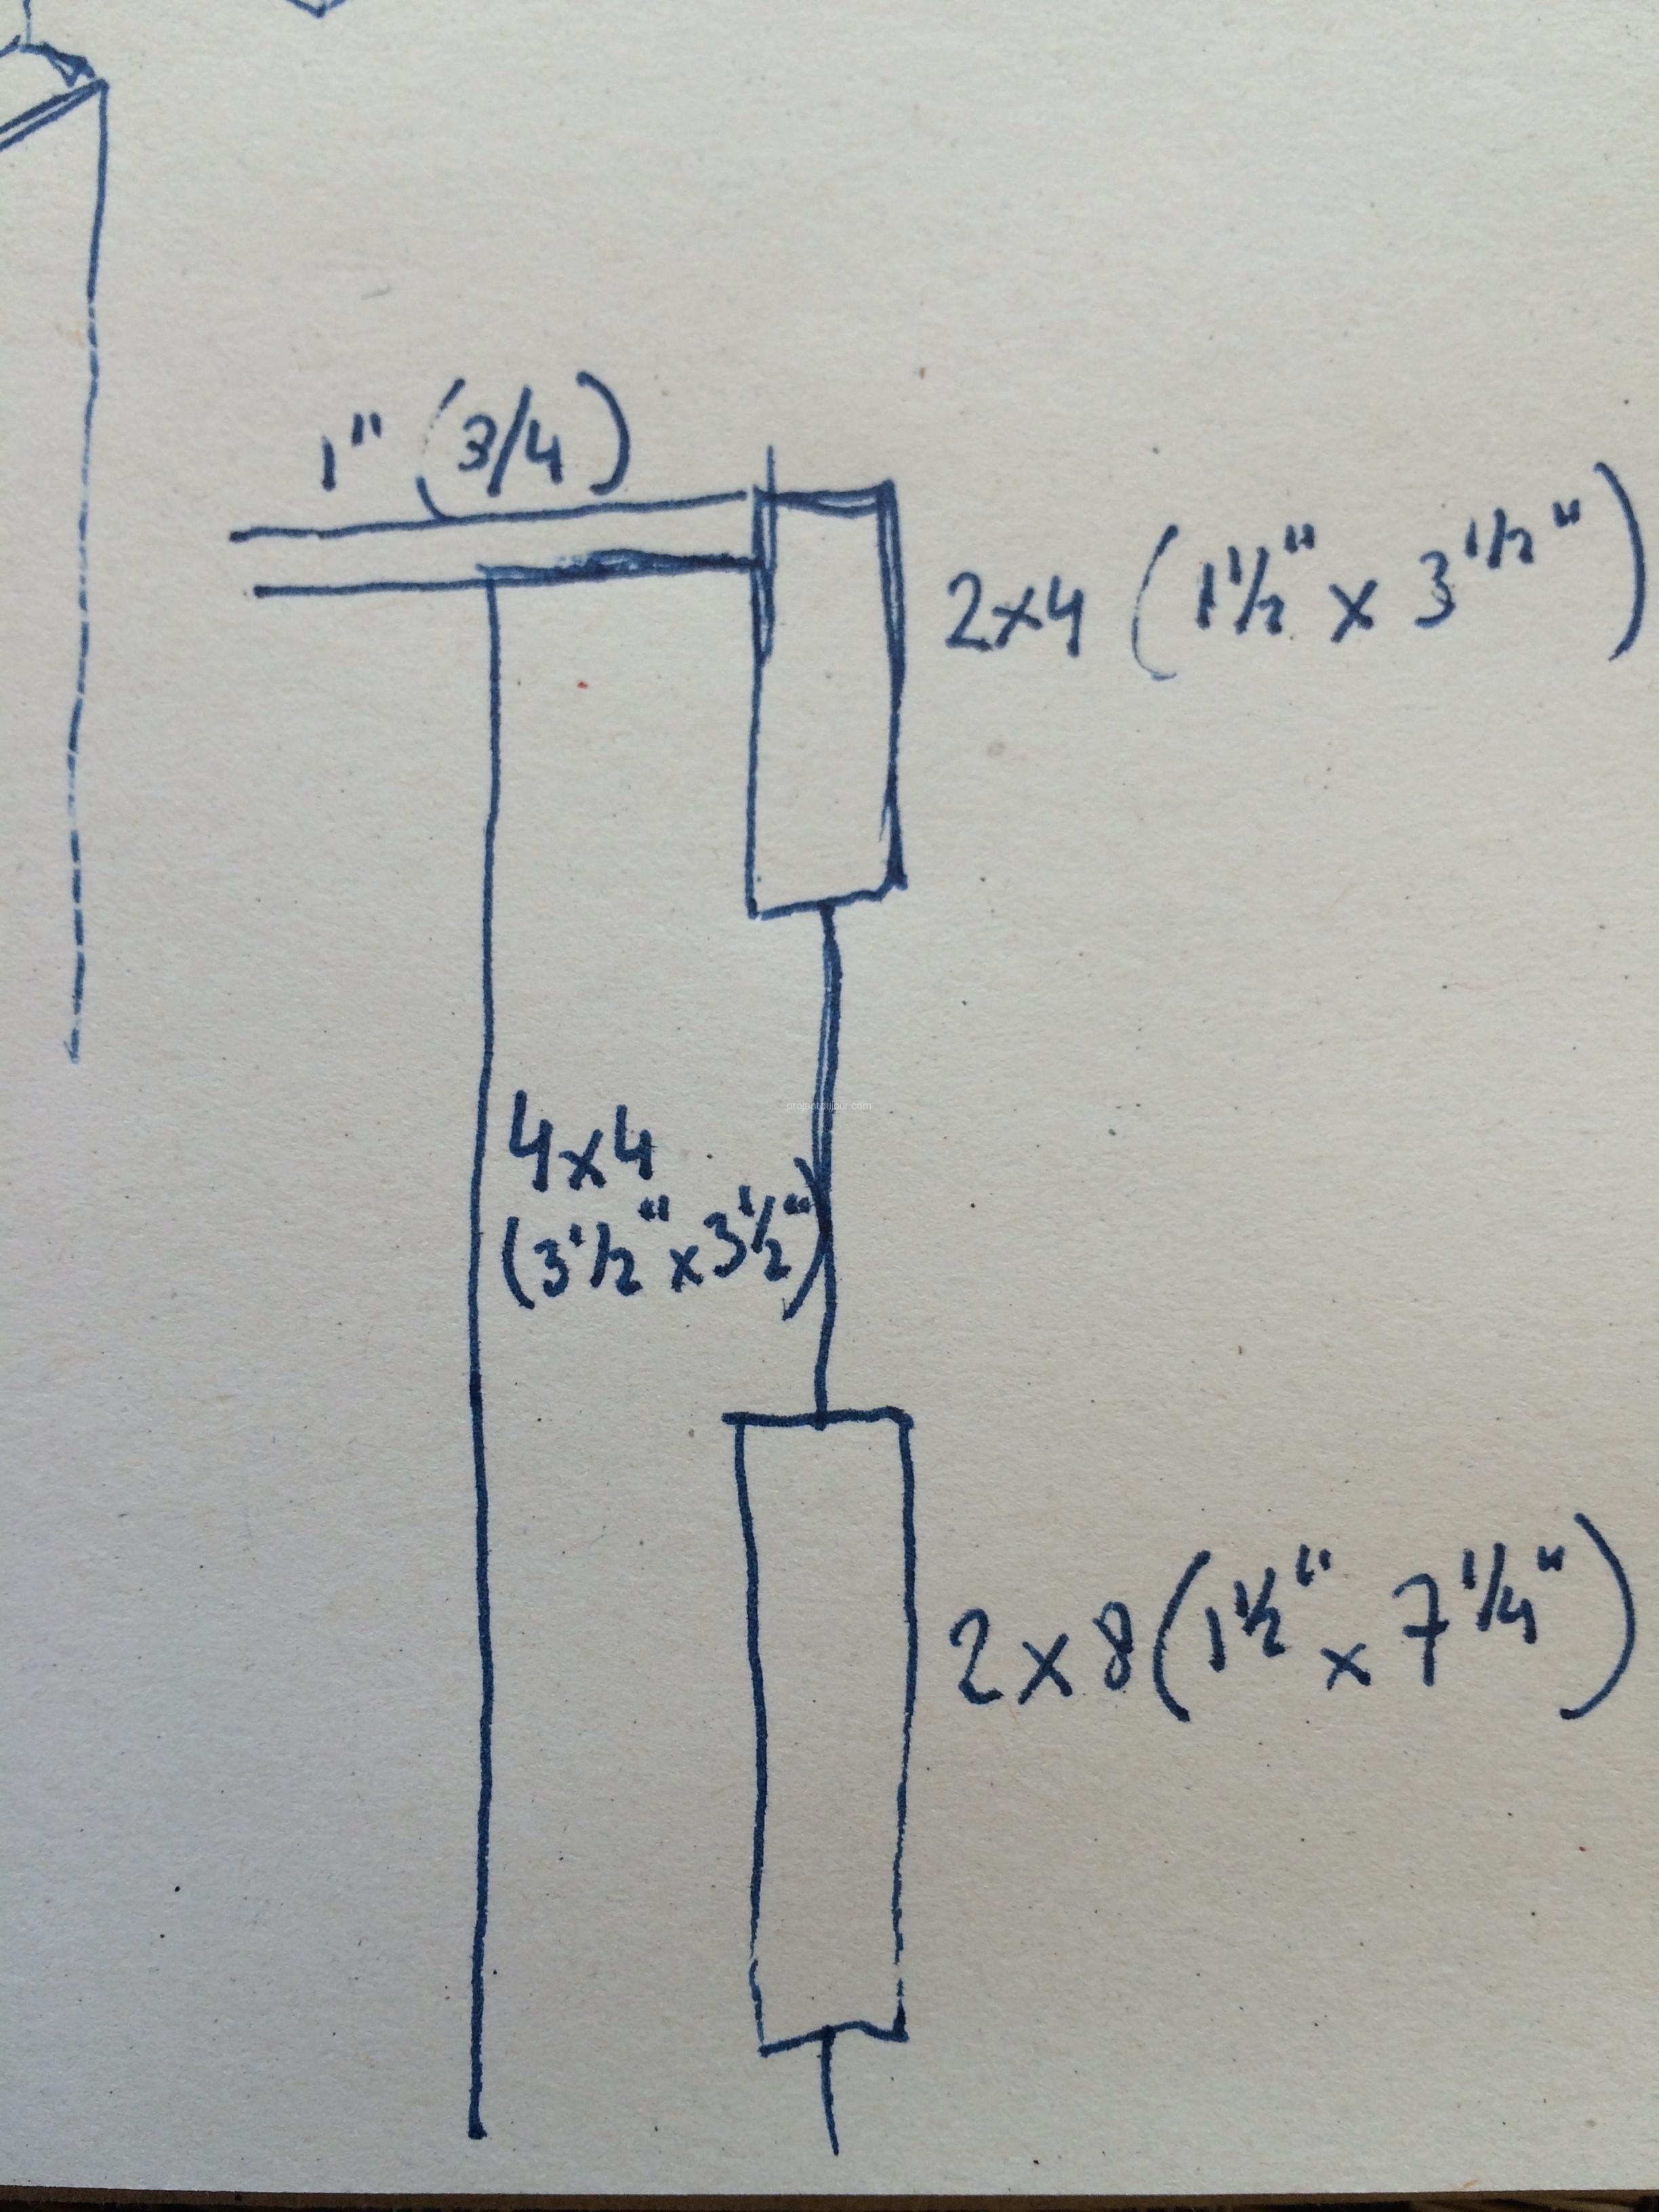
Dimensions for posts and grooves for horizontal beams
Cutting grooves or making tenons can be a bit tedious. I’m not totally sure my technique would be approved by real carpenters or cabinet makers but here is how I do it. I first make a bunch of parallel cuts using either a table saw or circular saw. I then hammer the wood away. The closer the cuts, the easier it is to break the wood but the longer it takes to cut.
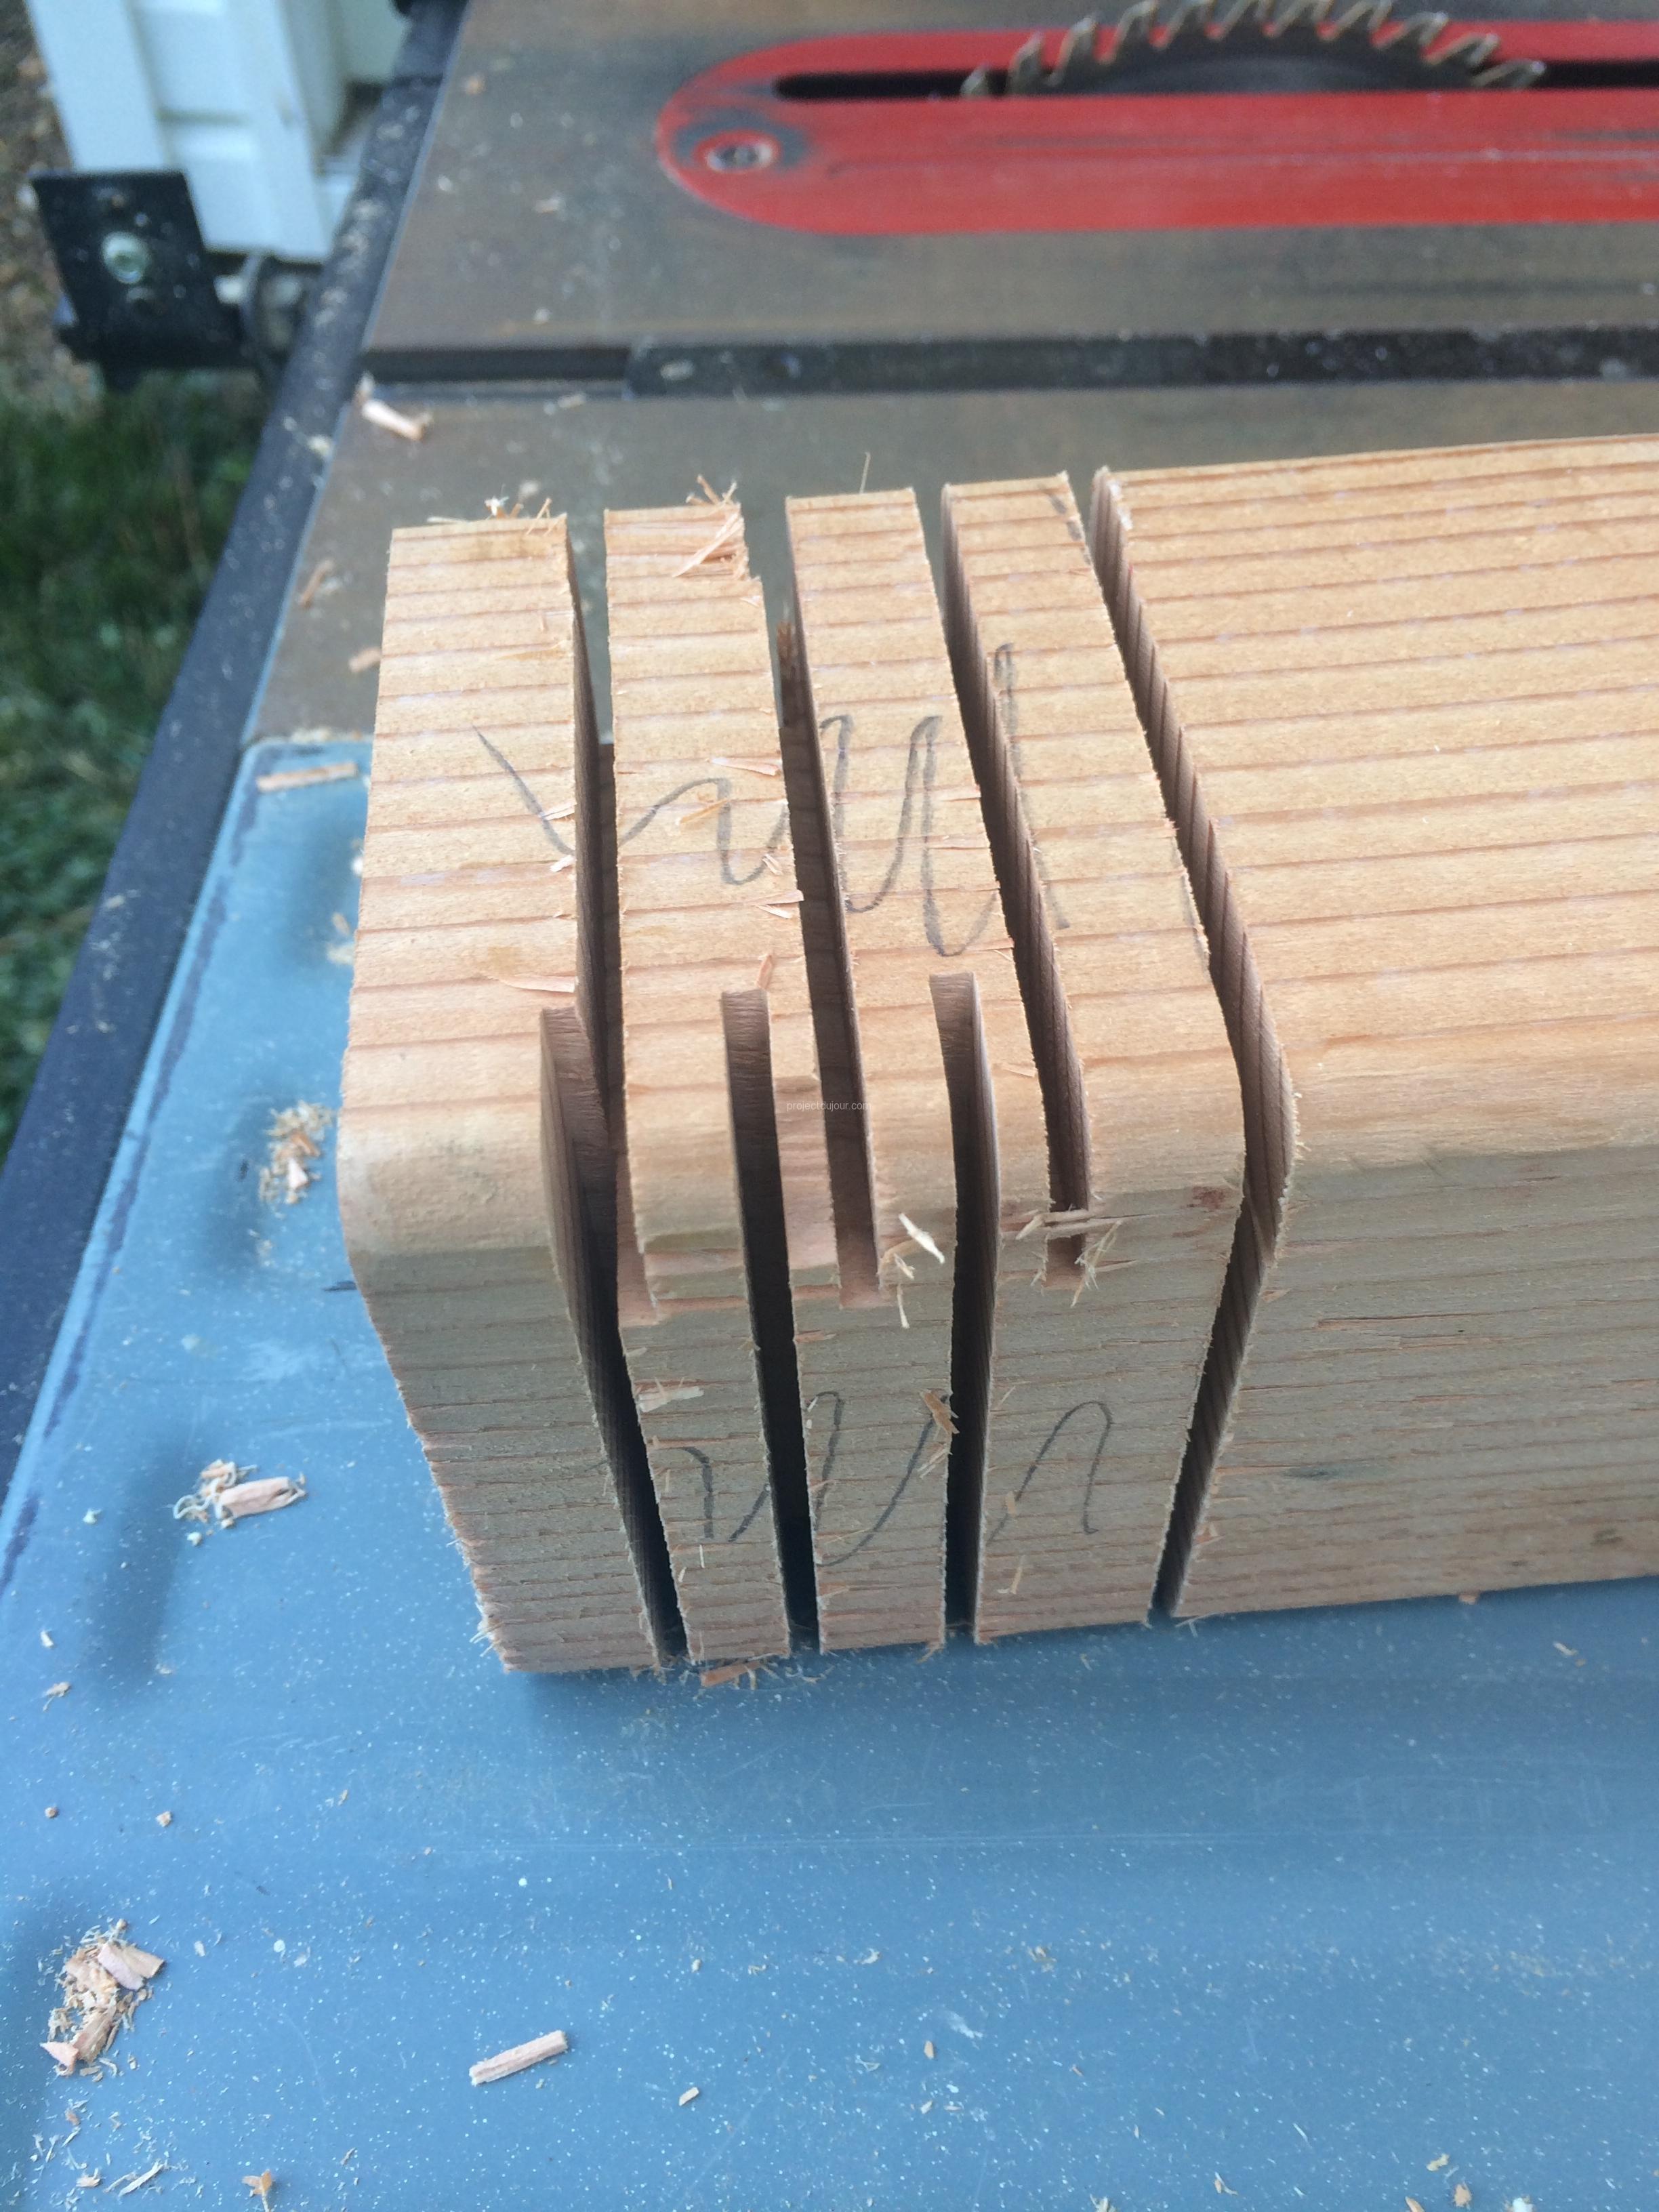
Making a tenon or groove with a table saw
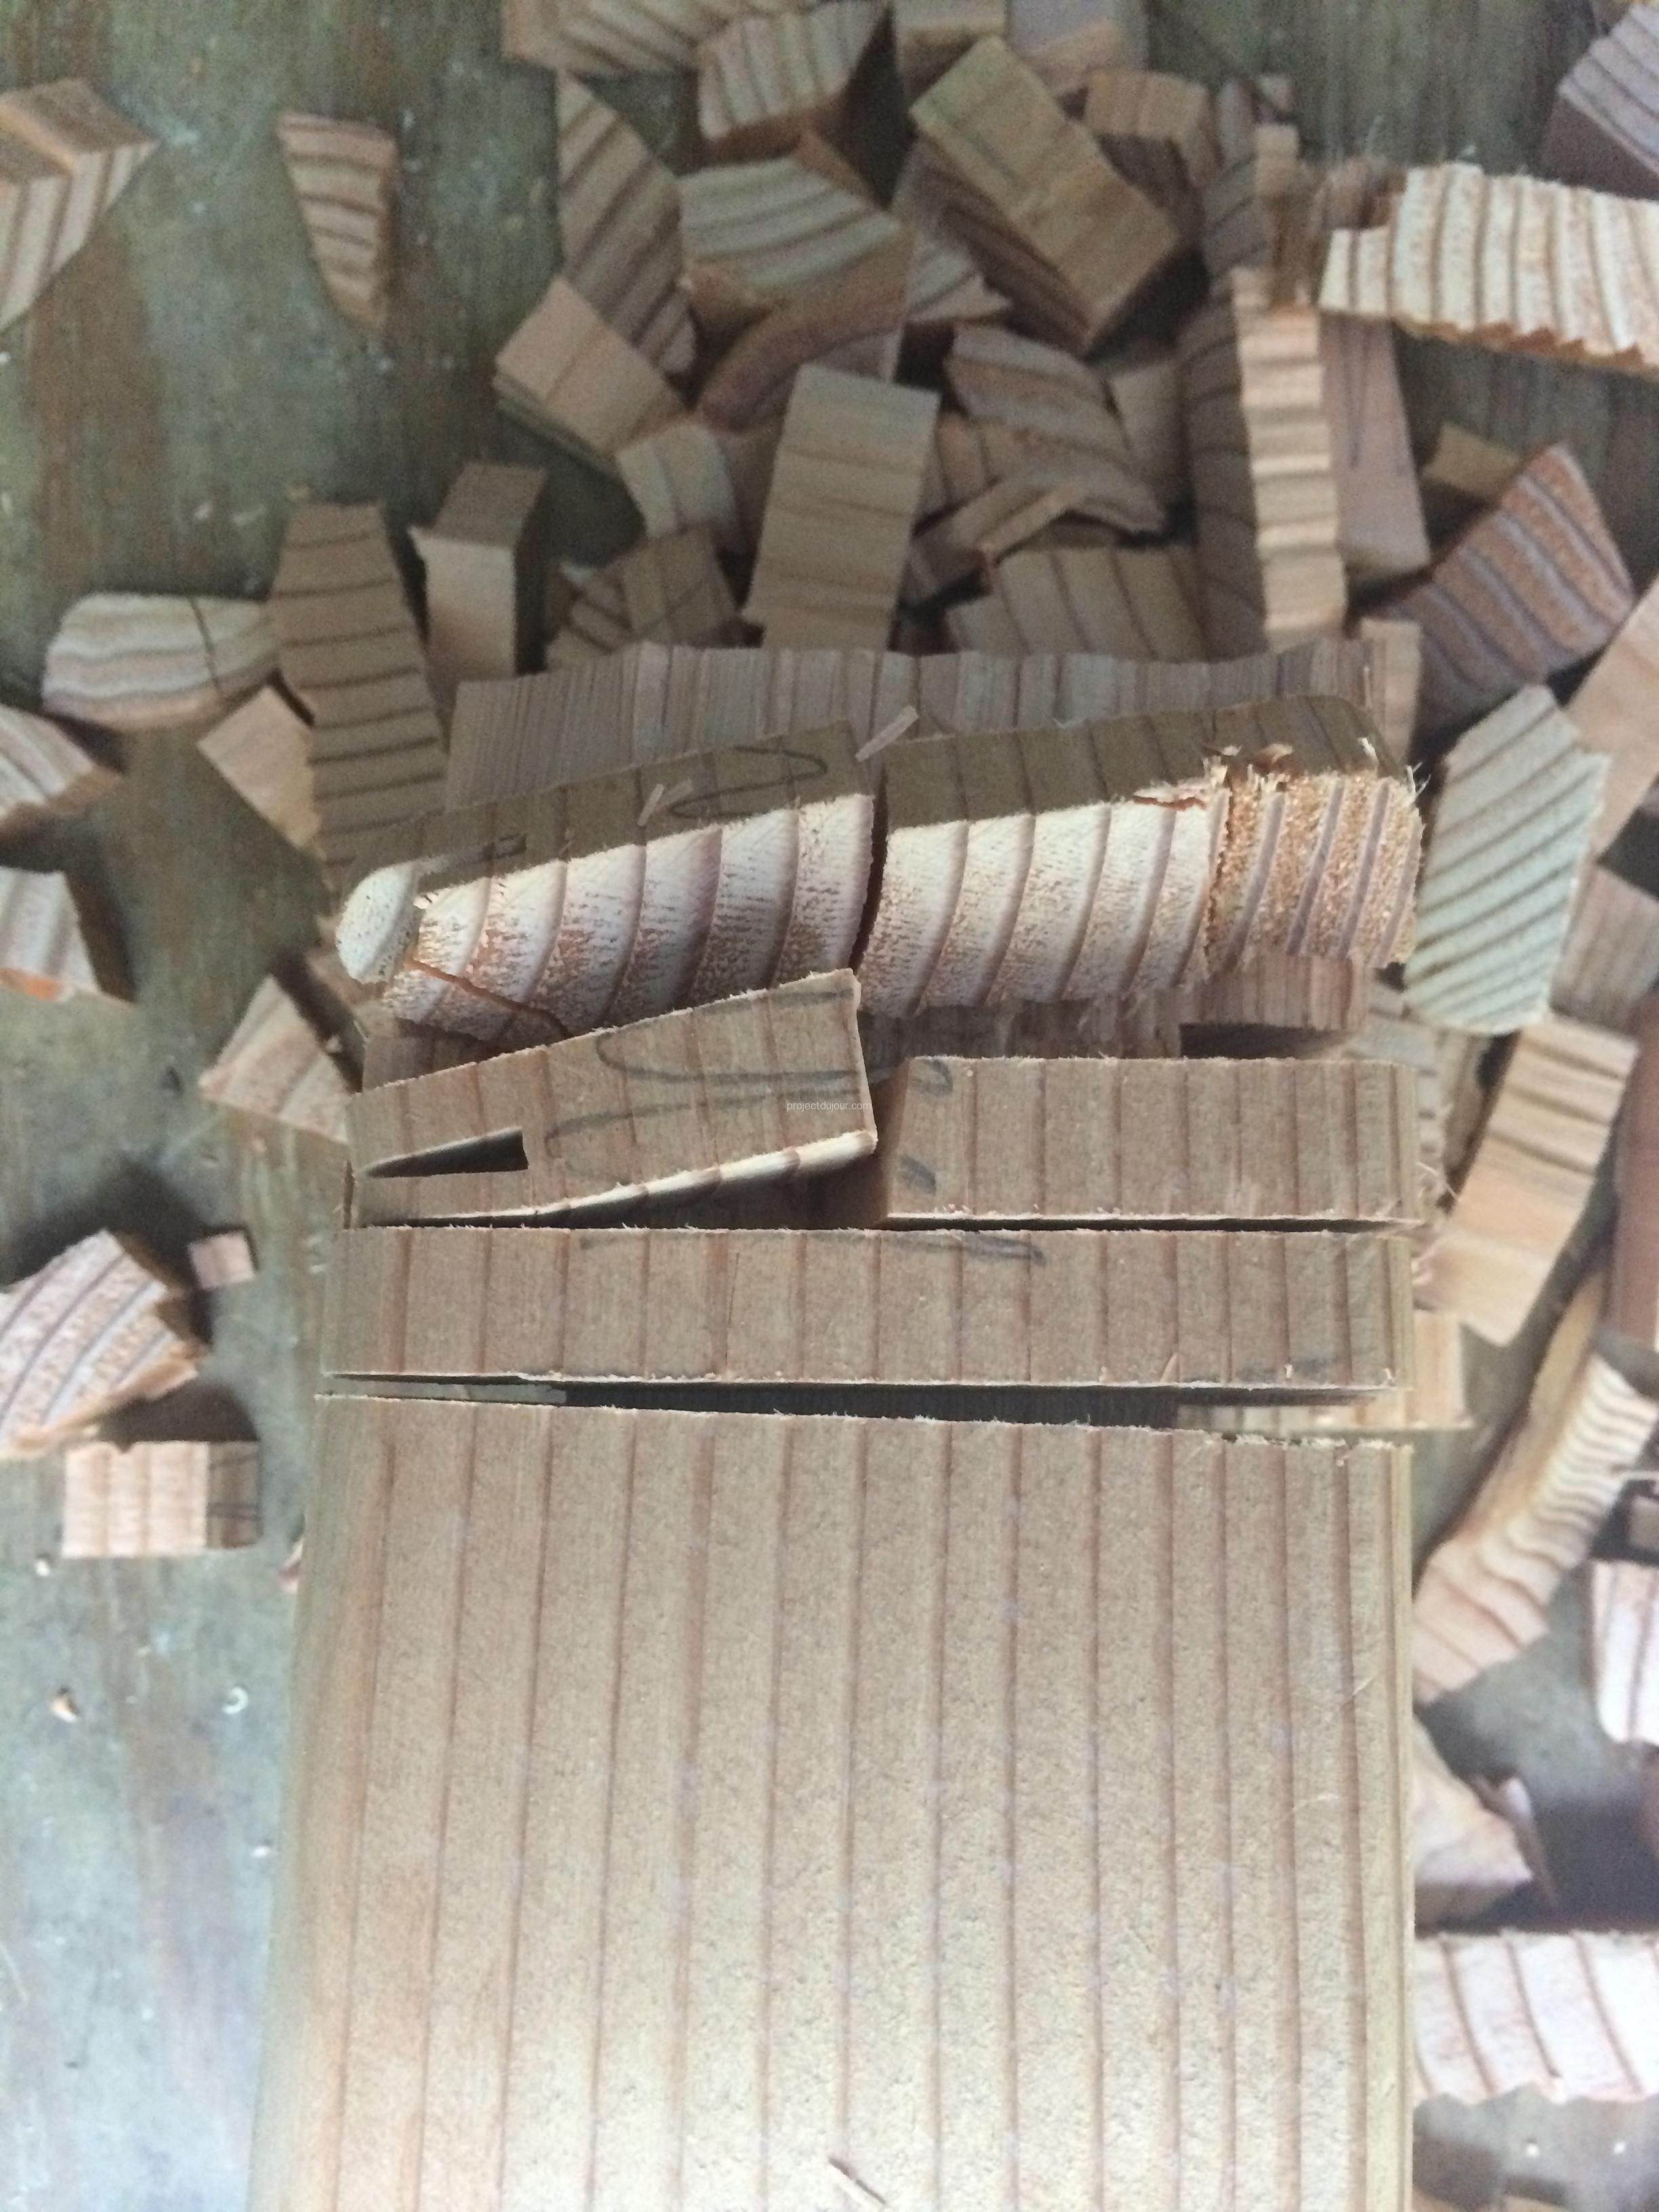
Hammering wood chunks
At that point, the inner part of the groove is really rough. I’ve used two different methods, a wood chisel or a circular/table saw sliding side to side (i.e. perpendicular to the cutting direction). I must say that the second method is fast but rather dangerous as the saw blade tends to grab wood chunks and project them all around. I make sure I wear safety goggles and gloves for this step (not that I don’t always wear safety goggles).
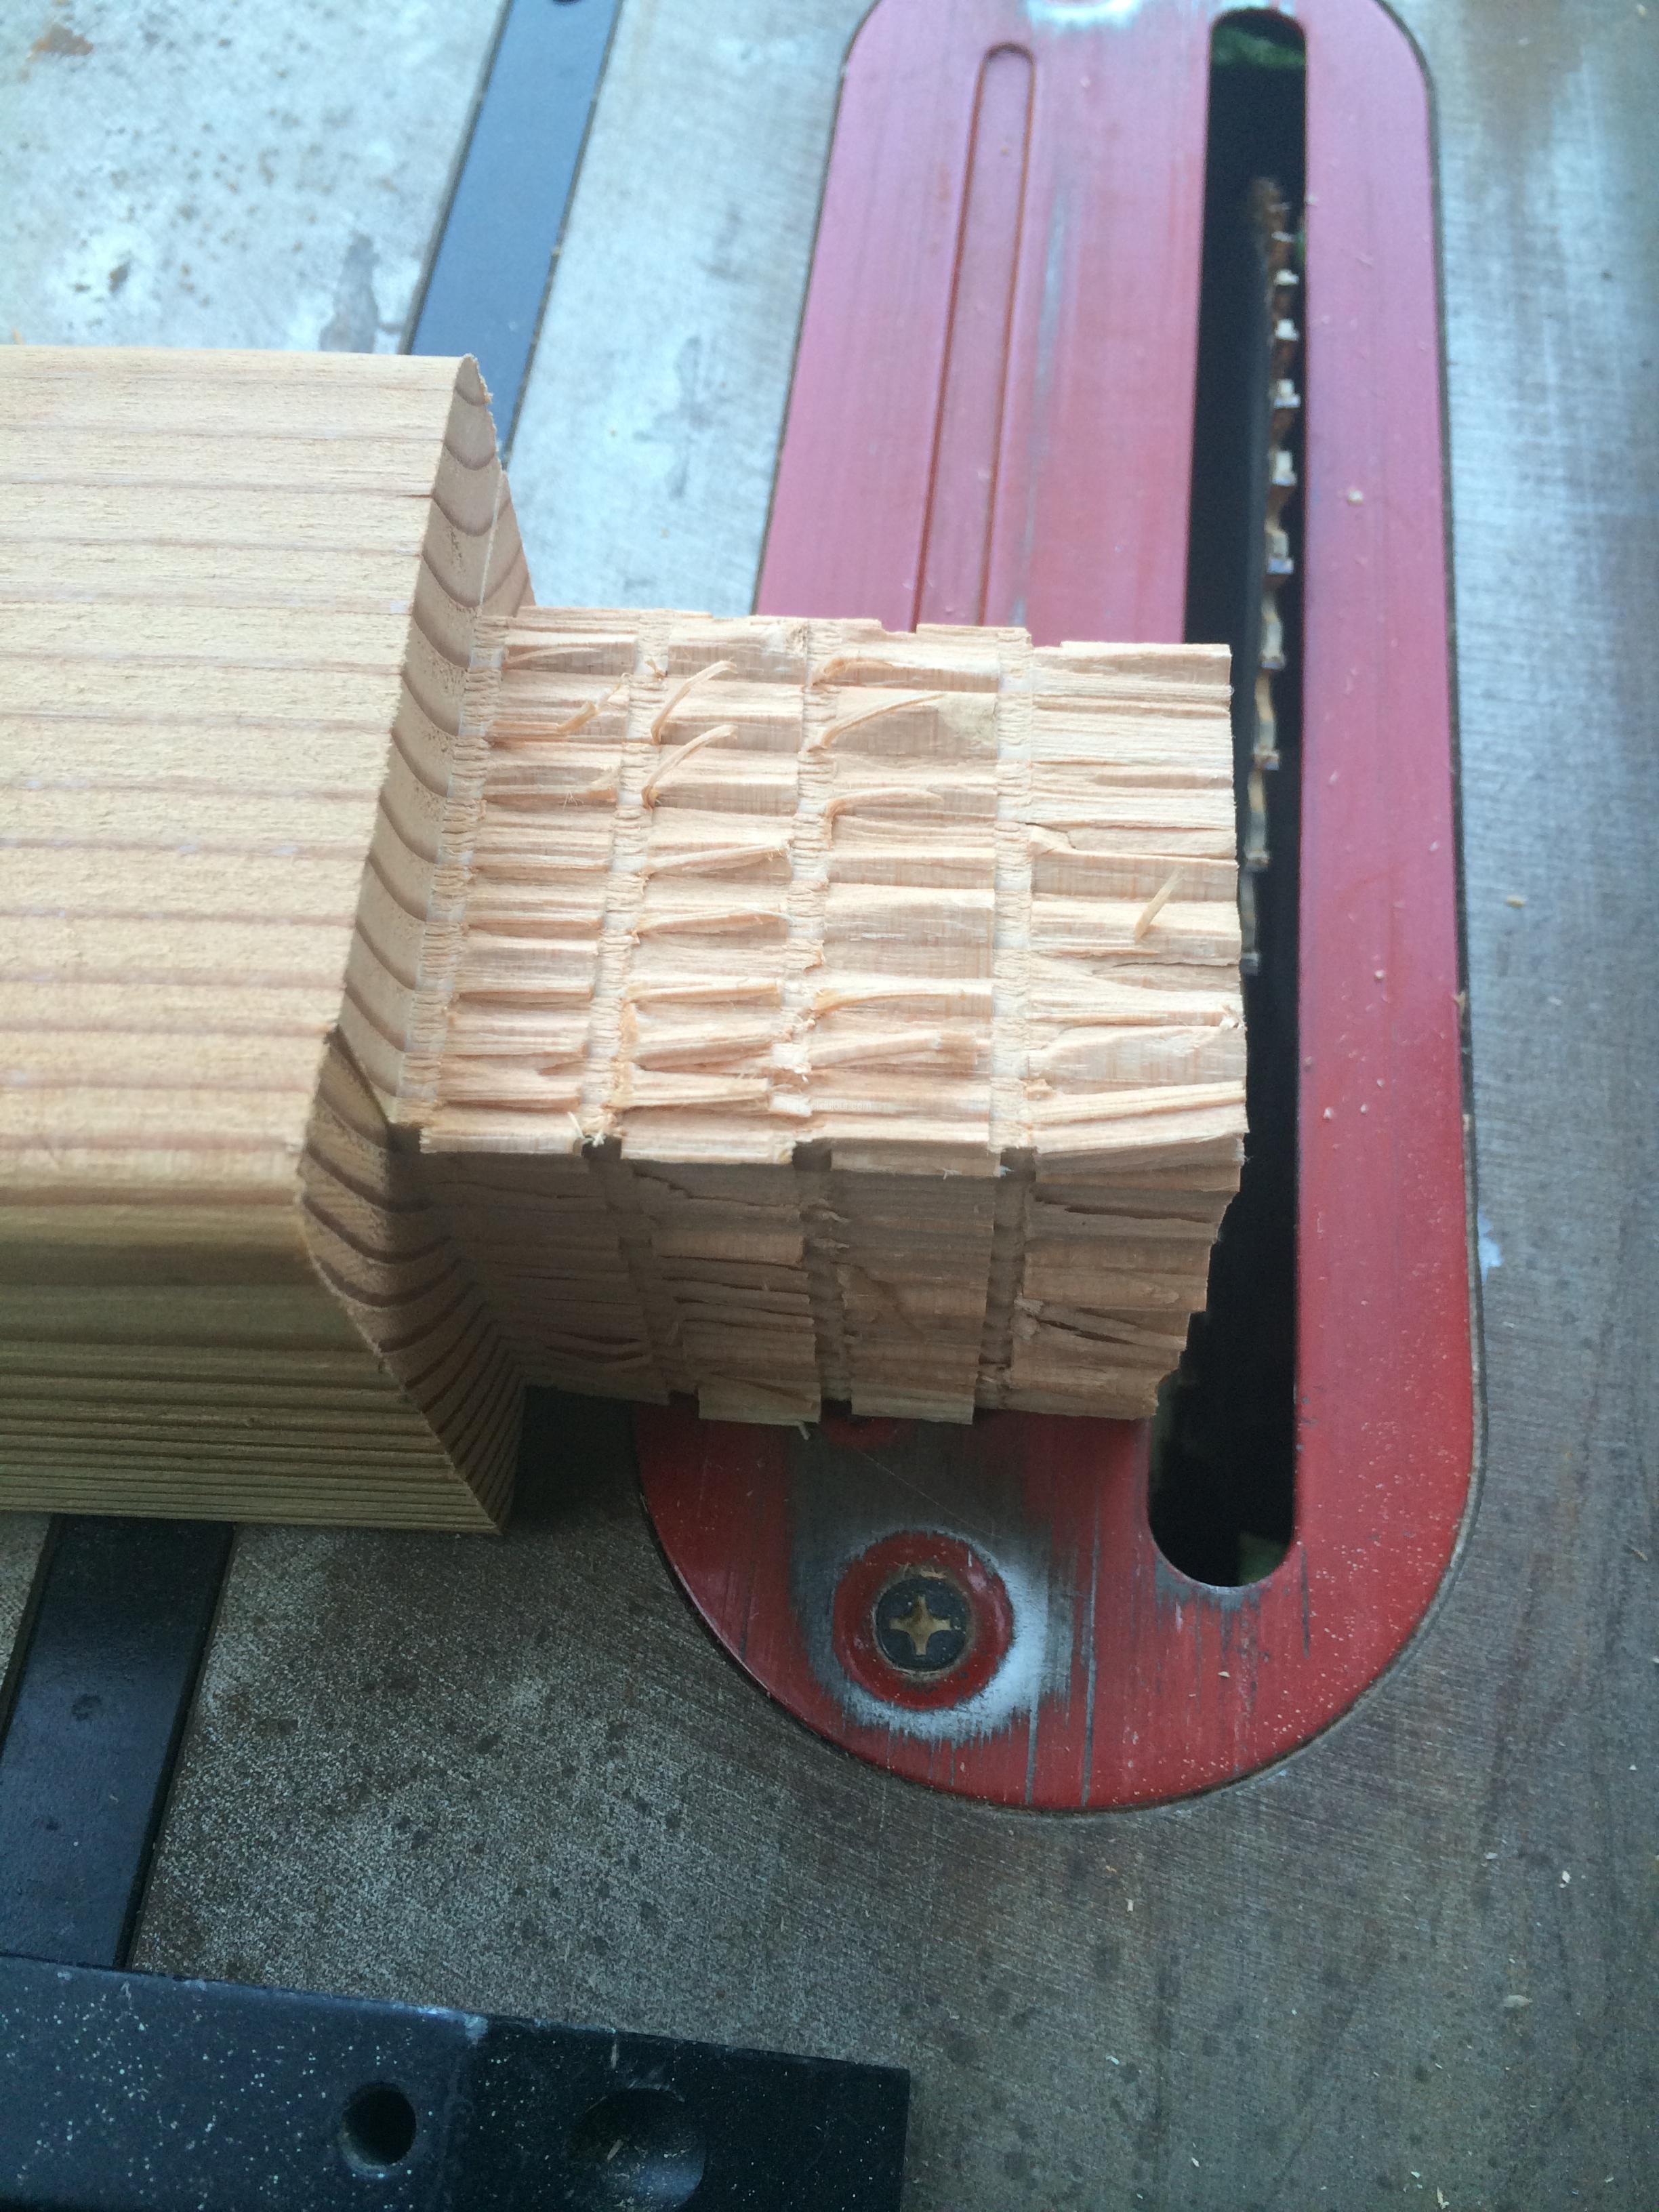
Smoothing using a table saw, moving piece sideways (with safety goggles)
I prepared all the posts at once and crossed my fingers that I had marked them all correctly. the next step was to sort them and start cutting the horizontal beams to test the fit. At that point the frame was holding with clamps only. All the horizontal pieces meeting at a corner are cut at 45 degrees.
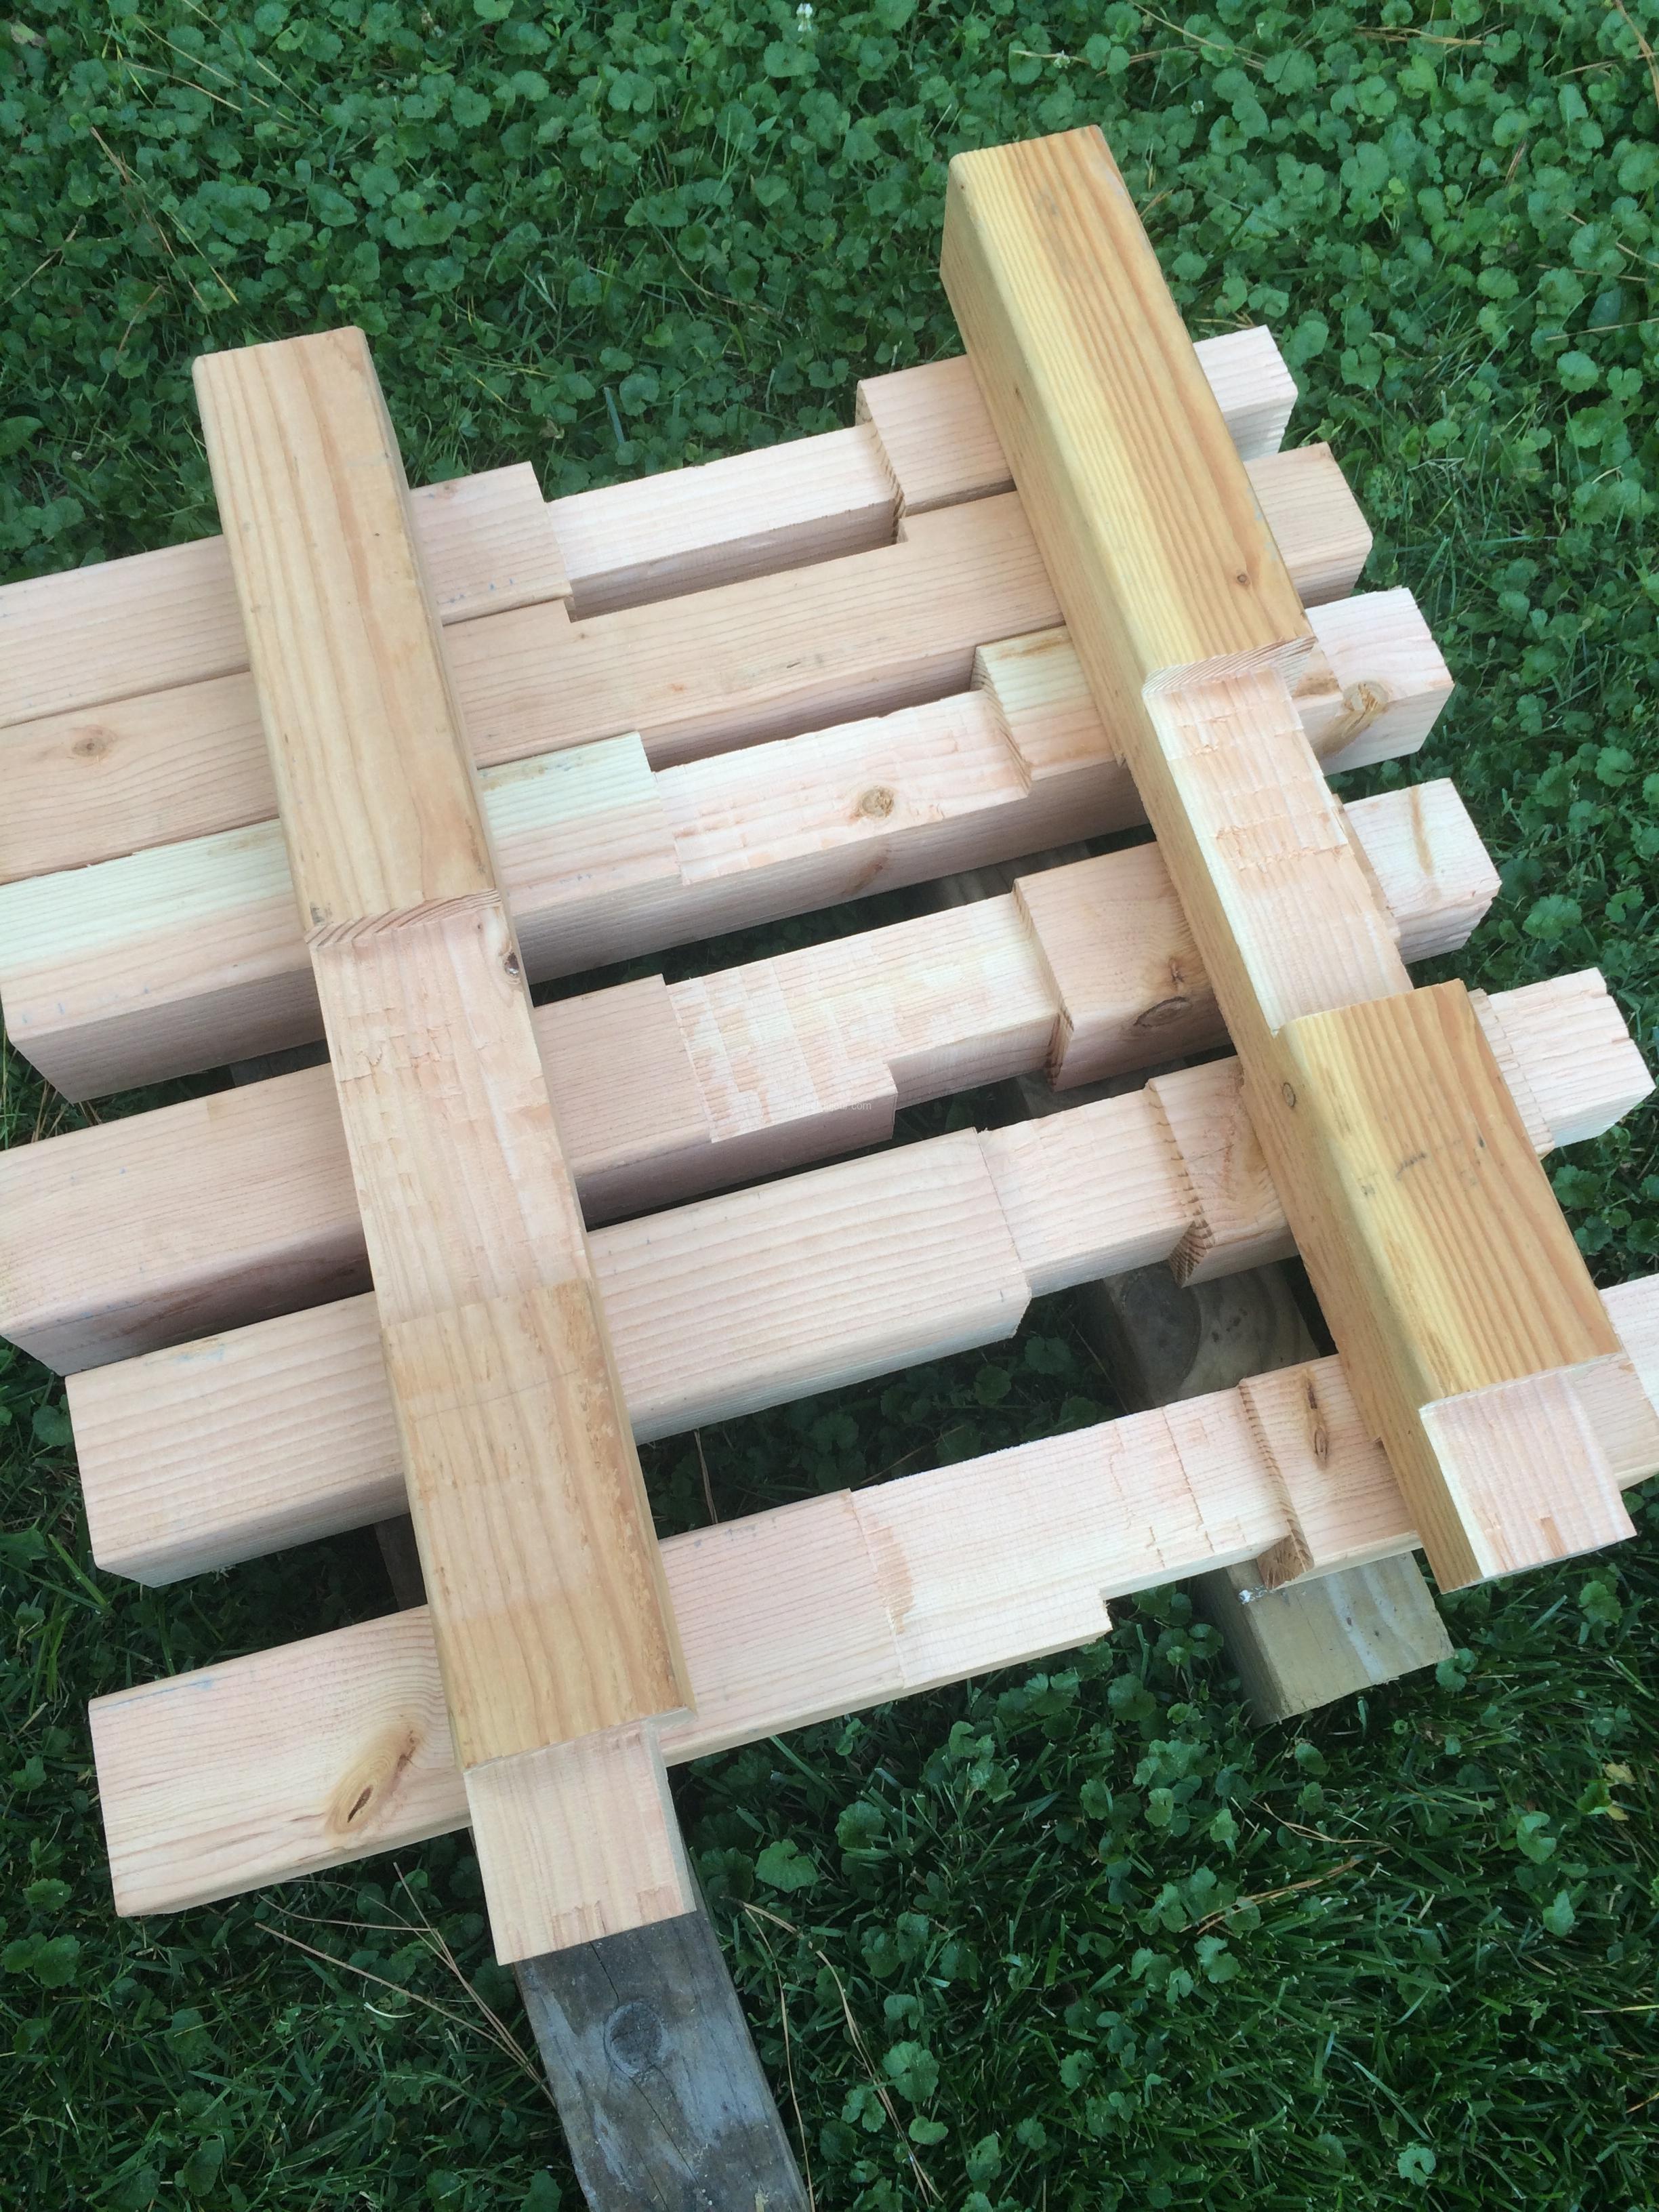
Posts ready, hoping all the cuts are correct
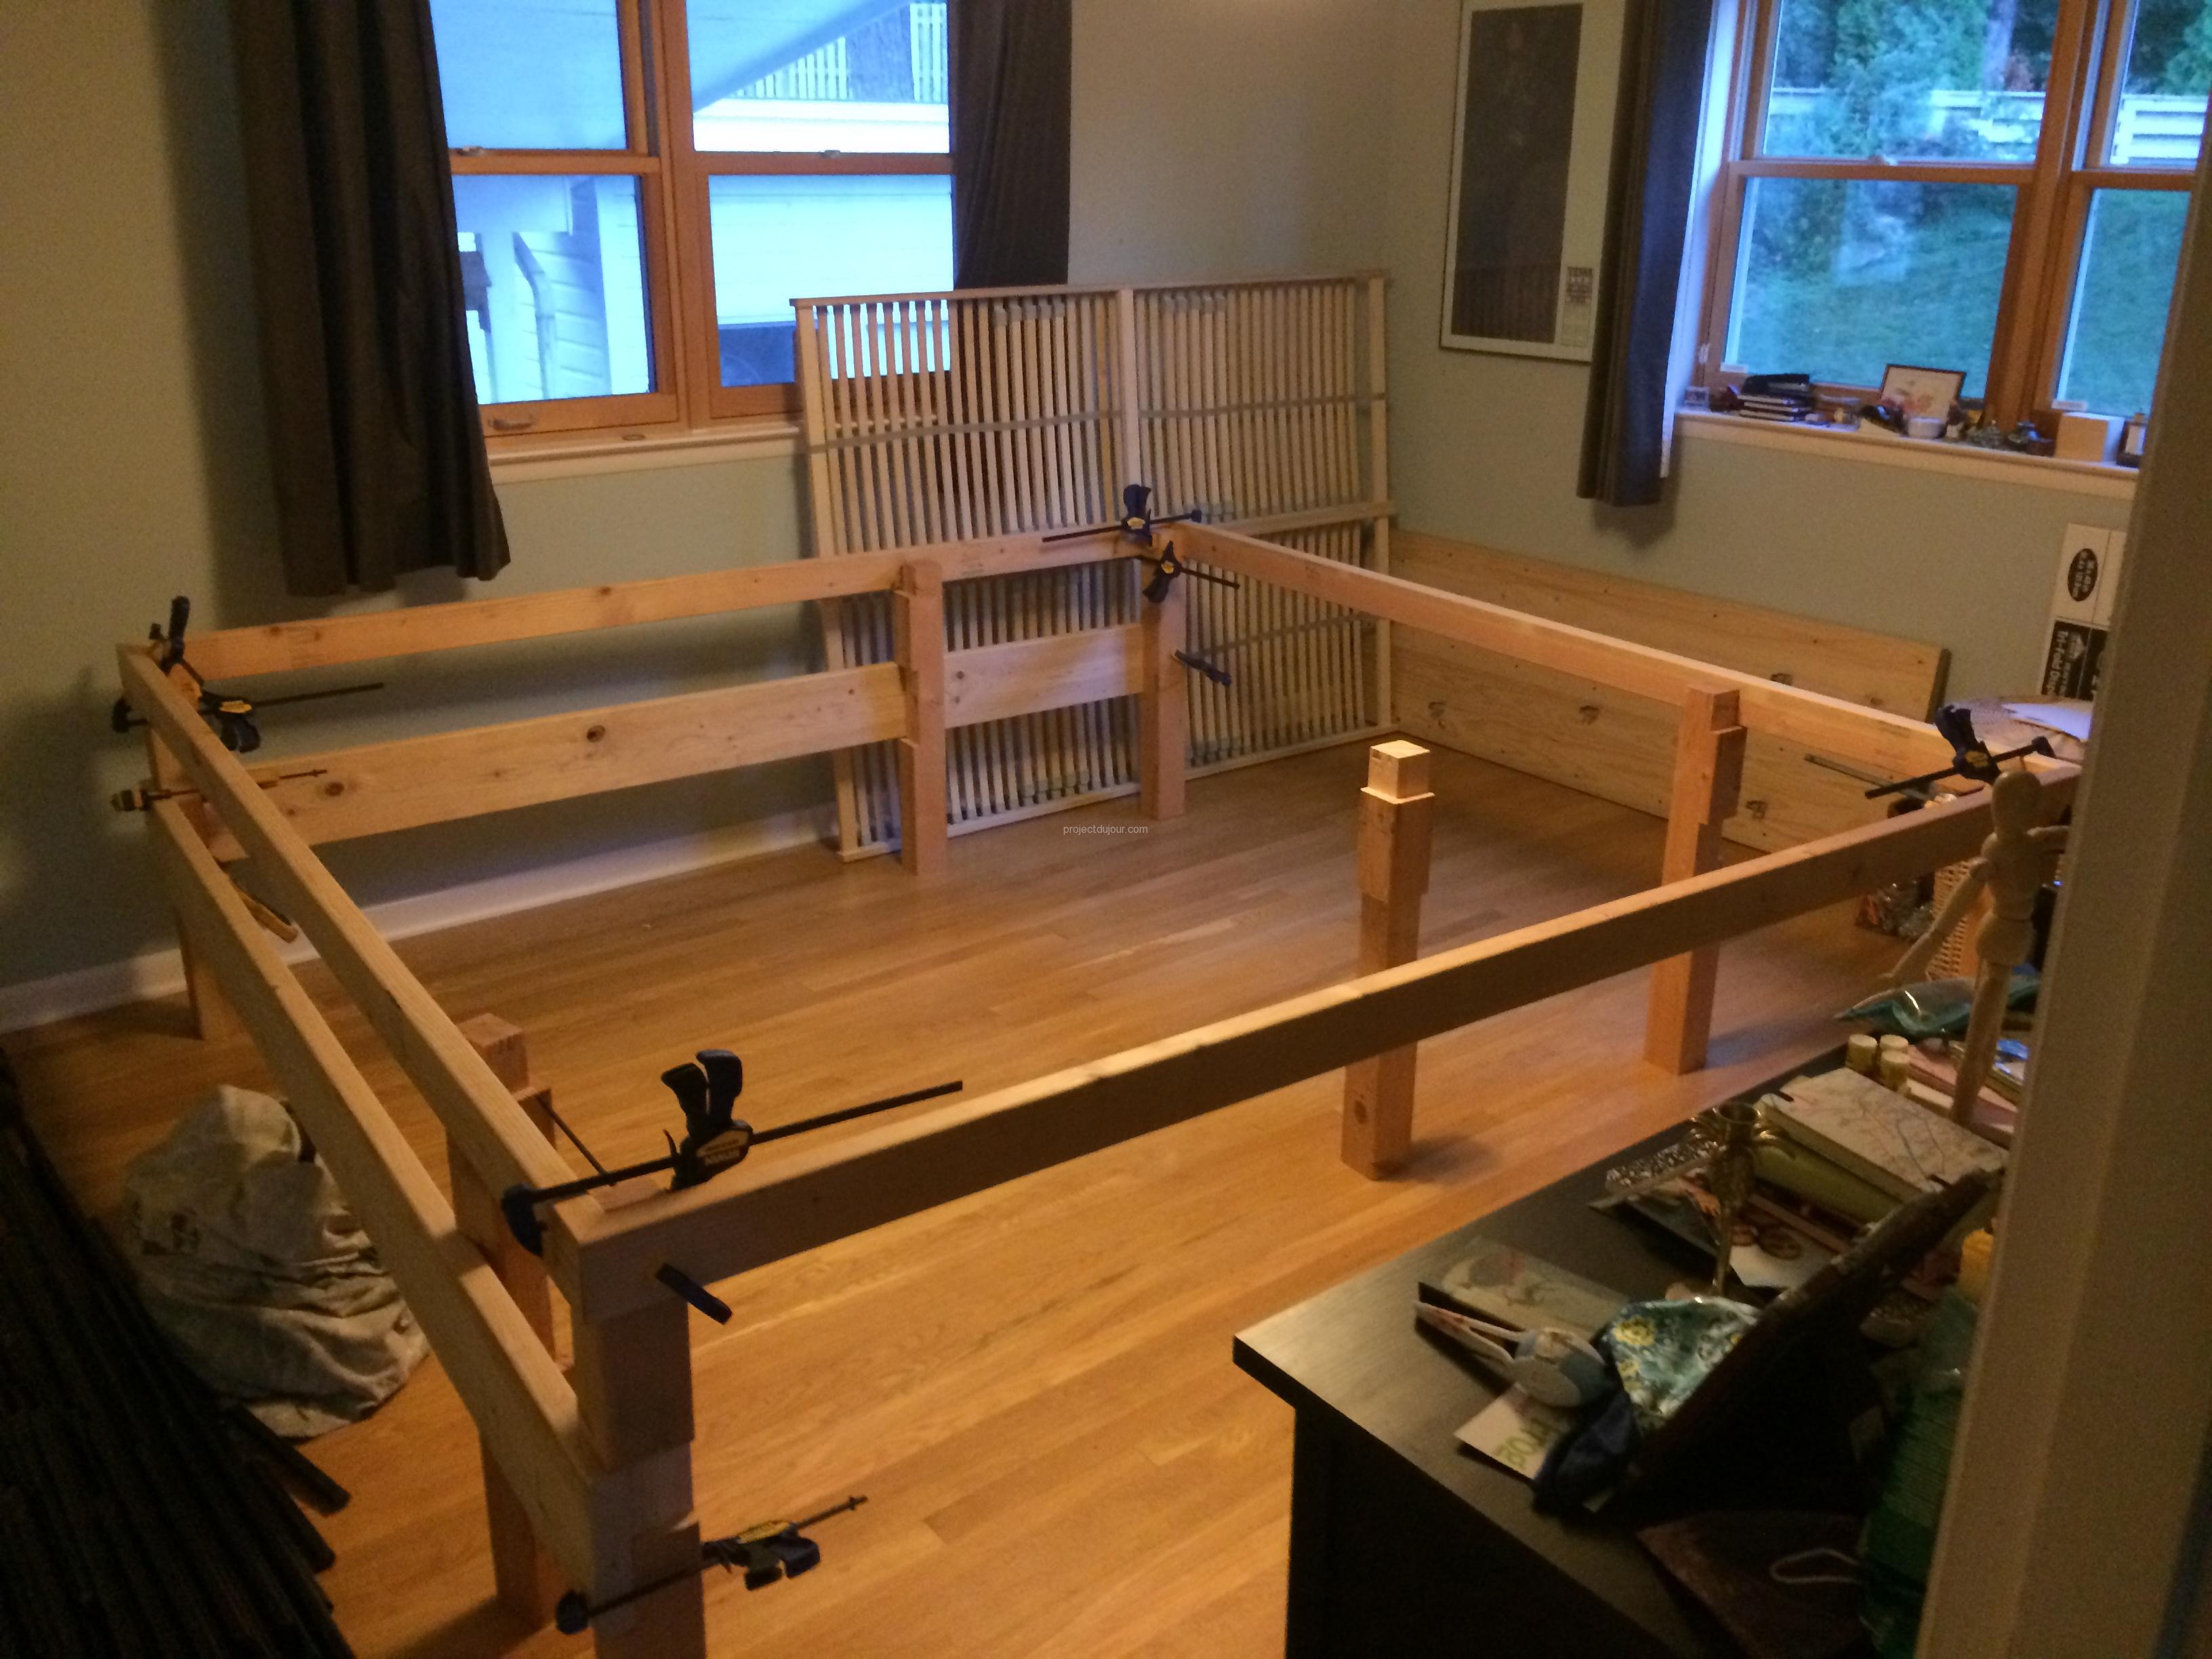
Testing posts and making sure it fits in the room
To hold the mattress, I bought a slatted wood base from IKEA (the exact model is discontinued but similar to LÖNSET). That base is not self supporting. It needs 3 beams to rest on, one on each side and one in the middle. I screwed a 2″ by 4″ board on each side of the bed (against the 2″ by 8″ of the lower layer) and the middle beam is composed of two 2″ by 6″ holding with a double joist hangers at each end I took the pictures after I finished the bed which explains why there is some dark stain around the frame.
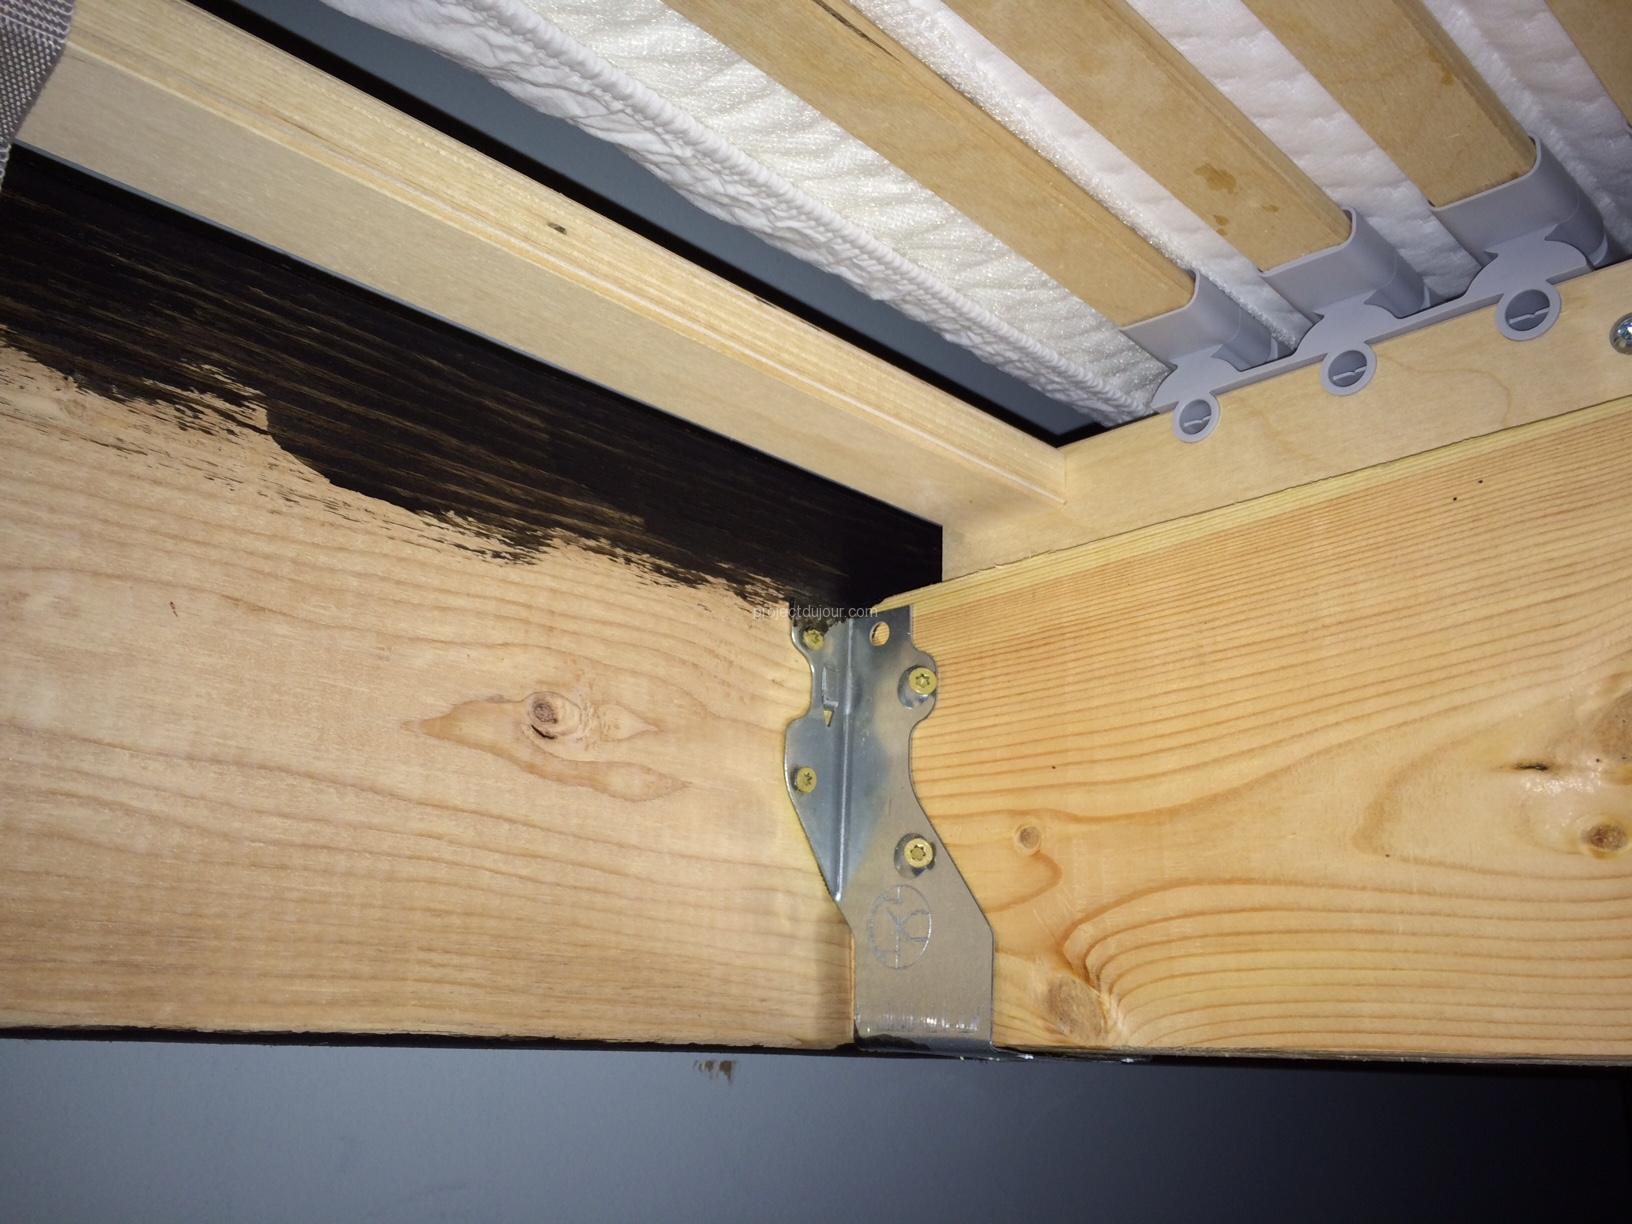
Two 2″ by 6″ in the middle with joist hanger
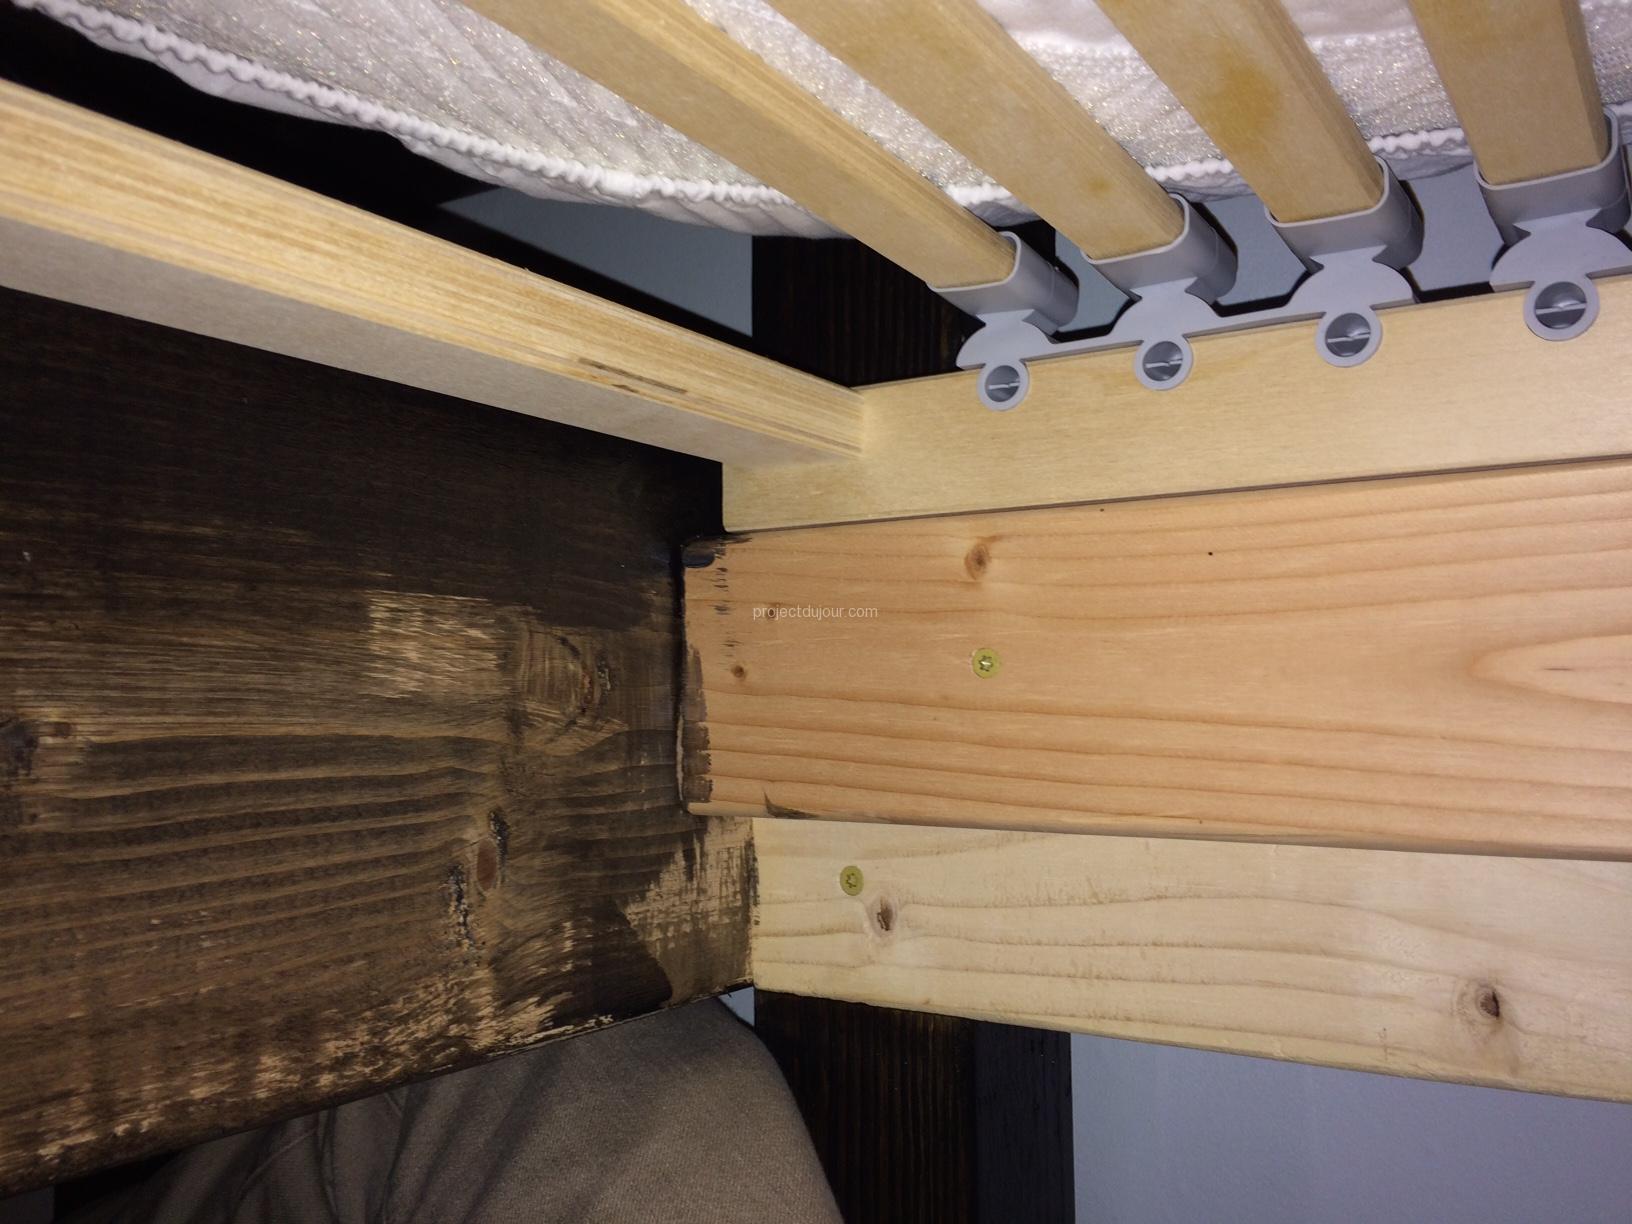
One 2″ by 4″ on each side of the bed
To add strength for the shelves and desk tabletop, I added some inner frames made of 2″ by 3″. The shelves and tabletop are made of 3/4″ solid pine (glued boards). These boards can be pricey but I happened to have a few of them in storage. The boards I had were all varnished and came in different thicknesses so I spent a lot of time planning and sanding them. If I had to redo this project, I would also spend more time making sure the frame is squared. Since it wasn’t even roughly squared (up to 1/4″ off over 8′), I wasted a fair amount of time measuring and cutting each and every board so they’d fit in the frame tightly.
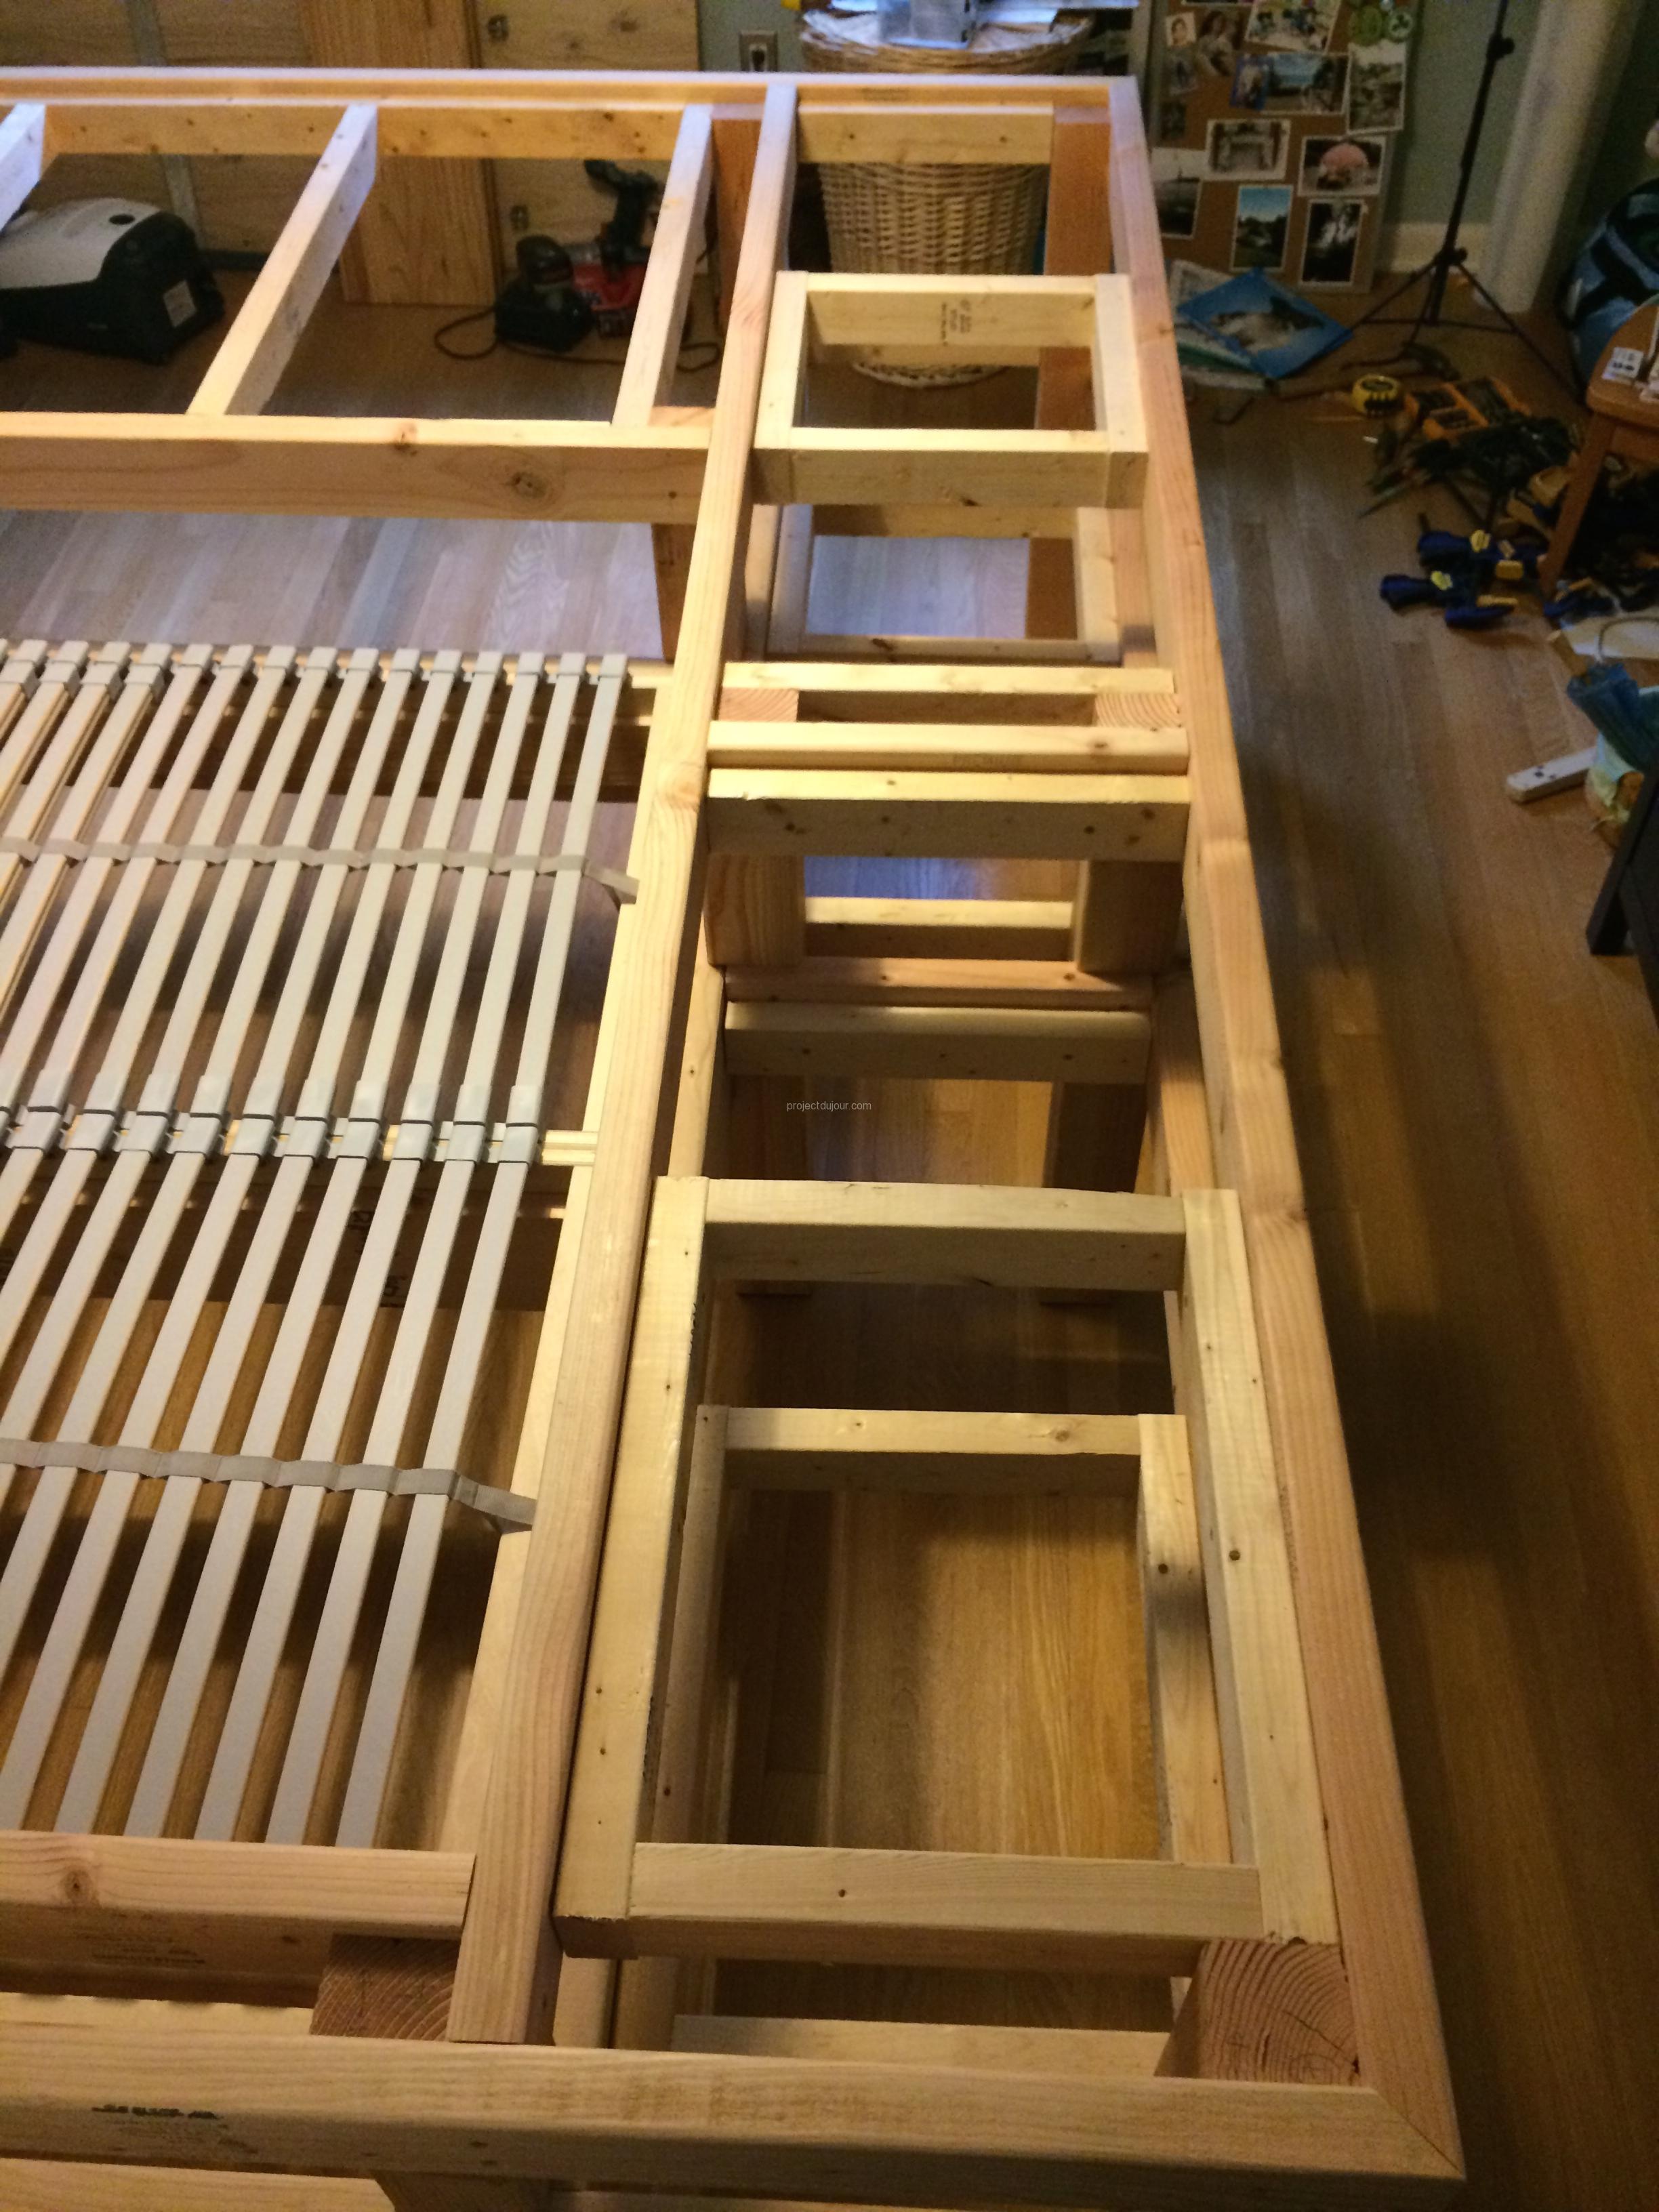
All framed, added support for shelves
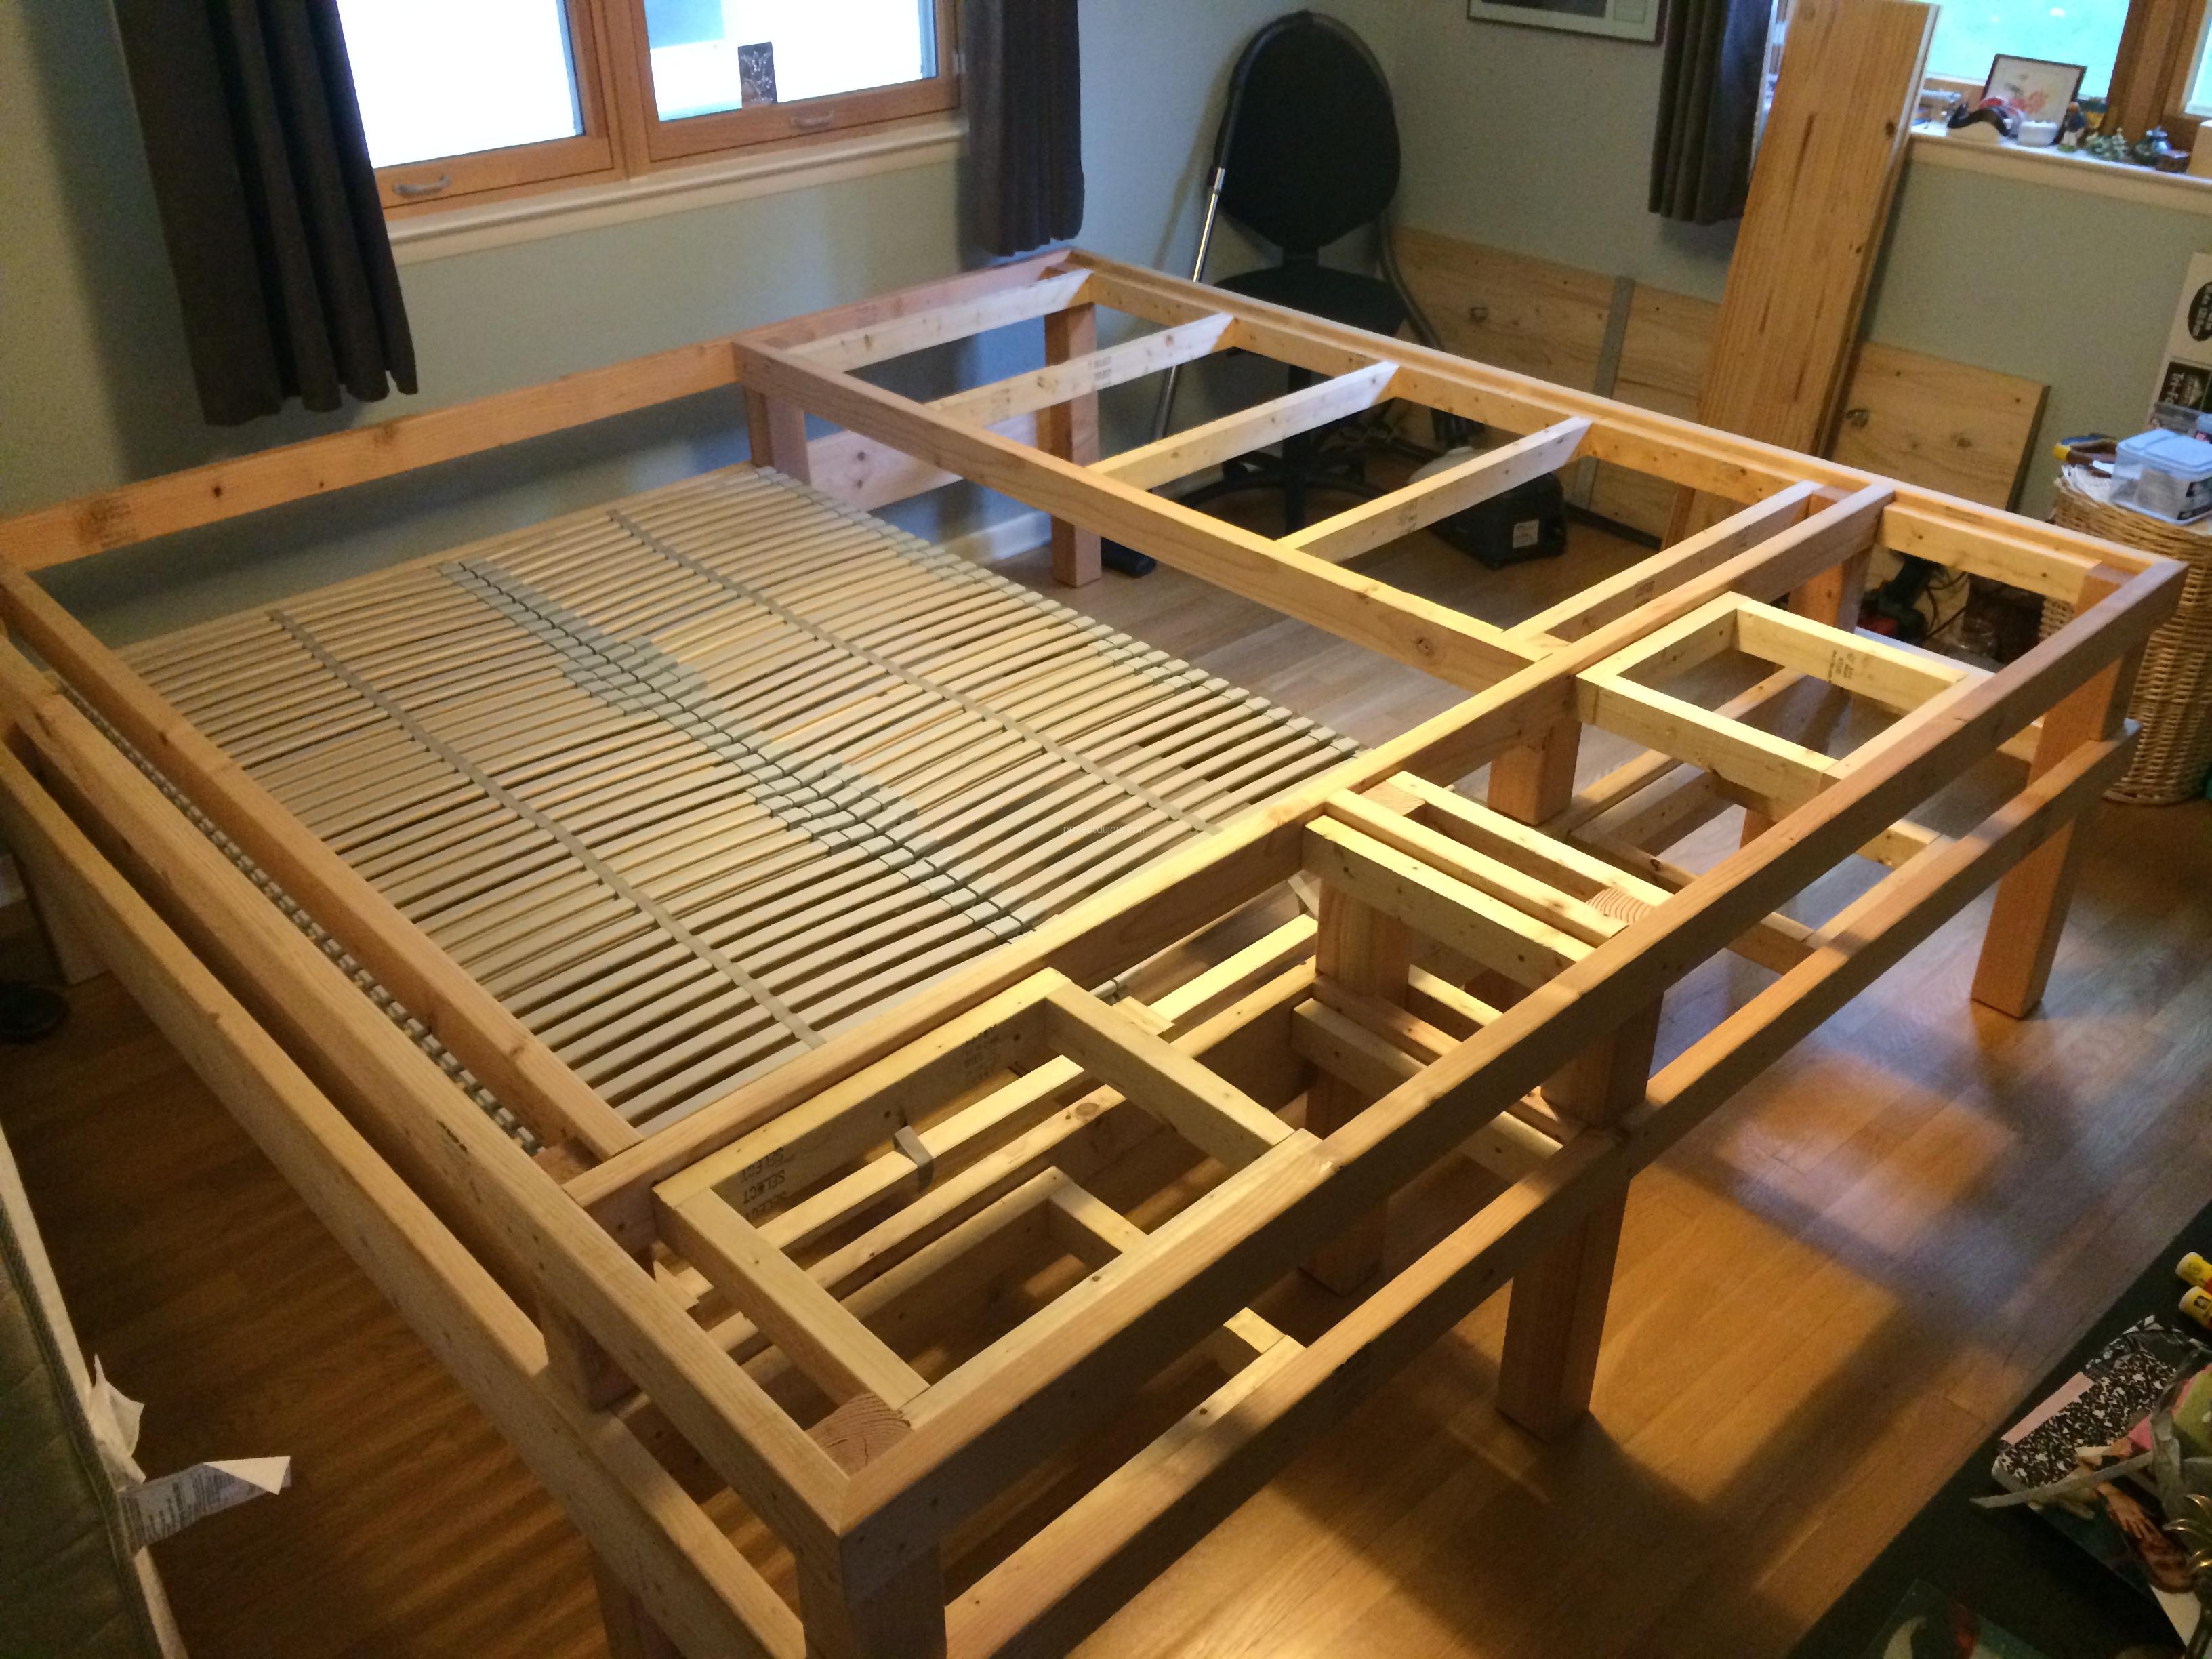
All framed, added support for shelves
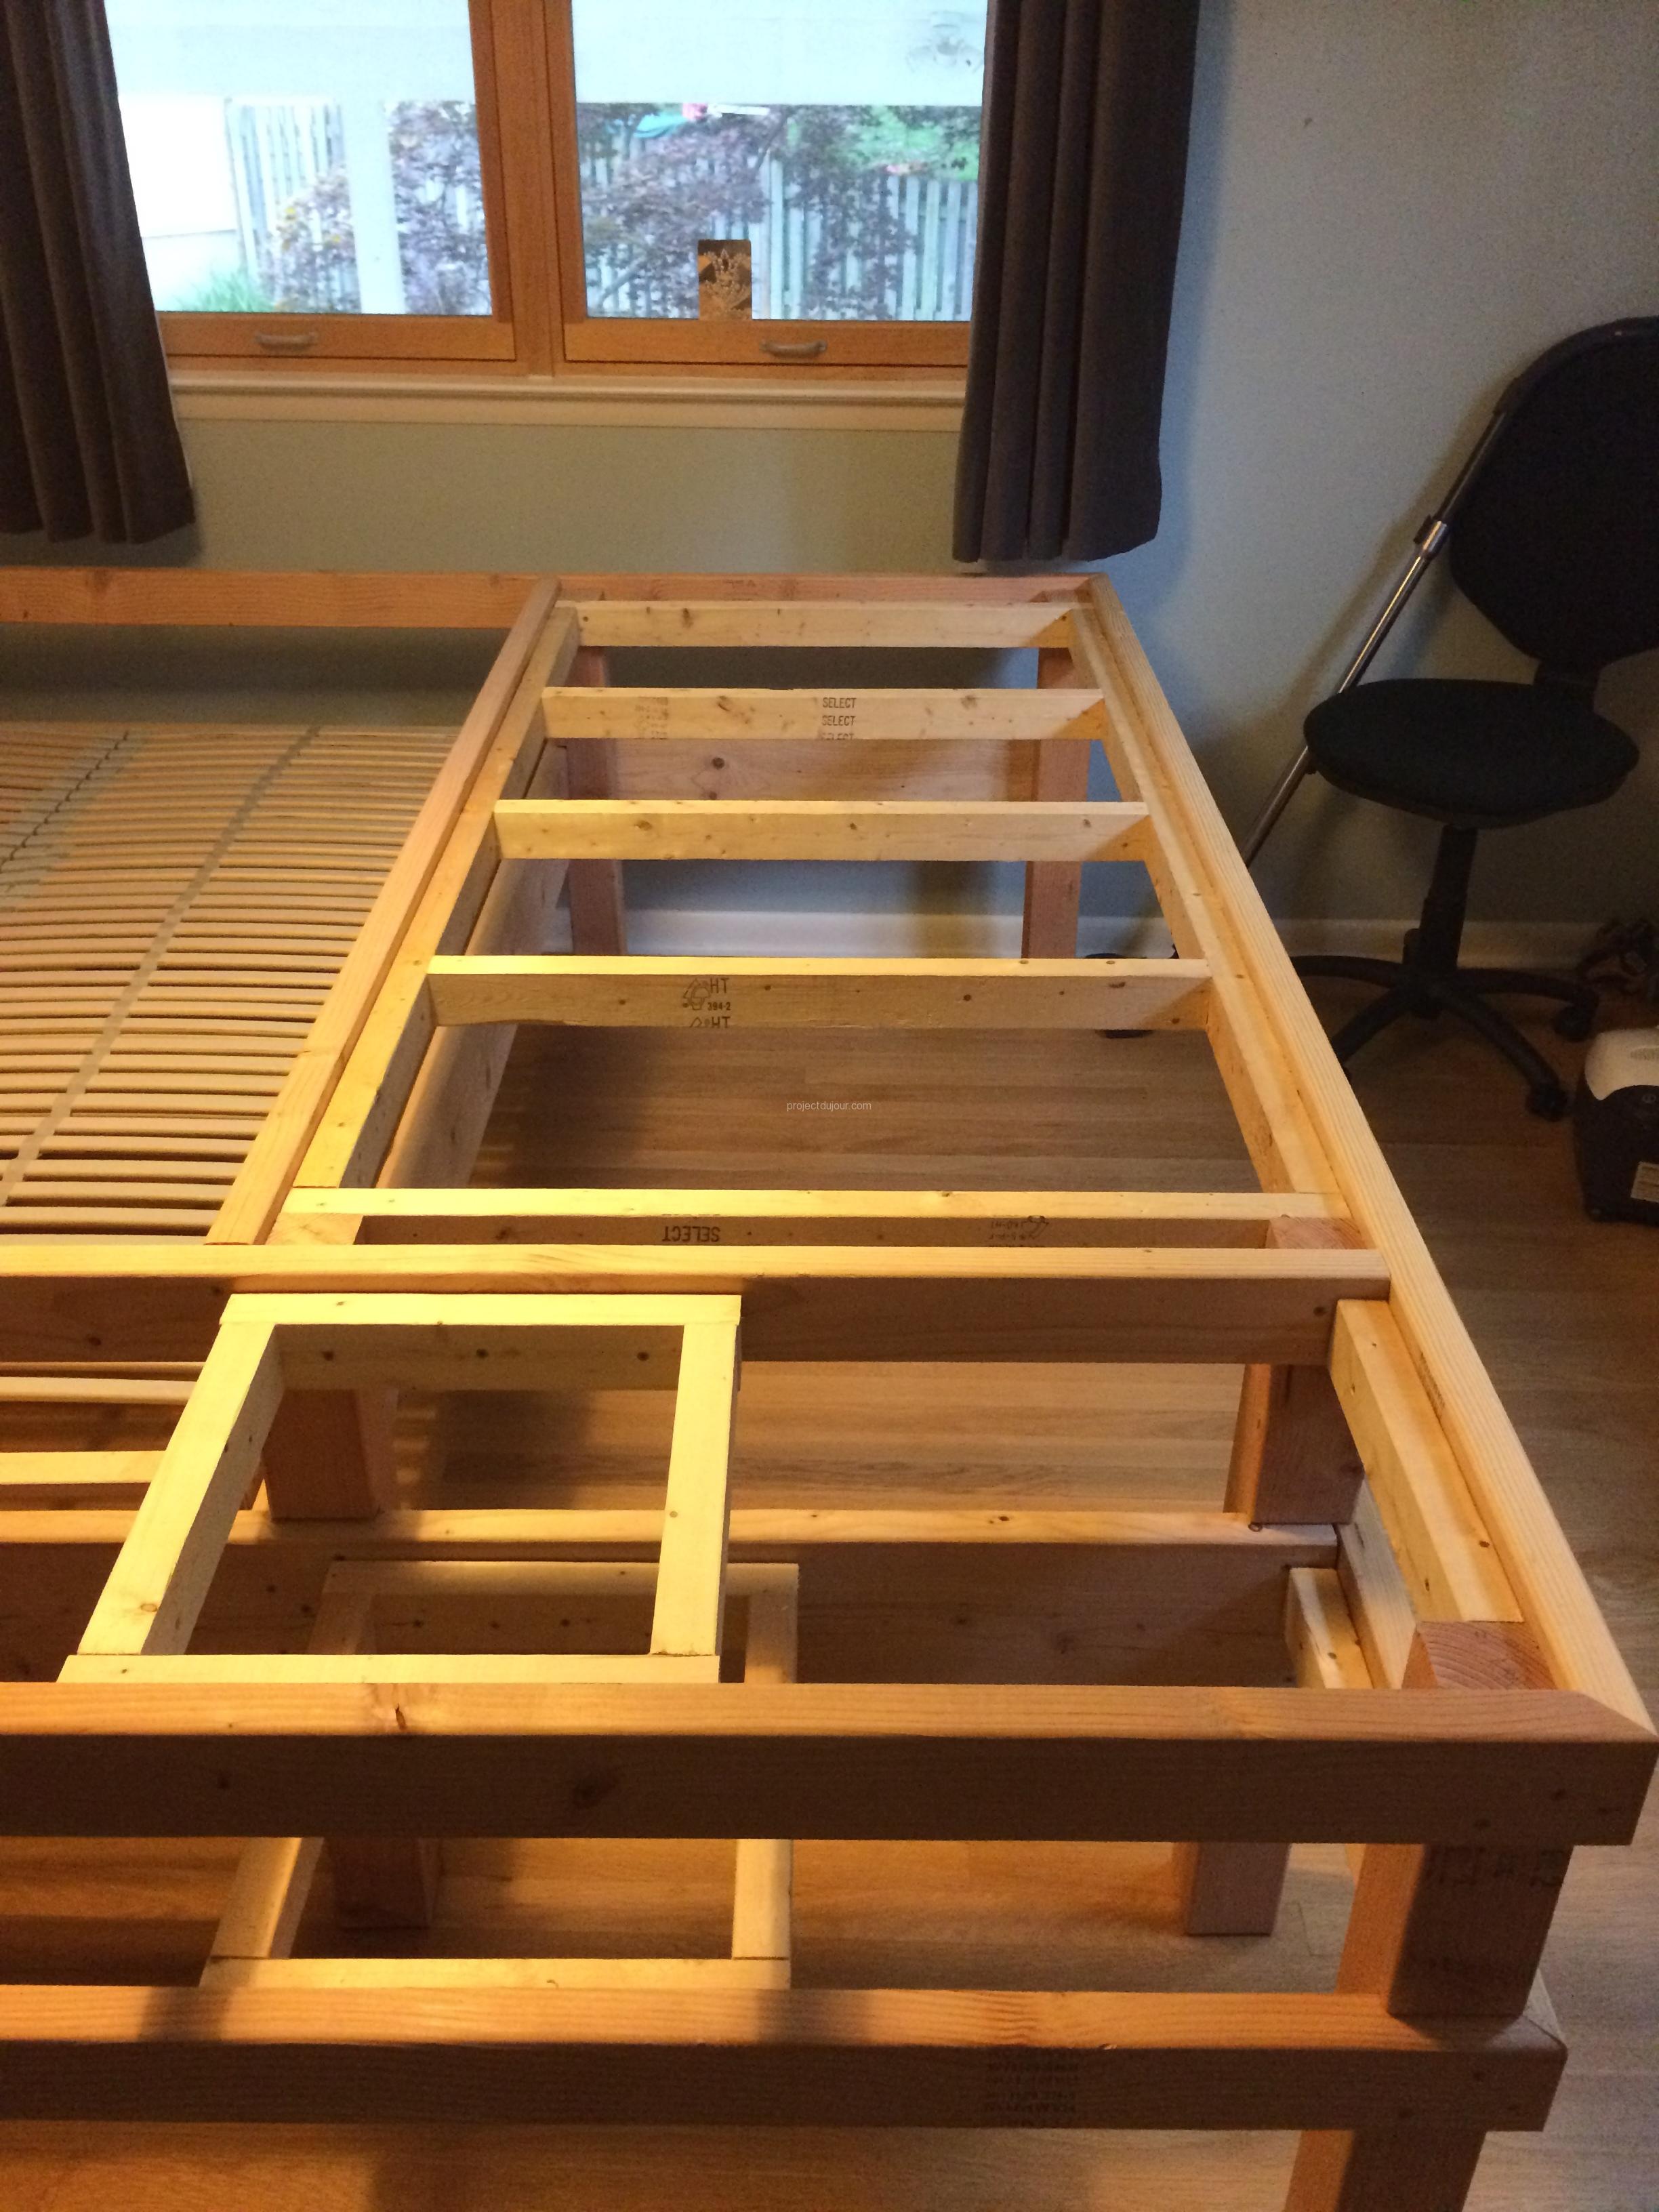
Added inner frame for the desk area
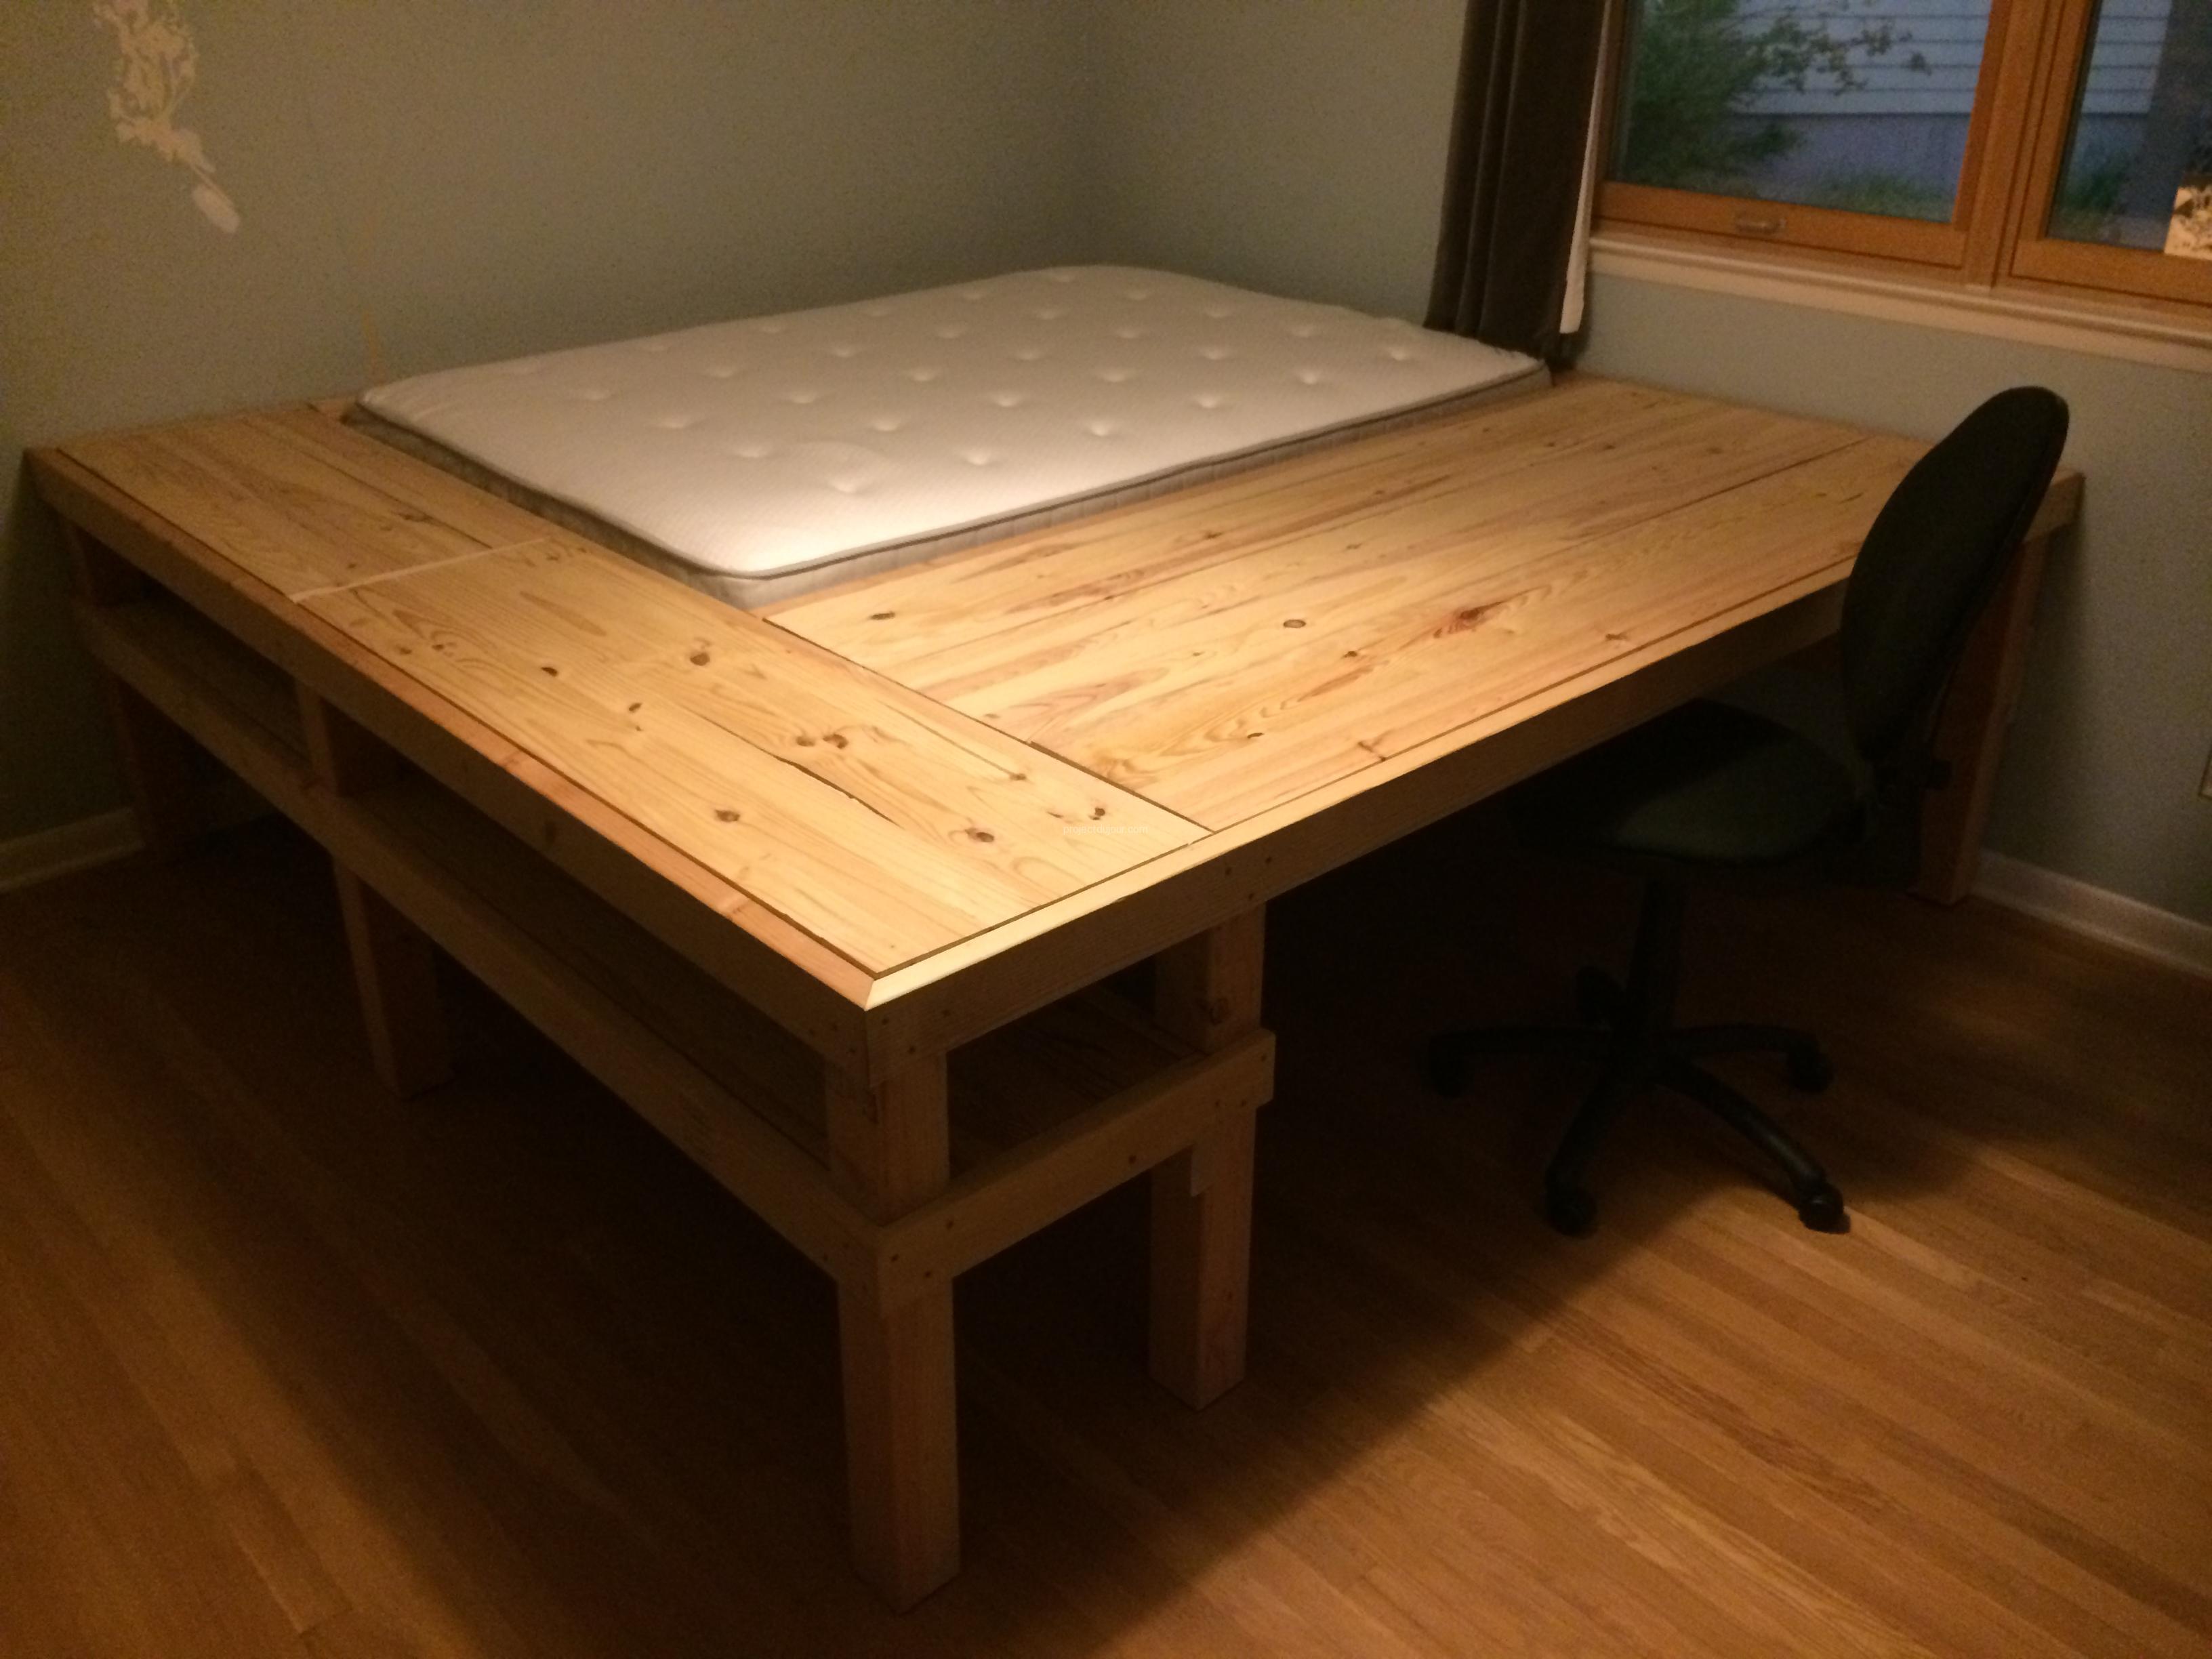
Testing shelves and table top fit
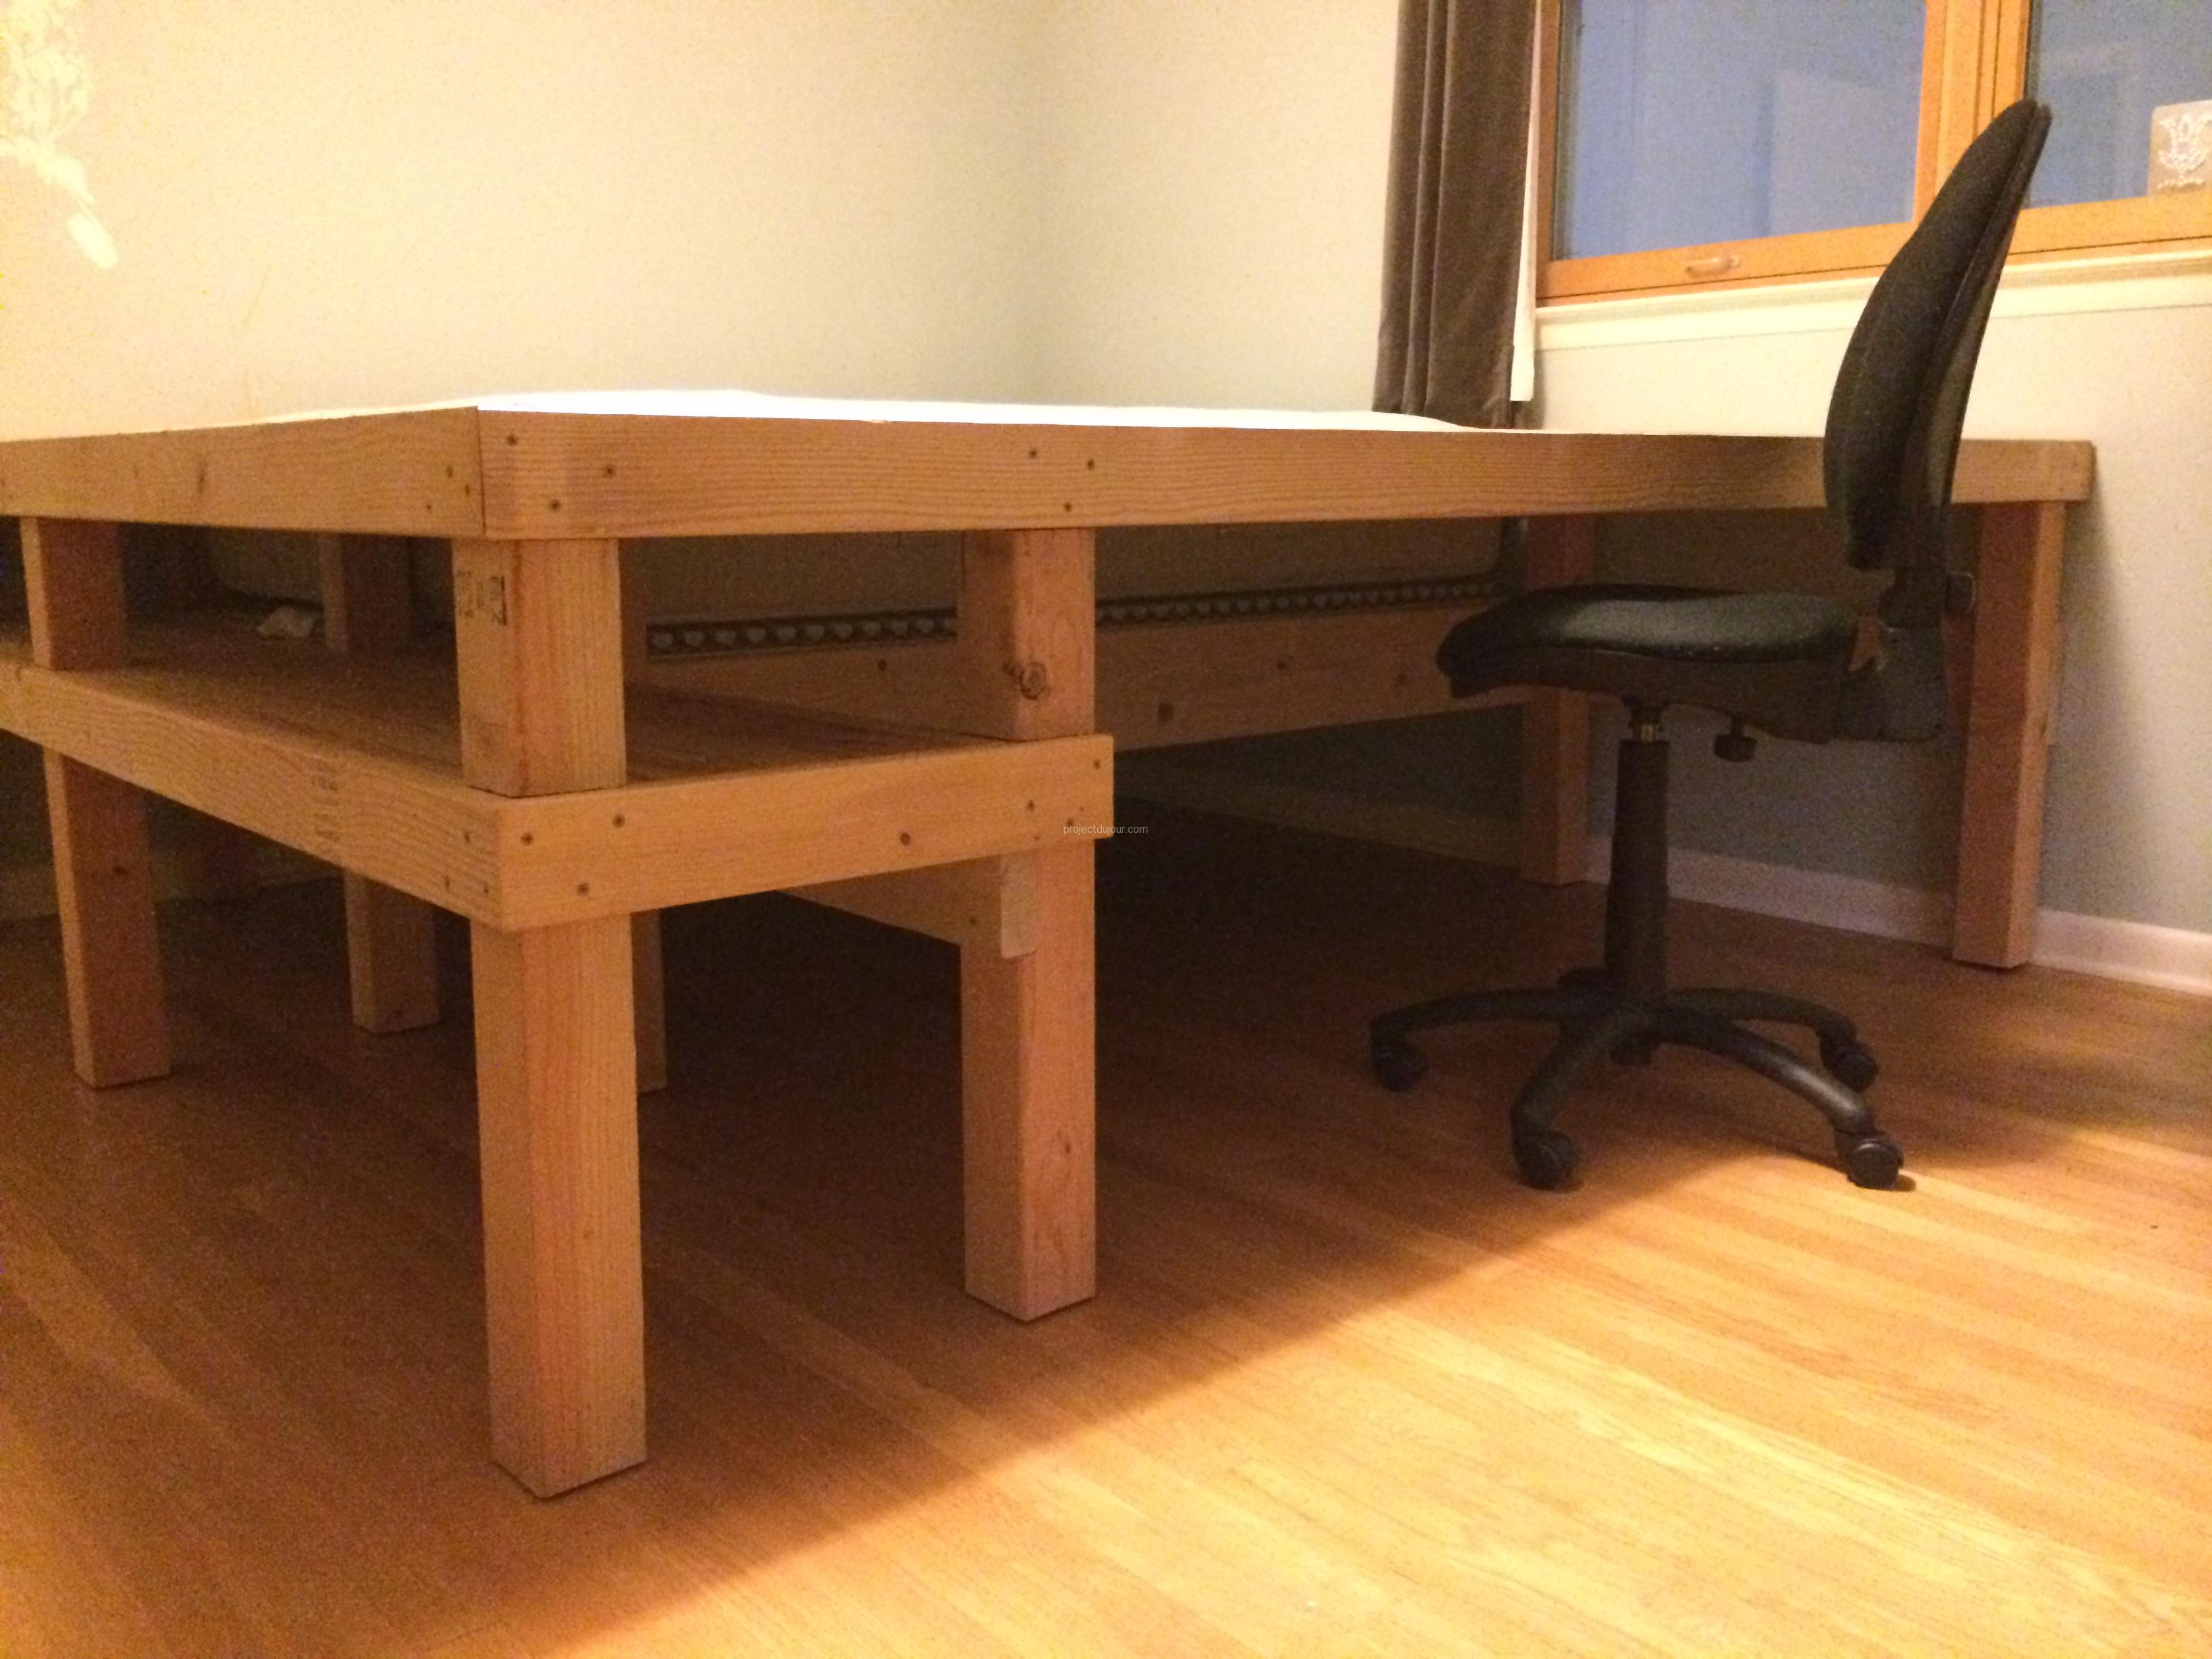
Desk and shelves
The overall structure is a bit massive so my daughter and I decided to whiten the flat surfaces. I used a white stain and 3 coats of clear finish for this. For the frame itself, we found a product that is both a stain and finish. We opted for a very dark color to add some contrast with the white boards and to make the wood look much richer than the dimensional pine lumber it is. I applied two coats and that seemed plenty enough. I’m always surprised by the time it takes to patch, sand, stain and varnish.
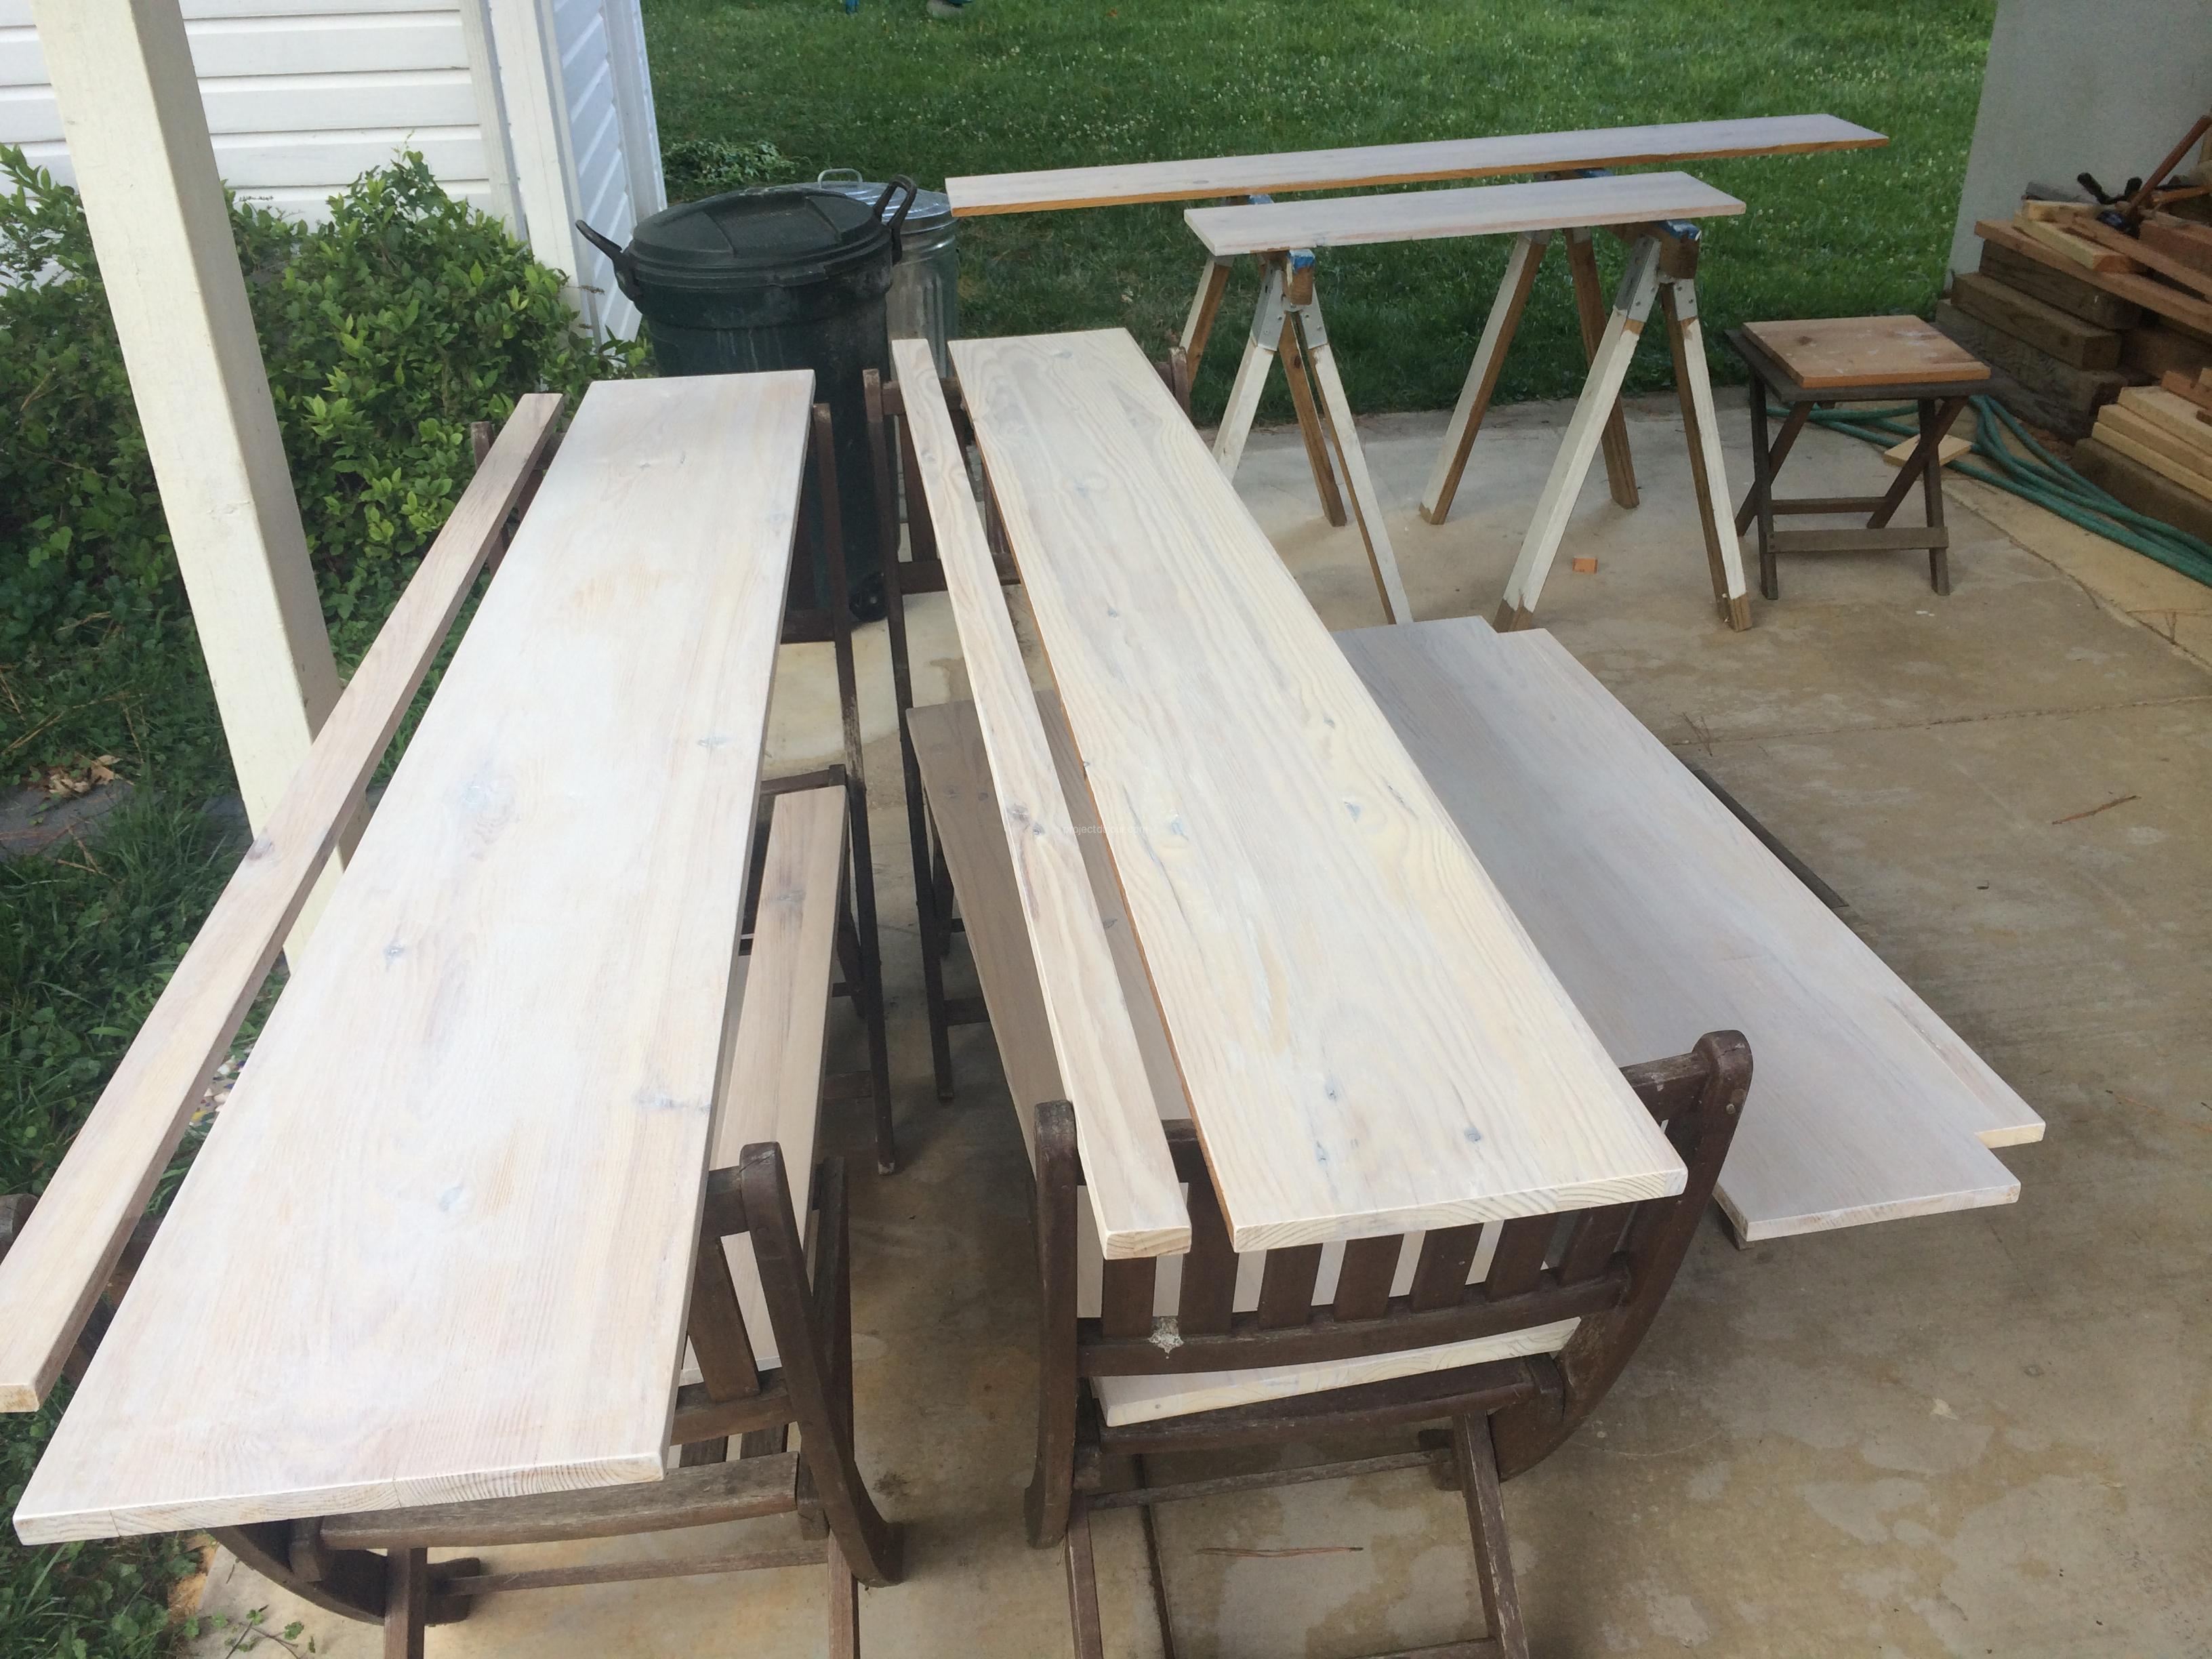
White stain and finish for flat surfaces
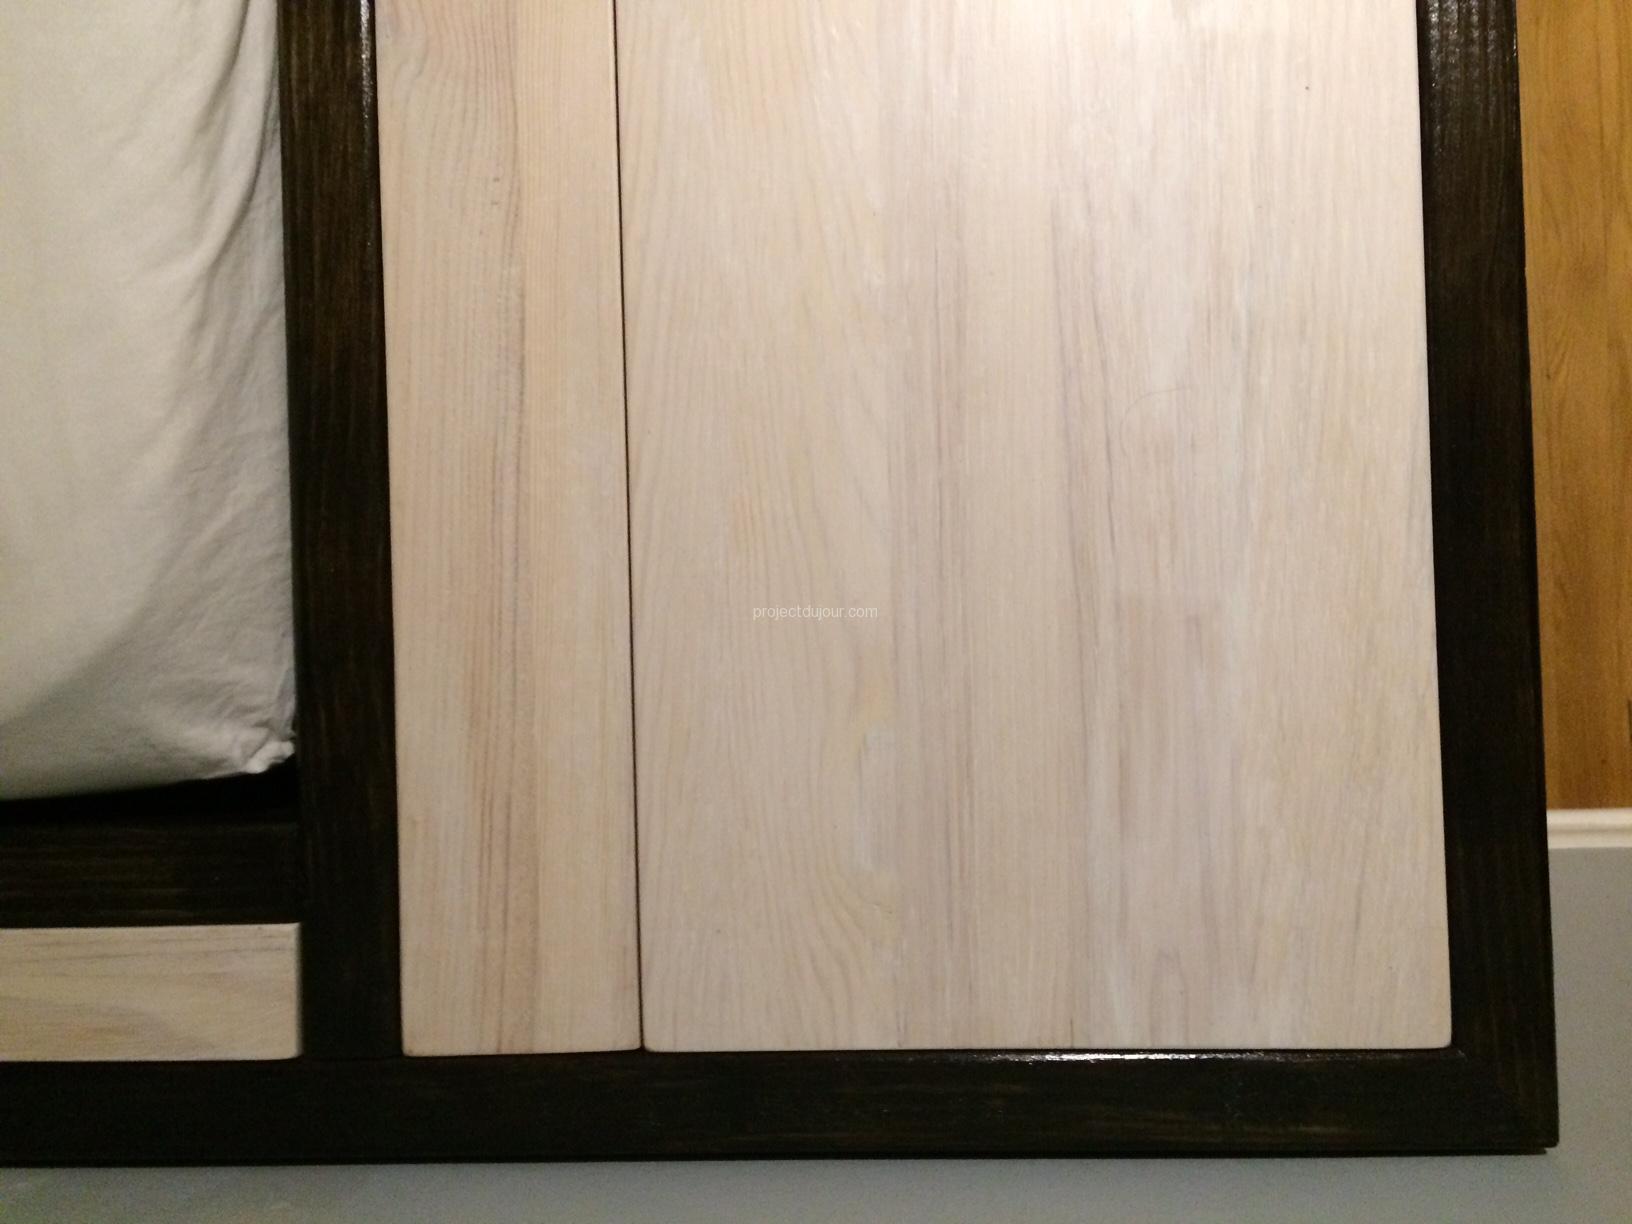
Top shelf and thin strip along the mattress
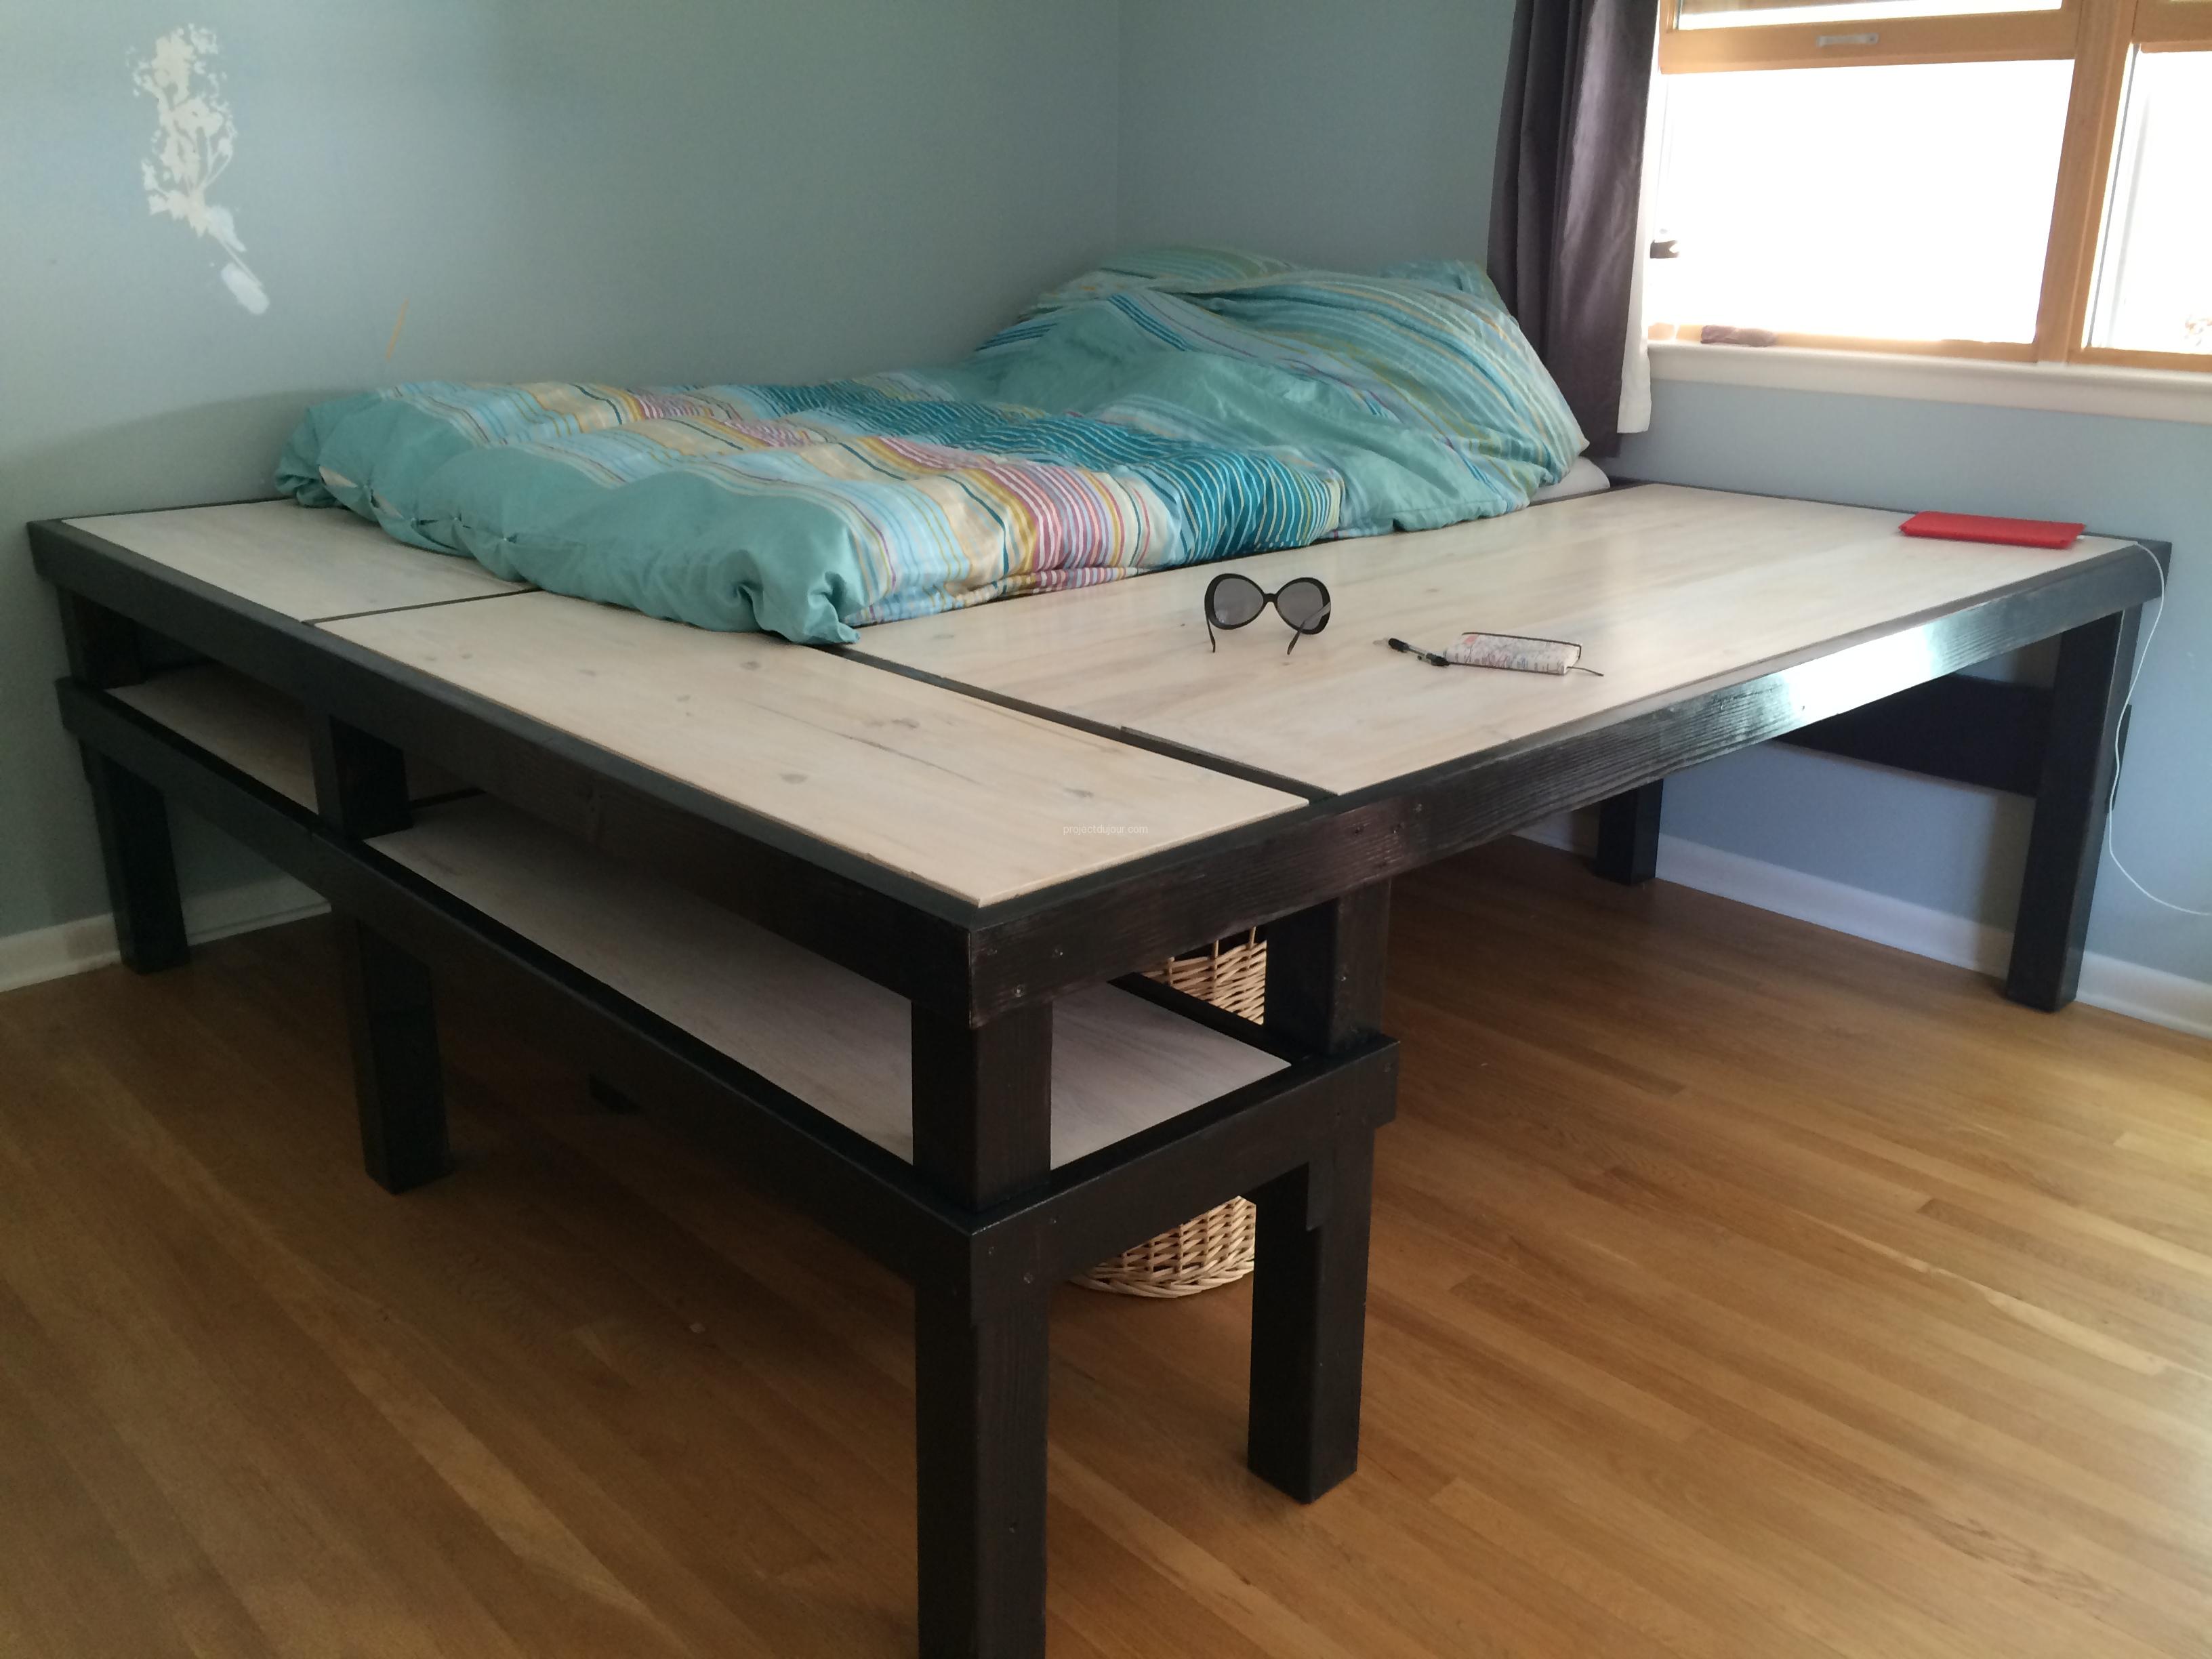
Finished
